Page
How to configure your Keycloak instance

Before you can connect Open Data Hub to your external identity provider, your Keycloak instance must be configured with the correct client, scopes, groups, and secrets. These ensure that users are authenticated with the right identity and permissions when accessing both the OpenShift cluster and the ODH dashboard.
Prerequisites:
- An Amazon Web Services account.
- A Red Hat account.
- A configured ROSA cluster.
- Keycloak server (v24.x or later) with admin access.
- Keycloak must be deployed outside the OpenShift cluster (or use an existing instance).
- Keycloak must be publicly accessible from the ODH OCP cluster.
In this lesson, you will:
- Create realms in Keycloak.
- Configure client scopes.
- Create groups and users.
- Set token lifespans.
Create realms and clients
The first configurations to make to Keycloak are creating realms to manage any users, roles, and groups that will access your instance in the future, and clients that can request future authentication.
- Navigate to your Keycloak admin console.
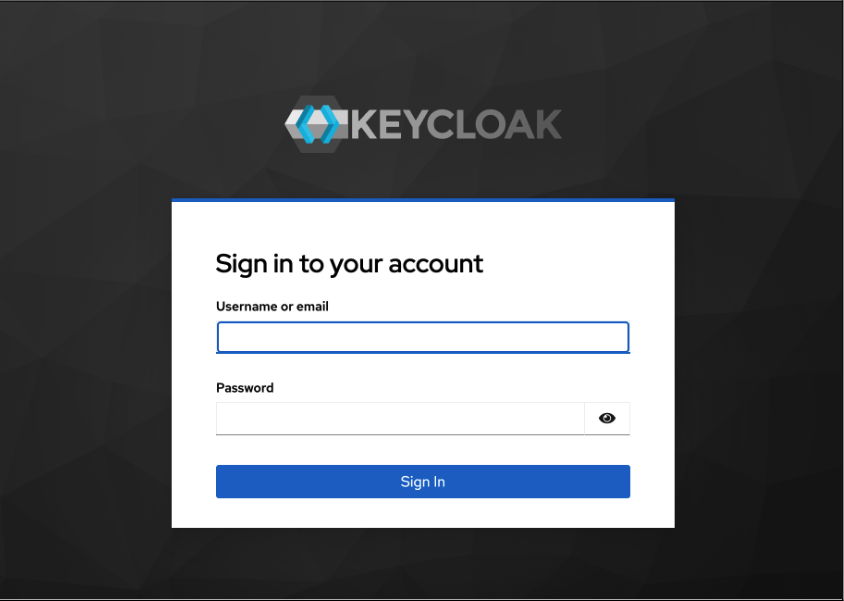
Log in with admin credentials to verify your access (Figure 1).

Figure 1: The Keycloak sign in page asking for username and password. Once signed in, click Create Realm.
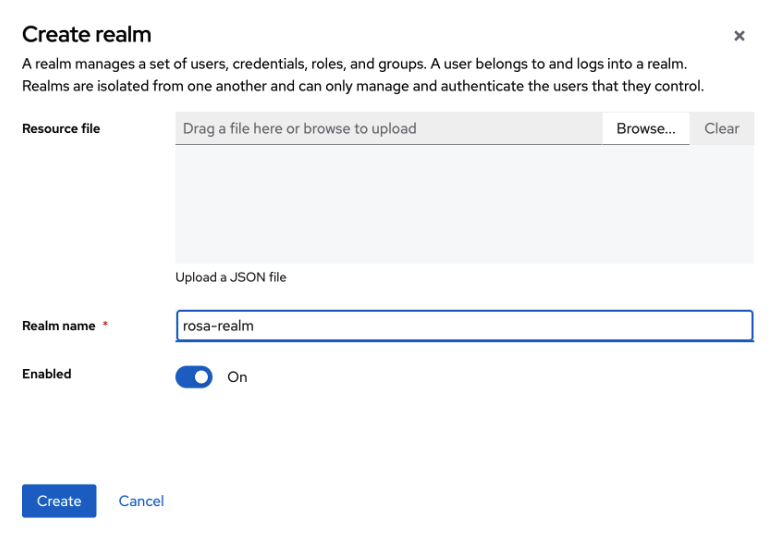
- In the modal pop-up, set the Realm name to
rosa-realm. Click Create. The new realm should appear in the realm dropdown once this is done (Figure 2).
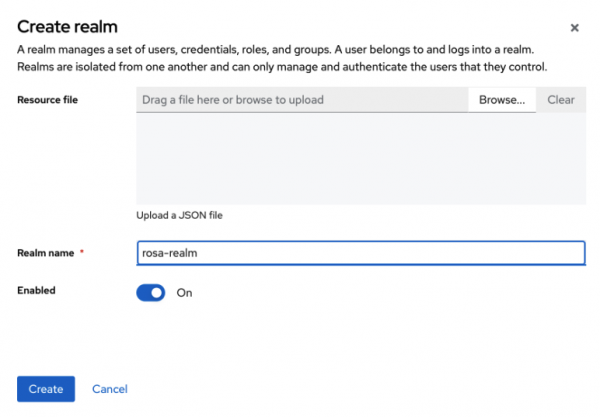
Figure 2: The Create realm modal with Realm name field populated with rosa-realm. Next, create clients and ensure that all three redirect uniform resource identifiers (URIs) are configured correctly.
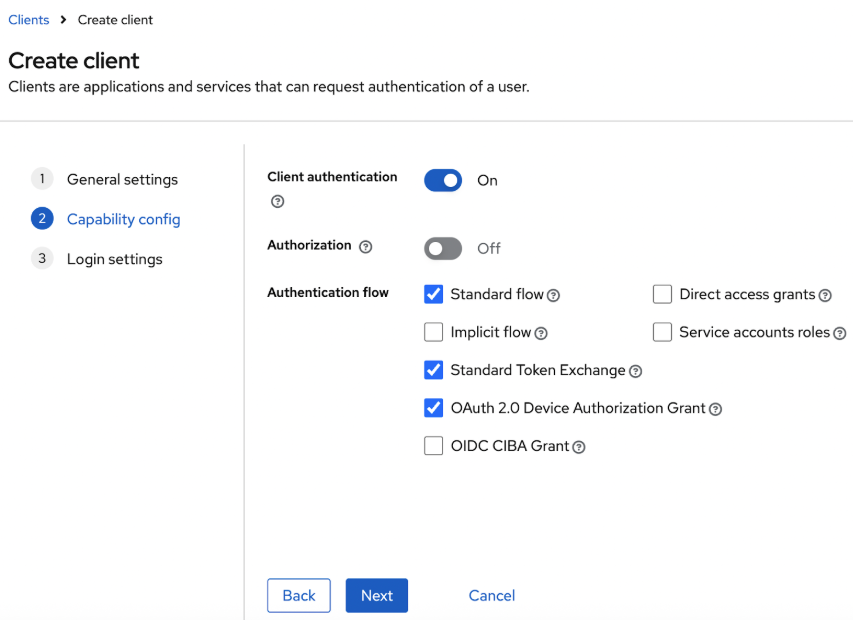
- Under the Clients menu, click Create Client.
- Input the following information in the fields that appear.
- Client ID:
odh-client - Name:
odh-client - Client type:
openID Connect - Client Authentication:
On - Authorization:
Off - Authentication flow:
Standard flow, Standard Token Exchange, OAuth 2.0 Device Authorization Grant
- Client ID:
Once added, click Next (Figure 3).

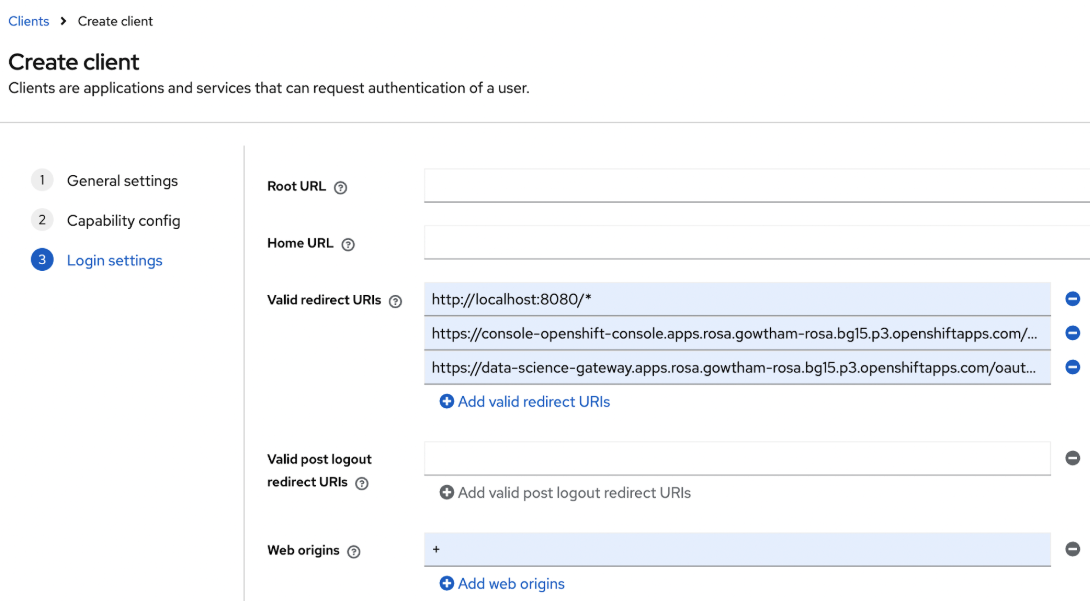
Figure 3: Create client modal with settings selected as per path instructions. - Configure Valid redirect URIs and replace ${CONSOLE_DOMAIN} with your ROSA cluster domain) with the following:
- https://console-openshift-console.${CONSOLE_DOMAIN}/auth/callback
- http://localhost:8080/*
- https://rh-ai.${CONSOLE_DOMAIN}/oauth2/callback
- Set Configure Web Origins to
+(permit all origins). Click Save (Figure 4).
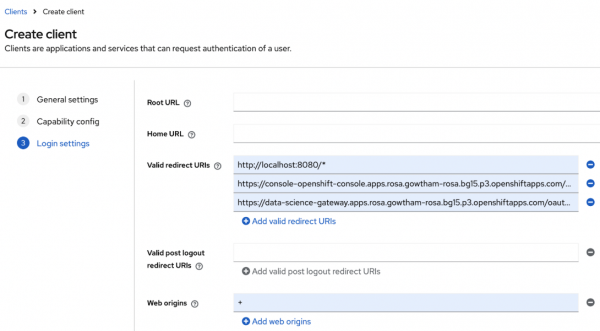
Figure 4: Create client screen URI section with redirects populated.
Configure client scopes
This next step is critical for role-based access control in OpenShift and for Open Data Hub to work correctly. The client scope mappers ensure that tokens issued by Keycloak include the user's audience, email, and group membership, which OpenShift and ODH use to determine what the user is authorized to access.
- Navigate to Clients → odh-client → Client scopes → odh-client-dedicated.
- Within Audience Mapper, select Configure a new mapper > By configuration, then click Audience.
- Within the Audience mapper modal, input the following settings:
- Name:
odh-client - Included Client Audience:
odh-client
- Name:
Click Save (Figure 5).
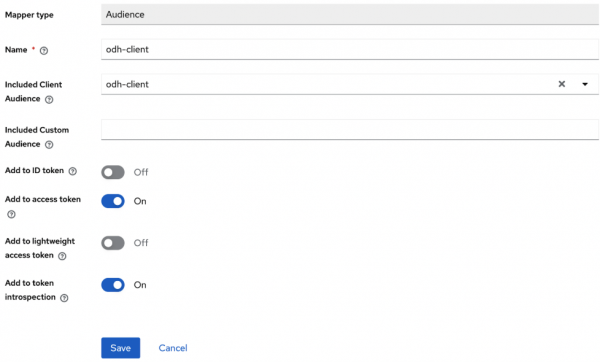
Figure 5: Audience mapper settings showing odh-client for name, add to access token on, and add to token introspection on. - Within Audience Mapper, select Configure a new mapper > By configuration, then click User property.
- Within the Email mapper modal, input the following settings:
- Name:
email - Property:
email - Token Claim Name:
email - Claim JSON Type:
String - Add to ID Token, Access Token, Userinfo, Token Introspection:
ON
- Name:
Click Save (Figure 6).

Figure 6: User property mapping showing email for name, property, and token claim name with Add to ID token, Add to access token, Add to userinfo, and Add to token introspection set to ‘On.’ - Within Audience Mapper, select Configure a new mapper > By configuration, then click Group membership.
- Within the Group membership mapper modal, input the following settings:
- Name:
groups - Token Claim Name:
groups - Full group path: OFF ⚠️ Important
- Add to ID Token, Access Token, Userinfo, Token Introspection: ON
- Name:
Click Save (Figure 7).

Figure 7: Group membership mapper modal showing Name and Token Claim Name set to groups with Add to ID token, Add to access token, Add to userinfo, and Add to token introspection set to ‘on’.


Create groups and users
Now that the client scope mappers are configured, you need to create the groups and users in Keycloak. Users added to the odh-admin group will receive cluster-admin access on OpenShift, matching the ClusterRoleBinding you created earlier.
- Within Keycloak, navigate to Groups and select Create Group.
- When prompted to create a name, you must use the same one you entered during
ClusterRoleBinding. Following this learning path example, you will enterodh-admin. Click Create (Figure 8).
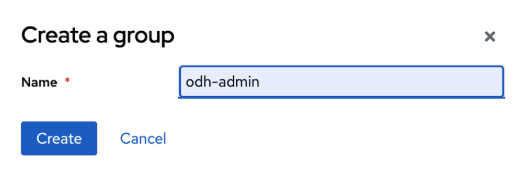
Figure 8: Create group modal pop up displaying name field filled with odh-admin. Next you will create users so they can be assigned to the newly created
odh-admingroup for cluster access.- Navigate to Users then select Create new user.
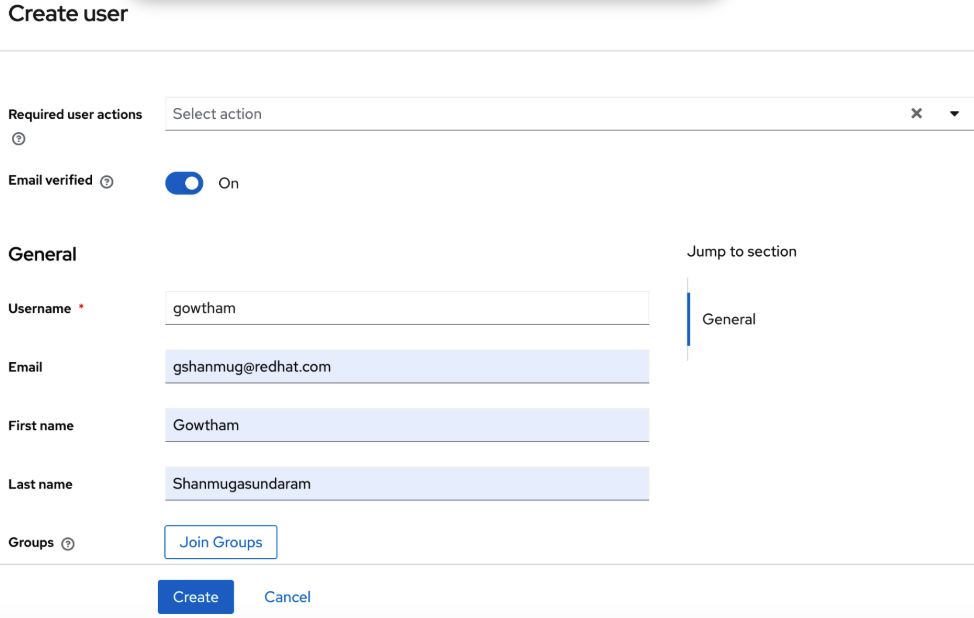
- In the Create user modal that appears, input the following:
- Username:
${ADMIN_USERNAME} - Email:
${ADMIN_EMAIL} - First name:
${ADMIN_FIRST_NAME} - Last name:
${ADMIN_LAST_NAME} - Email verified:
ON
- Username:
Click Create (Figure 9).

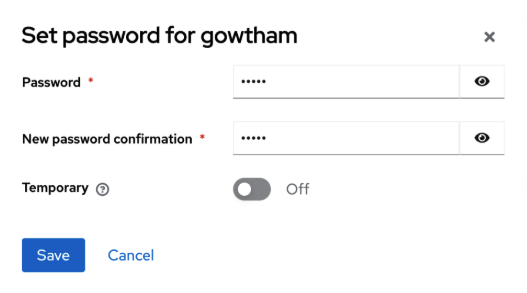
Figure 9: Create user modal populated with username, email, first and last name, and email verified set to ‘On’. - Next, go to the Credentials tab and select Set password.
In the modal that appears, set the desired password and ensure the Temporary setting is turned off (Figure 10).

Figure 10: The password creation modal with a new password input and the Temporary field turned off. - Navigate to the Groups tab.
- Go to Join Group and select odh-admin.
Click Join (Figure 11).
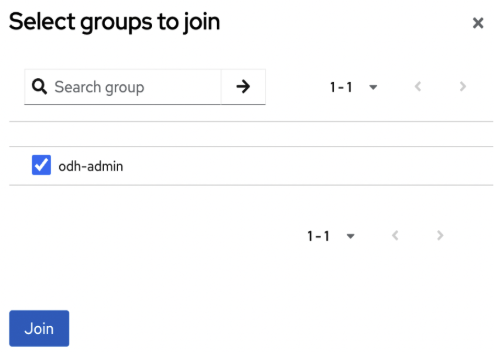
Figure 11: Select groups to join pop-up with odh-admin selected.


Get client secrets and set access token lifespans
To finalize your Keycloak setup, you must get the Client Secret value, as well as set your desired token lifespans.
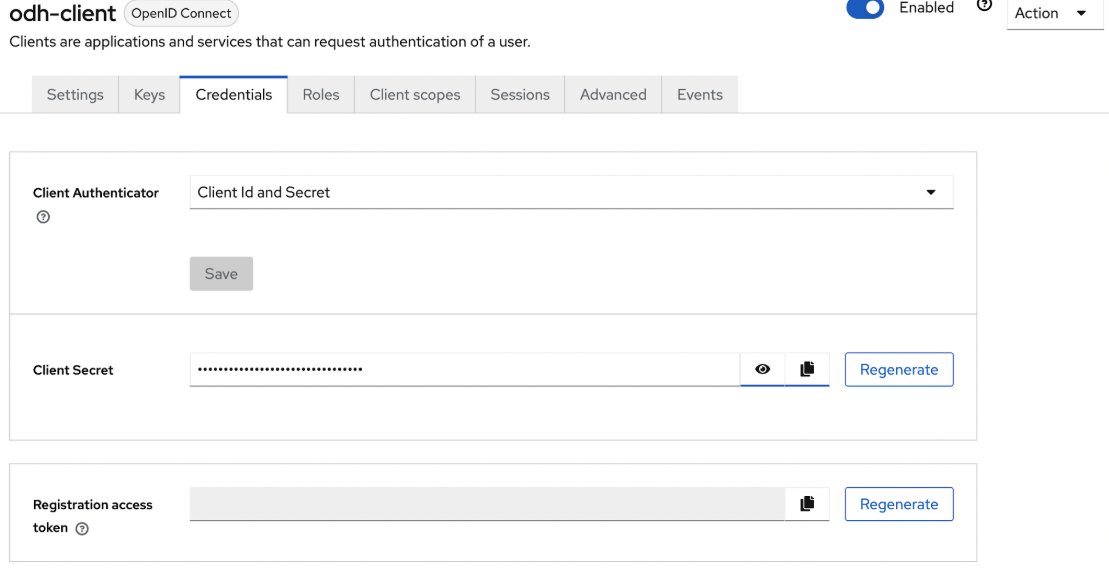
- Navigate to Clients → odh-client → Credentials.
- Copy the Client Secret value.
Save as
KEYCLOAK_CLIENT_SECRETenvironment variable (Figure 12). The secret is a long alphanumeric string.
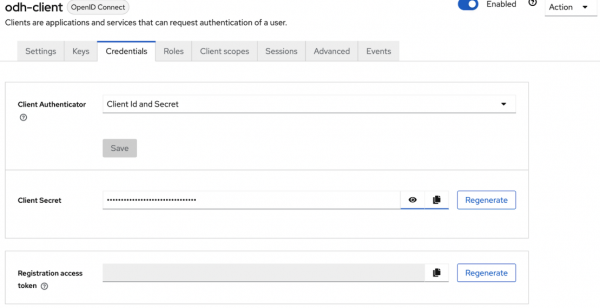
Figure 12: odh-client credentials tab showing Client Secret field populated with obscured token.
Note
- Keep this secret private; it will be used in ROSA and ODH configuration.
Next, you will set the access lifespans for your tokens for both single-sign on (SSO) session idle and gateway access. The ODH data science gateway runs an OAuth2 proxy whose default `GatewayConfig` cookie settings use a refresh interval of 1 hour (
spec.cookie.refreshdefaults to `1h` in the operator). If Keycloak issues shorter-lived access tokens or ends the SSO session sooner, the gateway may try to refresh while Keycloak already considers the session invalid. Users can see 401 Unauthorized, unexpected logouts, or errors loading the ODH dashboard.Set both to at least 1 hour, or longer if your policy allows:
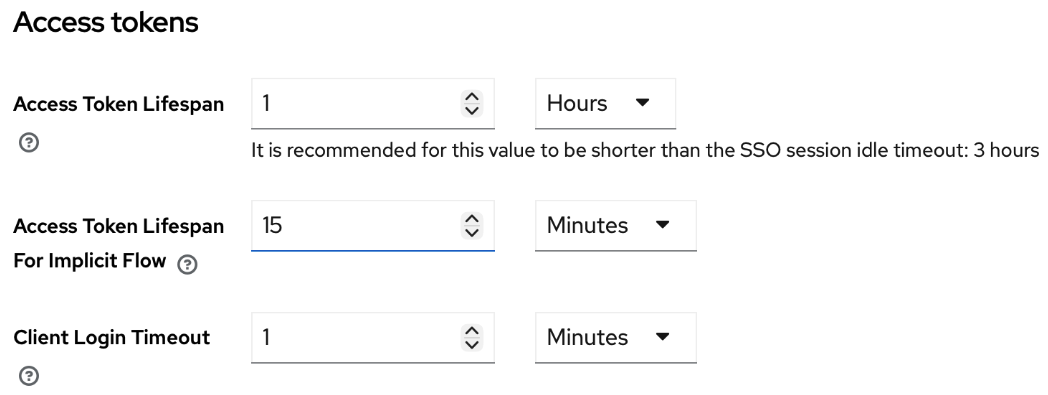
Realm settings → Tokens → Access Token Lifespan → 1 hour or more (Figure 13).

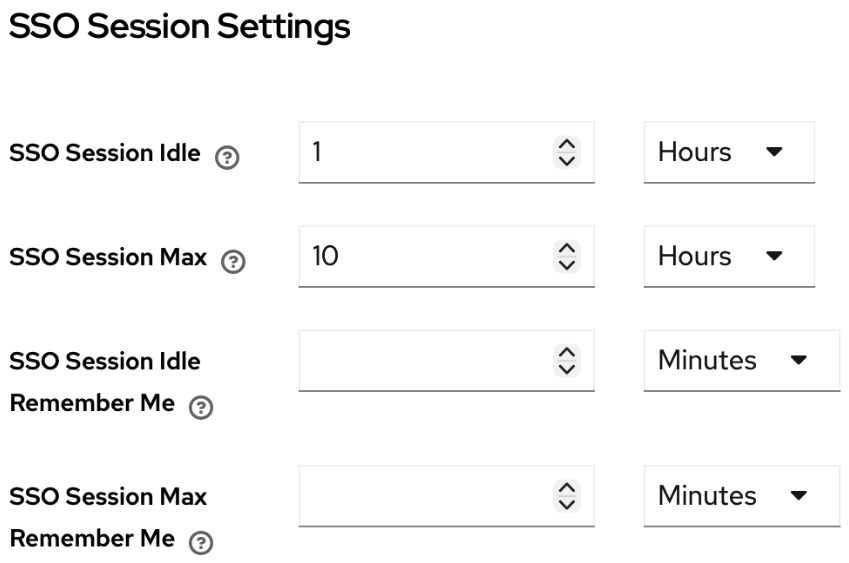
Figure 13: Access Token Lifespan set to 1 hour. Realm settings → Sessions → SSO Session Idle → 1 hour or more (Figure 14).
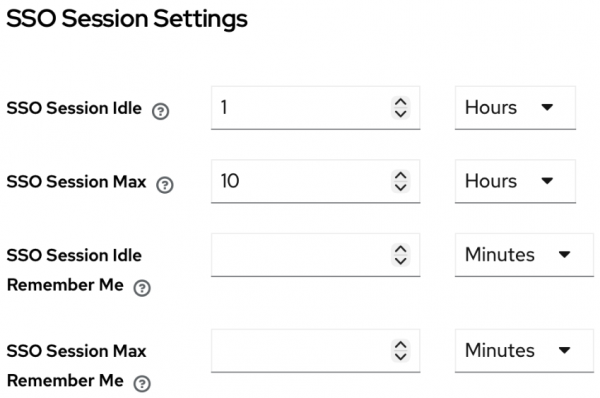
Figure 14: SSO session settings with idle set to 1 hour.
Security vs. session length: Longer access token and SSO session idle values reduce repeated logins but keep IdP-issued sessions valid for a longer time, which may increase risk if a token or browser profile is compromised. Always follow your security policies and compliance requirements. If you cannot configure ≥ 1 hour in Keycloak, consider lowering GatewayConfig spec.cookie.refresh (and align spec.cookie.expire) so the gateway refreshes before the Keycloak session or access token expires. Be sure to test the dashboard flow, as timing mismatches are a common cause of gateway authentication errors.
