Page
Prerequisites for the vLLM developer environment

Set up your environment
Before we dive into optimizing and serving models, we need to set up our development environment. In this section, we will walk you through launching a JupyterLab workbench inside Red Hat OpenShift AI on the Developer Sandbox, cloning the required learning path repository, and retrieving your API key from the OpenShift cluster. Once these quick prerequisite steps are complete, you’ll have all the models, code modules, and access keys needed to kick off your first hands-on lesson.
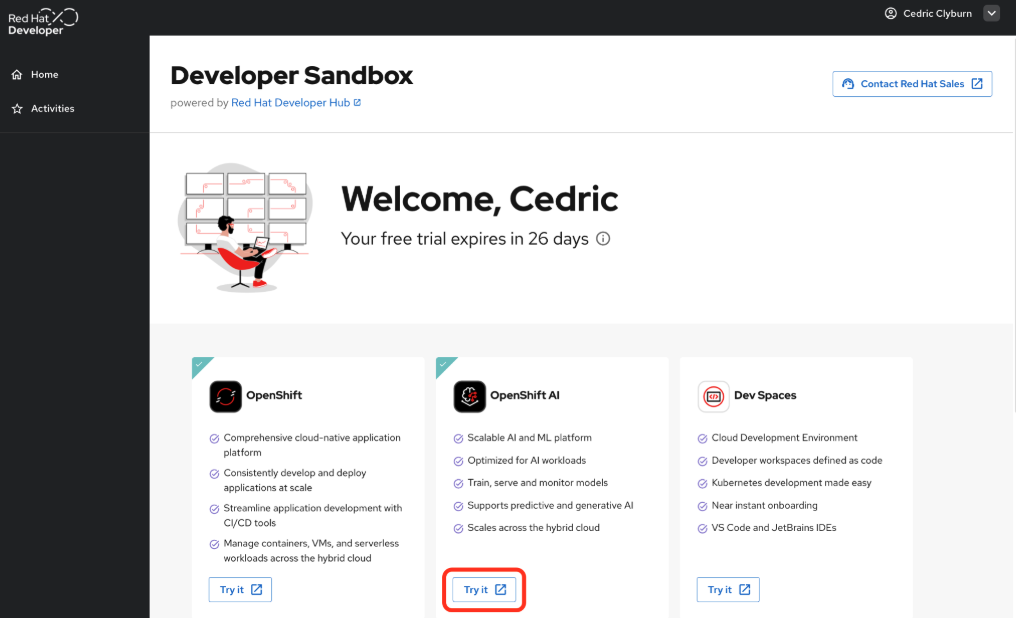
Open Red Hat OpenShift AI from the Developer Sandbox (Figure 1).
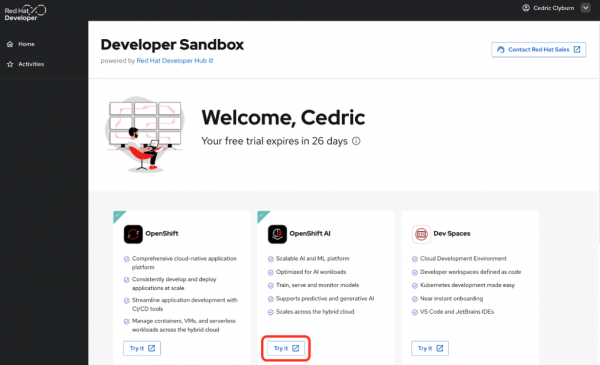
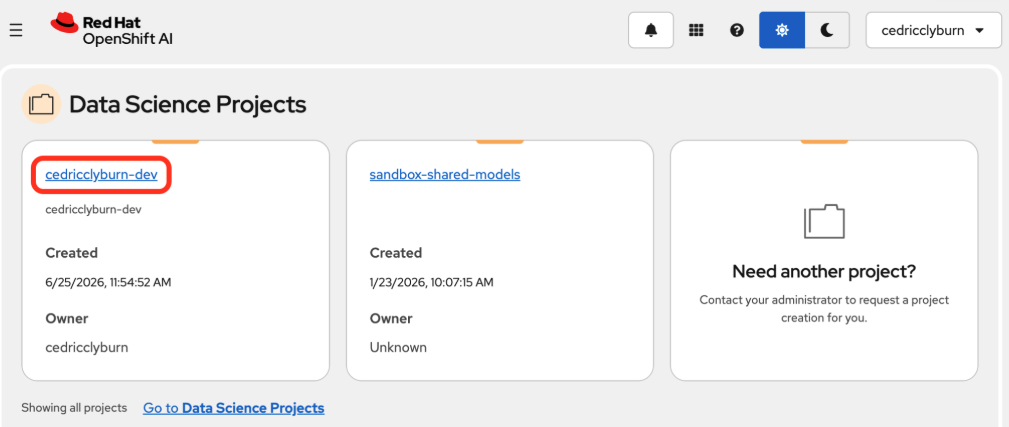
Figure 1: The Developer Sandbox homepage, where you’ll navigate to the OpenShift AI option. Head to the OpenShift AI dashboard and select your user’s project (Figure 2).
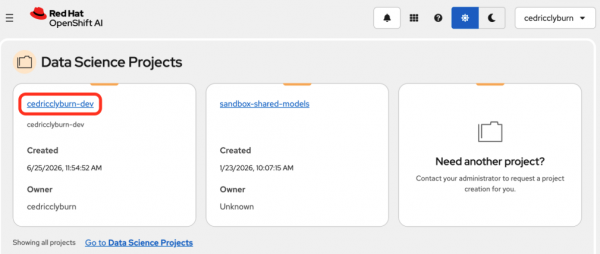
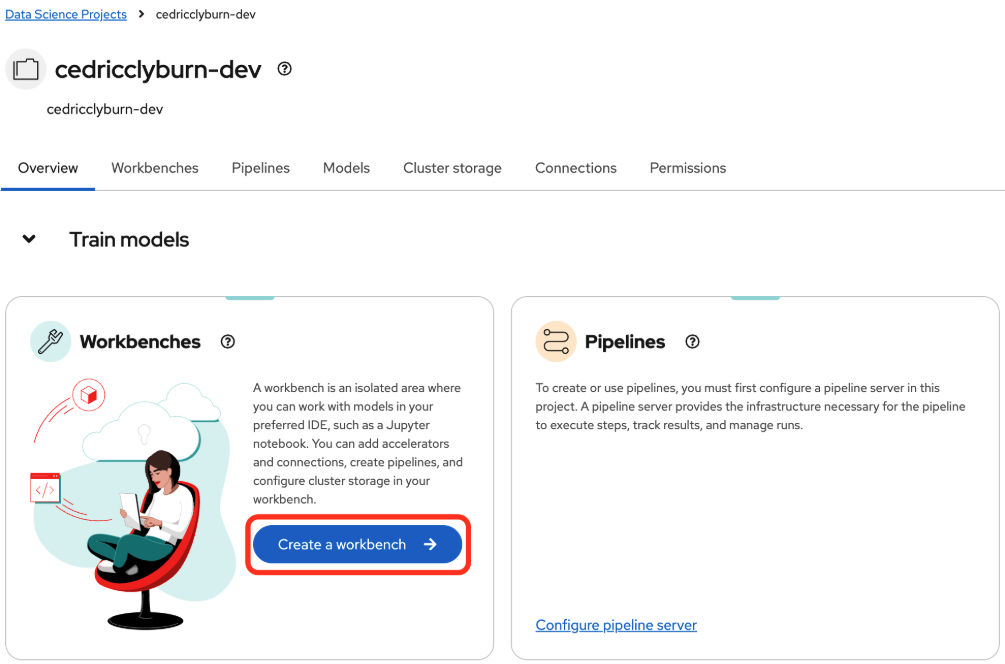
Figure 2: Here, the project is circled in red on the OpenShift AI dashboard. Click on the Create a workbench button (Figure 3). This is where we’ll execute all the Python code for the learning path to help you download models, run vLLM, and more.
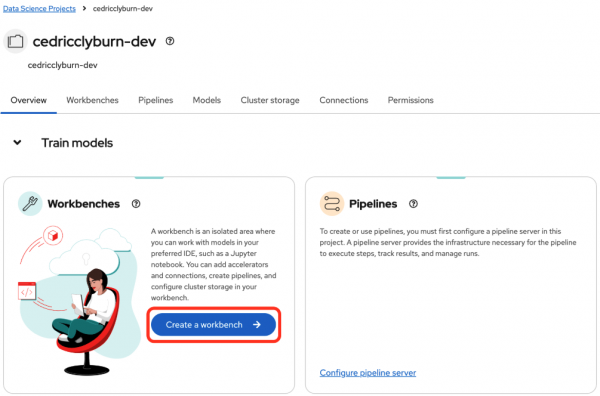
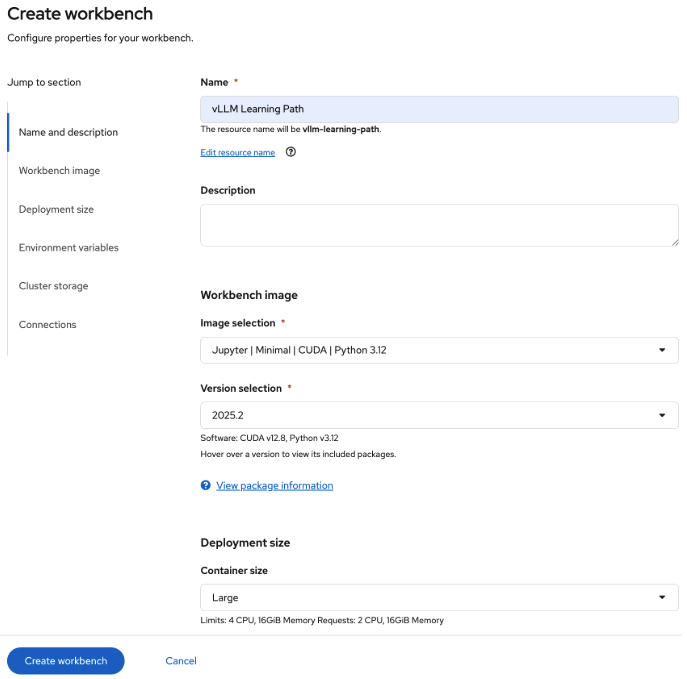
Figure 3: Within the project, the button to Create a workbench is indicated here by a red circle. On the Create workbench screen (Figure 4):
- Name your workbench vLLM Learning Path (or similar).
- Under Workbench image, select a JupyterLab instance with CUDA dependencies from the drop-down menu.
- Under Deployment size, select Large from the drop-down menu.
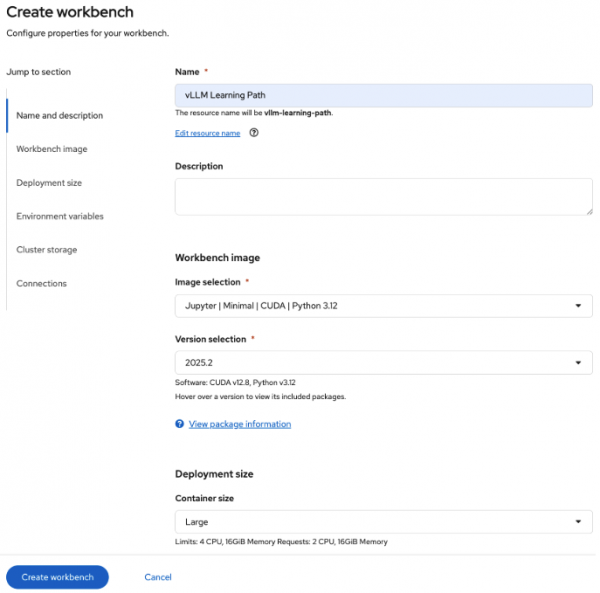
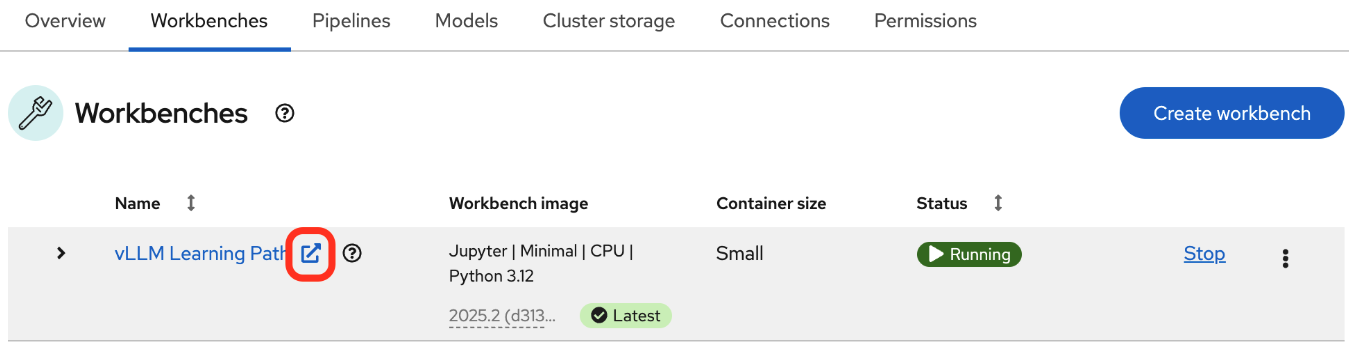
Figure 4: The fields to create a workbench, including the workbench name, image, and deployment size. Finally, once our development environment is ready after a minute or two, click the link (arrow symbol) to open it (Figure 5).
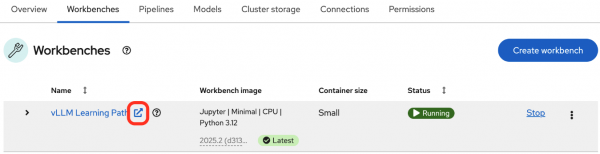
Figure 5: Select the link to your development environment, indicated here by the red circle.
Clone the repository
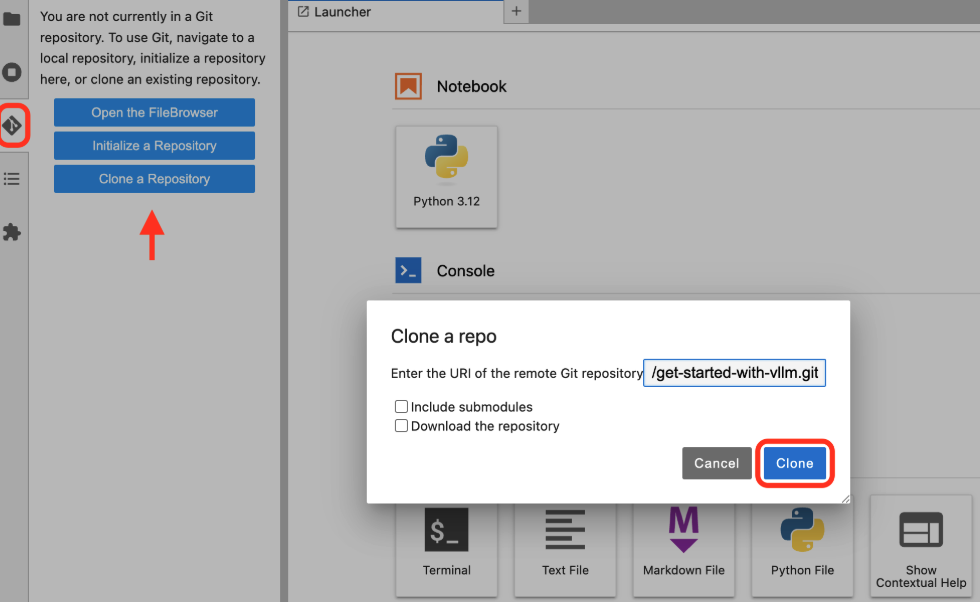
With your Developer environment open, on the left-hand sidebar, select Clone a Repository (Figure 6).
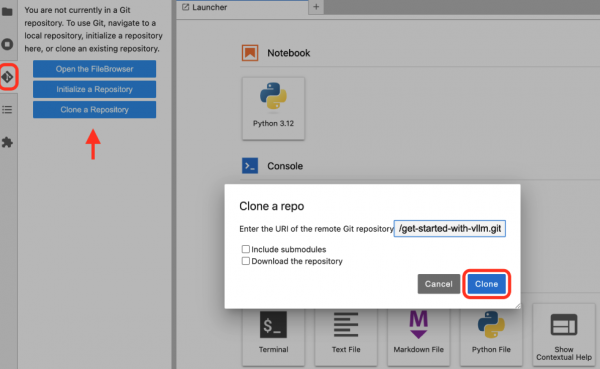
Figure 6: The Clone a Repository button is the third option on the left-hand sidebar. Clone this repo inside the workbench:
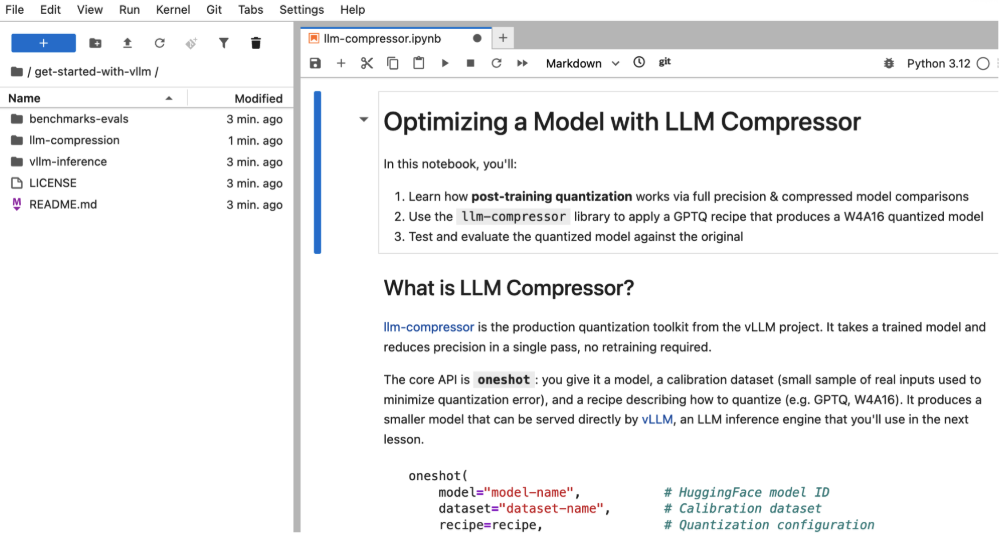
https://github.com/redhat-developer-demos/get-started-with-vllmThe repository may take a bit of time to clone, since you’re also downloading the model’s weights. Once the cloning process completes, you’ll have each of the modules for the learning path ready to view (Figure 7).
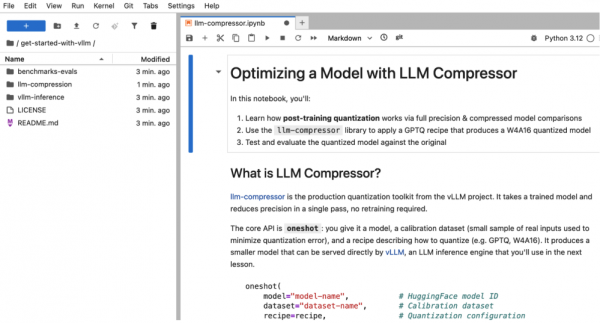
Figure 7: The module “Optimizing a Model with LLM Compressor” is the first one we will use in the first lesson.
Note
For Lessons 2 and 3, you’ll need to query a vLLM instance. We have already deployed a few models in the shared OpenShift AI cluster for you to use.
Set up your API key
Our last few prerequisite steps will guide you through setting up your API key from the OpenShift web console.
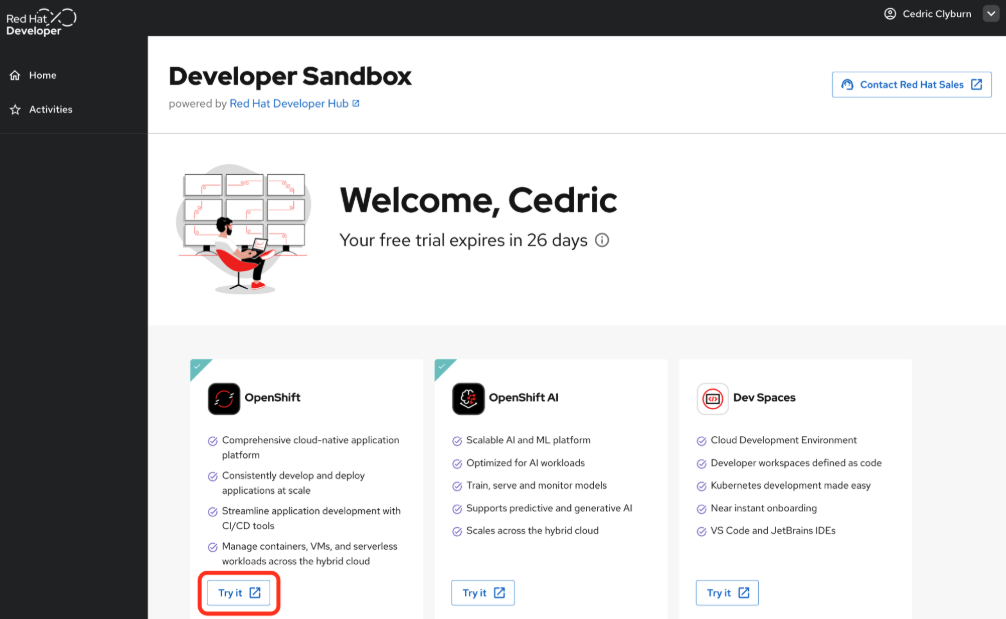
Return to the Developer Sandbox. This time, head to OpenShift itself, where cloud-native applications and resources run (Figure 8).
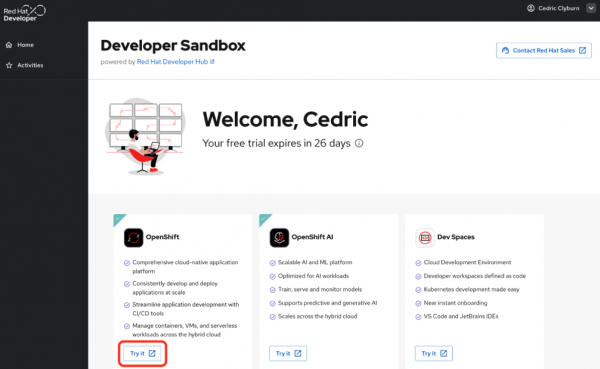
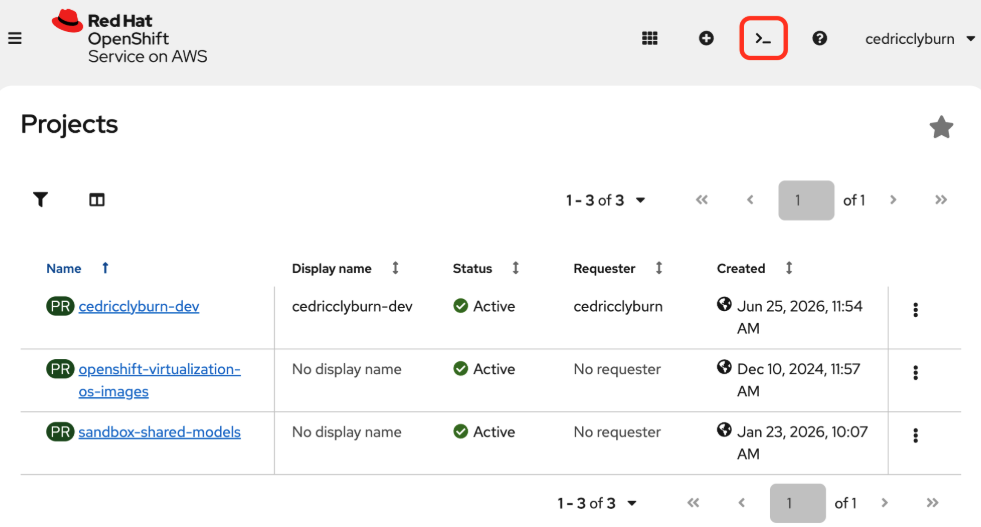
Figure 8: The Developer Sandbox homepage, where you will navigate to the OpenShift option. Click the Terminal icon at the top right (Figure 9).
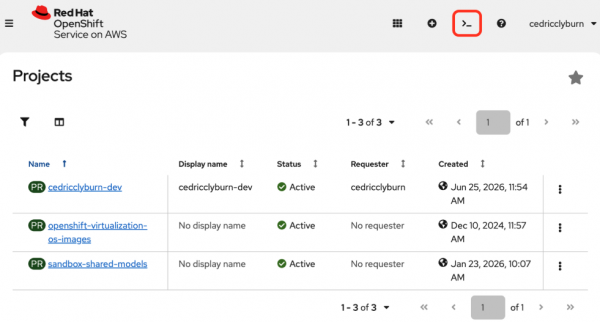
Figure 9: The Terminal icon is indicated here by a red circle, on the top-right of the OpenShift web console screen. Create a terminal session in the
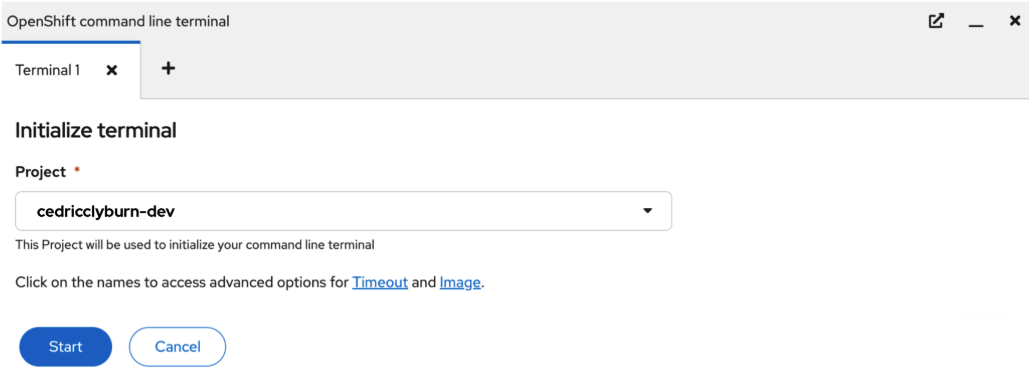
{username}-devproject (Figure 10).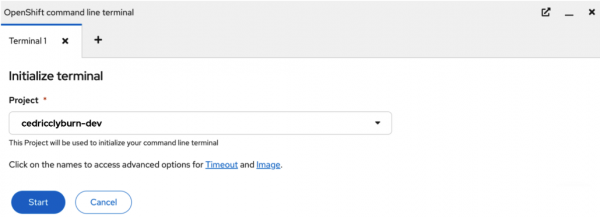
Figure 10: Initialize the terminal session within the project. The project name should appear in the drop-down menu. Run
oc whoami -t(Figure 11). This output key will be used for the lessons in this learning path, specifically when using vLLM and benchmarking later on.
Figure 11: In the terminal, the LLM API output key is indicated by a red circle.

You’re now ready to start the first lesson!

