Page
Configure SSO authentication in Ansible Automation Platform

In the previous lesson, we prepared a functional Keycloak instance with the necessary clients. However, Red Hat Ansible Automation Platform is still operating with local admin credentials. This creates a friction point for users and a maintenance burden for admins who must manage separate accounts. This lesson solves that disconnect by configuring Ansible Automation Platform to delegate its authentication to the Red Hat build of Keycloak. Whether you prefer a hands-on approach via the web UI or a programmatic approach via the API, this lesson provides you with a unified login experience using corporate single sign-on (SSO) credentials.
Prerequisites:
- You must have administrative access to a Red Hat OpenShift Container Platform cluster.
- Install the OpenShift command-line interface (CLI) and Kustomize locally.
- A valid Red Hat subscription is required.
- Install Ansible Automation Platform, Keycloak, and Developer Hub operators and run the base instances on your cluster (Lesson 1).
- Create and configure the Red Hat build of Keycloak client for SSO (Lesson 2).
In this lesson, you will:
- Retrieve the public key from the Red Hat build of Keycloak required for token verification.
- Configure the Keycloak authenticator within the Ansible Automation Platform interface or via API.
- Verify the end-to-end SSO pathway.
Configure SSO authentication in Ansible Automation Platform
This is where we connect Ansible Automation Platform to the Red Hat build of Keycloak for authentication. You can do this through the UI or API - I’ll show you both approaches.
Method 1: Use the Ansible Automation Platform web UI
Access Ansible Automation Platform Console by getting your Ansible Automation Platform URL:
AAP_URL=$(oc get route aap -n aap -o jsonpath='https://{.spec.host}')
echo "AAP Console: $AAP_URL"
Get admin password:
AAP_ADMIN_PWD=$(oc get secret aap-admin-password -n aap -o jsonpath='{.data.password}' | base64 -d) echo "Admin Password: $AAP_ADMIN_PWD"- Navigate to Access Management (Figure 1).
- Log in as admin (password from
aap-admin-passwordsecret). - Go to Access Management → Authentication Method → Create Authentication.
- Set the desired name.
Set the type to Keycloak.

Figure 1: Ansible Automation Platform “Create Authentication” interface. - Before configuring Ansible Automation Platform, you need the public key from Keycloak. Get the key from either of the two following options:
Option 1: Use the Keycloak realm.
curl -sk ${KEYCLOAK_URL}/auth/realms/rhdh | jq -r '.public_key'Option 2: Use the Keycloak console (Figure 2) by navigating to the Realm Settings → Keys tab. Then, find the RS256 row, click the Public Key button, and copy the key.

Figure 2: “Keys” tab in the Keycloak console showing the RS256 public key.
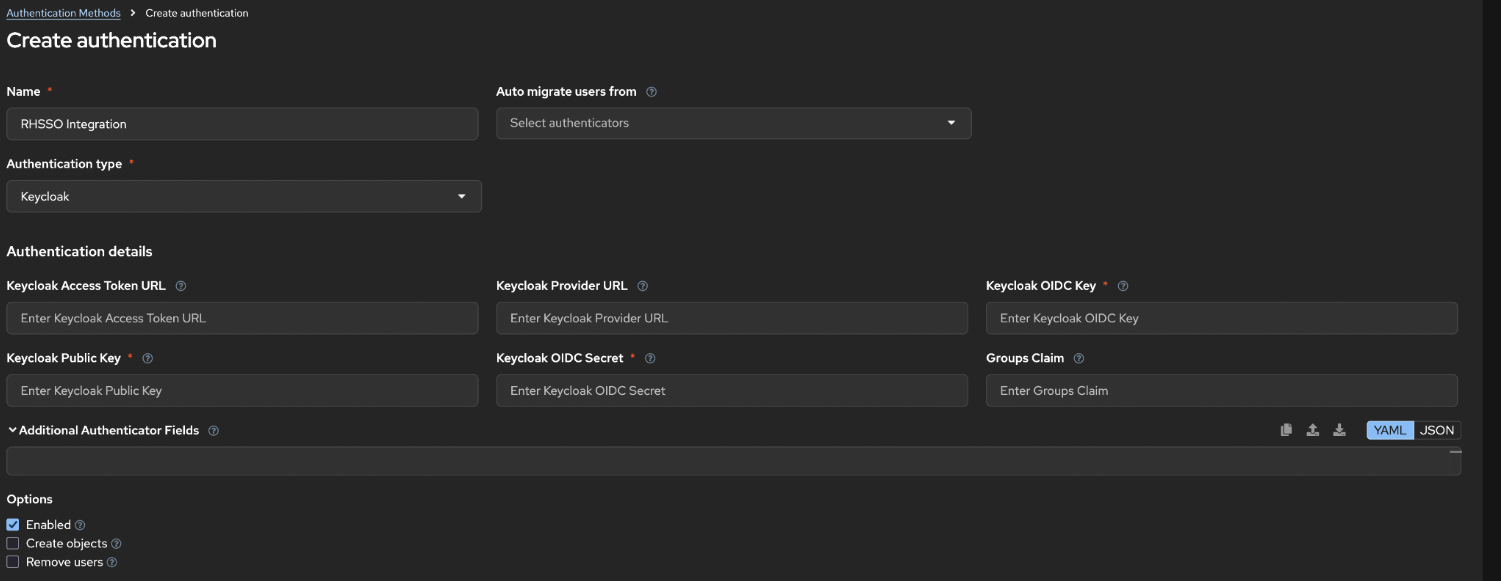
Configure the Keycloak parameters in Ansible Automation Platform by filling in these fields as shown in Figure 3.
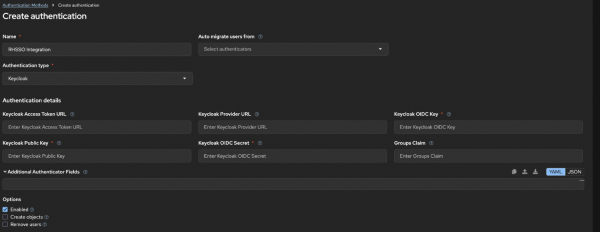
Figure 3: Ansible Automation Platform Authentication Settings configuration form.
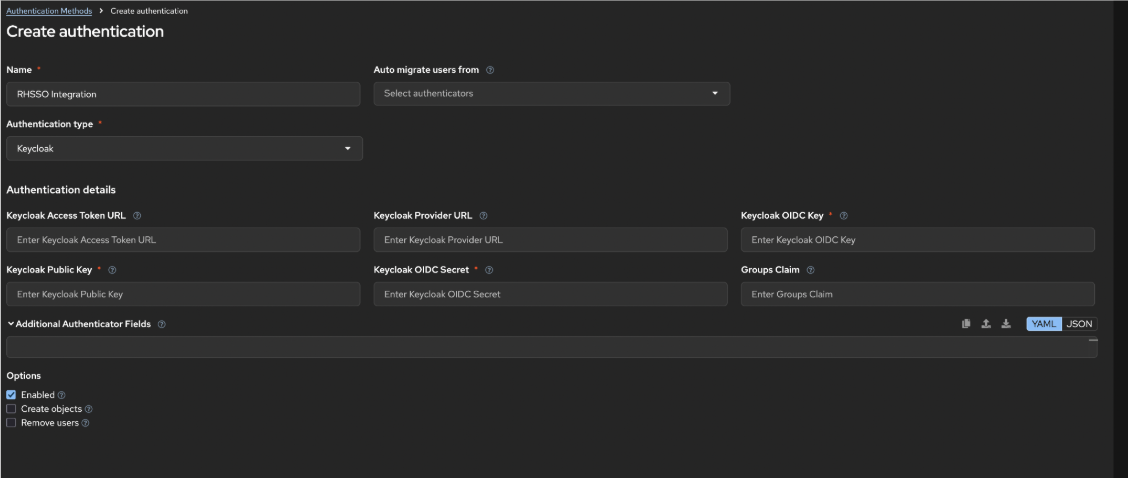

Field |
|
|---|---|
Keycloak Provider URL |
|
Keycloak Client ID |
|
Keycloak Client Secret | The client secret created in Lesson 2 |
Keycloak Public Key | The RS256 public key from Keycloak |
Access Token URL |
|
Access Token Method | POST |
- Click Save at the bottom of the form to save the configuration. The page should refresh with a success message.
Method 2: Use the Ansible Automation Platform API
For automation lovers, here’s how to configure SSO programmatically:
Set your variables:
KEYCLOAK_URL=$(oc get route keycloak -n rhsso -o jsonpath='https://{.spec.host}')
AAP_URL=$(oc get route aap -n aap -o jsonpath='https://{.spec.host}')
Retrieve your Ansible Automation password:
AAP_PASSWORD=$(oc get secret aap-admin-password -n aap -o jsonpath='{.data.password}' | base64 -d)Retrieve the client secret:
CLIENT_SECRET=$(oc get secret keycloak-client-secret-aap-client -n rhsso -o jsonpath='{.data.CLIENT_SECRET}' | base64 -d)Retrieve the Keycloak public key:
PUBLIC_KEY=$(curl -sk ${KEYCLOAK_URL}/auth/realms/rhdh | jq -r '.public_key')Configure Keycloak settings via the API:
curl -sk -X POST \
  "${AAP_URL}/api/gateway/v1/authenticators/" \
  -u "admin:${AAP_PASSWORD}" \
  -H "Content-Type: application/json" \
  -d '{
        "name": "RH SSO",
        "enabled": true,
        "type": "ansible_base.authentication.authenticator_plugins.keycloak",
        "configuration": {
            "ACCESS_TOKEN_URL": "'"${KEYCLOAK_URL}"'/auth/realms/rhdh/protocol/openid-connect/token",
            "AUTHORIZATION_URL": "'"${KEYCLOAK_URL}"'/auth/realms/rhdh/protocol/openid-connect/auth",
            "GROUPS_CLAIM": "Group",
            "KEY": "aap",
            "PUBLIC_KEY": "'"${PUBLIC_KEY}"'",
            "SECRET": "'"${CLIENT_SECRET}"'"
        }
  }'
## Expected output
## {"id":2,"url":"/api/gateway/v1/authenticators/2/"
## ...
## }
Verify the configuration ID:
curl -sk -u "admin:${AAP_PASSWORD}" \
  "${AAP_URL}/api/gateway/v1/authenticators/2/" | \
  jq '.'
Verify the SSO Configuration
After configuration, test that SSO is working:
- Log out from Ansible Automation Platform.
Access the login page. You should now see an option to Log in with RH SSO (Figure 4).
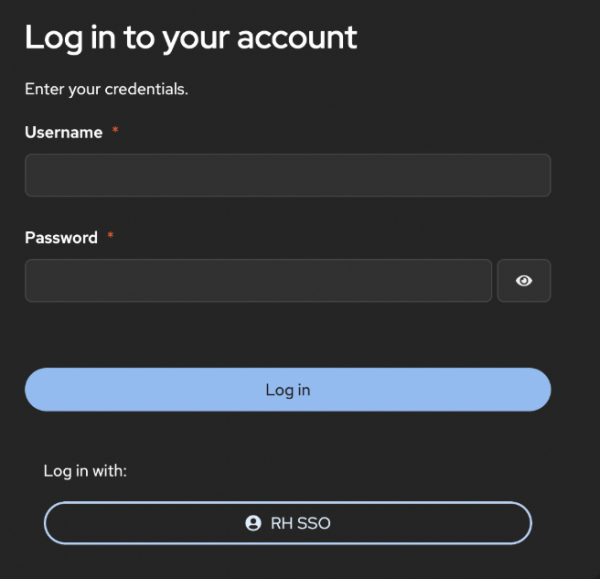
Figure 4: Ansible Automation Platform login screen with RH SSO option enabled. - Click Log in with RH SSO. You’ll be redirected to the Red Hat build of Keycloak.
- Log in with your Keycloak credentials. Use the test
rhdp-adminuser or any user in therhdhrealm. - Success! You should be redirected back to Ansible Automation Platform, logged in via SSO.

Success! By providing Ansible Automation Platform with the Keycloak public key and credentials, you have moved from insecure local authentication toward a modern, centralized SSO model. Your automation platform is now ready to recognize users authenticated by the Red Hat build of Keycloak, which is the final requirement before we connect the Red Hat Developer Hub (Developer Hub) in the next lesson.
