This blog post will guide you through how to configure Red Hat Satellite for deploying virtual machines (VMs) to Microsoft Azure. We will also use the image builder service for Red Hat Enterprise Linux to push a custom virtual machine image to the same platform.
Many organizations must adapt to running workloads both in their own data centers and in the cloud, using hyperscalers like Microsoft Azure and IBM Cloud. This blog post shows how Red Hat Satellite eliminates the need to introduce unfamiliar tooling that might fragment management and responsibility. In short, use the same tools to manage both on-premises and cloud workloads in a centralized way with existing governance, policies, and personnel.
Prerequisites
- A Microsoft Azure resource group for deploying VMs must be in place
- Microsoft Azure credentials for the resource pool, including a service principal assigned to a role with the following details: cloud, client ID, client secret, subscription ID, tenant ID, and Azure region
- A Red Hat Satellite 6.x instance (the Azure connector was introduced in version 6.7)
- Access to console.redhat.com to build a custom image
I created this demonstration in a basic test environment where Satellite connects to the internet, and the virtual machines created in Microsoft Azure also use a public IP address to keep the configuration simple.
For a production setup, connectivity between the on-premises data center and Microsoft Azure would use Azure ExpressRoute or a similar VPN connection to avoid exposing virtual machines directly to the internet. For larger deployments of virtual machines in Microsoft Azure, consider extending the on-premises Satellite instance with a Satellite Capsule closer to the workloads.
Create a custom virtual machine image for Microsoft Azure
To create a virtual machine disk image file for Microsoft Azure, you can either use the integrated image builder in Red Hat Enterprise Linux or our cloud-based image builder service. To keep it simple, I’m using our cloud-based image builder.
Log in to the Red Hat Hybrid Cloud Console and navigate to Red Hat Enterprise Linux -> Inventory -> Image Builder. Create a new blueprint, name it, select repositories, and customize it as needed.
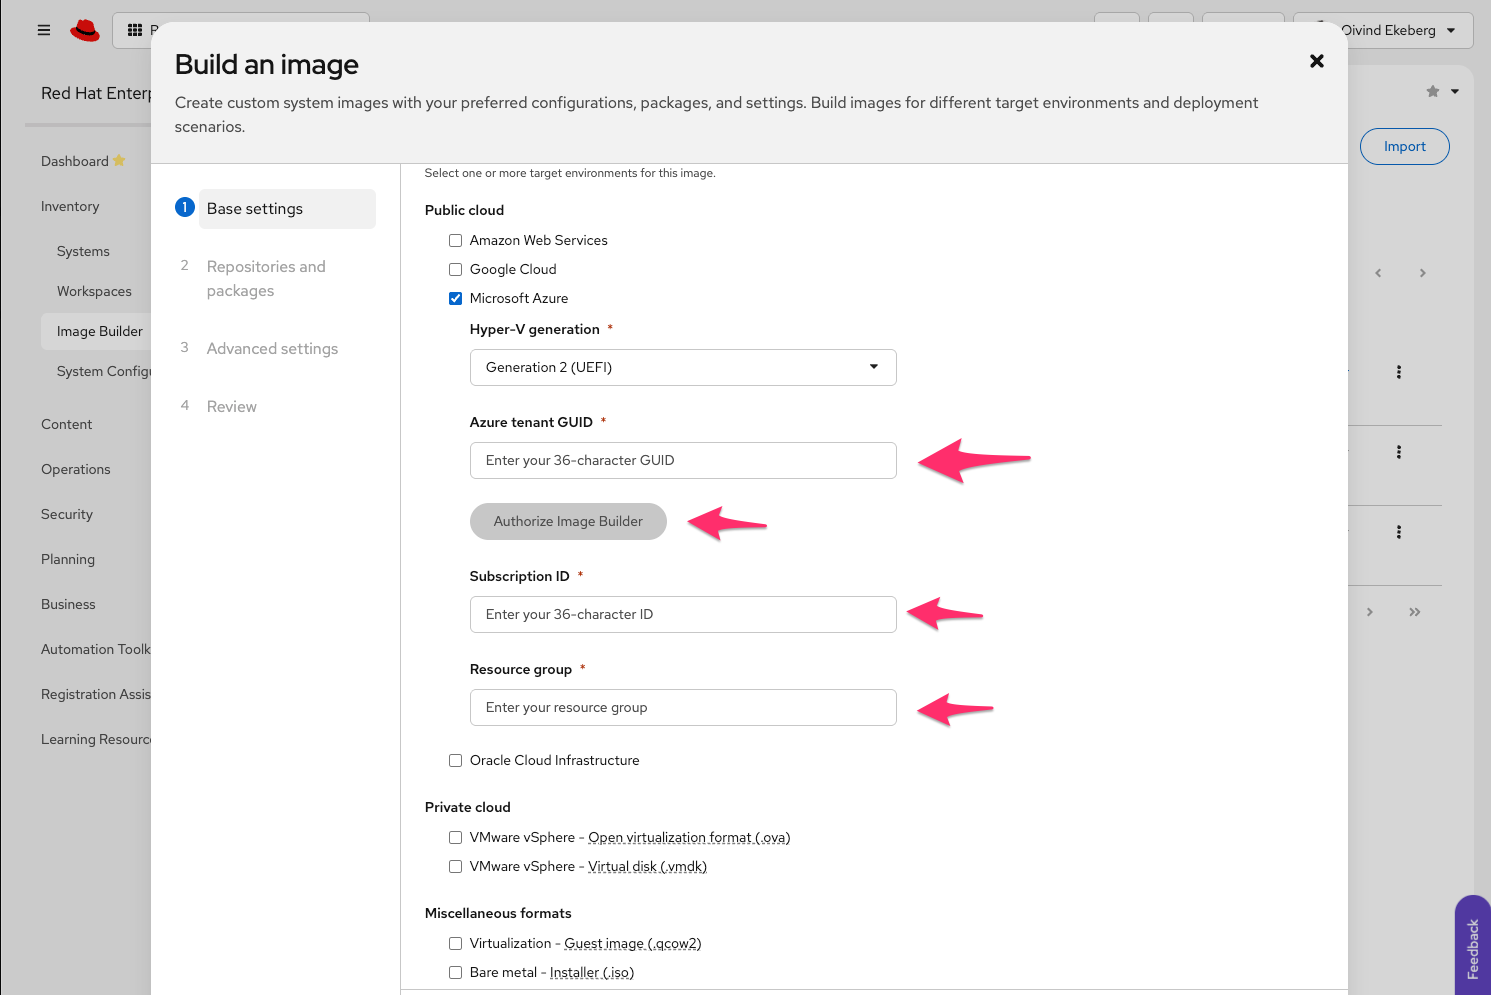
In the Base settings, select Microsoft Azure and enter the required credentials. Then select Authorize Image Builder and approve the pop-up to allow image builder to connect to Azure (Figure 1). Save the blueprint; do not create an image yet.
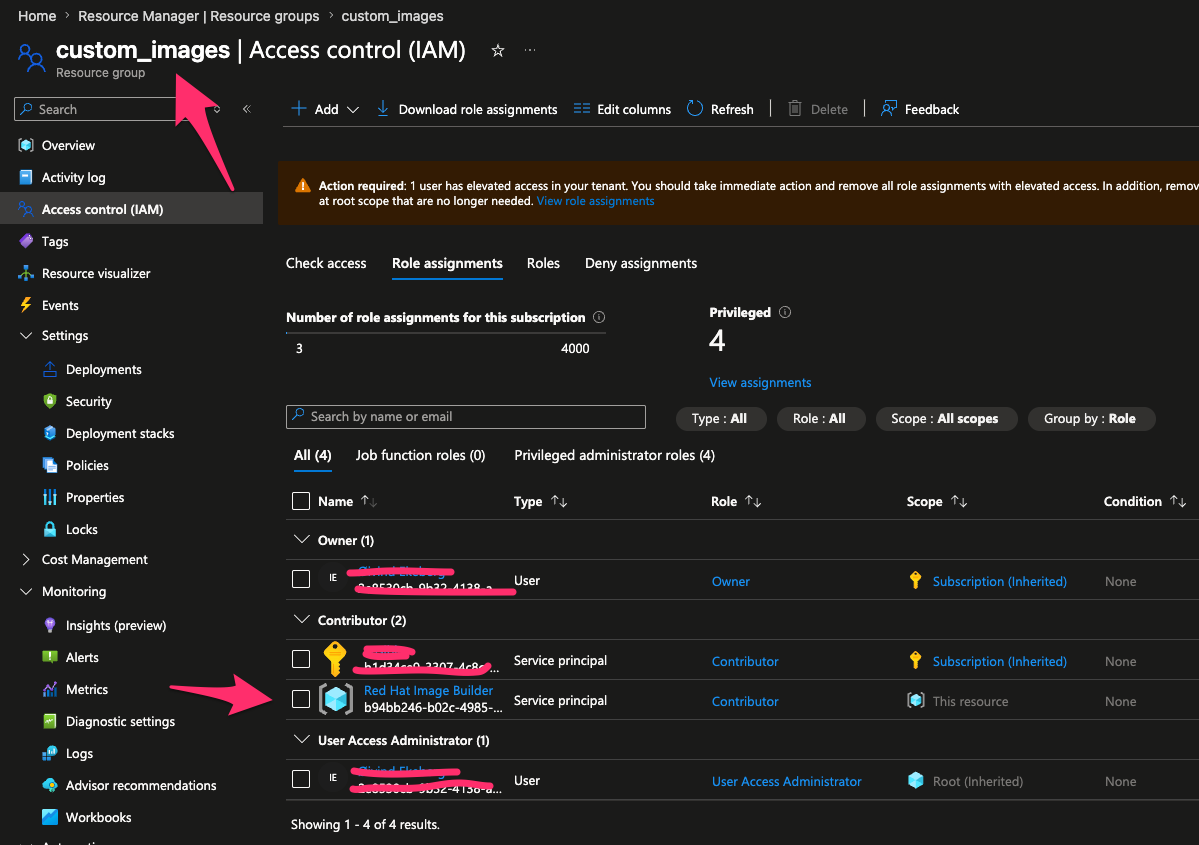
Log in to the Azure portal and add the Red Hat Image Builder service principal with Contributor role to the resource group assigned for images (Figure 2). This permission allows image builder to upload images.
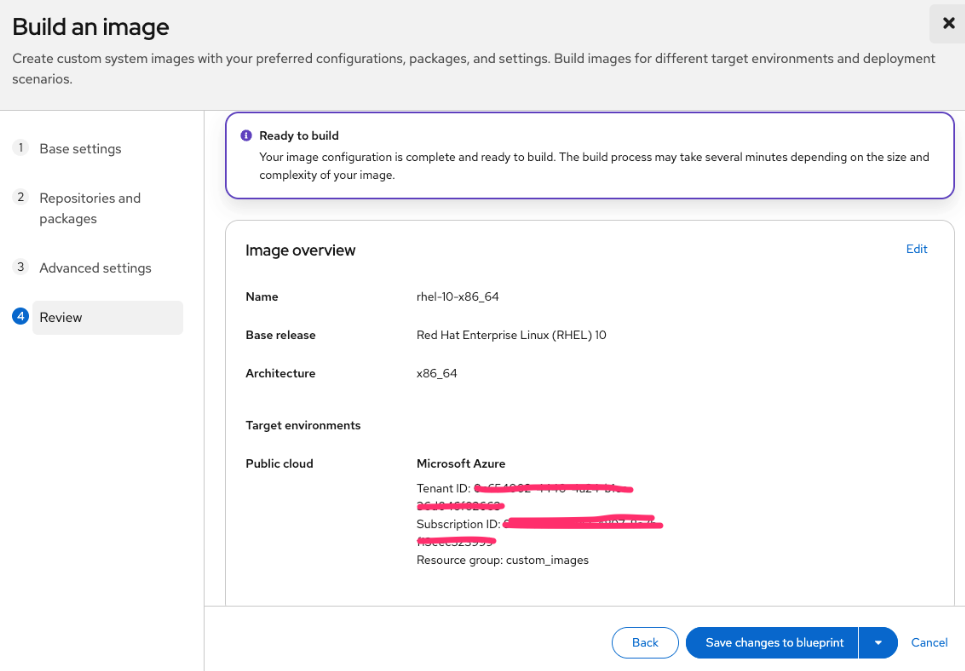
Once Azure permissions are set for Red Hat Image Builder, return to the cloud-based image builder and generate the image from your blueprint. While the image builds and uploads to the cloud, move to the next step.
Configure Microsoft Azure as a compute resource in Satellite
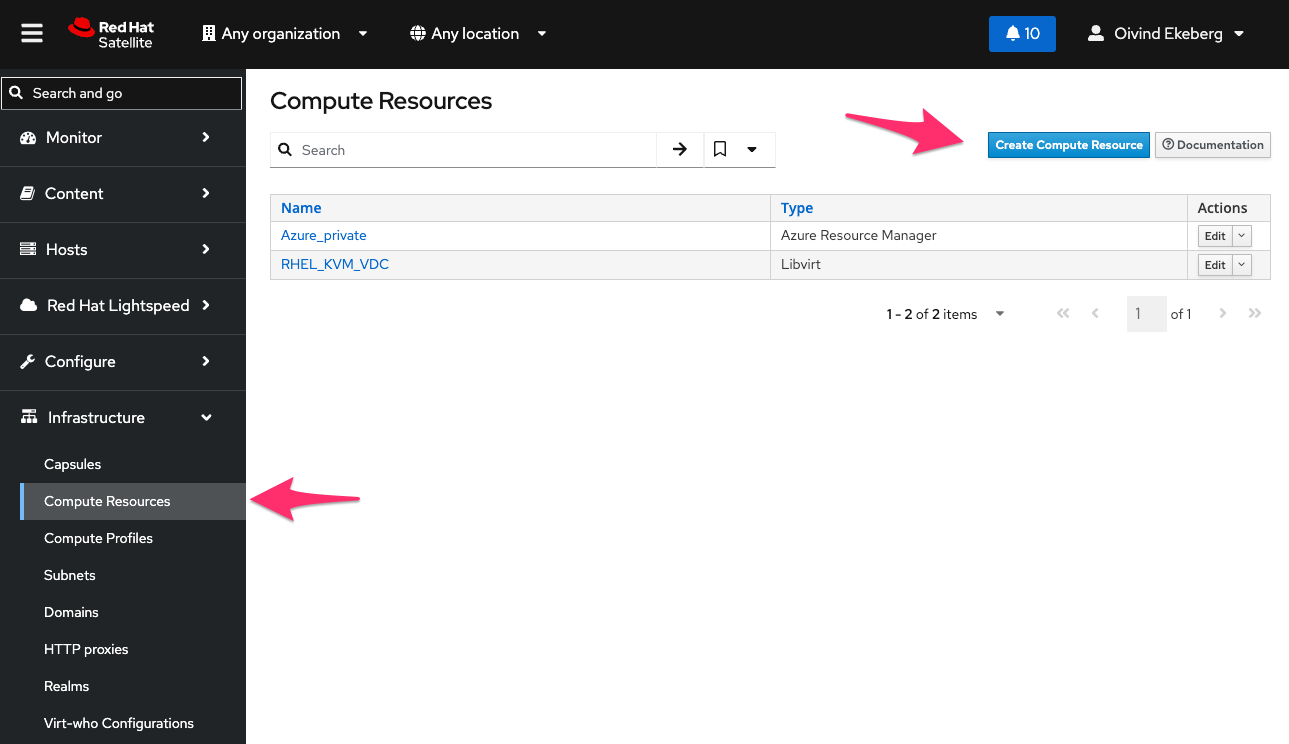
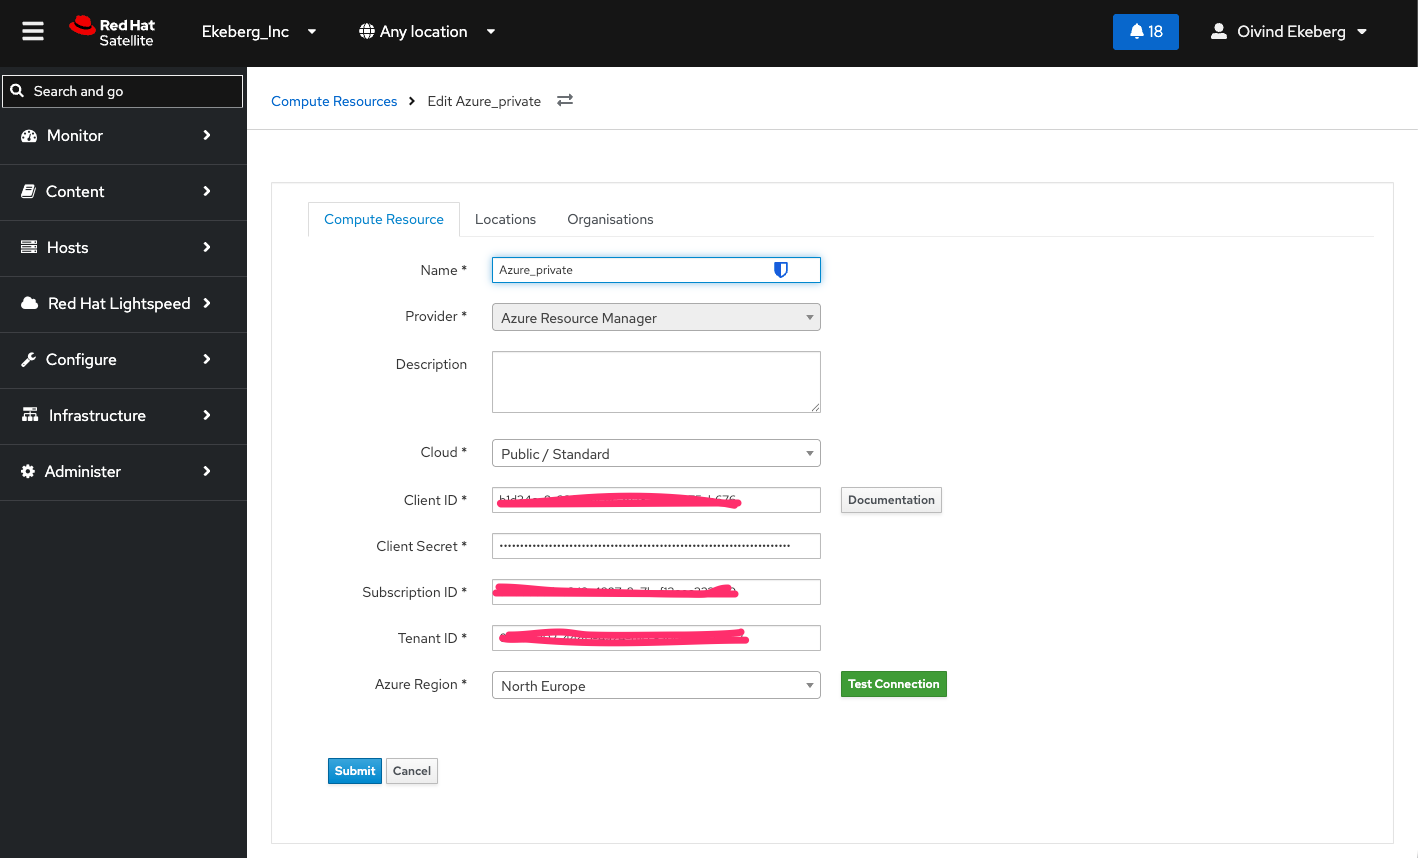
In Satellite, navigate to Infrastructure -> Compute Resources -> Create Compute Resource, and select Azure Resource Manager from the list of providers (Figure 4).
Enter your Microsoft Azure subscription details, select a region, and test the connection to establish a direct connection from Satellite to Microsoft Azure.
Configure the custom image in Satellite
Before the next step, create a location (Locations -> New Location) and a host group (Host Groups -> Create Host Group) for Microsoft Azure in Satellite.
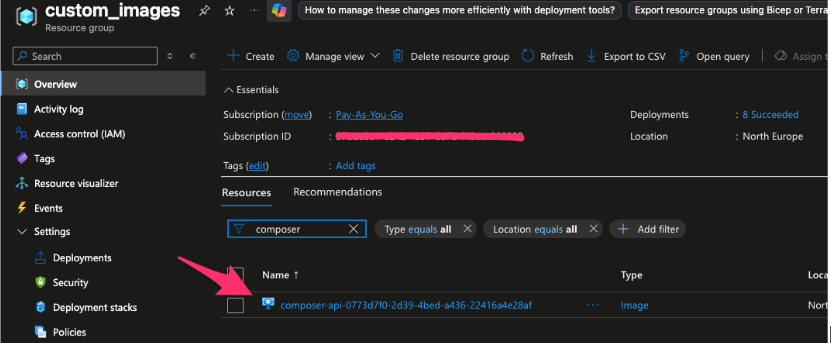
Check that the image builder process in the Red Hat Cloud Console has completed. Once it finishes, verify that the image uploaded successfully by checking the resource group in Microsoft Azure. The image file will have a prefix of composer-api-<guid>. Copy the file name.
Names are autogenerated, and you cannot rename them in Microsoft Azure. If you want specific names on image files, use the local image builder in Red Hat Enterprise Linux and upload the renamed image to Microsoft Azure manually.
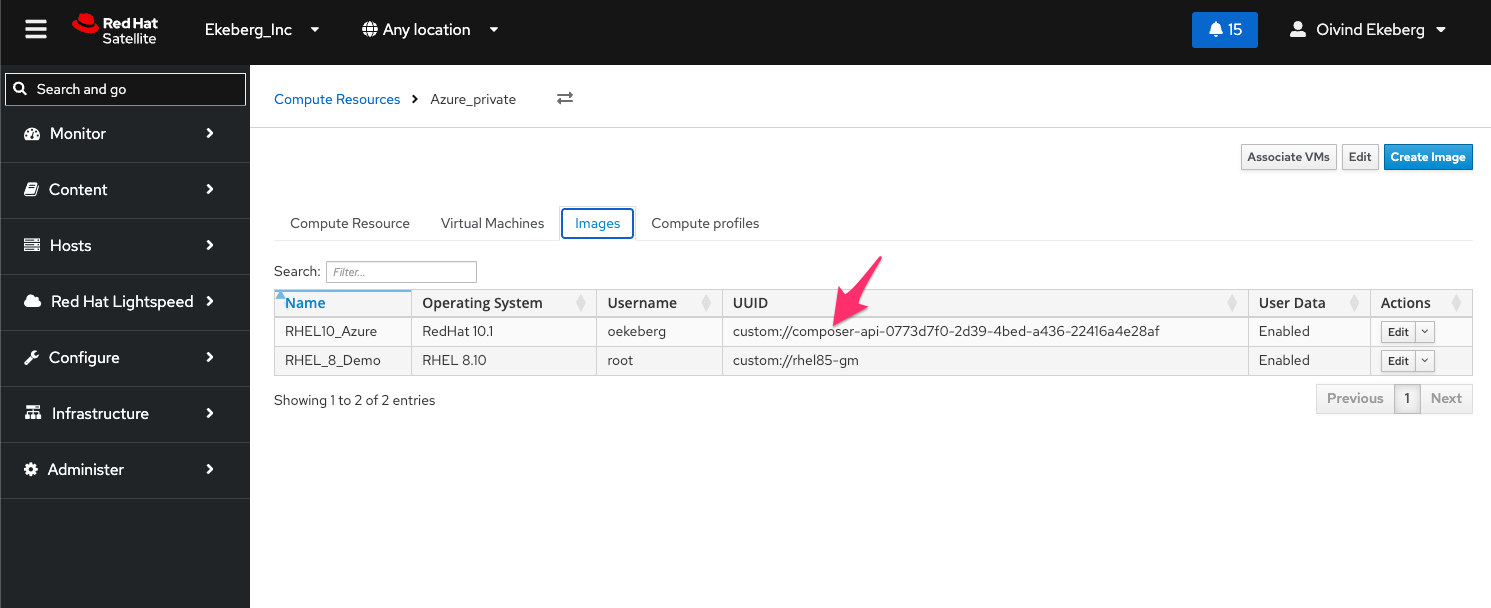
After copying the file name, return to Satellite and the newly created compute resource. Select the Images tab, select Create Image, and point your image definition to the file in Microsoft Azure. Remember to add the custom:// prefix to specify that you are using a custom image rather than a marketplace image.
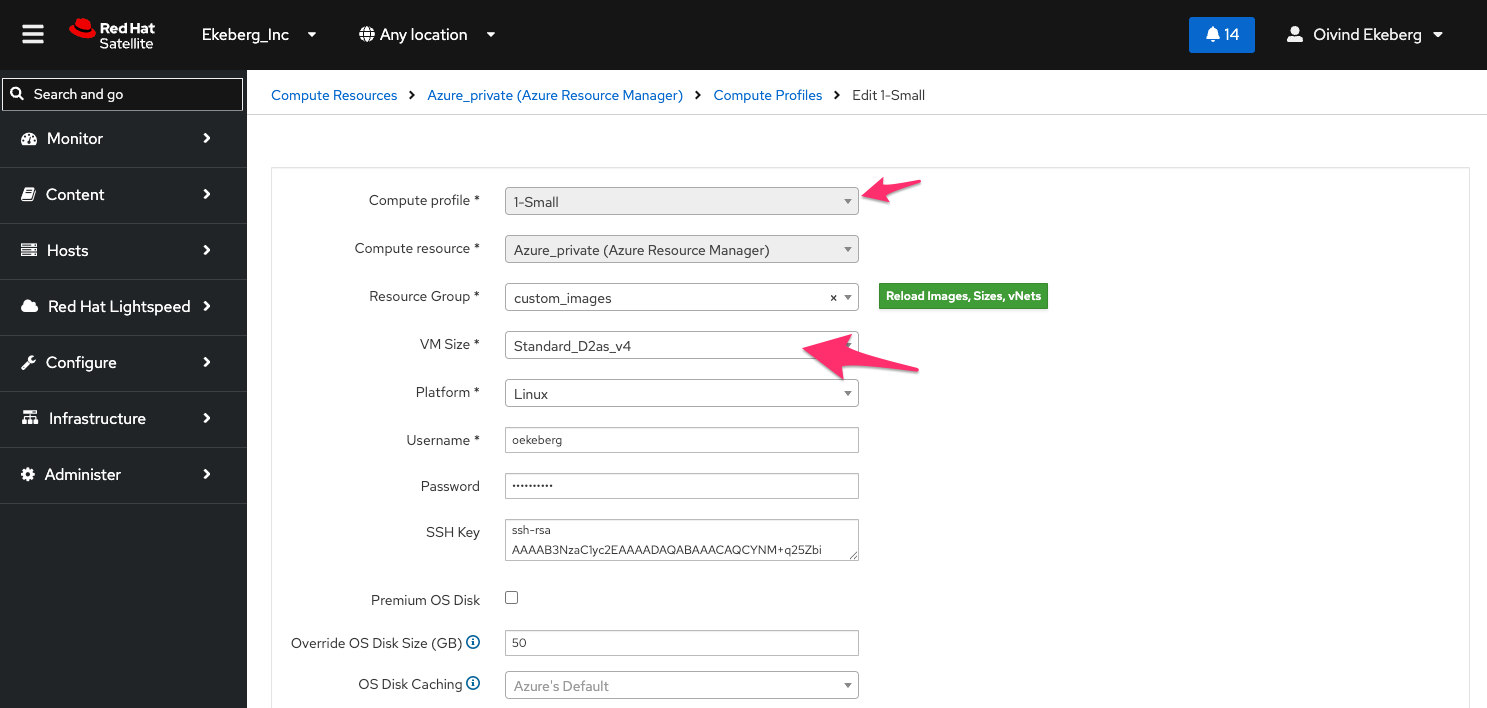
Create a compute profile
Move to the next tab, Compute Profile, and define your profile. Select your resource group in Microsoft Azure and fill in the other fields as needed. The VM Size field shows all available virtual machine profiles in Microsoft Azure.
Deploy the virtual machine directly in Microsoft Azure
We are now ready to deploy a virtual machine based on the custom image. In Satellite, navigate to Hosts -> Create Host. Select Location, Host Group, and Content View, then select Submit.
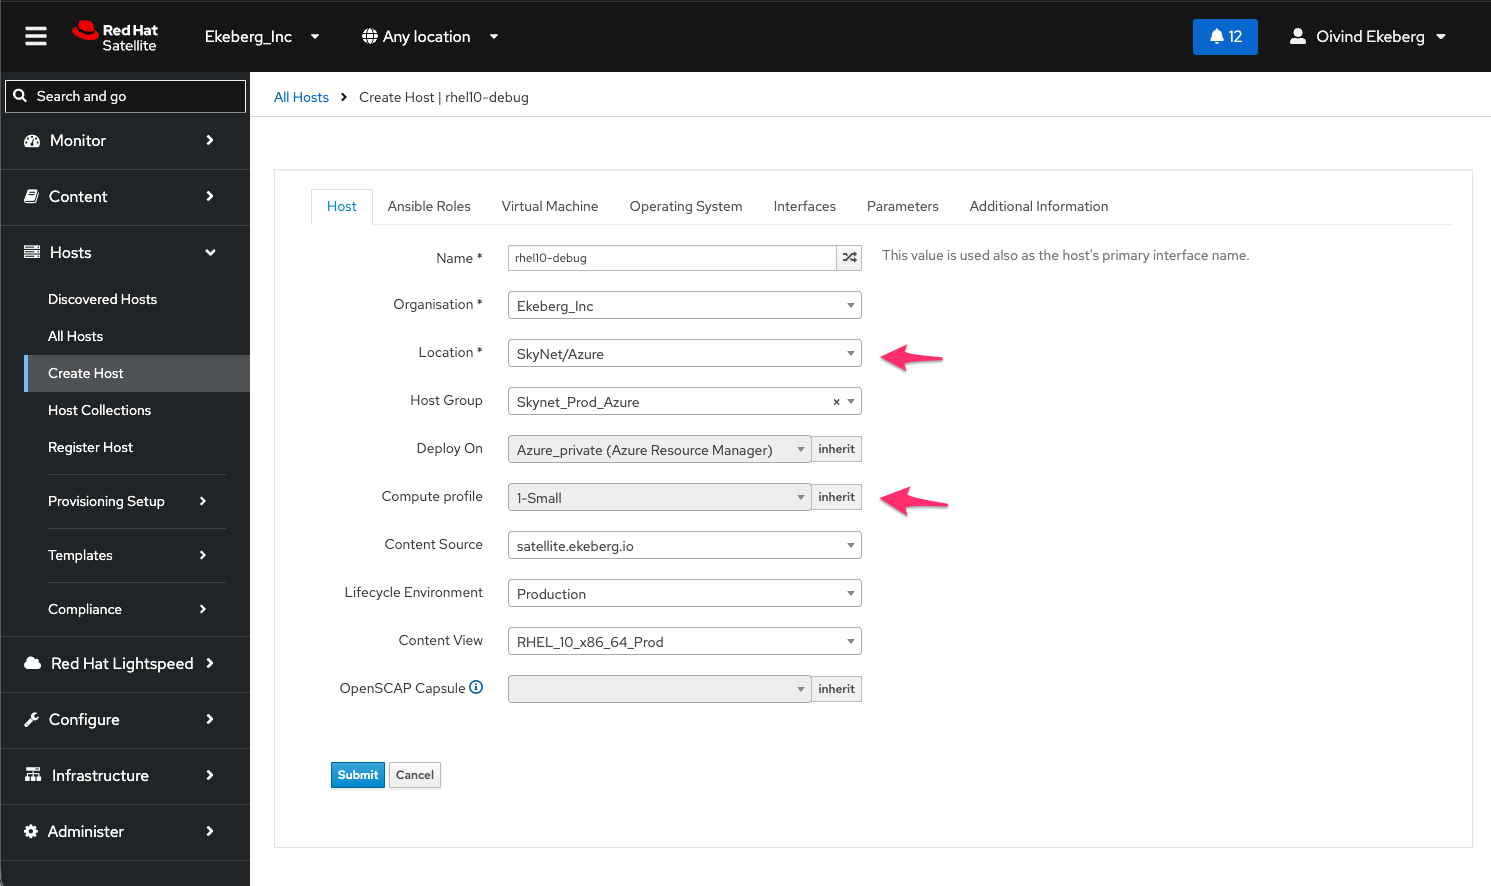
Once the virtual machine deploys, Satellite refreshes to show the new instance.
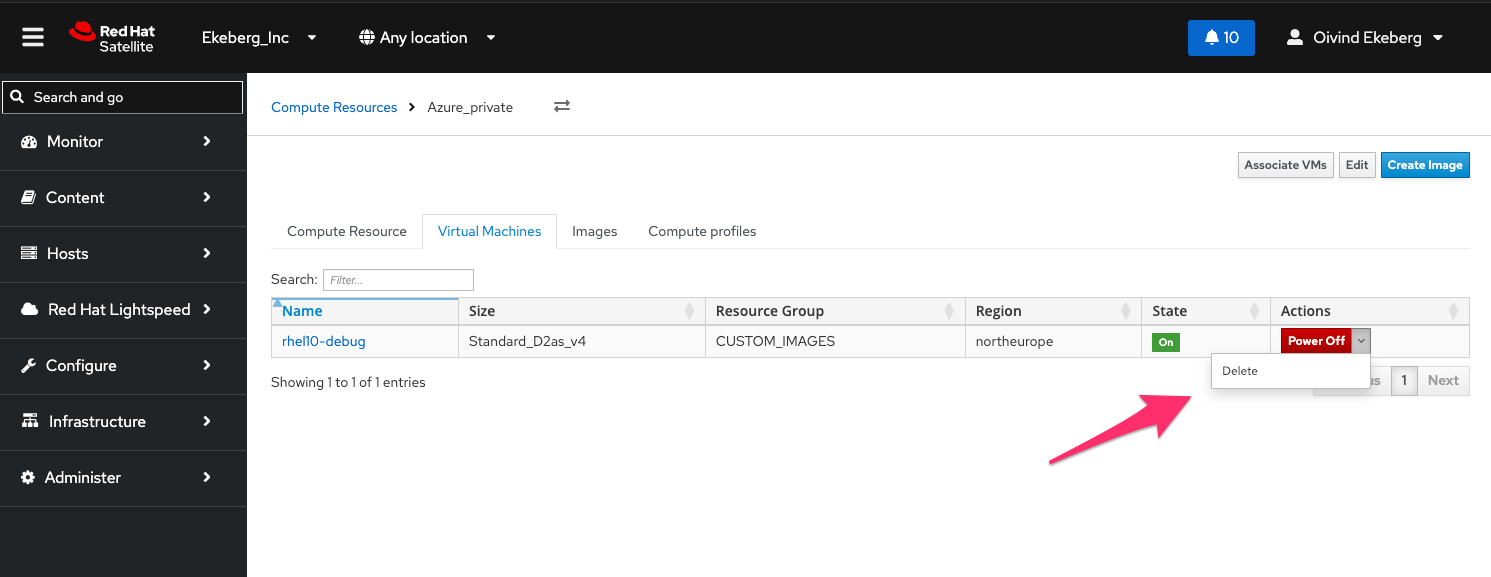
Navigate back to the Microsoft Azure compute resource to observe the state of the new virtual machine and the option to power it off. If you want to delete the virtual machine, power it off, select the down arrow on the button, and select Delete. This action removes the resources in Microsoft Azure.
Best practices for deleting virtual machines
Delete machines through Satellite rather than directly in the Microsoft Azure resource group, which can be cumbersome. A virtual machine in Microsoft Azure includes multiple files and objects. Using the Satellite interface ensures all related resources are cleaned up properly.
This basic demonstration shows how easily you can add Microsoft Azure as a compute resource in Red Hat Satellite to centralize the management of Red Hat Enterprise Linux instances, regardless of where they run.