Page
Develop a sample application image for Python Flask
This lesson walks through developing a basic Python Flask application in a development container and deploying it as a web page using Gunicorn. You will set up basic code and configuration files and build a Containerfile, which you will use to create our bootable container.
Prerequisites:
- Existing knowledge of how to create and edit Linux text files.
- Understanding of Python language syntax and how to work within the Python environment.
- Download Red Hat build of Podman Desktop for Windows, macOS, or Red Hat Enterprise Linux (RHEL).
In this lesson, you will:
- Develop a foundational understanding of the core application components.
- Develop a sample application image for Python Flask:
- Step 1: Create the development
containerfile. - Step 2: Build the development container image.
- Step 3: Run the developer container.
- Step 4: Create a basic "Hello, world" application using Python and Flask.
- Step 5: Test the developed application.
- Step 1: Create the development
Core application components
This application is made up of two key components: Flask and Gunicorn.
In this architecture, Flask provides a lightweight and flexible web framework for the Python programming language. Flask handles routing (matching web addresses to Python functions), requests, and templating basics to build web applications in a Pythonic way. Flask is used for this learning path because it has a simple core that's quick to learn and use, but it’s also extensible and well supported by the Python community.
Green Unicorn (Gunicorn) is the Python Web Server Gateway Interface (WSGI) HTTP server used in this architecture. Flask doesn’t know how to directly talk to the web. Instead, it uses WSGI, a standard interface. Gunicorn accepts HTTP requests and passes them to your Flask app through WSGI, then returns the response to the client. In production, you might add a reverse proxy in front of Gunicorn.
Develop a sample application image for Python Flask
Before you write any code, start by creating a container that can serve as a cross-platform application development environment. This ensures all the tools are ready for use. By using a volume mount, changes made in a local code editor appear instantly inside the container.
Step 1: Create the development containerfile
We need a place on our computer to store our source files for our application.
mkdir -p $HOME/src/flask-devThe Containerfile will use the latest build version of our security-hardened image container for development. The current version of the image includes Python 3.14 and also provides a shell and development tools. Set up the working directory to the /app directory where our development work will happen, then use pip to download Flask and Gunicorn so they are ready for our code. Expose port 8080 so that Red Hat build of Podman Desktop knows to expose the port for your web application when the container is running, and use a keep-alive command (in this case tail -f /dev/null) to ensure the container stays running in the background while we write code on our laptops.
We save the following file as Containerfile in our flask-dev folder:
# Start with a Red Hat hardened builder image
FROM registry.access.redhat.com/hi/python:latest-builder
# Switch to root to install our tools
USER 0
WORKDIR /app
# Install Flask and Gunicorn
RUN pip install flask gunicorn
# Expose port 8080
EXPOSE 8080
# Keep the container running so we can work inside it
CMD ["tail", "-f", "/dev/null"]
Step 2: Build the development container image
With the file your_home_directory/src/flask-dev/Containerfile in place, we’re ready to build our application development container. To do so:
- Create the subdirectory
your_home_directory/src/flask-dev/hardened/appon our local desktop system, using our preferred native desktop tools. You’ll use this directory as the central repository for your application files. This lets you edit files either using the editors in our container or by using your preferred desktop text editor or IDE. Either way, they will be accessible from your container. Open Red Hat build of Podman Desktop on your local machine and go to the Images section in the left navigation (Figure 1).
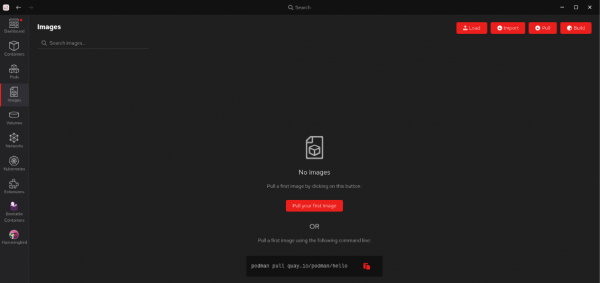
Figure 1: The Podman Desktop Images section. Select Build in the top right corner to open the Build an image screen as shown in Figure 2.
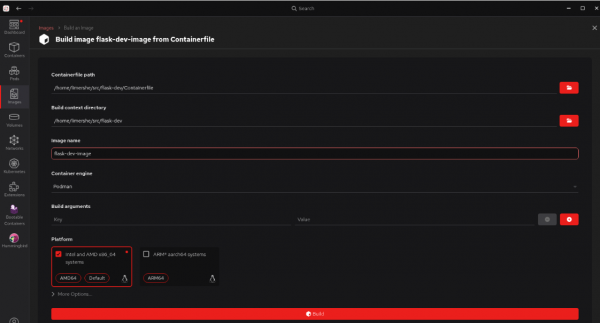
Figure 2: Build the image from your Containerfile. - Fill in the following fields:
- Containerfile path: In this example, the path is
your_home_directory/src/flask-dev/Containerfile. - Build context directory: In this example, this is
your_home_directory/src/flask-dev. - Image name: In this example, the image name is
flask-dev-image. - Container engine and Build arguments can stay as is for now.
- Platform: For my RHEL-based laptop, I chose the Intel and AMD x86_64 image option.
- Containerfile path: In this example, the path is
Now that you have filled in the information, select Build at the bottom. Our new image will be built as shown in Figure 3.
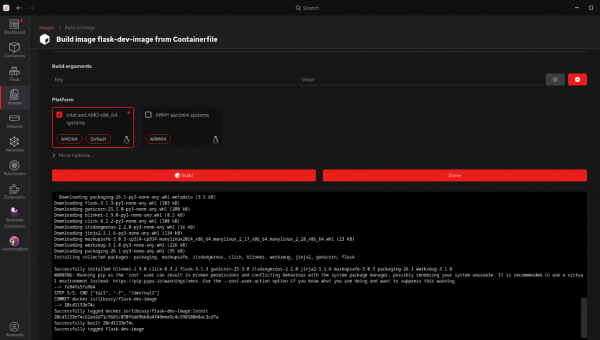
Watch the process, then confirm the image was built successfully. - Select Done.
Return to the main Images section, as shown in Figure 4.
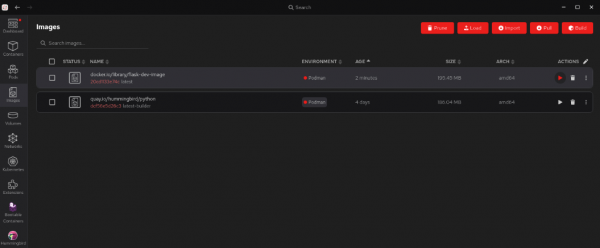
Figure 4: The Images screen now shows your new image(s).


Step 3: Run the developer container
Now it's time to launch your application development container:
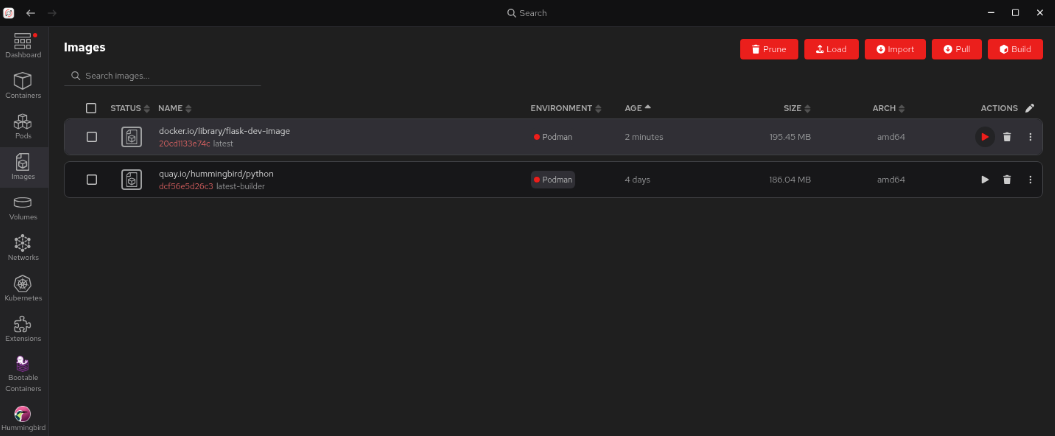
- Select the right arrow next to
flask-dev-imageto start the image (Figure 4). This will bring you to the screen to create your container (Figure 5).
Warning
Do not select Start Container yet. We still have an additional step to take.
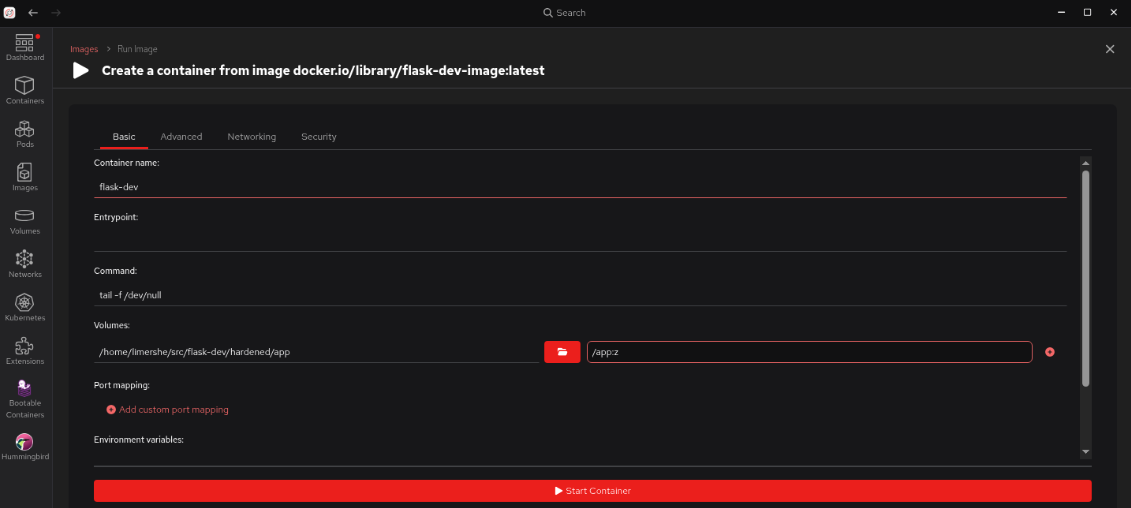
- For the Container name in the case of this example, enter
flask-dev. - In the Volumes section, select the subdirectory you created earlier,
flask-dev/hardened/app, as the path on the host. Specify/app:zas the path inside the container.
Note
The :z option will not show up in the actual container path. It’s a directive to Podman to allow multiple containers to share the volume content with the local host. In this case, your desktop. You achieve this by re-labeling the directory to container_t on SELinux-enabled Linux systems. The :z is only necessary if you are running Red Hat build of Podman Desktop on RHEL, where SELinux is enabled by default.
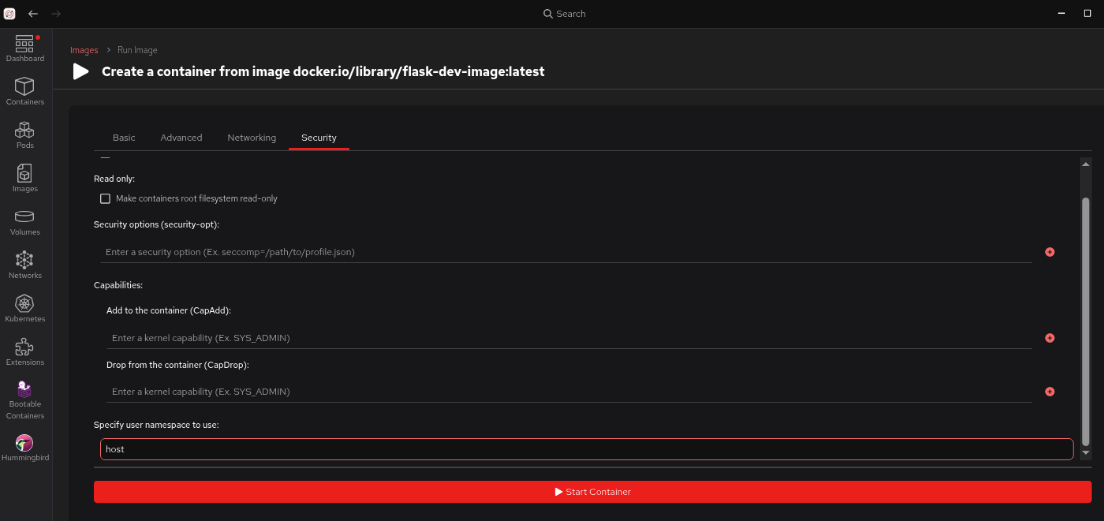
Select the Security tab at the top right of the form, which takes you to the screen shown in Figure 6.
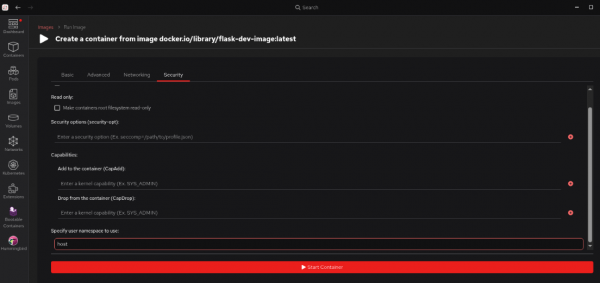
Figure 6: Choose the container's security settings in the Security tab. - Scroll down to the Specify user namespace to use: field and enter
host. This keyword will map the root user in our container to your local system user on the machine running Podman. That way, you can share files between our native desktop environment and our new development container. - Select Start container at the bottom. You now have a running container named
flask-dev.
For the next part of this learning path, your examples assume you're working from your local host using our preferred desktop editor or IDE unless you say otherwise.
Step 4: Create a basic "Hello, world" application using Python and Flask
Let’s start creating the "Hello, world" Flask application:
In Red Hat build of Podman Desktop, you will be brought to the Tty tab for the running container. Select the Terminal tab (Figure 7).

Figure 7: Interact with your container through its CLI. Create the file
your_home_directory/src/flask-dev/hardened/app/app.pyas follows:from flask import Flask app = Flask(__name__) @app.route("/") def home(): return "<h1>Red Hat Hardened Images</h1><p>Your Flask app is running in a hardened image!</p>" if __name__ == "__main__": app.run(host="0.0.0.0", port=8080)Now, create the file
your_home_directory/src/flask-dev/hardened/app/wsgi.pyas follows:from app import app if __name__ == "__main__": app.run()

Step 5: Test the application
Test your application by running the following from the container Terminal screen:
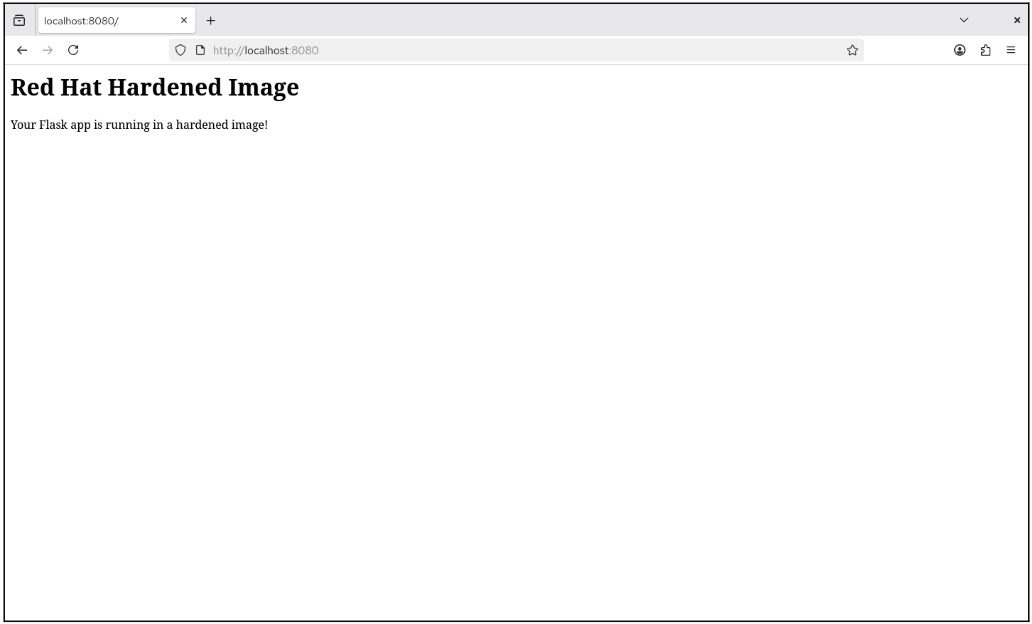
cd /app
gunicorn --bind 0.0.0.0:8080 wsgi:app
Our "Hello, world" message will be displayed in our browser (Figure 8) using the URL:
http://localhost:8080