Apache Camel development is improving on Eclipse Che 7 compared to Che 6. On Che 6, it is limited to XML DSL and without classical XSD-based XML support. With Che 7, Camel Java DSL is available and XSD-based XML support is working nicely with the Camel XML DSL support. Please note that Che 7 is still in beta.
Camel language features available
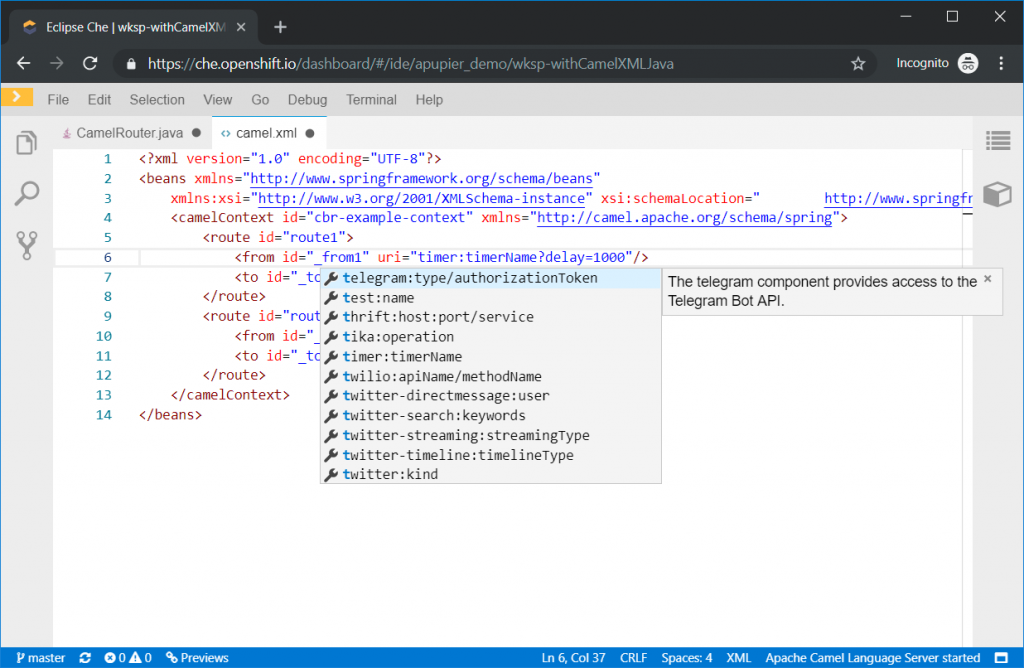
Inside the same editor, there is access to classic XML tooling and Camel XML DSL support.
Classic XML tooling completion based on XSD:
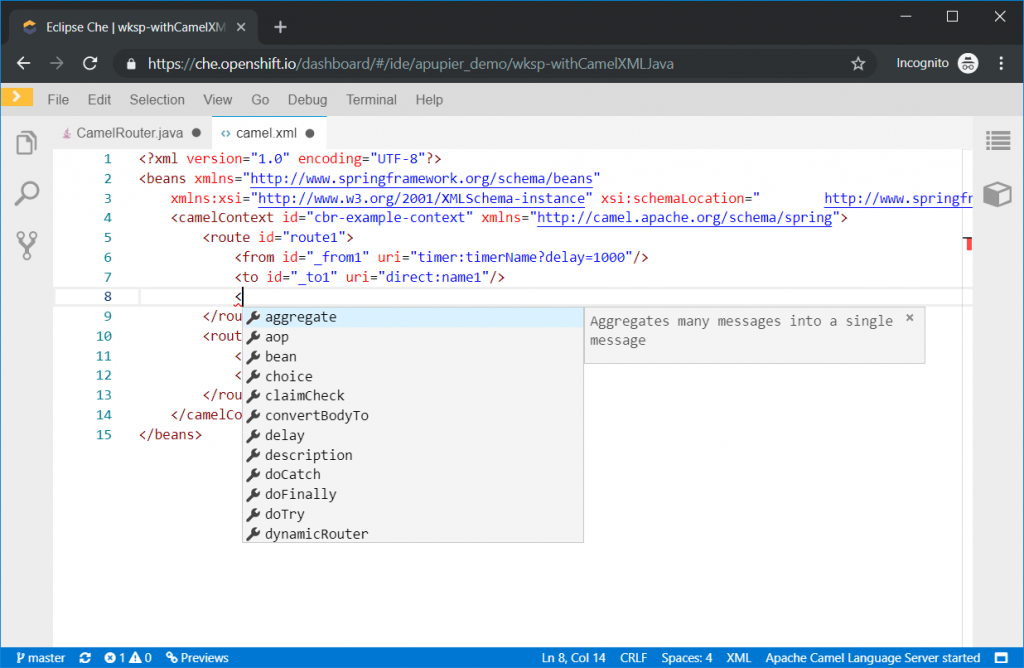
Camel XML DSL tooling completion:
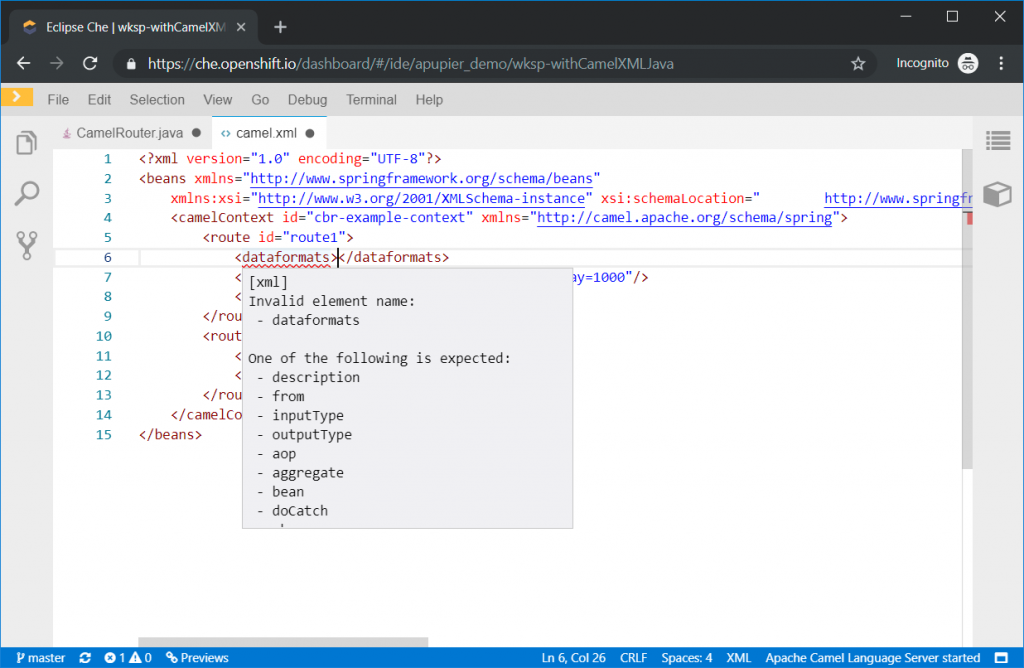
Classic XML tooling validation:
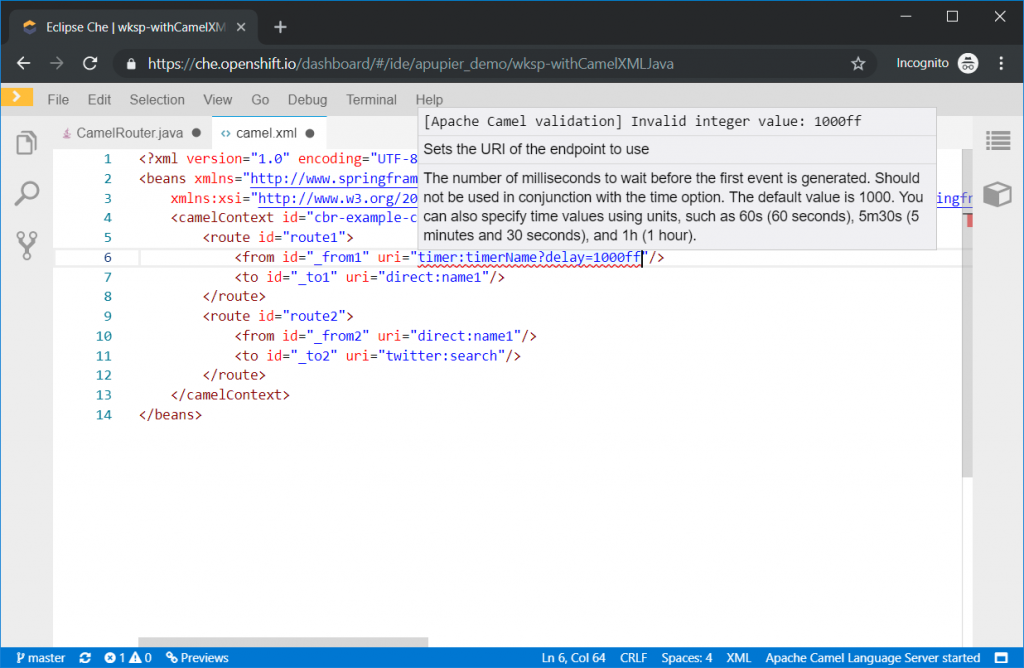
Camel XML DSL tooling validation:
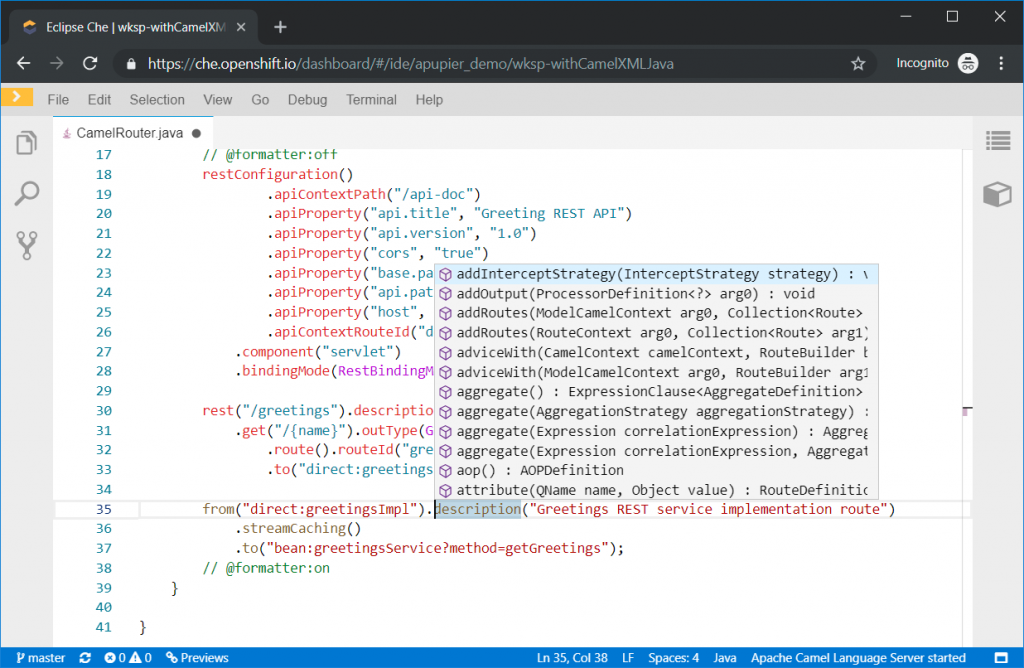
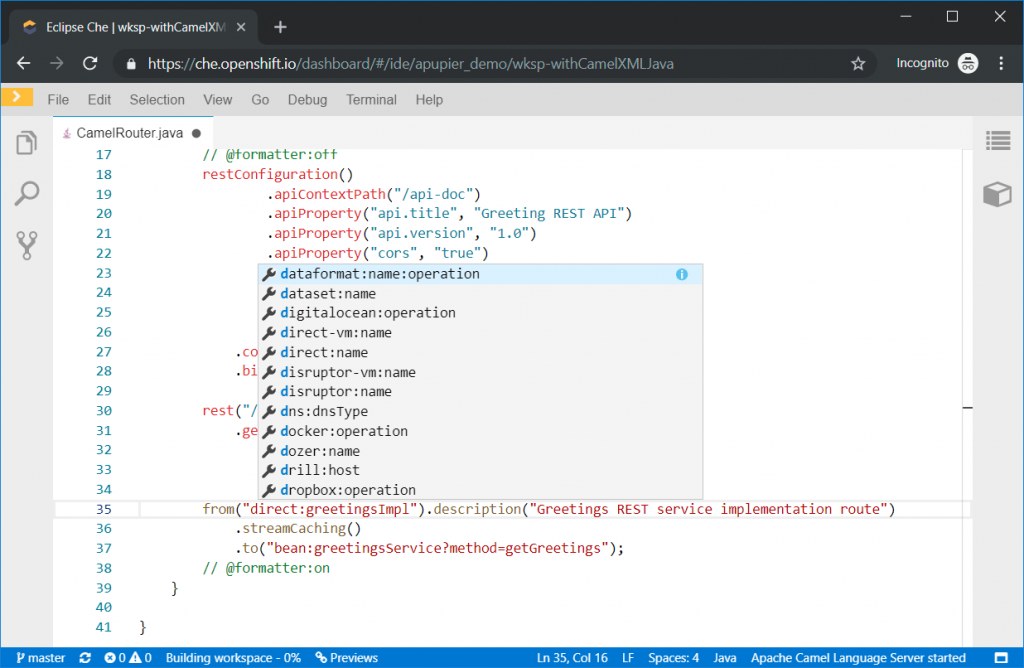
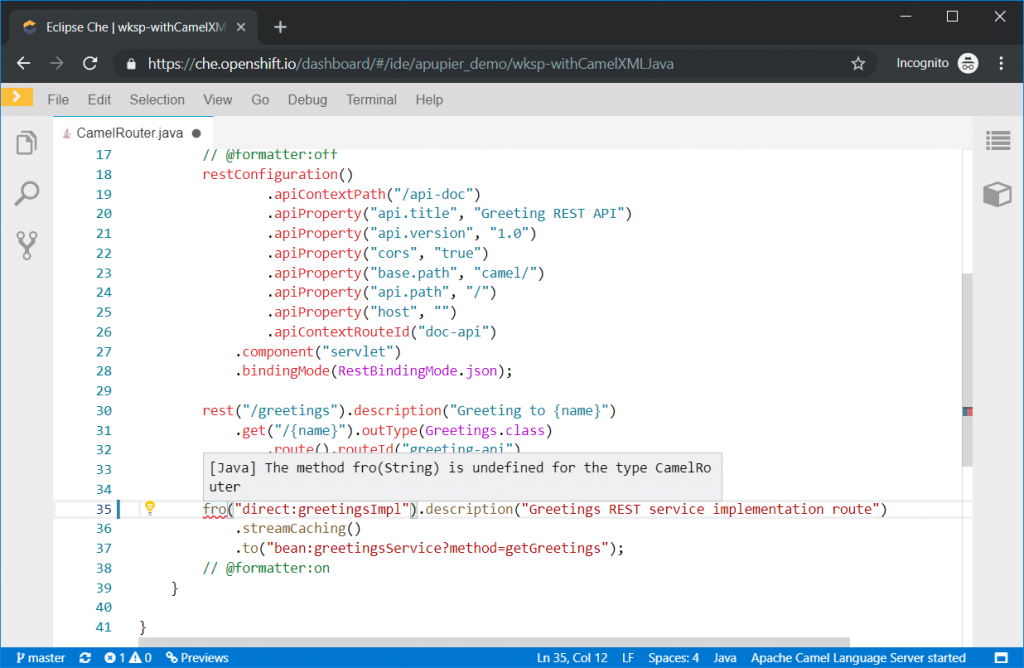
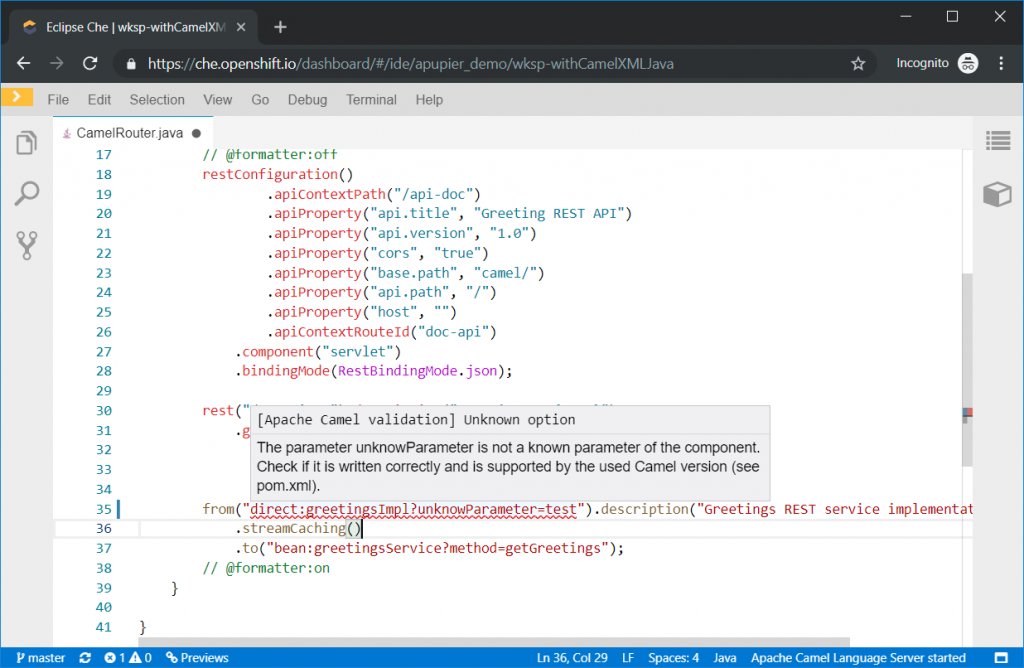
Inside the same editor, there is access to classic Java tooling and Camel Java DSL support.
Classic Java tooling completion:
Camel Java DSL completion:
Classic Java tooling validation:
Camel Java DSL tooling validation:
How to configure on che.openshift.io
Currently, some advanced steps are needed to have all extensions working together on a resource-limited Che environment, which is the default for che.openshift.io. Let's see how to activate it.
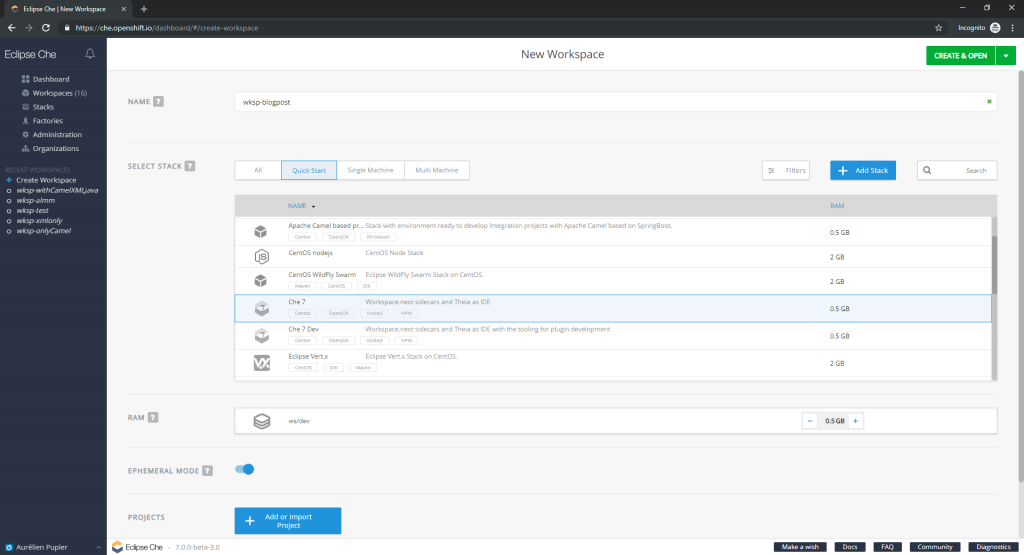
- Go to che.openshift.io (you will have to register if you've not done so already).
- Create a workspace based on Che 7.
- Wait that workspace creation is finished.
- Import the Camel/Fuse project that you want.
- Go back to workspace configuration by using the top-left yellow arrow and clicking on Workspaces.

- Click on the running workspace.
- Click stop at the top right.
- Go to Plugins tab.
- Enable Language Support for Apache Camel, Language Support for Java and XML.
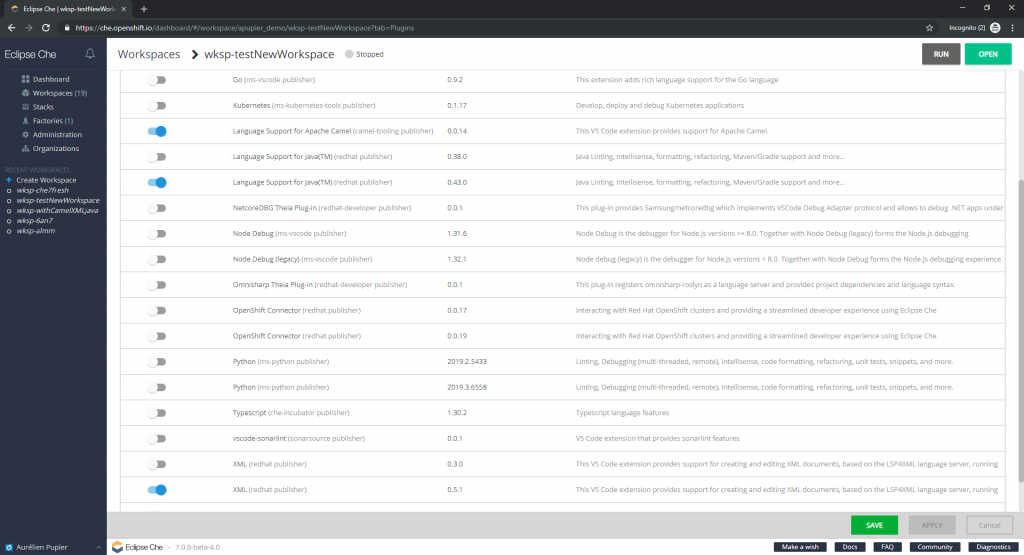
- Go to config tab.
- Search for "attributes", add memory limits for each of the plugins, you should end with something like:
"attributes": { "sidecar.redhat/java.memory_limit": "1280Mi", "sidecar.camel-tooling/vscode-apache-camel.memory_limit": "128Mi", "sidecar.redhat/vscode-xml.memory_limit": "128Mi", "sidecar.eclipse/che-theia.memory_limit": "512Mi", "editor": "eclipse/che-theia/next", "plugins": "eclipse/che-machine-exec-plugin/0.0.1,redhat/java/0.43.0,camel-tooling/vscode-apache-camel/0.0.14,redhat/vscode-xml/0.5.1" } - Click on Open button on top right.
- Open a Java file and wait that the Java Language Server has started (it can take several minutes).
- Enjoy!
What's next?
As you've noticed, the installation is currently a bit cumbersome as it requires you to touch the YAML config file. Don't worry; there is work in progress to improve the installation experience, such as providing a specific Camel stack. This will allow you to create a workspace preconfigured, which means doing only the first three steps instead of the 11 steps of the configuration. Several other features are in the works by incorporating existing VS Code extensions inside Che 7. Stay tuned.
Last updated: November 8, 2023