In an effort to improve security, browsers have become stricter in warning users about sites that aren't properly secured with SSL/TLS. ASP.NET Core 2.1 has improved support for HTTPS. You can read more about these enhancements in Improvements to using HTTPS. In this blog post, we’ll look at how you can add HTTPS to your ASP.NET Core applications deployed on Red Hat OpenShift.
Before we get down to business, let’s recap some OpenShift vocabulary and HTTPS fundamentals. If you are familiar, you can skip over these sections.
OpenShift, pods, services, routes, and S2I
OpenShift is a Kubernetes-based open-source container application platform. A Kubernetes pod is a set of containers that must be deployed on the same host. In most cases, a pod consists of a single container. When we run the same application in several pods, a service does the load balancing across those pods. A route makes a service accessible externally via a hostname.
Source-to-Image (S2I) is a tool that allows OpenShift to build applications from source code into images. These images contain the applications that get executed in the pods.
HTTPS, certificates, private keys, and certificate authorities
When you browse to redhat.com, the web server sends you a certificate. This certificate links the name www.redhat.com to a public key. The certificate is signed by a certificate authority (for example, DigiCert Inc). Since your browser trusts DigiCert, it trusts information in the certificate. The browser uses the public key to encrypt and decrypt information and the web server uses the corresponding private key.
Use-cases
We'll look at two use-cases: securing public communication and securing internal communication.
When we are securing public communication, we want to add HTTPS to a route. After registering the hostname with a domain name registrar, we obtain a certificate from a certificate authority so we can prove we own that name.
Securing internal communication means we want to use HTTPS to access services. HTTPS is not required between services when OpenShift is deployed on a private network and configured to restrict traffic between pods (using network policy/multitenant configuration). Even when it is not needed, you can use it to have an additional layer of security.
Securing public communication
OpenShift can terminate the HTTPS traffic and send plain HTTP requests to our container. To do this, we configure the OpenShift route to our service. As part of the configuration, we can provide the hostname, the certificate, and the private key. This can be done in the OpenShift Console: click the Edit this route link under TLS Settings and then select the Secure route checkbox.
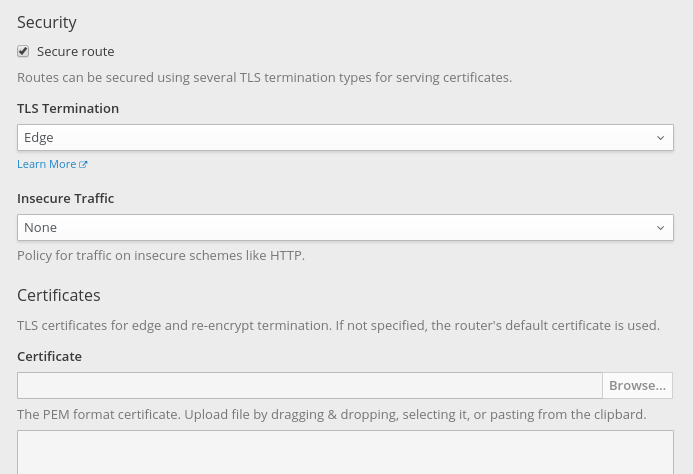
By changing Insecure Traffic from None to Redirect, OpenShift will redirect (HTTP 302 response) clients from HTTP to HTTPS.
If we don’t provide a certificate, OpenShift will use a wildcard certificate for the subdomain of the router.
Securing internal communication
To secure internal communication, we need certificates for our services. Managing these certificates ourselves would be quite a challenge: generating certificates, handling expiration, distributing certificates, securing the private keys, and so on. Fortunately, OpenShift can take care of that.
To our application’s service, we add a service.alpha.openshift.io/serving-cert-secret-name annotation. As a value, we pick a name for a secret. OpenShift will create this secret and generate a certificate and key that matches the internal service DNS name (<service name>.<service.namespace>.svc). The certificate/key pair is automatically replaced when it gets close to expiration. We need to mount this secret in our ASP.NET Core container and tell the web server to use it.
When someone is using our service (for example, another .NET Core service deployed on OpenShift) they can now reach it over HTTPS. However, the certificate generated by OpenShift uses an internal certificate authority. For applications to trust that certificate authority, OpenShift provides a certificate bundle at /var/run/secrets/kubernetes.io/serviceaccount/service-ca.crt.
After importing that certificate authority bundle, applications can securely access the services via https://<service name>.<service.namespace>.svc:8080. We can trust the bundle in our container using DOTNET_SSL_DIRS. The HttpClientFactory introduced in ASP.NET Core 2.1 provides a convenient way to consolidate the URLs for various services used by our application.
.NET Core has no public API to work with the certificate format provided by OpenShift. To read those certificates, we’ll add a dependency on the Portable.BountyCastle package:
<PackageReference Include="Portable.BouncyCastle" Version="1.8.2" />
Next, we’ll add OpenShift.cs to our application and with a one-liner we can configure our application to use the OpenShift HTTPS certificate. When the service certificate expires, the application will terminate and OpenShift will restart it with a renewed certificate. As part of the one-liner, we set the CertificateMountPoint property to the mount point of the secret that contains the OpenShift generated certificate:
public static IWebHostBuilder CreateWebHostBuilder(string[] args) =>
  WebHost.CreateDefaultBuilder(args)
 .UseOpenShiftIntegration(_ => _.CertificateMountPoint = "/var/run/secrets/service-cert")
 .UseStartup();
That covers the changes to our ASP.NET application. For the OpenShift configuration, we’ll use a template: dotnet-example-https.json. This template can be imported using the OpenShift Console or via the CLI command oc create -f <url>. It has the following changes compared to a plain HTTP application:
- The service has a
service.alpha.openshift.io/serving-cert-secret-nameannotation. - The container spec defines and mounts the certificate secret.
- The liveness and readiness probes use the HTTPS scheme.
- The route is configured for TLS passthrough.
DOTNET_SSL_DIRSis set to trust the cluster certificate authority bundle.
An internal service shouldn't have a route (this is for public access). It is part of the template, so we can look at the certificate with our browser.
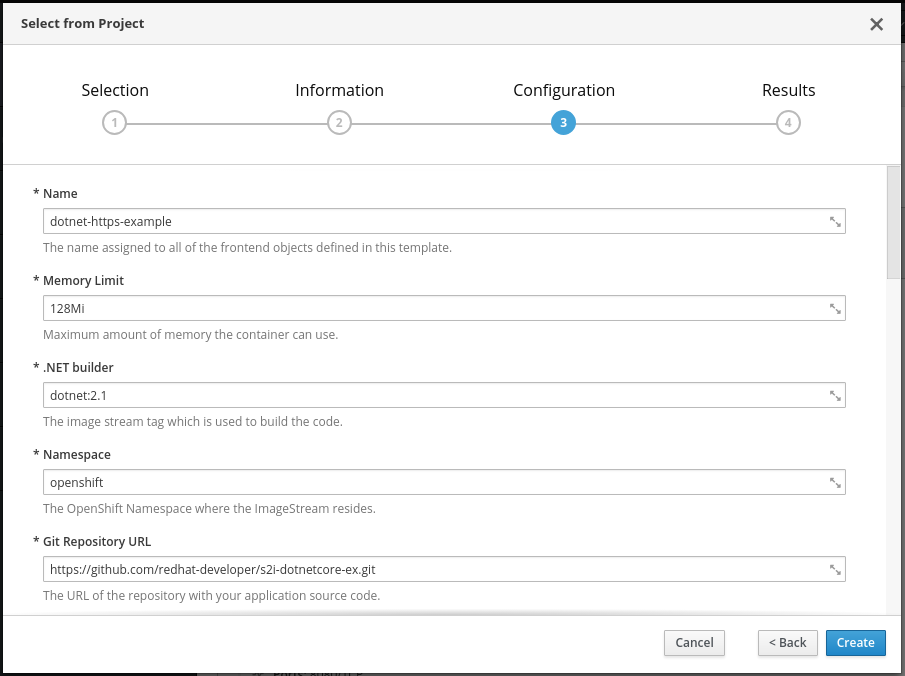
Once we’ve imported the template, we can add it via Add to Project > Select from Project > .NET Core HTTPS Example. In the configuration step, we can change parameters like the Git repository that contains our source code.
In the Overview page, we can track the progress of the S2I build and deployment. When our application is up and running, we click the HTTPS URL of the route. In the browser, we’ll get a warning about the certificate. This is expected: we get the internal service certificate, which isn’t trusted by our browser and doesn’t match the hostname.
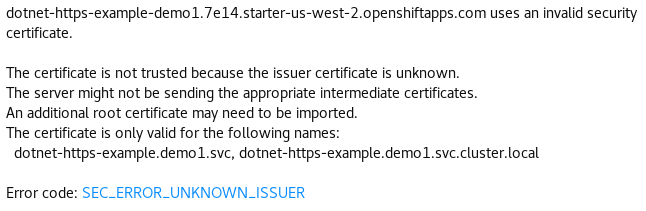
In the error message, we see the certificate is for the internal service name (in this case, dotnet-https-example.demo.svc). The issuer (unknown to our browser) is the internal cluster certificate authority.
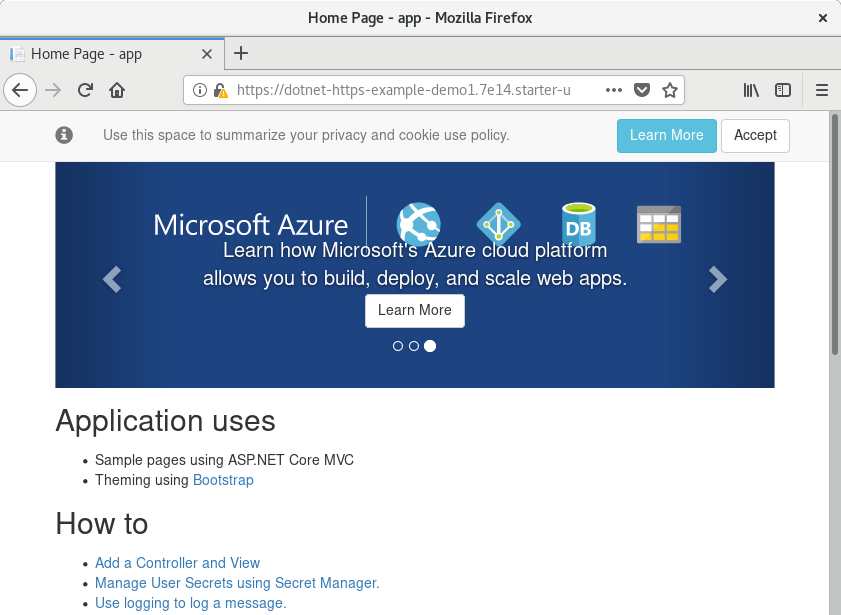
If we tell the browser to accept the certificate, we'll see our ASP.NET Core application up and running and terminating SSL using the OpenShift service certificate!
In the previous section, we let OpenShift terminate SSL for our route using edge termination. With our current configuration, we are terminating SSL directly in our ASP.NET Core application using passthrough. Another option is to do both: OpenShift terminates SSL with the public certificate and internally we use service certificates. This is the Re-encrypt configuration.
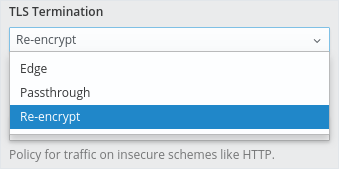
When we change to re-encrypt our demo site, which is deployed on Red Hat OpenShift Online, it will use the router wildcard certificate. This certificate is trusted by the browser.
![]()
Summary
In this blog post, you’ve learned how to secure your ASP.NET Core applications on OpenShift using HTTPS. We’ve looked at terminating SSL in OpenShift for public routes and at terminating SSL in ASP.NET Core directly using OpenShift-generated service certificates.
For more information about running .NET Core on OpenShift, see the .NET Core 2.1 getting started guide.
There are also other security topics on the Red Hat Developer blog.
Last updated: March 24, 2023