The Red Hat Enterprise Linux (RHEL) web console is an interface designed for managing and monitoring your local system, as well as Linux servers in your network environment. The web console supports multiple plug-ins (for example, one to manage virtual machines and another to manage Podman containers). This post guides you through setting up and using a Podman Quadlet with the web console.
What is Podman Quadlet?
Podman Quadlet is a tool for running Podman containers under systemd in a declarative way. For more information, read the Podman Quadlet introductory blog post.
Quadlet support in the web console
The Podman plug-in for the web console supports creating containers and all supported lifecycle operations on a container. A quadlet container is ephemeral, configured with a declarative file, but once it's created it does not start automatically. The Podman plug-in has been adjusted to detect these inactive containers and use systemd for lifecycle operations.
After incremental improvements in cockpit-podman versions 100, 107, 108 and 116, quadlet containers are now fully integrated in the web console.
Creating a Podman Quadlet test application
To demonstrate how you can deploy a Podman Quadlet container fully in the web console, we will set up the built-in Python web server in a container. The Podman plug-in doesn't come with an editor to create a quadlet configuration file, but the web console has a plug-in with a built-in file editor.
Open the web console, and ensure that you have administrative access. If the web console shows Limited Access, click on it to gain administrative access.
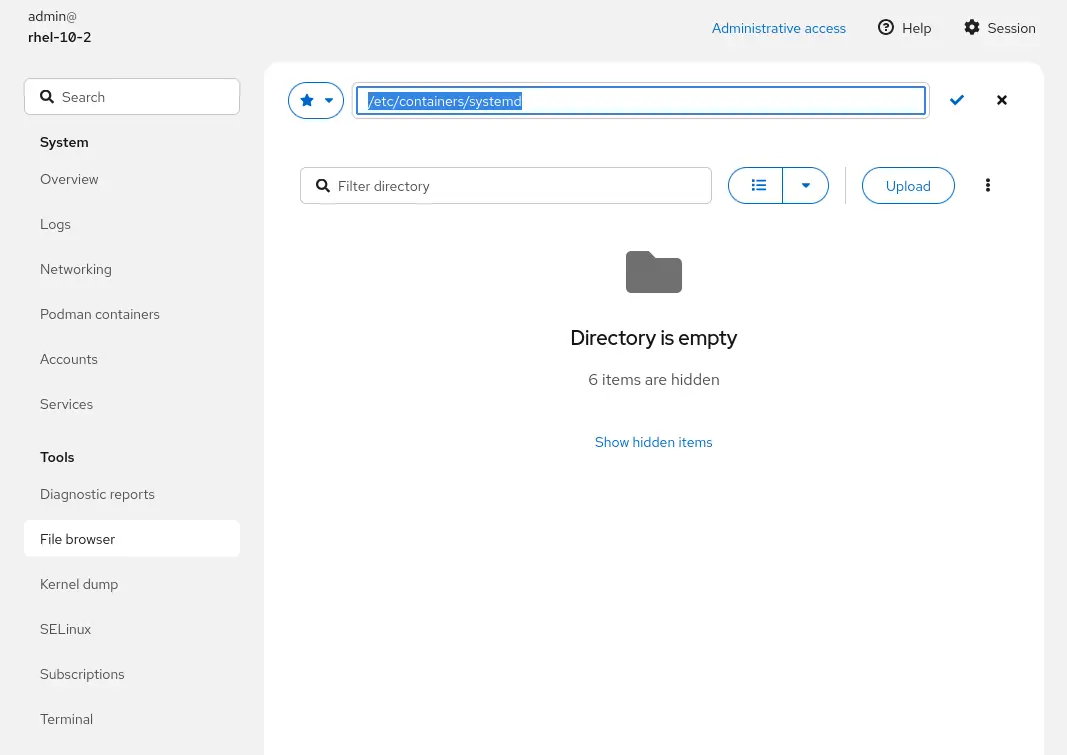
Click on the File browser under Tools and browse to /etc/containers/systemd/. To change the path using text input, click on the pencil icon next to Favorites (as in Figure 1).
Right-click and create a new file named webserver.pod with as contents (as demonstrated in Figure 2):
[Pod]
PodName=webserver-pod
PublishPort=80:8000

[Install]
WantedBy=default.target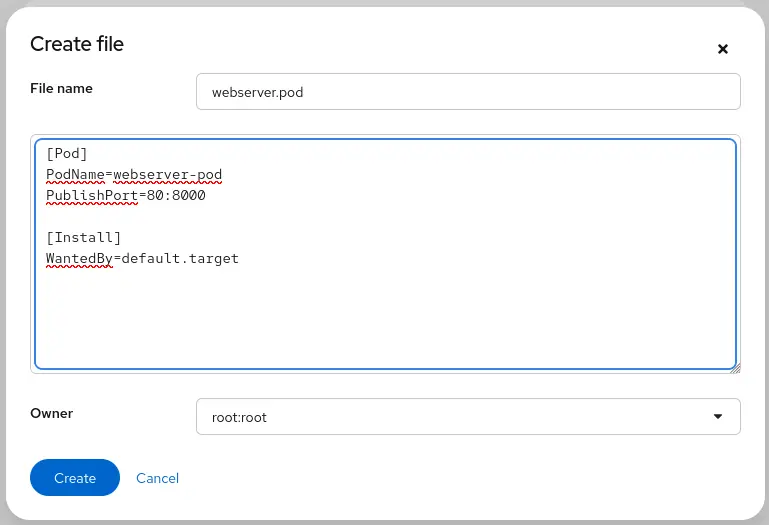
Now create a new file webserver-data.volume:
[Unit]
Description=Webserver Data Volume
[Volume]
Label=app=webserver_data
Lastly the actual container "webserver.container" with as contents:
[Unit]
Description=Python webserver
After=local-fs.target
[Container]
ContainerName=webserver
Pod=webserver.pod
Image=docker.io/python:3.14
Exec=/usr/bin/python3 -m http.server
Volume=webserver-data.volume:/data
WorkingDir=/data
HealthCmd=["/usr/bin/curl", "--fail", "--silent", "--show-error", "http://localhost:8000"]
HealthStartPeriod=30s
HealthInterval=30s
[Install]
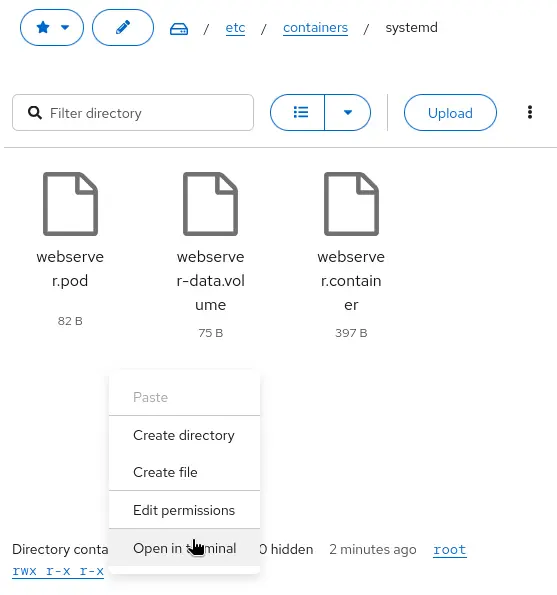
WantedBy=default.targetOnce the files are there, we need to reload the systemd units. The web console doesn't have a button for this, but the terminal page provides you with everything you need. Right-click on the directory pane, or click the "kebab" (3 vertical dots) menu to open the terminal page in the current directory, as in Figure 3:
To generate systemd units for the Podman Quadlet container and pod, use the systemctl daemon-reload command:
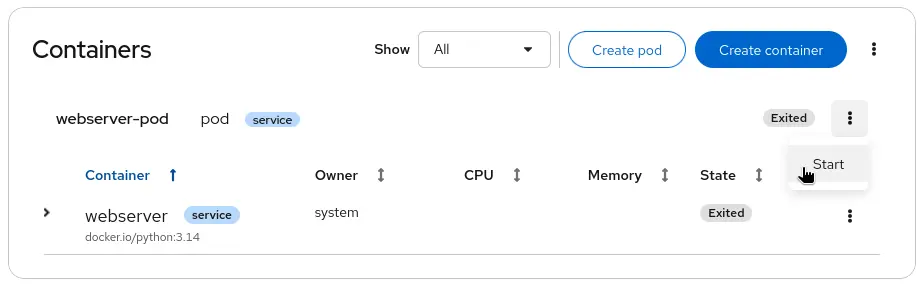
$ sudo systemctl daemon-reloadThe quadlets are now available and visible in the Cockpit Podman plug-in for easy management. Open the cockpit-podman page to verify that it now displays your new pod, as in Figure 4. Select Start from the kebab menu to start the pod.
Click the disclosure triangle on the left, and then click the Health check tab to reveal that the health check has failed consistently (Figure 5):
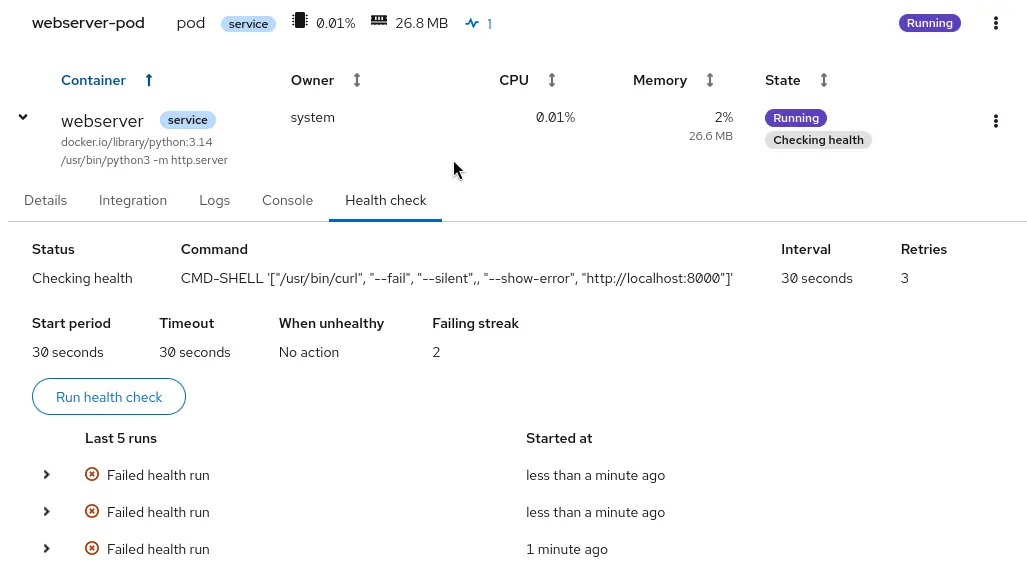
The health check fails because the web server doesn't serve anything (or rather, it serves an empty podman volume). The web console currently doesn't support listing volumes, but the volume is listed in the Integration tab (Figure 7):

If you copy and paste the volume location to the host, you can open it in the file browser, and then create a file named index.html with some basic HTML as its content:
<!DOCTYPE html>
<html>
<head>
    <title>Red Hat Enterprise Linux</title>
</head>
<body>
    <h1>Welcome</h1>
</body>
</html>
In the terminal page of the web console, use curl to view the rendered web page:
$ curl http://localhost:80
<!DOCTYPE html>
<html>
<head>
<title>Red Hat Enterprise Linux</title>
</head>
<body>
<h1>Welcome</h1>
</body>
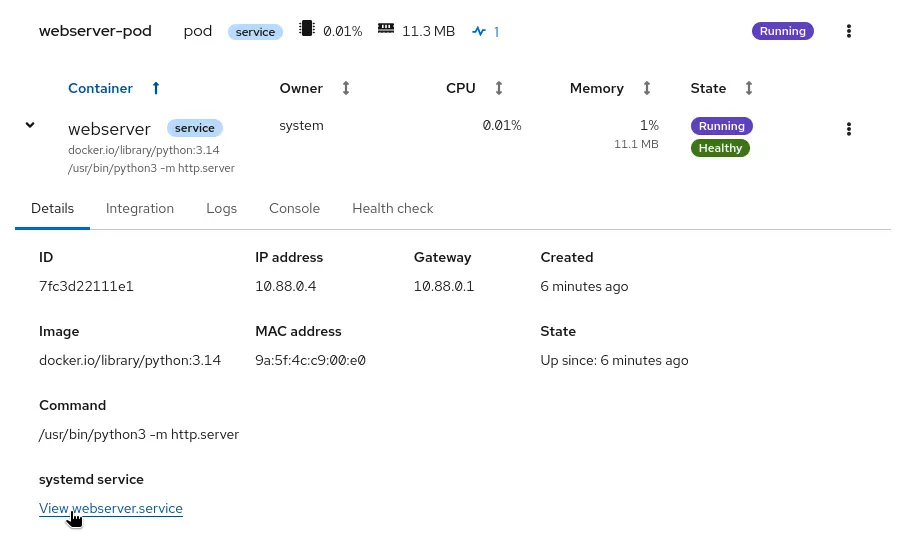
</html>On the Podman page, the container now shows Healthy, because the health check passes (Figure 9):
Web console integration
Podman Quadlet containers are fully integrated in the Services, Metrics, and Logs pages of the web console. The Details tab has a direct link (at the bottom of the page, as in Figure 7) to the Service page, where you can see the logs and the systemd unit status.
The metrics page shows the quadlet container, if it's using a lot of CPU, memory or disk I/O.
Limitations
The Podman page does not support listing all volumes on the system and operating on them. It also doesn't have a modal to make quadlets.
We want your feedback
Now it's time for you to try it for yourself! Report bugs regarding Quadlet and Podman integration to the Podman issue tracker. Send ideas or feedback to the discussions page. For the file management functionality, report bugs to the files issue tracker, and ideas or feedback to the discussions page.