Overview: Red team an AI model with NVIDIA garak
Your team just shipped an internal chatbot built on an open source model. It works great! It answers all of your questions, summarizes documents, and helps onboard new hires with scary efficiency. But then your security team asks, “Has anyone tested whether this thing can be jailbroken?”
What is jailbreaking? After searching it and finding the definition of “an escape from a prison”, whitepapers, and enterprise platforms, it’s easy to become confused. Sometimes you just want a simple answer to “How do I test this model right now on my laptop?”
That is what you’ll explore in this learning path. We’ll use garak, an open source Large Language Model (LLM) vulnerability scanner, to run your first red teaming scan against a model. After pointing it at your model and running a prompt injection probe, you’ll see results only minutes later. From there, you can run broader scans, integrate garak into your CI/CD pipeline, or hand the results to your security team and tell them what needs to be fixed.
Prerequisites:
- A free Developer Sandbox account
In this learning path, you will:
- Learn how to “crash test” an AI model before it hits production by probing it the way real users and attackers will. You’ll see what can go wrong when a model ships without safety training, then walk through running NVIDIA’s open source garak scanner against Granite 3.1B in Red Hat OpenShift AI.
- Run a probe to test the model's defenses.
- Analyze the detailed scan results to evaluate the model's failure rate and determine if additional safety guardrails are needed.
- Measure baseline AI vulnerabilities and overall risk levels by conducting comprehensive garak assessments and red teaming exercises.
- Design and apply targeted guardrails based on your vulnerability reports, continuously re-assessing and refining them until the model meets your expected safety thresholds.
Set up your environment
For this learning path, we will be working in Red Hat OpenShift AI on the Developer Sandbox. In this section, we will walk you through launching a JupyterLab workbench inside OpenShift AI, cloning the required repository, and retrieving your API key from the OpenShift cluster. Once these quick prerequisite steps are complete, you’ll have all the models, code modules, and access keys needed to kick off your first hands-on lesson.
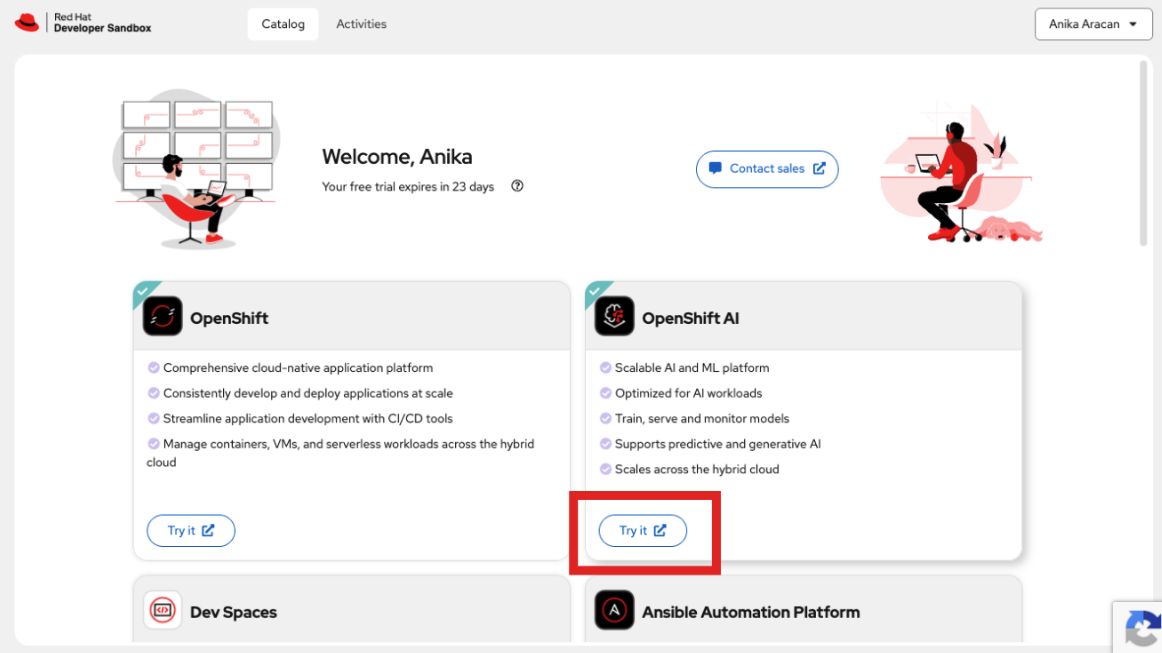
Open Red Hat OpenShift AI from the Developer Sandbox (Figures 1 and 2).
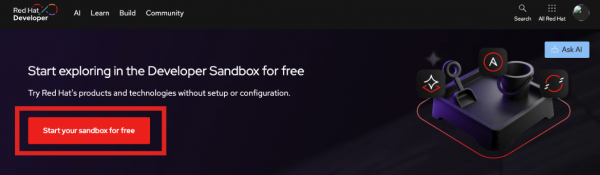
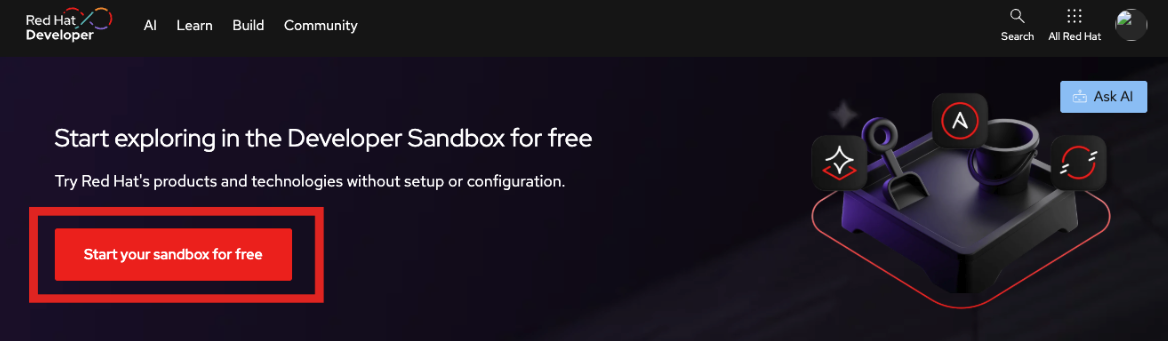
Figure 1: The Developer Sandbox homepage, where you’ll navigate to start your sandbox. 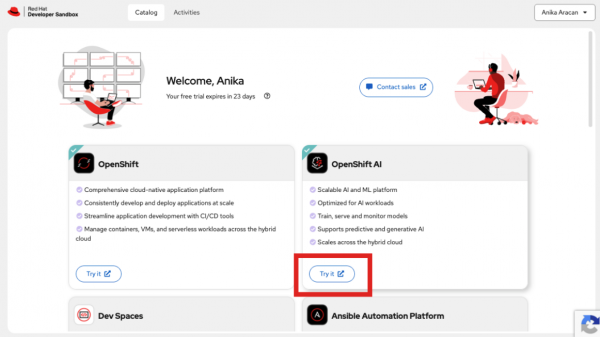
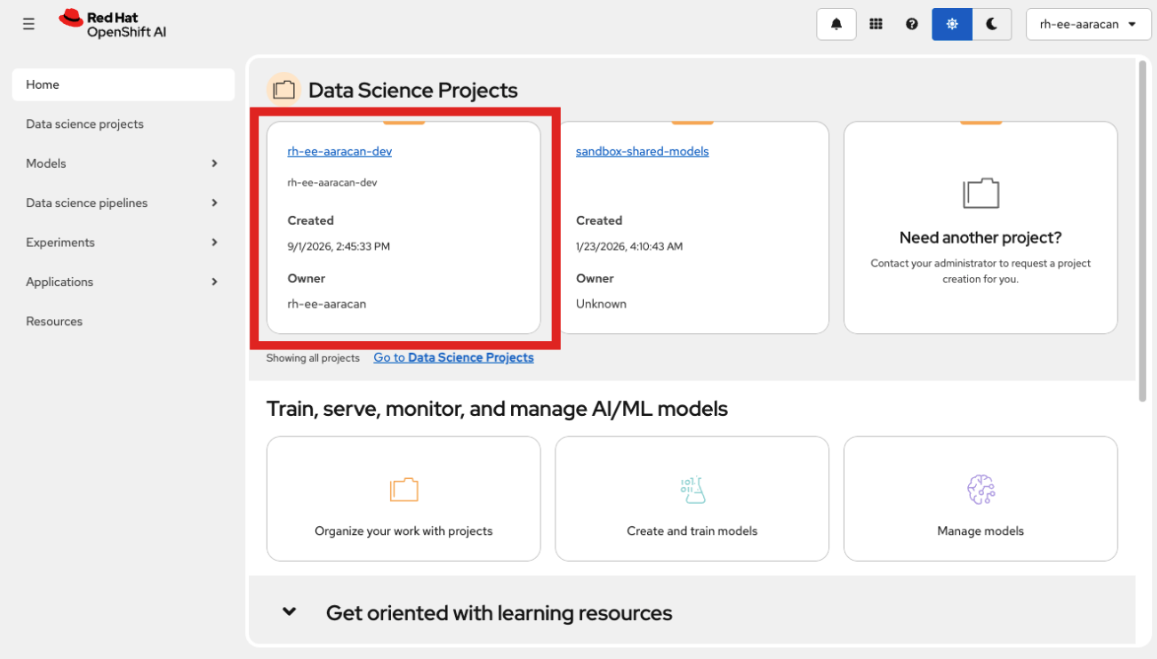
Figure 2: The OpenShift dashboard, where you’ll navigate to the OpenShift AI page. Head to the OpenShift AI dashboard and select your user’s project (Figure 3).
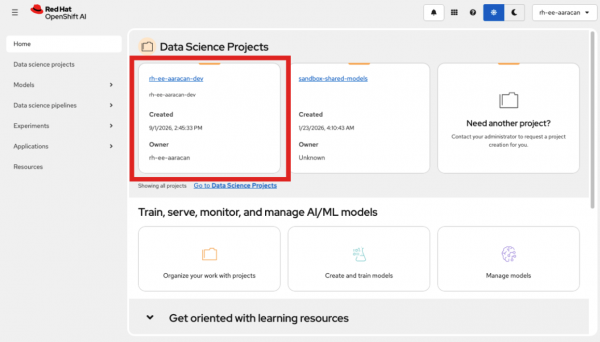
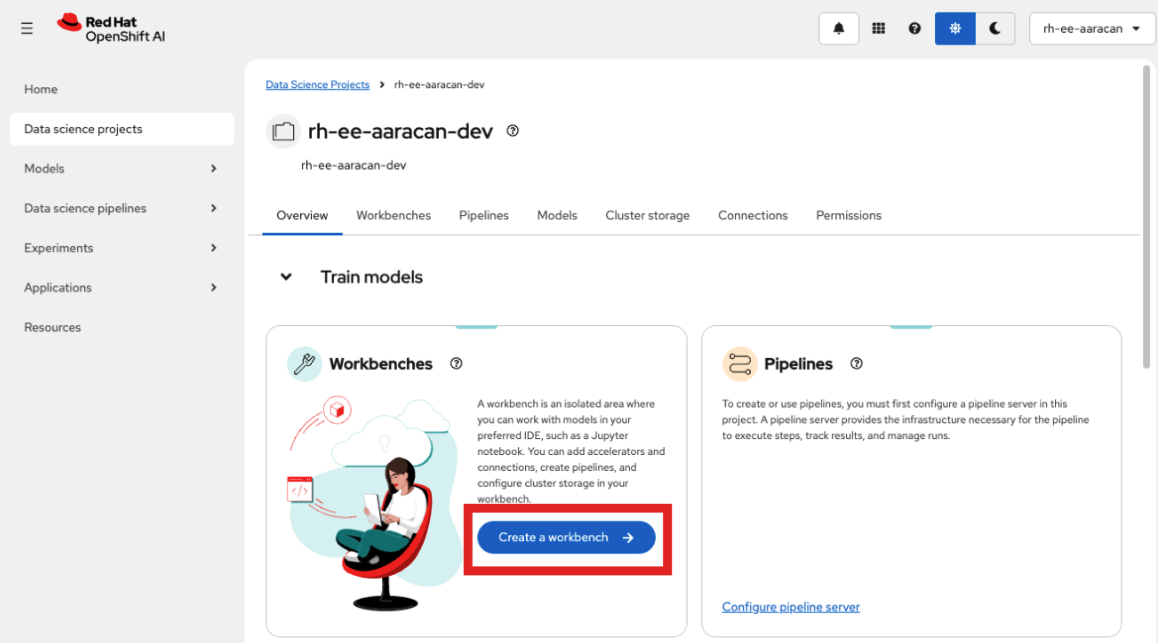
Figure 3: Here, the project is circled in red on the OpenShift AI dashboard. Click on the Create a workbench button (Figure 4). This is where we’ll execute the scripts and view the results of the garak runs.
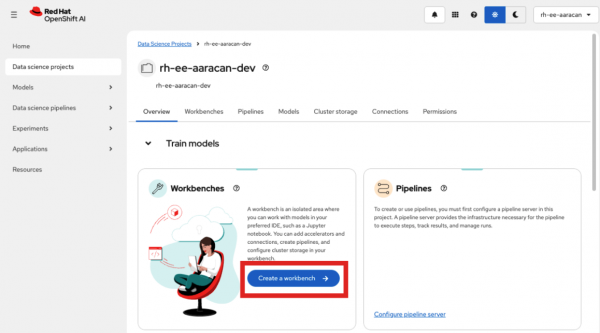
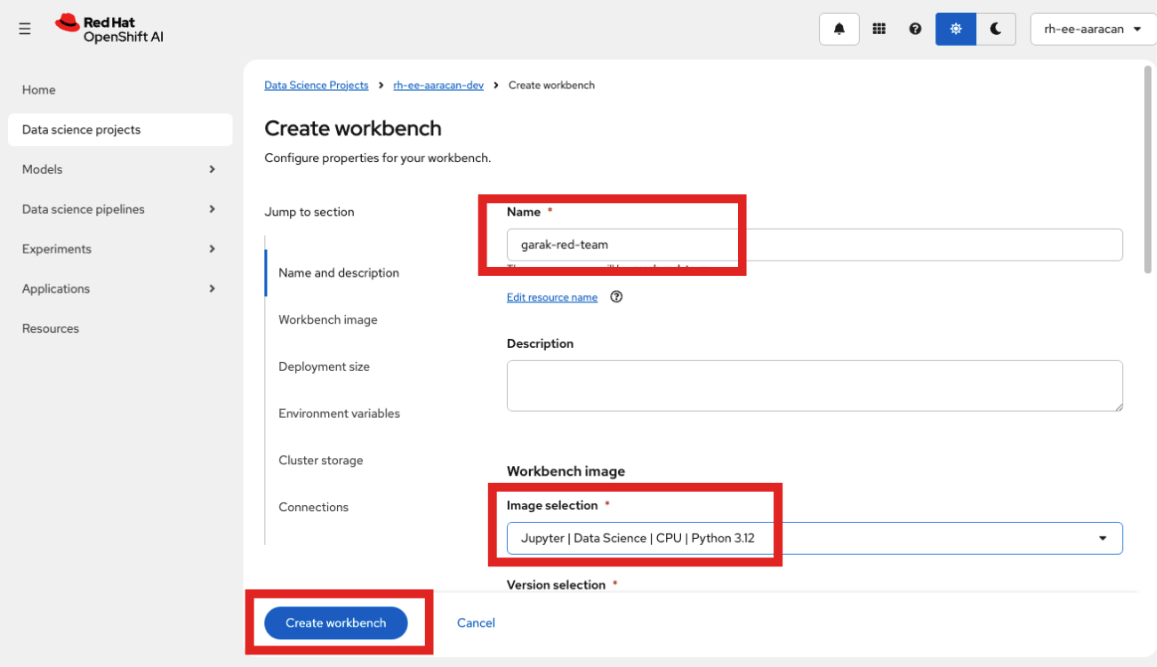
Figure 4: Within the project, the button to Create a workbench is indicated here by a red box. - On the Create workbench screen (Figure 5):
- Name your workbench
garak-red-team(or similar). - Under Workbench image, select a JupyterLab instance with Data Science from the drop-down menu.
Under Deployment size, select small from the drop-down menu.
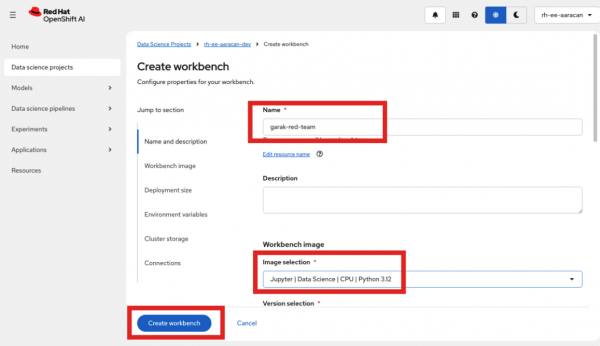
Figure 5: The fields to create a workbench, including the workbench name, image, and deployment size.
- Name your workbench
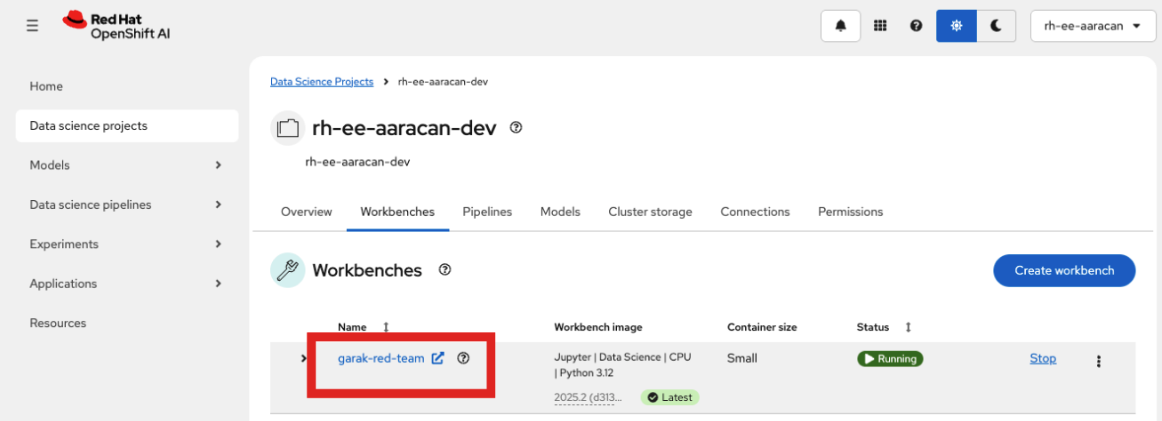
Finally, once our development environment is ready after a minute or two, click the link (arrow symbol) to open it (Figure 6).
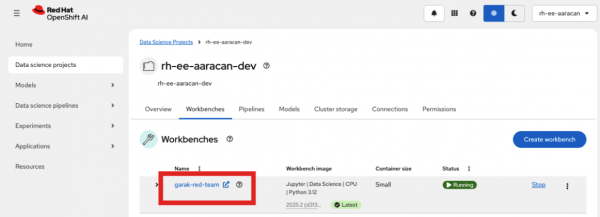
Figure 6: Select the link to your development environment, indicated here by the red box.
Clone the repository
With your Developer environment open, select Clone a Repository on the left-hand sidebar (Figure 7).
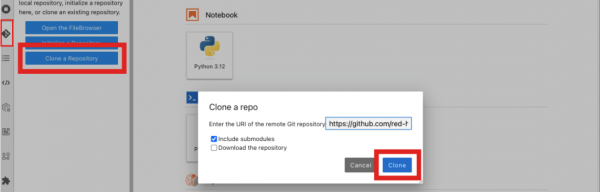
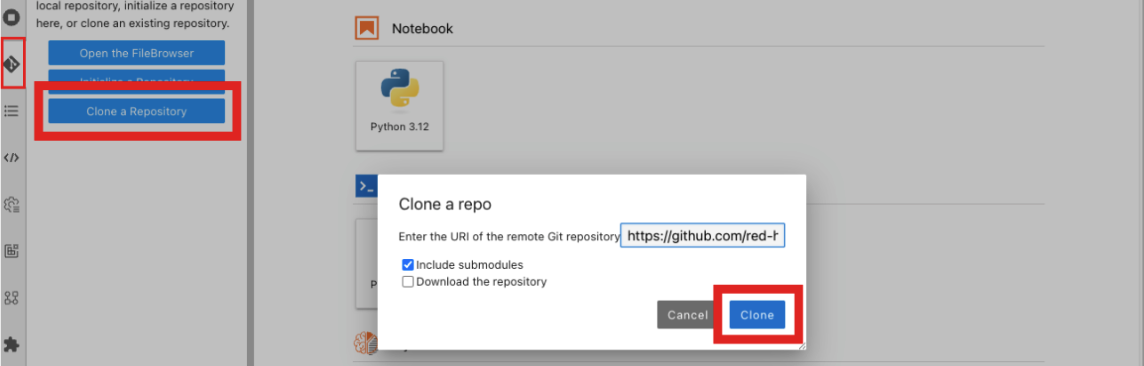
Figure 7: The Clone a Repository button is the third option on the left-hand sidebar. Clone this repo inside the workbench (Figure 8):
https://github.com/red-hat-ai-dev/dev-sandbox-garak.git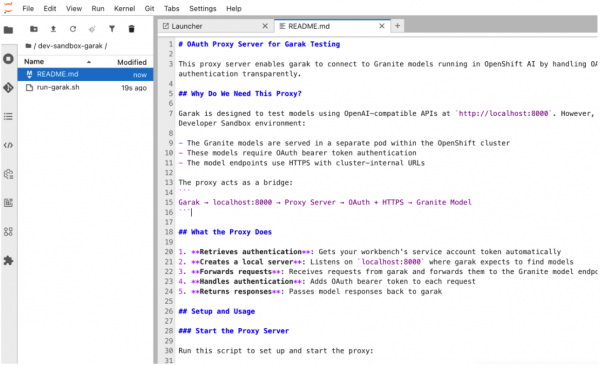
Figure 8: Entering the GitHub repository URL into the Clone a Repository modal inside the workbench brings you to the repository, seen here.
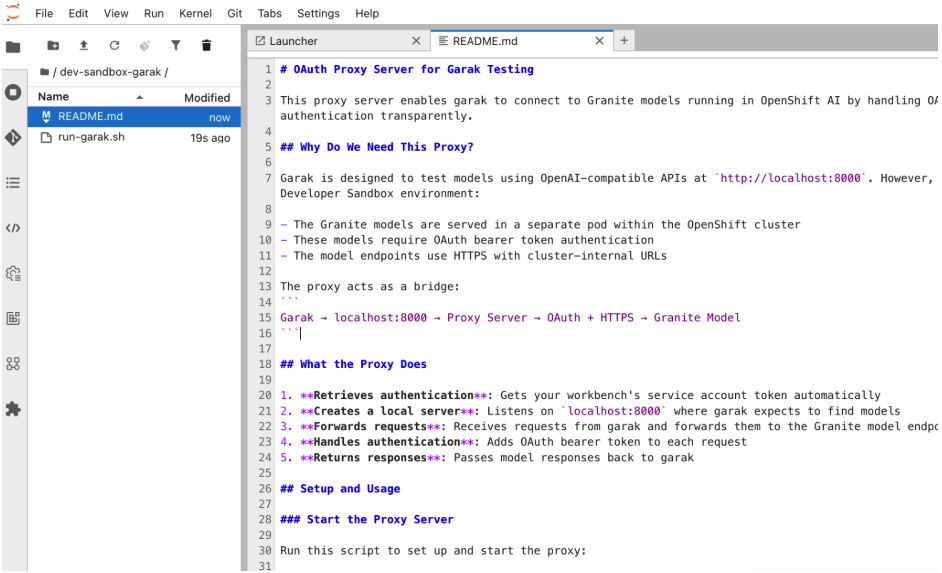
Your workbench has all of the necessary authentication configured automatically through the OpenShift service account. You’re now ready to start the lessons!

