This article shows you how to install Red Hat JBoss Enterprise Application Platform (JBoss EAP) XP 2.0.0 GA with support for Eclipse MicroProfile. Once you've enabled Eclipse MicroProfile, you will be able to use its quickstart examples to start developing your own MicroProfile applications with Red Hat CodeReady Studio. In this demonstration, you'll learn two ways to build and run the MicroProfile Config quickstart application.
Installing JBoss EAP XP 2.0.0 GA
To install JBoss EAP XP 2.0.0 GA:
- Download the following software from the product download page:
- JBoss EAP XP 2.0.0 GA manager
- JBoss EAP 7.3.4 GA patch
- JBoss EAP XP 2.0.0 GA patch
- Apply the JBoss EAP 7.3.4 GA patch:
$ patch apply /DOWNLOAD/PATH/jboss-eap-7.3.4-patch.zip
- Set up the JBoss EAP XP manager:
$ java -jar jboss-eap-xp-2.0.0.GA-manager.jar setup --jboss-home=/INSTALL_PATH/jboss-eap-7.3
- Apply the JBoss EAP XP 2.0 patch using the following management command:
$ java -jar jboss-eap-xp-2.0.0.GA-manager.jar patch-apply --jboss-home=/INSTALL_PATH/jboss-eap-7.3 --patch=/DOWNLOAD/PATH/jboss-eap-xp-2.0.0.GA-patch.zip
Configuring CodeReady Studio
To enable Eclipse MicroProfile support on JBoss EAP, we first need to register a runtime server for our newly installed JBoss EAP XP 2.0.0 instance. For this, we will create a new JBoss EAP 7.3 server called Red Hat JBoss EAP 7.3 XP 2.0.
The server will use a new JBoss EAP 7.3 XP 2.0 runtime that points to the runtime that we've just installed. The JBoss EAP 7.3 XP 2.0 runtime uses the standalone-microprofile.xml configuration file.
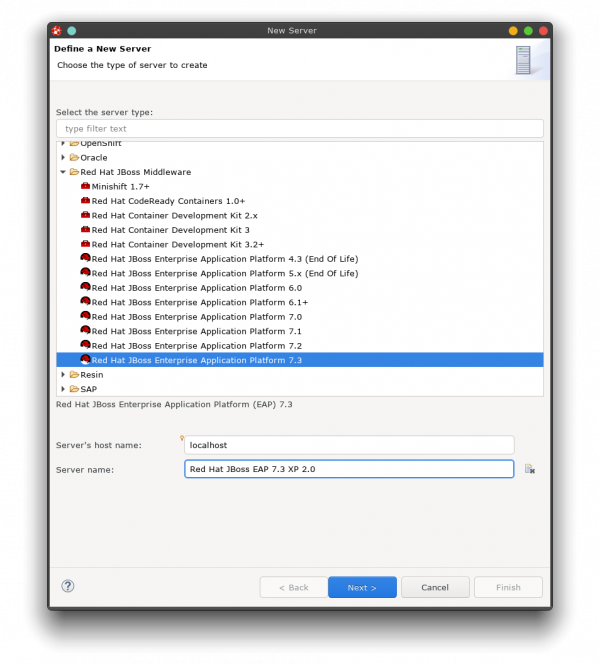
Select or enter the following configurations in the Define a New Server dialog, as shown in Figure 1:
- Select the server type Red Hat JBoss Enterprise Application Platform 7.3.
- Set the server’s hostname to localhost.
- Enter Red Hat JBoss EAP 7.3 XP 2.0 as the server name.
- Click Next.
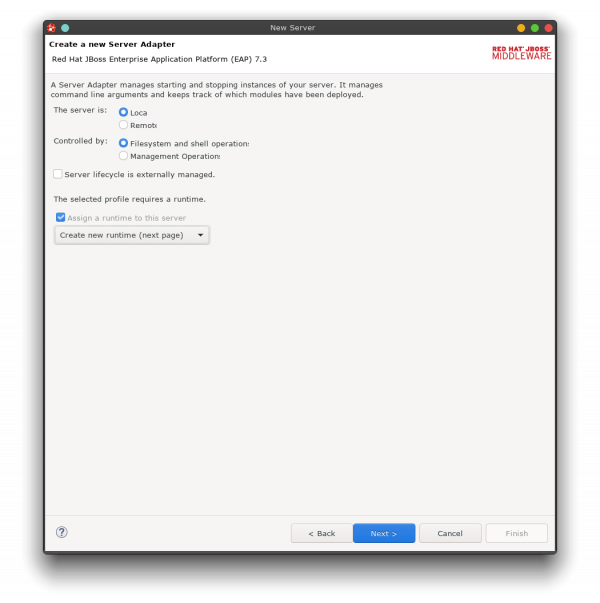
The next screen invites you to create a new server adapter. Keep the defaults and select Create new runtime to continue, as shown in Figure 2.
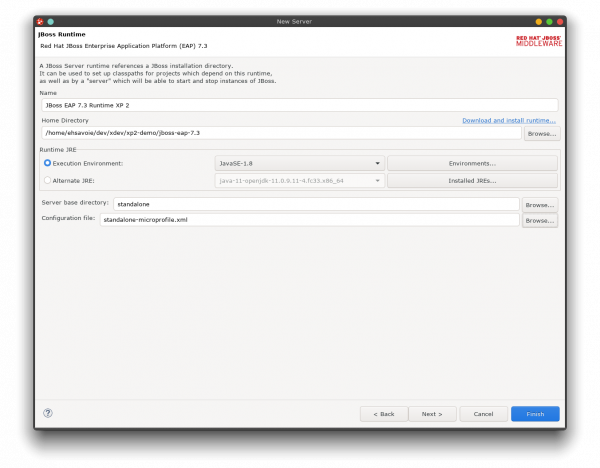
In the next dialog, you will configure your new runtime server. Enter the configurations shown in Figure 3:
- Set the home directory if you don’t want to use the default setting.
- Make sure your execution environment is set to JavaSE-1.8 (but you can use JavaSE-11).
- Change the settings for the server base directory and configuration file if you don’t want the defaults.
- Click Finish.
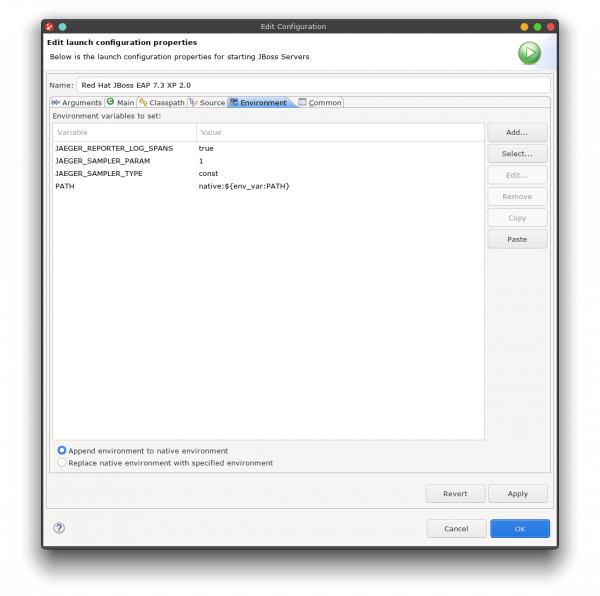
Before we can run the MicroProfile quickstarts (see Figure 5), we need to set the environment variables on our runtime. Navigate to the Red Hat JBoss EAP 7.3 XP 2.0 Server Overview dialog and click Open launch configuration. You will see the option to set the environment variables, as shown in Figure 4.
- Set JAEGER_REPORTER_LOG_SPANS to true.
- Set JAEGER_SAMPLER_PARAM to 1.
- Set JAEGER_SAMPLER_TYPE to const.
Running the Eclipse MicroProfile quickstarts
The Eclipse MicroProfile quickstarts offer the following examples, which you can run and test on your installed server:
- Eclipse MicroProfile Config
- Eclipse MicroProfile Fault-tolerance
- Eclipse MicroProfile Health
- Eclipse MicroProfile JWT
- Eclipse MicroProfile Metrics
- Eclipse MicroProfile OpenAPI
- Eclipse MicroProfile OpenTracing
- Eclipse MicroProfile REST Client
To turn on the quickstarts, open your project explorer, then select and import the quickstart-parent pom.xml. You will see the list of quickstarts shown in Figure 5.

Running the Eclipse MicroProfile Config quickstart
There are two ways to run the Eclipse MicroProfile Config application: A bare-metal installation of JBoss EAP XP Server or a bootable JAR application. I'll show you how to do both.
Bare-metal installation
If you are installing microprofile-config on bare metal, do the following:
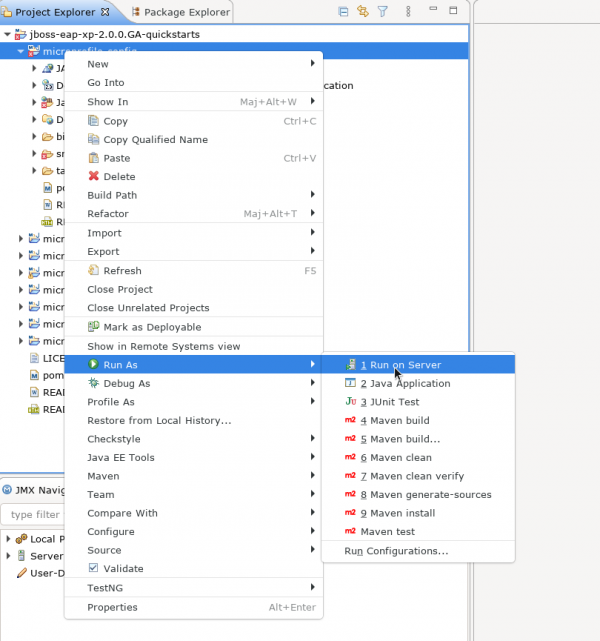
- Right-click on the microprofile-config file.
- Select Run As.
- Left-click 1 Run on Server.
This configuration, shown in Figure 6, starts the server with the microprofile-config application deployed.
Install the application as a bootable JAR
Instead of running your application on a bare-metal installation of JBoss EAP XP server, you can now package a JBoss EAP XP server and Eclipse MicroProfile application inside a bootable JAR. You can then run the application on a JBoss EAP XP bare-metal platform.
For demonstration purposes, we've defined a Maven project for microprofile-config. The project includes the following bootable-jar profile:
    ----
      <profile>
          <id>bootable-jar</id>
          <build>
              <plugins>
                  <plugin>
                      <groupId>org.wildfly.plugins</groupId>
                      <artifactId>wildfly-jar-maven-plugin</artifactId>
                      <configuration>
                          <feature-pack-location>org.jboss.eap:wildfly-galleon-pack:${version.server.bootable-jar}</feature-pack-location>
                          <layers>
                              <layer>jaxrs-server</layer>
                              <layer>microprofile-platform</layer>
                          </layers>
                      </configuration>
                      <executions>
                          <execution>
                              <goals>
                                  <goal>package</goal>
                              </goals>
                          </execution>
                      </executions>
                  </plugin>
              </plugins>
          </build>
      </profile>
----
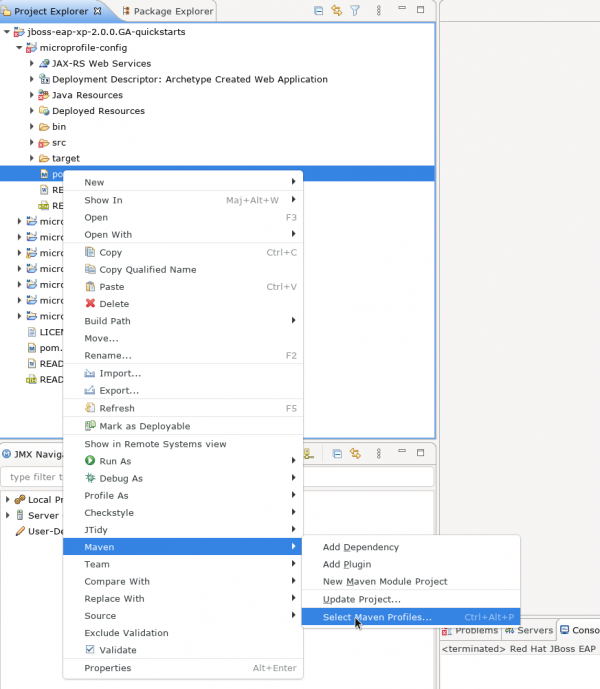
As you can see, we have selected the jaxrs-server and the microprofile-plateform layers to construct a slim version of the JBoss EAP XP server, which encapsulates our application. All you need to do is select the correct profile, as shown in Figure 7:
- Right-click on the pom.xml.
- Navigate to Maven and choose Select Maven Profiles.
- Check bootable-jar.
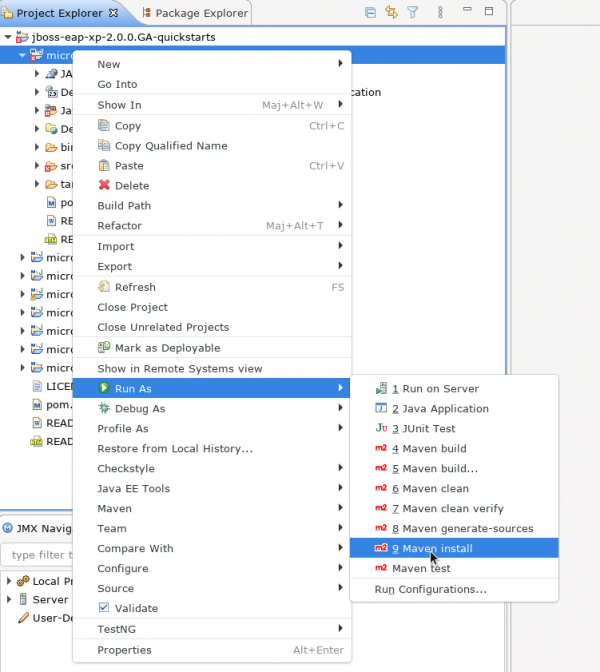
Next, we need to build the bootable JAR using Apache Maven. Right-click on the pom.xml. Then, go into the Run As menu, and select 9 Maven install. Figure 8 shows these selections.
Once the bootable JAR is built, we need to run our application from CodeReady Studio. We will create a new Apache Maven run configuration for this purpose. As shown in Figure 9, right-click on the pom.xml and navigate to the Run As menu, then select 5 Maven build. Set org.wildfly.plugins:wildfly-jar-maven-plugin:run as the goal and rename the execution to microprofile-config bootable run, then click Run.
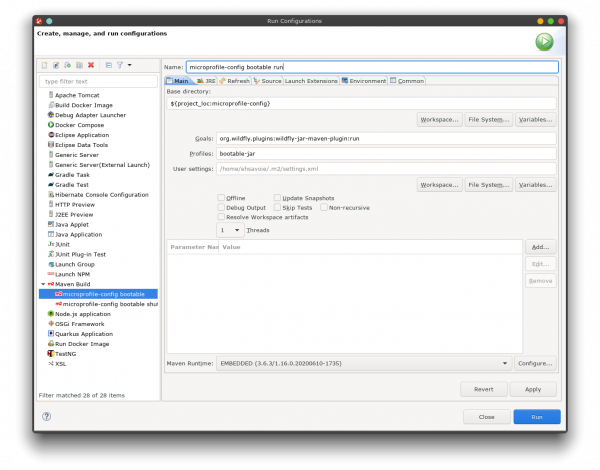
When the server starts, the application will be available as the root context, at http://localhost:8080/config/value.
Shutting down the server
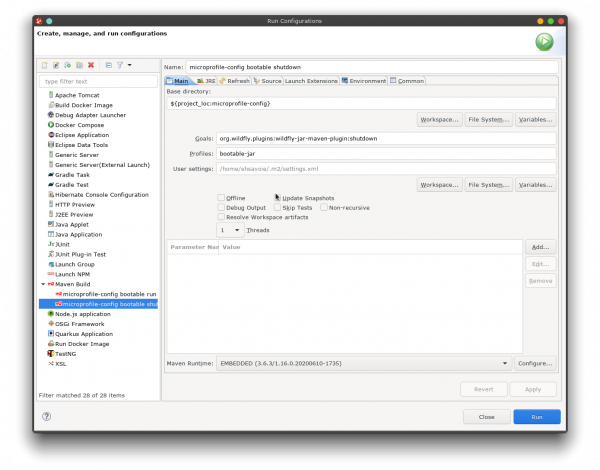
Closing or terminating the terminal will not stop the running server, so we need another run configuration to shut down the server. The easiest approach is to copy the run configuration we've just created, rename it microprofile-config bootable shutdown, and use the goal org.wildfly.plugins:wildfly-jar-maven-plugin:shutdown, as shown in Figure 10.
Conclusion
This article showed you how to install JBoss Enterprise Application Platform XP 2.0.0 GA with Eclipse MicroProfile support. I then showed you two ways to configure and run a MicroProfile Config quickstart project using Red Hat CodeReady Studio.
Last updated: January 11, 2021