The Red Hat Integration Q4 release adds many new features and capabilities with an increasing focus around cloud-native data integration. The features I'm most excited about are the introduction of the schema registry, the advancement of change data capture capabilities based on Debezium to technical preview, and data virtualization (technical preview) capabilities.
Data integration is a topic that has not received much attention from the cloud-native community so far, and we will cover it in more detail in future posts. Here, we jump straight into demonstrating the latest release of data virtualization (DV) capabilities on Red Hat OpenShift 4. This is a step-by-step visual tutorial describing how to create a simple virtual database using Red Hat Integration's data virtualization Operator. By the end of the tutorial, you will learn:
- How to deploy the DV Operator.
- How to create a virtual database.
- How to access the virtual database.
The steps throughout this article work on any Openshift 4.x environment with operator support, even on time- and resource-constrained environments such as the Red Hat OpenShift Interactive Learning Portal.
Prepare the environment
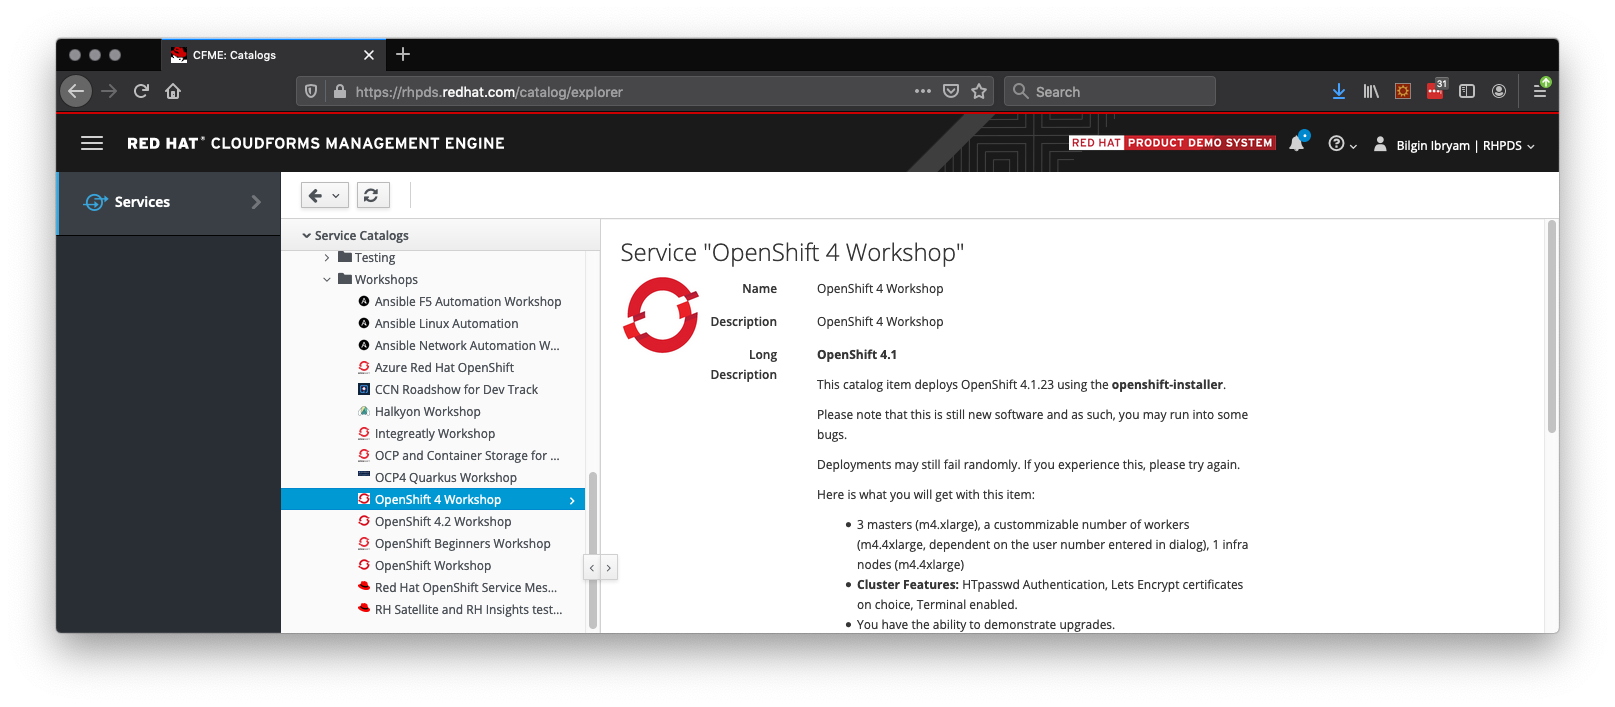
First, you need to prepare an environment for deploying the productized DV operator on OpenShift 4. If you are a Red Hat partner and have access to the Red Hat Product Demo System (RHPDS), request an OpenShift cluster of type "OpenShift 4 Workshop" from the Services menu, as shown in Figure 1. A simple cluster of one node (five users) should be enough:
ALTERNATIVE: Whether you are a partner or not, if you do not have access to RHPDS, the same steps also work on the Red Hat OpenShift Interactive Learning Portal. There, you get a resource- and time-constrained OpenShift cluster for one hour. In this environment, choose OpenShift 4.2 Playground and follow the same steps (and don't forget to type fast). The rest of this guide assumes RHPDS as the environment.
Now, to create the dv-demo project.
In the GUI
Once the OpenShift cluster is set up, log into OpenShift and go to the Projects page, as shown in Figure 2:

Create a new project named dv-demo.
On the command line
Alternatively, get your token and log in from the command line to create a new project called dv-demo:
$ oc login --token=YOUR_TOKEN --server=YOUR_SERVER
$ oc new-project dv-demo
Then, execute all of the following operations in the dv-demo namespace. Create a Secret using your Red Hat Customer Portal credentials to get access to the Red Hat container images:
$ oc create secret docker-registry dv-pull-secret --docker-server=registry.redhat.io --docker-username=$RH_PORTAL_USERNAME --docker-password=$RH_PORTAL_PASSWORD --docker-email=$RH_PORTAL_EMAIL
$ oc secrets link builder dv-pull-secret
$ oc secrets link builder dv-pull-secret --for=pull
Deploy the DV operator
The following steps deploy the DV operator:
- Select Catalog -> OperatorHub from the OpenShift menu.
- Search for "Data Virtualization."
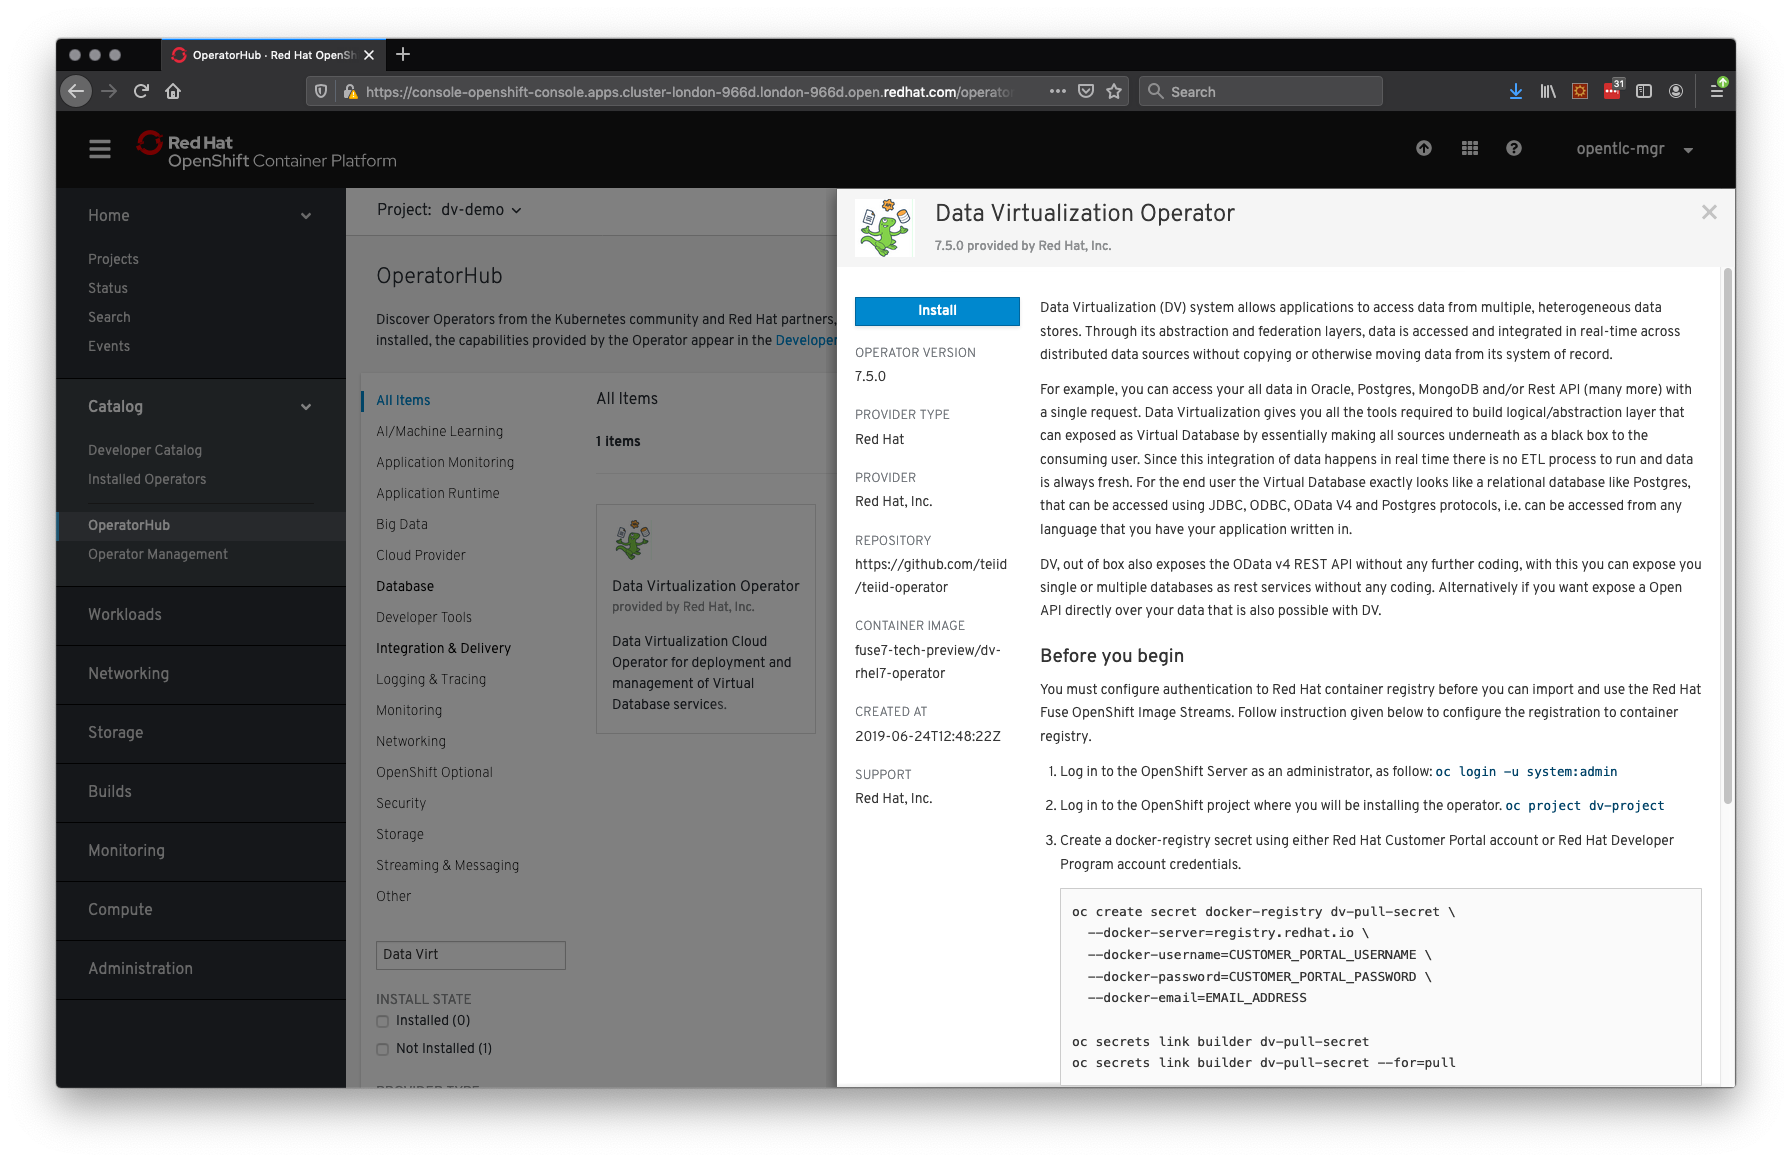
Select the Data Virtualization Operator 7.5.0 provided by Red Hat, Inc., as shown in Figure 3:
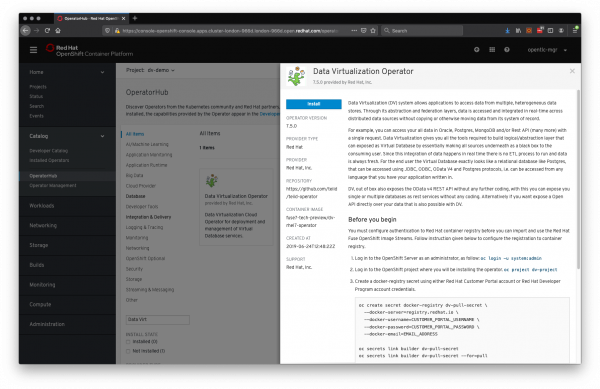
Figure 3: The Data Virtualization Operator dialog box. ALTERNATIVE: Data Virtualization Operator 7.5.0 provided by Red Hat, Inc., requires credentials to access the Red Hat Container Catalog. Instead, you can use the Teiid Community Operator, which is based on upstream container images. Its implementation does not require Red Hat credentials. This Operator is not supported by Red Hat, but it can be used for quick demo purposes.
- Click Install.
Make sure the namespace is the same as the one created earlier and then click Subscribe, as shown in Figure 4:

Figure 4: The Create Operator Subscription dialog box.

After a few minutes, you should see the DV Operator deployed as a pod in Running status, as shown in Figure 5:

Link the Secret created earlier with the
dv-operatorservice account so that the DV Operator can pull images from the Red Hat registry, too. This step should be performed after the operator is installed and the service account created, and before creating a new VirtualDatabase CustomResource (CR):$ oc secrets link dv-operator dv-pull-secret --for=pull
With that, the operator installation process is complete and ready for creating virtualizations.
Create a sample database
Before creating a virtualization, we need a sample database populated with data. The following script installs a PostgreSQL database and inserts sample data. If you are going to create a virtualization to an existing database, instead, you can skip this step and go to the next section:
Create a PostgreSQL database:
$ oc new-app
-e POSTGRESQL_USER=user
-e POSTGRESQL_PASSWORD=mypassword
-e POSTGRESQL_DATABASE=sampledb
postgresql:9.6
Once the PostgreSQL pod is in Running status, connect to it and run the
psqlclient:$ oc rsh $(oc get pods -o name -l app=postgresql) $ psql -U user sampledb
Create a few tables and populate them with data:
CREATE TABLE CUSTOMER (
ID bigint,
SSN char(25),
NAME varchar(64),
CONSTRAINT CUSTOMER_PK PRIMARY KEY(ID));
CREATE TABLE ADDRESS (
ID bigint,
STREET char(25),
ZIP char(10),
CUSTOMER_ID bigint,
CONSTRAINT ADDRESS_PK PRIMARY KEY(ID),
CONSTRAINT CUSTOMER_FK FOREIGN KEY (CUSTOMER_ID) REFERENCES CUSTOMER (ID));
INSERT INTO CUSTOMER (ID,SSN,NAME) VALUES (10, 'CST01002','Joseph Smith');
INSERT INTO CUSTOMER (ID,SSN,NAME) VALUES (11, 'CST01003','Nicholas Ferguson');
INSERT INTO CUSTOMER (ID,SSN,NAME) VALUES (12, 'CST01004','Jane Aire');
INSERT INTO ADDRESS (ID, STREET, ZIP, CUSTOMER_ID) VALUES (10, 'Main St', '12345', 10);
q
exit
With that, we have a simple database set up with data and ready for our demo.
Create a virtual database
We now have our operator installed and a sample database populated. We are all set to create a virtualization. Here are a few ways to do it.
The simplest approach
For this purpose, we will use the simplest approach where the data description language (DDL) definition is embedded in the CR itself. For other approaches, where the DDL and its dependencies are retrieved from external locations, check out the "Next steps" section at the end of this document:
- From the OpenShift menu, select Catalog -> Installed Operators as shown in Figure 6:
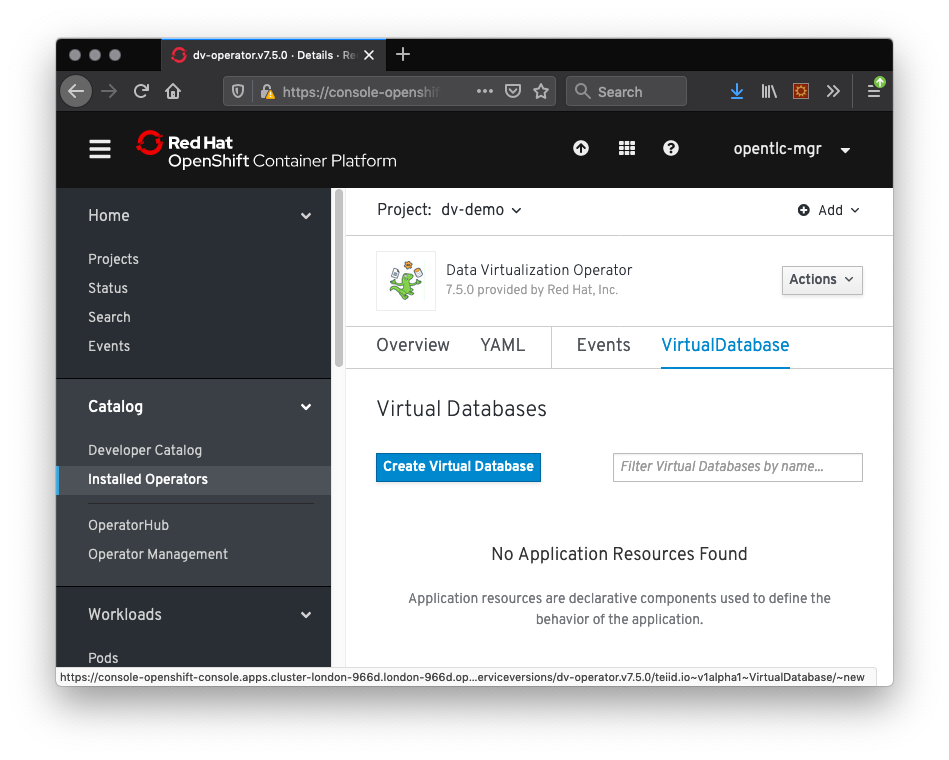
- Select Data Virtualization Operator.
- Select the Virtual Database tab.
- Click Create Virtual Database, which opens the Create Virtual Database dialog box shown in Figure 7:

- Inspect and modify the example CR that defines the data virtualization.
The essence of virtualization is the DDL definition that creates new abstract data layers on top of the physical data layers using SQL-MED specification. Here is a brief explanation of the example:
//Step 1 Defines a name for the virtual database you want to create
CREATE DATABASE customer OPTIONS (ANNOTATION 'Customer VDB');USE DATABASE customer;
//Step 2: Configures a translator to interpret data from the datasource
CREATE FOREIGN DATA WRAPPER postgresql;
//Step 3: Configures the datasource connection details for the external source
CREATE SERVER sampledb TYPE 'NONE' FOREIGN DATA WRAPPER postgresql;
//Step 4: Creates schemas to hold metadata about the source and virtual layers
CREATE SCHEMA accounts SERVER sampledb;
CREATE VIRTUAL SCHEMA portfolio;
//Step 5: Imports the metadata from source schema into a virtual schema
SET SCHEMA accounts;
IMPORT FOREIGN SCHEMA public FROM SERVER sampledb INTO accounts OPTIONS("importer.useFullSchemaName" 'false');
// Step 6: Create virtual views
SET SCHEMA portfolio;
CREATE VIEW CustomerZip(id bigint PRIMARY KEY, name string, ssn string, zip string) AS
   SELECT c.ID as id, c.NAME as name, c.SSN as ssn, a.ZIP as zip
FROM accounts.CUSTOMER c LEFT OUTER JOIN accounts.ADDRESS a
ON c.ID = a.CUSTOMER_ID;
To read more about these constructs, check out the data virtualization guide.
ALTERNATIVE: Before creating the virtual database, you can customize the CR containing the details of the virtualization and the embedded DDL. In the example CR above, the connection details are hardcoded and match with those of the PostgreSQL database created earlier. If you just want to get this example running, don’t edit anything and hit the Create button. If you prefer to retrieve the PostgreSQL connection details from a Kubernetes Secret object rather than hard-coding them in the CR, see the section "Using a Kubernetes Secret object instead."
Using a Kubernetes Secret object instead
To use a Kubernetes Secret object:
- Create a Secret that will be used to access the database from the virtualization:
oc create -f - <<EOF
apiVersion: v1
kind: Secret
metadata:
  name: postgresql
type: Opaque
stringData:
  database-user: user
  database-name: sampledb
  database-password: mypassword
EOF
- In the CR, replace:
- name: SPRING_DATASOURCE_SAMPLEDB_USERNAME
value: user
- name: SPRING_DATASOURCE_SAMPLEDB_PASSWORD
value: mypassword
- name: SPRING_DATASOURCE_SAMPLEDB_DATABASENAME
value: sampledb
with:
- name: SPRING_DATASOURCE_SAMPLEDB_USERNAME
valueFrom:
secretKeyRef:
name: postgresql
key: database-user
- name: SPRING_DATASOURCE_SAMPLEDB_PASSWORD
valueFrom:
secretKeyRef:
name: postgresql
key: database-password
- name: SPRING_DATASOURCE_SAMPLEDB_DATABASENAME
valueFrom:
secretKeyRef:
name: postgresql
key: database-name
- Hit the Create button to instantiate the virtualization, as shown in Figure 8:

After a few minutes, you should see that in addition to the dv-operator and postgresql pods, there is also an rdbms-springbootpod running our new virtualization. Once this pod is in Running status, we are ready to use our new virtualization, as you can see in Figure 9:
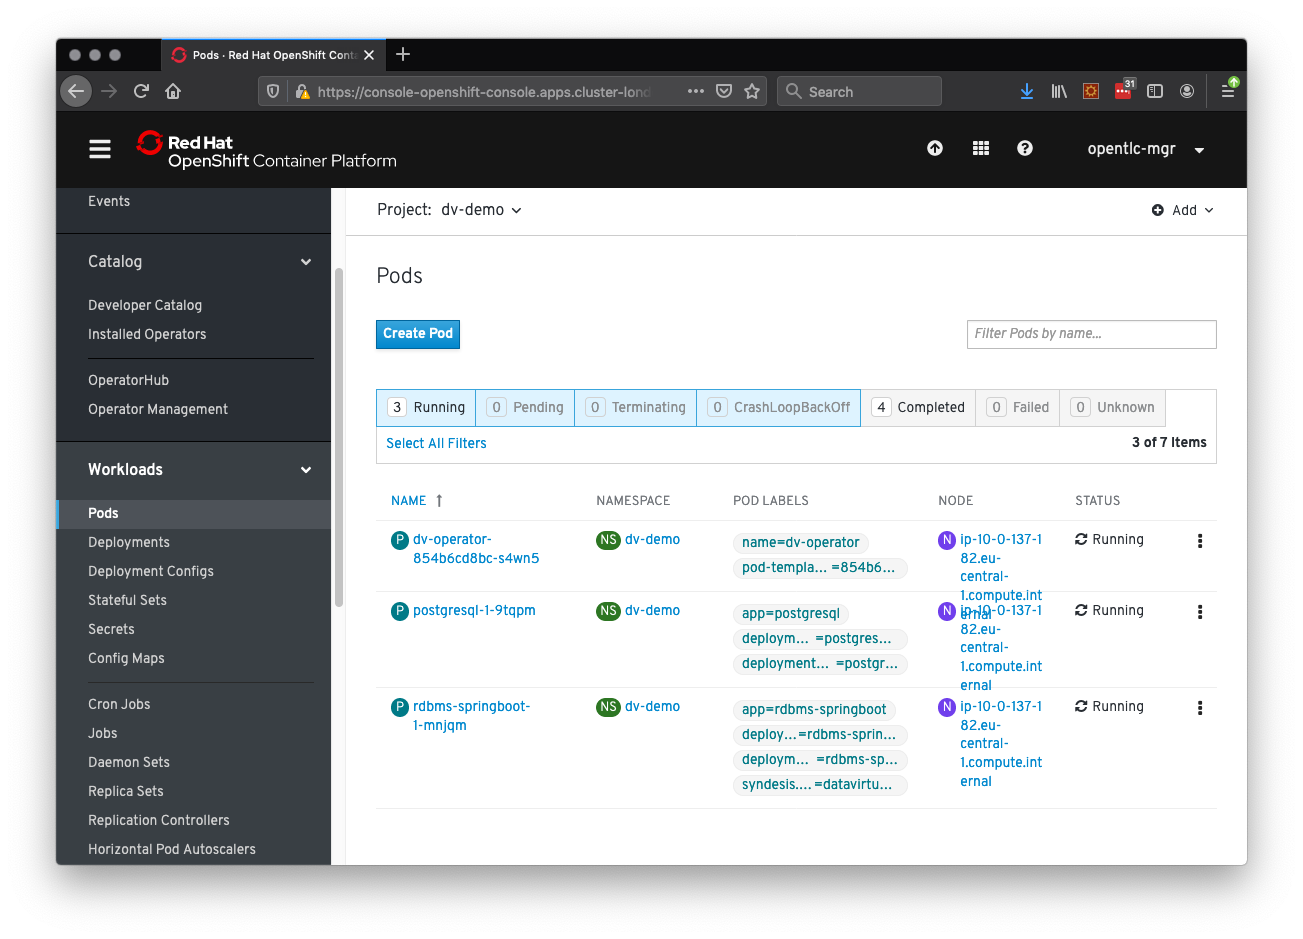
dv-operator, postgresql, and rdbms-springboot pods all running in the dv-demo namespace.Using the CLI
Virtualizations can be created not only from the OpenShift console as demonstrated in the previous section but also through the command line as part of the CI/CD process. You can create a similar virtualization (named dv-customer) with one CLI command as follows:
$ oc create -f https://raw.githubusercontent.com/teiid/teiid-openshift-examples/7.5-1.2.x/rdbms-example/dv-customer.yaml
In the end, you can mix and match your methods. Create your virtualization through CLI and then manage them from OpenShift console, or the other way around. Once done, you can also delete the virtualization within the CLI like this:
$ oc delete vdb dv-customer
Access the virtual database
In addition to deploying virtualization, the DV Operator also creates a service and a route for exposing various virtual database endpoints.
Access from inside the cluster
To see what protocols are exposed through the service, go to the OpenShift menu and select Networking -> Services. Then, choose the service named rdbms-springboot, as shown in Figure 10:

rdbms-springboot service overview window.All of the ports named here are accessible from inside the OpenShift cluster; for example, from other pods that want to use the virtualization. Here we can see the following endpoints listed:
-
- Monitoring data exposed through Jolokia and Prometheus ports.
- OData and OpenAPI exposed over the HTTP port.
- JDBC access available as a Teiid port.
- ODBC access available as a PostgreSQL (
pg) port.
HTTP access from outside the cluster
The simplest way to access the virtualization from outside of the OpenShift cluster is through HTTP and OData/OpenAPI. To find the created route, go to the OpenShift menu and select Networking -> Routes, and choose the route named after the virtualization rdbms-springboot as shown in Figure 11:

rdbms-springboot route.Clicking on the location will give you "404 - Not found," as there is no endpoint exposed at "/". To see the OData metadata, append odata/$metadata to the end of the URL (for example, https://rdbms-springboot-dv-demo.example.com/odata/$metadata).
If you don’t want to edit the URL and want to directly access the OData endpoint, go to the OpenShift menu and select Installed Operator -> DV Operator -> Virtual Databases -> rdbms-springboot and then route link.
Try out other queries based on the OData Basic Tutorial such as:
- Retrieve top 2 customer records ordered by name:
https://rdbms-springboot-dv-demo.example.com/odata/portfolio/CustomerZip?$top=2&$orderby=name - Retrieve a customer record by ID and pick the name field value:
https://rdbms-springboot-dv-demo.example.com/odata/portfolio/CustomerZip(10)/name/$value - Search customer records by name, and display the result in JSON:
https://rdbms-springboot-dv-demo.example.com/odata/portfolio/CustomerZip?$filter=startswith(name,%27Joseph%27)&$format=JSON - Generate OpenAPI v3 schema from OData metadata
https://rdbms-springboot-dv-demo.example.com/odata/openapi.json?version=3
JDBC/ODBC access from outside the cluster
To access the virtualizations over JDBC/ODBC from outside of the OpenShift cluster, we have to expose the JDBC/ODBC ports to the outside world. Then, we can use an SQL client supporting these protocols, or use this Spring Boot-based client application.
The simplest way
The simplest way to expose JDBC/ODBC ports for development purposes (specifically) is by using the oc client as follows:
$ oc port-forward $(oc get pods -o=jsonpath='{.items[0].metadata.name}' -l app=rdbms-springboot) 35432 31000This command maps ports 35432 (ODBC/PG) and 31000 (Teiid JDBC) from the pod with label rdbms-springboot to the local machine. While this command is running in the terminal, you can start an application and connect to it with configurations such as:
jdbc:postgresql://127.0.0.1:35432/customer?sslMode=disable
or
jdbc:teiid:customer@mm://127.0.0.1:31000
Create a Kubernetes LoadBalancer service
Another way to expose the same port is by creating a Kubernetes LoadBalancer service that can be customized with sticky sessions, etc. To create the LoadBalancer service, execute the following:
$ oc apply -f - << EOF
apiVersion: v1
kind: Service
metadata:
  name: rdbms-springboot-expose
spec:
  type: LoadBalancer
  ports:
  - name: teiid
    port: 31000
  - name: pg
    port: 35432
  selector:
    app: rdbms-springboot
EOF
Once the service is created, you can discover the full URL to access the LoadBalance for your cluster and infrastructure provider with the following query:
$ oc get svc rdbms-springboot-expose -o=jsonpath='{..ingress[0].hostname}'For my OpenShift cluster, the command returns the following URL:
A4d3bf5fd1b9311eab2b602474b8b0b4-143190945.eu-central-1.elb.amazonaws.com
This URL can be used by the sample program above, or any other tool, as follows:
jdbc:postgresql://a4d3bf5fd1b9311eab2b602474b8b0b4-143190945.eu-central-1.elb.amazonaws.com:35432/customer?sslMode=disable
or
jdbc:teiid:customer@mm://a4d3bf5fd1b9311eab2b602474b8b0b4-143190945.eu-central-1.elb.amazonaws.com:31000
The above mechanisms give easy access from outside of the OpenShift cluster to the running virtualizations. There are other mechanisms too, but these are enough for a getting started experience.
Next steps
Congratulations, you have reached the end of how to get started with the data virtualization Operator for OpenShift. Data virtualization is an essential part of the Red Hat Integration stack and we will cover how it integrates with other Red Hat technologies in future pieces. To find out more about data virtualization, try out our examples and check out the latest Red Hat Integration documentation on how to configure data virtualization with other data sources and secure its endpoints through 3scale.
If you have requests or questions related to running the data virtualization technical preview, please let us know by sending an email to the data-integration-preview mailing list.
Last updated: November 6, 2025