There's a lot of excitement about AI coding assistants, but many of the available options either aren't open source, or don't respect your data privacy by sending what you're working on to the cloud for processing. If you're looking for an alternative to closed AI, then you need an open coding assistant and an open source IDE. The OpenCode project provides you with an open source AI coding assistant using the Model Context Protocol (MCP), so it can be used with most text editors, including VS Code or Cursor, or as a standalone command-line interface.
What is OpenCode?
OpenCode is an open source AI coding agent. It can be used as a terminal-based interface, a desktop application, or as an IDE extension. You install OpenCode on your computer, so it can run locally with no internet connection.
OpenCode is the software providing an interface for you to access an LLM. It's not an LLM itself, so there are a few different components you must install. This kind of modularity is good, though, because it gives you the choice to use any LLM (even one that's private to your organization, or one that requires a paid subscription).
Install OpenCode
First, you must install OpenCode itself. This provides a terminal-based chat interface, and the software that gets run for MCP connections.
On Linux, install using curl and Bash:
curl -fsSL https://opencode.ai/install | bashOn MacOS, install using the brew command from the Homebrew project:
brew install anomalyco/tap/opencodeOn Windows, install using the choco command from the Chocolatey project:
choco install opencodeInstall an LLM
Now that OpenCode has been installed, you need an LLM to actually process queries and formulate probable responses. OpenCode provides an LLM by default, but it is not an open source one. If you're happy to use a proprietary LLM that sends your data to someone else's cloud, then you can skip down to the Integrate OpenCode with your editor section, bypassing the installation and configuration of an open LLM. I don't recommend this, because the LLM that OpenCode provides does not keep your data private, and its no-cost access could potentially end. There are a few good open source LLMs to choose from, and the one you use is likely to be determined by your use case and your available resources.
At Red Hat, the adage is that local AI is a race car, and Red Hat AI is a bullet train. With a local AI, you can go fast with just a few passengers, but with a bullet train you can go even faster with lots of passengers. For local development, it makes sense to use local AI tools, like Ollama or OpenVINO.
In summary:
- Red Hat AI: Use Red Hat AI and vLLM for applications running in production.
- Ollama: Use Ollama if you're using AMD or NVIDIA graphic processors.
- OpenVINO: Use OpenVino if you're using an integrated Intel graphic processor (common on standard laptops).
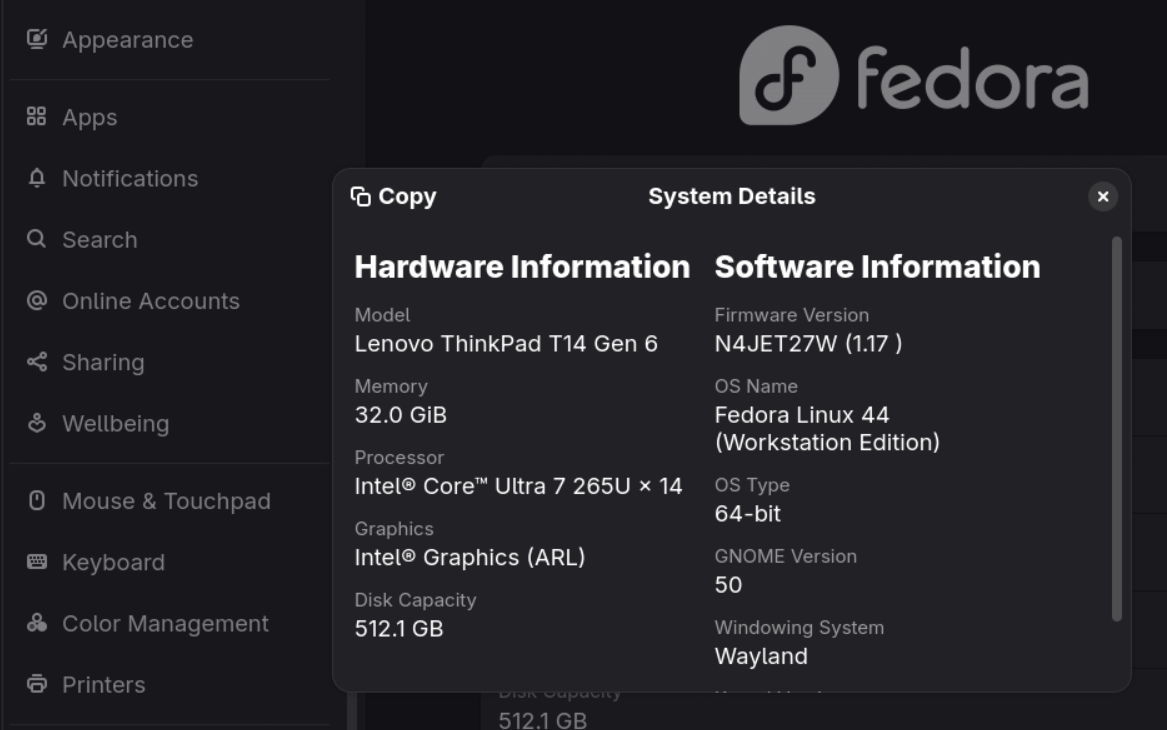
To find out what graphic processor your computer uses, go to your desktop's system settings and search for "GPU" or "graphics processor". For example, in the GNOME desktop for Linux, launch Settings, click System in the left column, and then About > System Details (figure 1).
Ollama for AMD and NVIDIA
The Ollama project is an open source AI platform that lets you download and run large language models locally, on your own computer. After it's downloaded, you don't need access to the internet to run the model of your choice, so there's no need for confusing subscription plans, and no concern about your data getting sent to somebody else's server. Currently there aren't any models designed to work on integrated Intel graphics chips, so Ollama works on a physical GPU only.
As with OpenCode, installation is just one command. On Fedora Linux or similar:
sudo dnf install ollamaOn macOS:
brew install ollamaOn Windows:
choco install ollamaOllama gives you access to publicly available LLMs, but lots of no-cost models are not open source. For this article, I use Qwen3:14b, which is released under the terms of the Apache license. There are many other models also released under the terms of the Apache license, including Granite and Olmo.
First, start an Ollama server:
$ ollama serveNext, pull and then run the qwen3:14b model:
$ ollama run qwen3:14bSkip the next section, and continue with OpenCode configuration.
OpenVINO for Intel
OpenVINO/Qwen3-8B-int4-ov is the Qwen3-8B model converted to the OpenVINO intermediate representation (IR) format. Its weights have been compressed to INT4 for fast, low-memory local inference on Intel integrated graphic chips.
Most laptops and many desktop motherboards ship with Intel integrated graphics by default, so this is a common setup. However, it's also the most limited one. Even with an optimized model, AI computation is not particularly efficient, so even a simple prompt (like "say hello") generates thousands of tokens. A local AI without a dedicated GPU is slow, even on the latest hardware.
This method uses OpenVINO instead of Ollama. You can run OpenVINO using Podman:
$ podman run -d --name ovms-server \
  --device /dev/dri/renderD128 \
  --user root -p 8001:8001 \
  -v ~/models:/models:z openvino/model_server:latest-gpu \
  --model_name Qwen3-8B-int4-ov \
  --source_model Qwen3-8B-int4-ov \
  --model_repository_path /models \
  --task text_generation \
  --rest_port 8001 \
  --target_device GPU
Confirm that the container is running:
$ podman psOpenCode configuration
Open the file ~/.config/opencode/opencode.jsonc (create it, if it doesn't exist), and enter this JSON configuration so that OpenCode uses the model you have setup.
For Ollama on AMD or NVIDIA:
{
  "$schema": "https://opencode.ai",
  "snapshot": true,
  "model": "ollama/qwen-7b-ov",
  "provider": {
    "ollama": {
      "npm": "@ai-sdk/openai-compatible",
      "name": "Ollama local",
      "options": {
        "baseURL": "http://127.0.0.1:8001/v1"
      },
      "models": {
        "qwen-7b-ov": {
          "name": "qwen 7b ov",
          "capabilities": [
            "chat",
            "completion",
            "code"
          ]
        }
      }
    }
  }
}
For OpenVINO on Intel, the configuration is similar (and lies about being Ollama because OpencCde refuses to recognize it otherwise):
{
  "$schema": "https://opencode.ai",
  "snapshot": true,
  "model": "ollama/Qwen3-8B-int4-ov",
  "provider": {
    "ollama": {
      "npm": "@ai-sdk/openai-compatible",
      "name": "OpenVINO Model Server",
      "options": {
        "baseURL": "http://127.0.0.1:8001/v1"
      },
      "models": {
        "Qwen3-8B-int4-ov": {
          "name": "Qwen 3 8B (Intel iGPU)",
          "capabilities": [
            "chat",
            "completion",
            "code"
          ]
        }
      }
    }
  }
}
It seems that different applications expect different OpenCode configuration filenames, so create the alias opencode.json (note the lack of the trailing "c") pointing to opencode.jsonc. For example, on Linux:
$ cd ~/.config/opencode
$ ln -s opencode.jsonc opencode.json
Launch OpenCode and provide a simple query (Figure 2), like print hello world.
opencode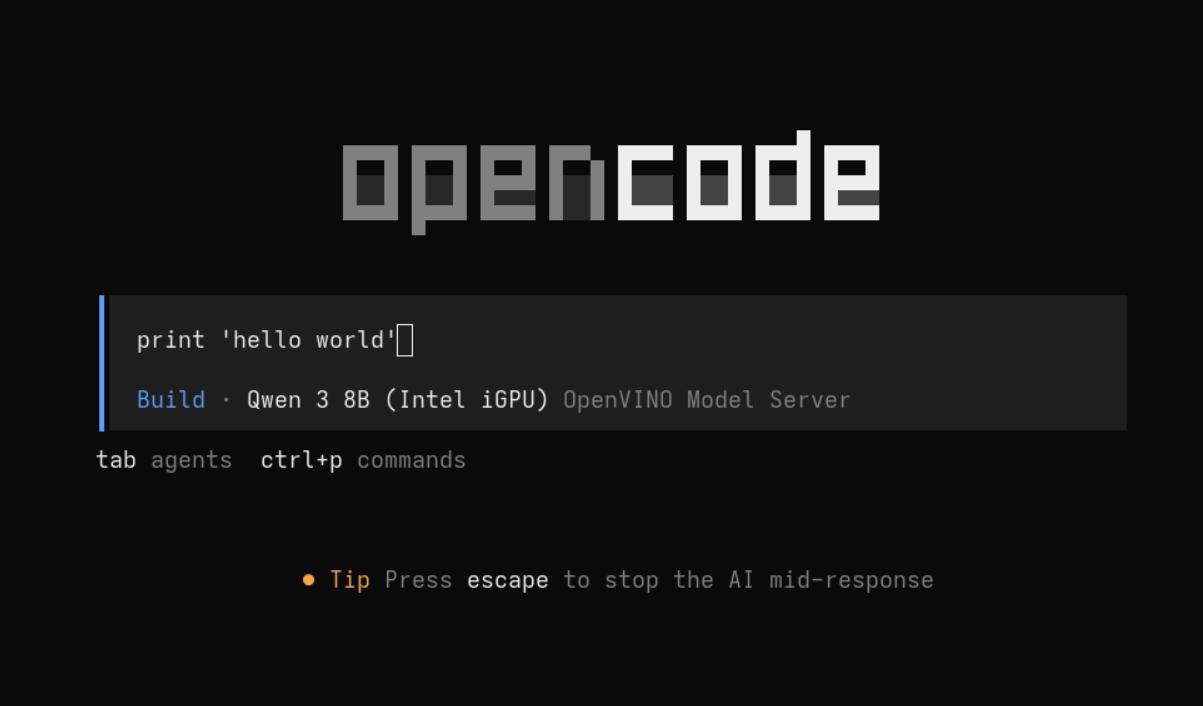
Install a text editor or IDE
Because you're using OpenCode as a frontend, you can bind OpenCode to a text editor or IDE. This includes VS Code, VSCodium, Cursor (proprietary), and most IDEs. Whatever IDE you choose, the process is generally similar:
- Install the IDE
- Install a coding assistant plug-in
- Configure the plug-in to use OpenCode
I use Netbeans for my Java coding, so that's the example I provide in this article.
1. Install the IDE
Install Netbeans:
$ flatpak remote-add --if-not-exists flathub https://flathub.org
$ flatpak install flathub org.apache.netbeans
2. Install a coding assistant plug-in
In Netbeans, open the Tools menu and select Plugins. In the Plugins window, open the Available Plugins tab. Look for the Coding Assistant plug-in and install it.
3. Configure the plug-in to use OpenCode
In Netbeans, open the Tools menu and select Options. In the Options window, open the Assistant tab. Set the path to OpenCode in the Path to OpenCode Binary text field. For example, on Linux the path is /home/tux/.opencode/bin/opencode.
Start coding
The first query you make to your coding assistant might be slower than normal, allowing for extra configuration files to be generated. Once it's up and running though, your local AI coding assistant works as well as AI can be expected to work.
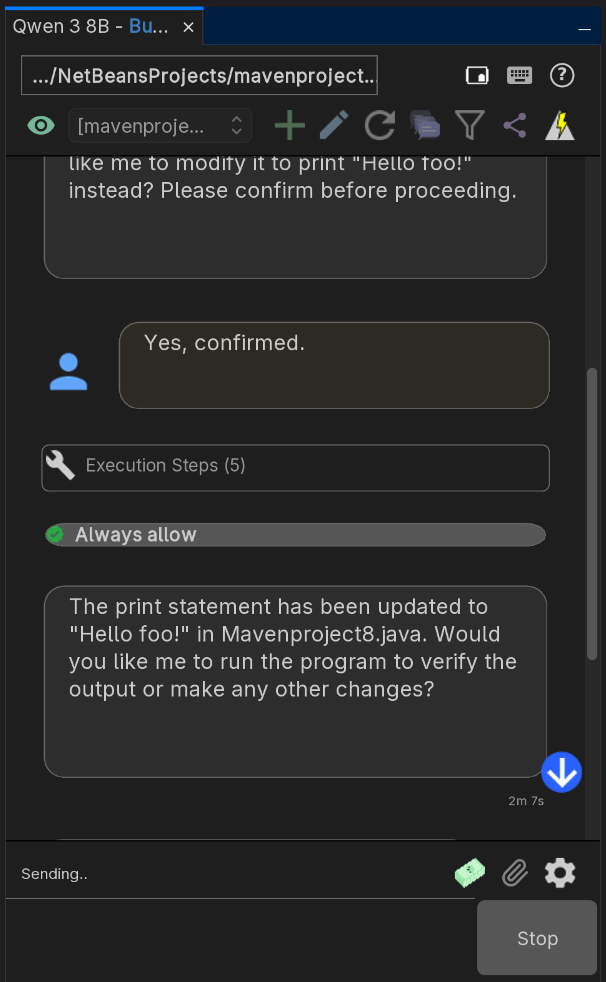
An AI code assistant can make suggestions, edit files (Figure 3), and help with finding libraries and learning syntax. Remember, though: AI is just a probability engine, and can be extremely accurate sometimes but utterly unfounded other times. So make sure to use it as a tool, never in place of your own brain.

