If you're running a virtual machines (VM) on Red Hat OpenShift Virtualization, then you know that keeping everything visible in ServiceNow is key for change management, incident routing, and licensing. ServiceNow provides CMDB Kubernetes import capabilities but the standard Kubernetes patterns can be a bit messy. They often clutter your configuration management database (CMDB) with pods, deployments, and nodes, while failing to identify KubeVirt VMs as the proper configuration items (CIs) they actually are. In this article, I show you how to transform a running cluster into a clean, precise inventory by creating exactly one CI for each VM, cutting out all that extra pod noise.
In part 1, we set the stage by deploying a registered, CA-trusted in-cluster ServiceNow MID server using a least privileged RBAC. Now we're moving forward to define a specialized VM CI class with its own identification rules. We also implement, schedule, and verify a custom Discovery pattern to bring it all together.
A quick reminder: OpenShift Virtualization is powered by the KubeVirt upstream project, which is what I'm targeting here.
Prerequisites
Picking up where the previous article left off, we begin by verifying that the initial setup is operational. I have a preflight check script that checks for an HTTP 200 status with a VirtualMachineList, and that the MID server should be listed as Up and Validated within the ServiceNow instance. For this phase, I am also testing with a ServiceNow Australia instance with full Discovery and CMDB administrative privileges, ensuring that both the CI Class Manager and Pattern Designer are accessible. Additionally, the environment must have at least one active VirtualMachine to inventory. Detailed guidance on required plug-ins and MID validation are in sections 1 and 3 of the runbook.
Build, run, and verify VM discovery
The process involves five key phases:
- Establish the CI class
- Set its identification criteria
- Import the Discovery Pattern
- Configure the schedule
- Validate the results
1. Create the custom OpenShift virtual machine CI class
Using the CI Class Manager, we can create a new custom child class by extending cmdb_ci_vm_instance, or cmdb_ci_vm_object if the former is unavailable (figure 1).
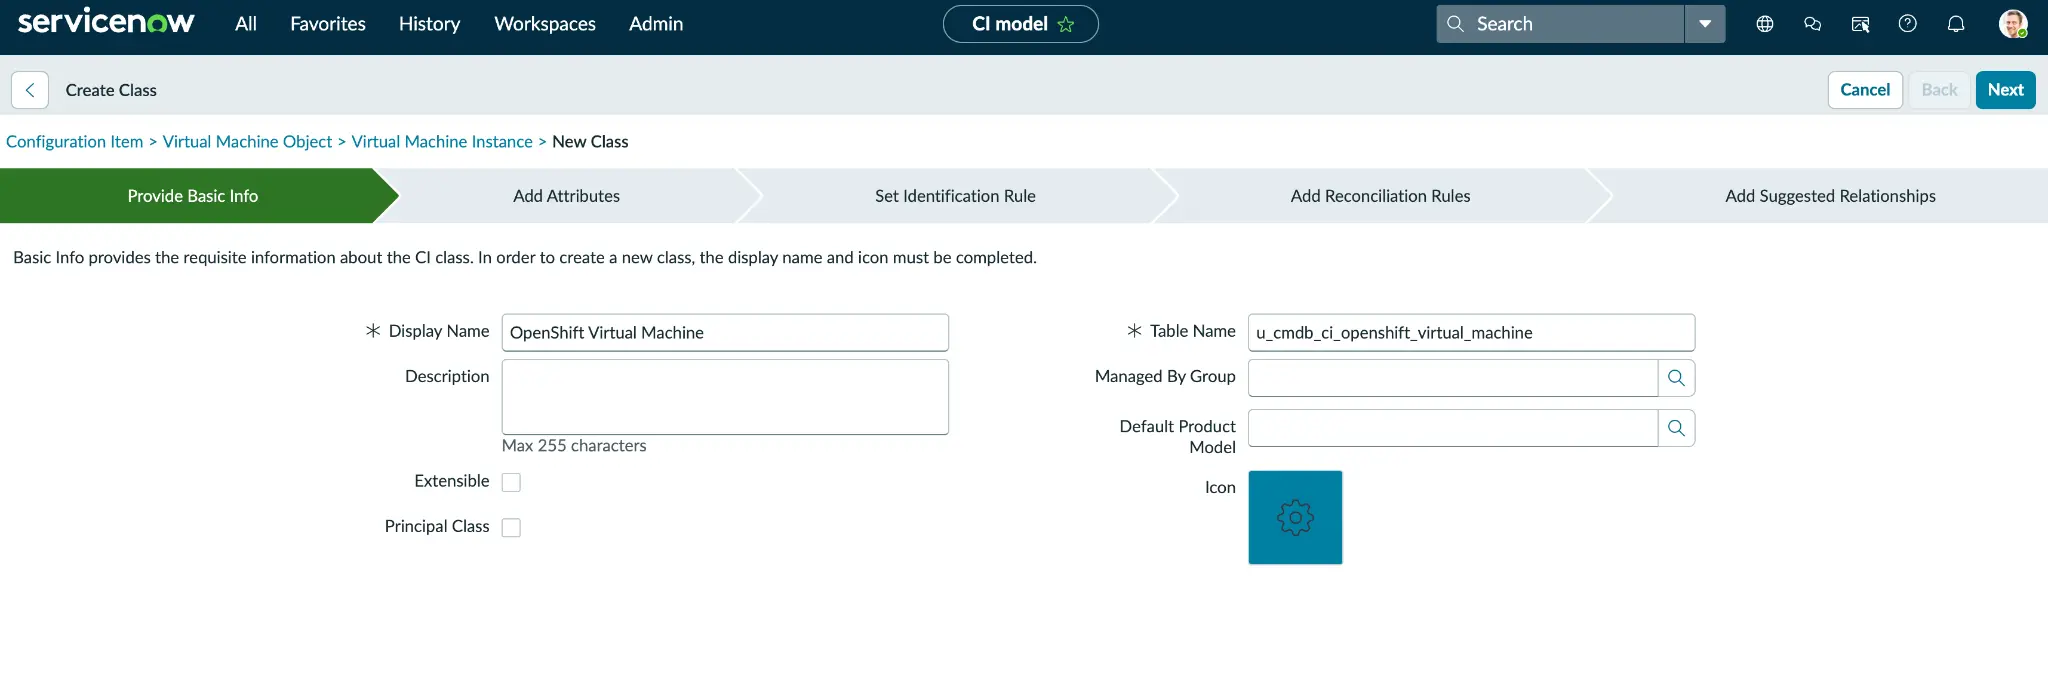
This new table, labeled OpenShift Virtual Machine and named u_cmdb_ci_openshift_virtual_machines, includes several KubeVirt-specific attributes not found in standard VM columns: Cluster name and URL, namespace, node, run strategy, status, machine type, firmware, guest OS, vCPU topology, and the VM UID. Because this Kubernetes context is stored as simple string columns within the VM row, no separate Kubernetes CIs are generated. Comprehensive details on these columns are available in the runbook sections 4 and 4.1, and an optional REST automation in section 4.3.
2. Define an independent identification rule
While KubeVirt UIDs are modified during VM recreation, the combination of cluster, namespace, and VM names remains constant through stop and start cycles (figure 2). Consequently, I utilize this persistent three-attribute tuple for identification by accessing the new class and modifying its identification rule to Independent.
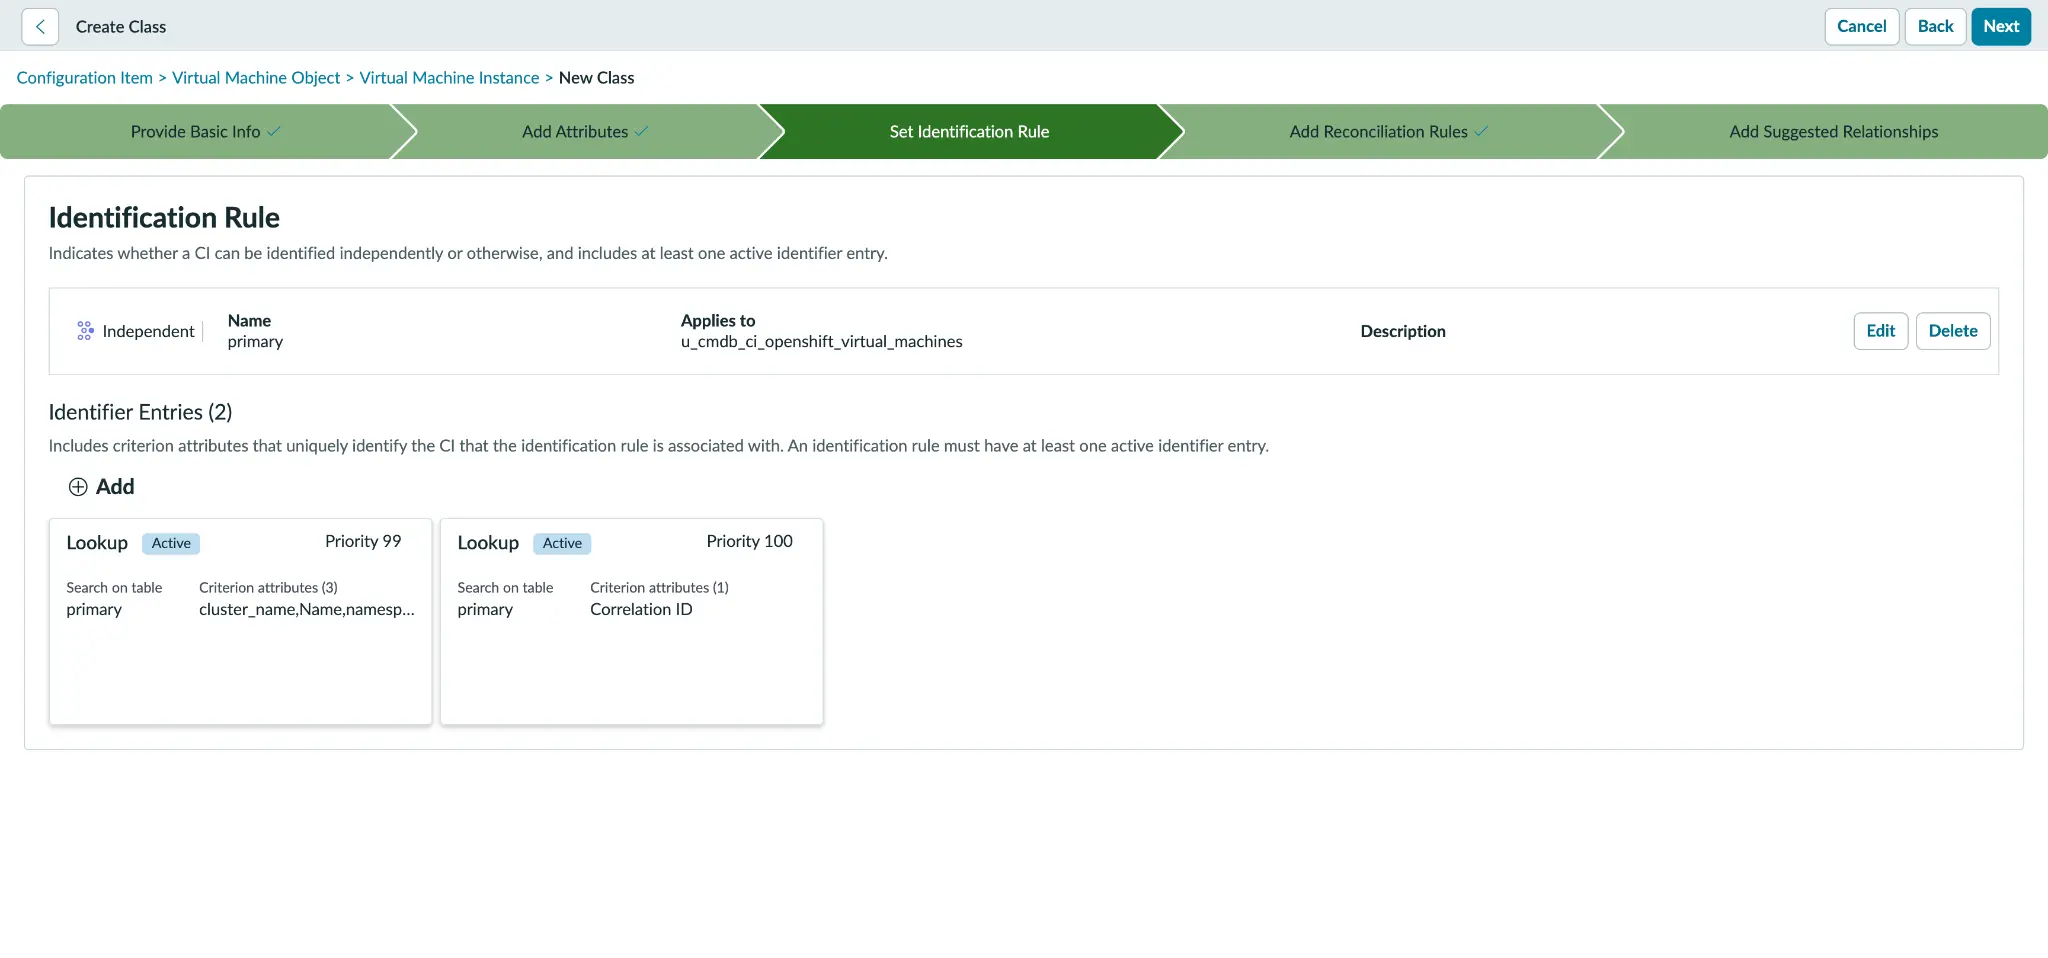
I also prevent it from inheriting the VMware-style instance identifier typically associated with cmdb_ci_vm_instance. I then establish the primary identifier using this durable tuple, while designating correlation_id (which stores the UID) as the secondary identifier to serve as a tiebreaker for recreated VMs sharing the same name.
The runbook explains the exact field values in section 4.2.
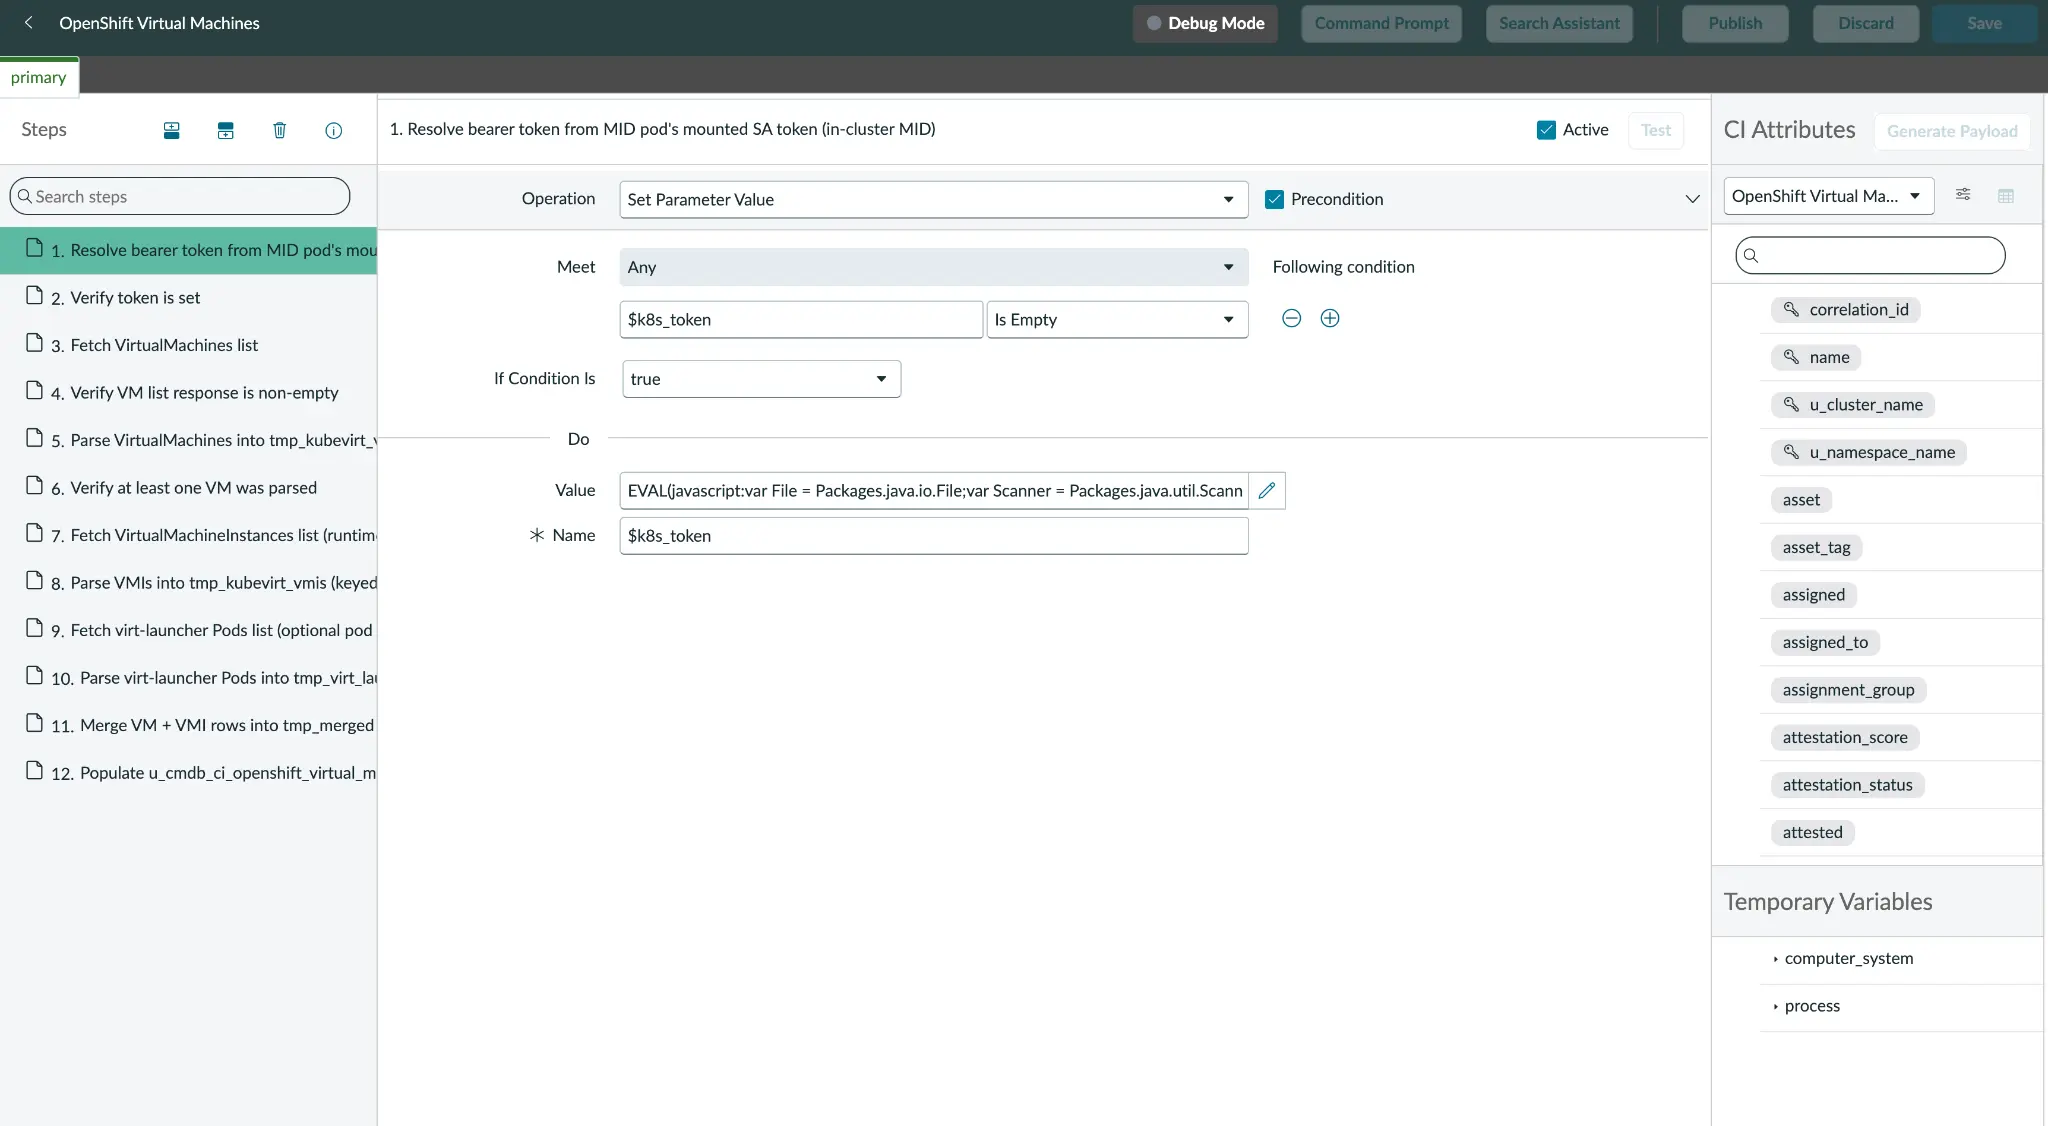
3. Load the standalone Discovery Pattern
To begin, I define the pattern as a Cloud Resource rather than a standard Discovery Pattern. This is a critical distinction: Cloud Resource patterns are horizontal and API-driven, whereas Discovery Patterns rely on the IP-probe Shazzam flow—a network-scanning phase that is unnecessary for this use case. After binding the pattern to our new CI class.
The logic for the data flow is direct: Execute an HTTP GET request on the virtualmachines endpoint and a subsequent GET on virtualmachineinstances. These results are then combined using a LEFT join on the parent VM UID, which ensures that stopped VMs are preserved in the inventory. The final Create CI step generates a single VM CI for every VM. If a pod-list RBAC is available, I can also include enrichment data from the virt-launcher pod (figure 3).
There are two primary methods for authoring this pattern:
- Pattern Designer: The officially supported, click-through interface.
- Raw NDL PATCH: By using the companion scripts
pattern-openshiftandpattern-openshift.sh, you can perform a one-shot upload of the Neebula Discovery Language (NDL). While this method is faster, it is more "release-fragile" and may require updates between ServiceNow versions.
The runbook provides further details on these paths and the overall pattern architecture in sections 5 through 5.5.
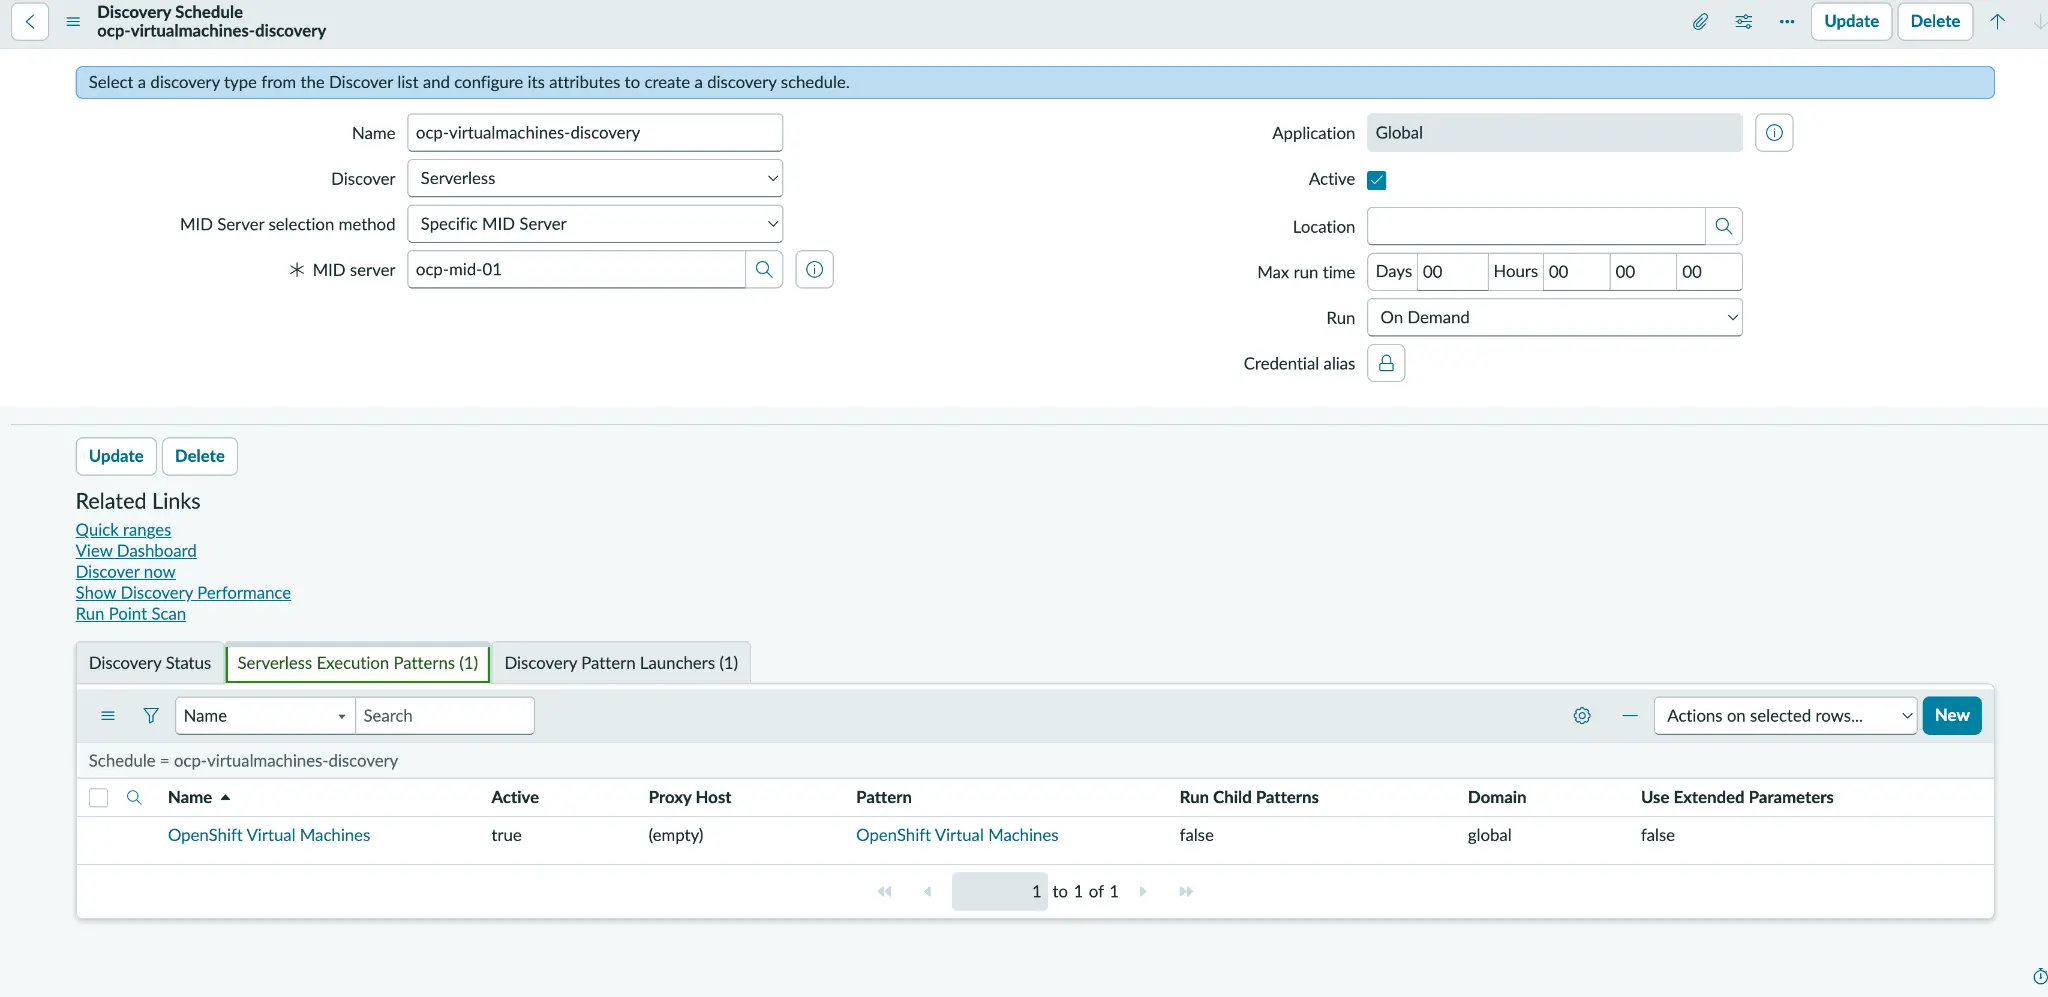
4. Schedule and run discovery
To initiate the discovery process, configure a serverless, on-demand Discovery Schedule. It's crucial to ensure this is bound to the in-cluster MID server established in part 1. Within the pattern launcher, define three essential attributes that act as our connection string: url, cluster_name, and namespace. A major advantage here is that no credentials alias is required, as authentication is handled seamlessly by the pod-mounted service-account token.
With the configuration locked in, select Discover Now. Monitor the progress through Discovery and Status, watching the Device and CI counts climb as the inventory populates (figure 4). If you're following along with the runbook, you can find detailed instructions regarding the schedule and launcher attributes in section 6, while the schedule-openshift.sh helper and specific execution steps are detailed in section 7.1.
5. Verify the resulting VM CIs
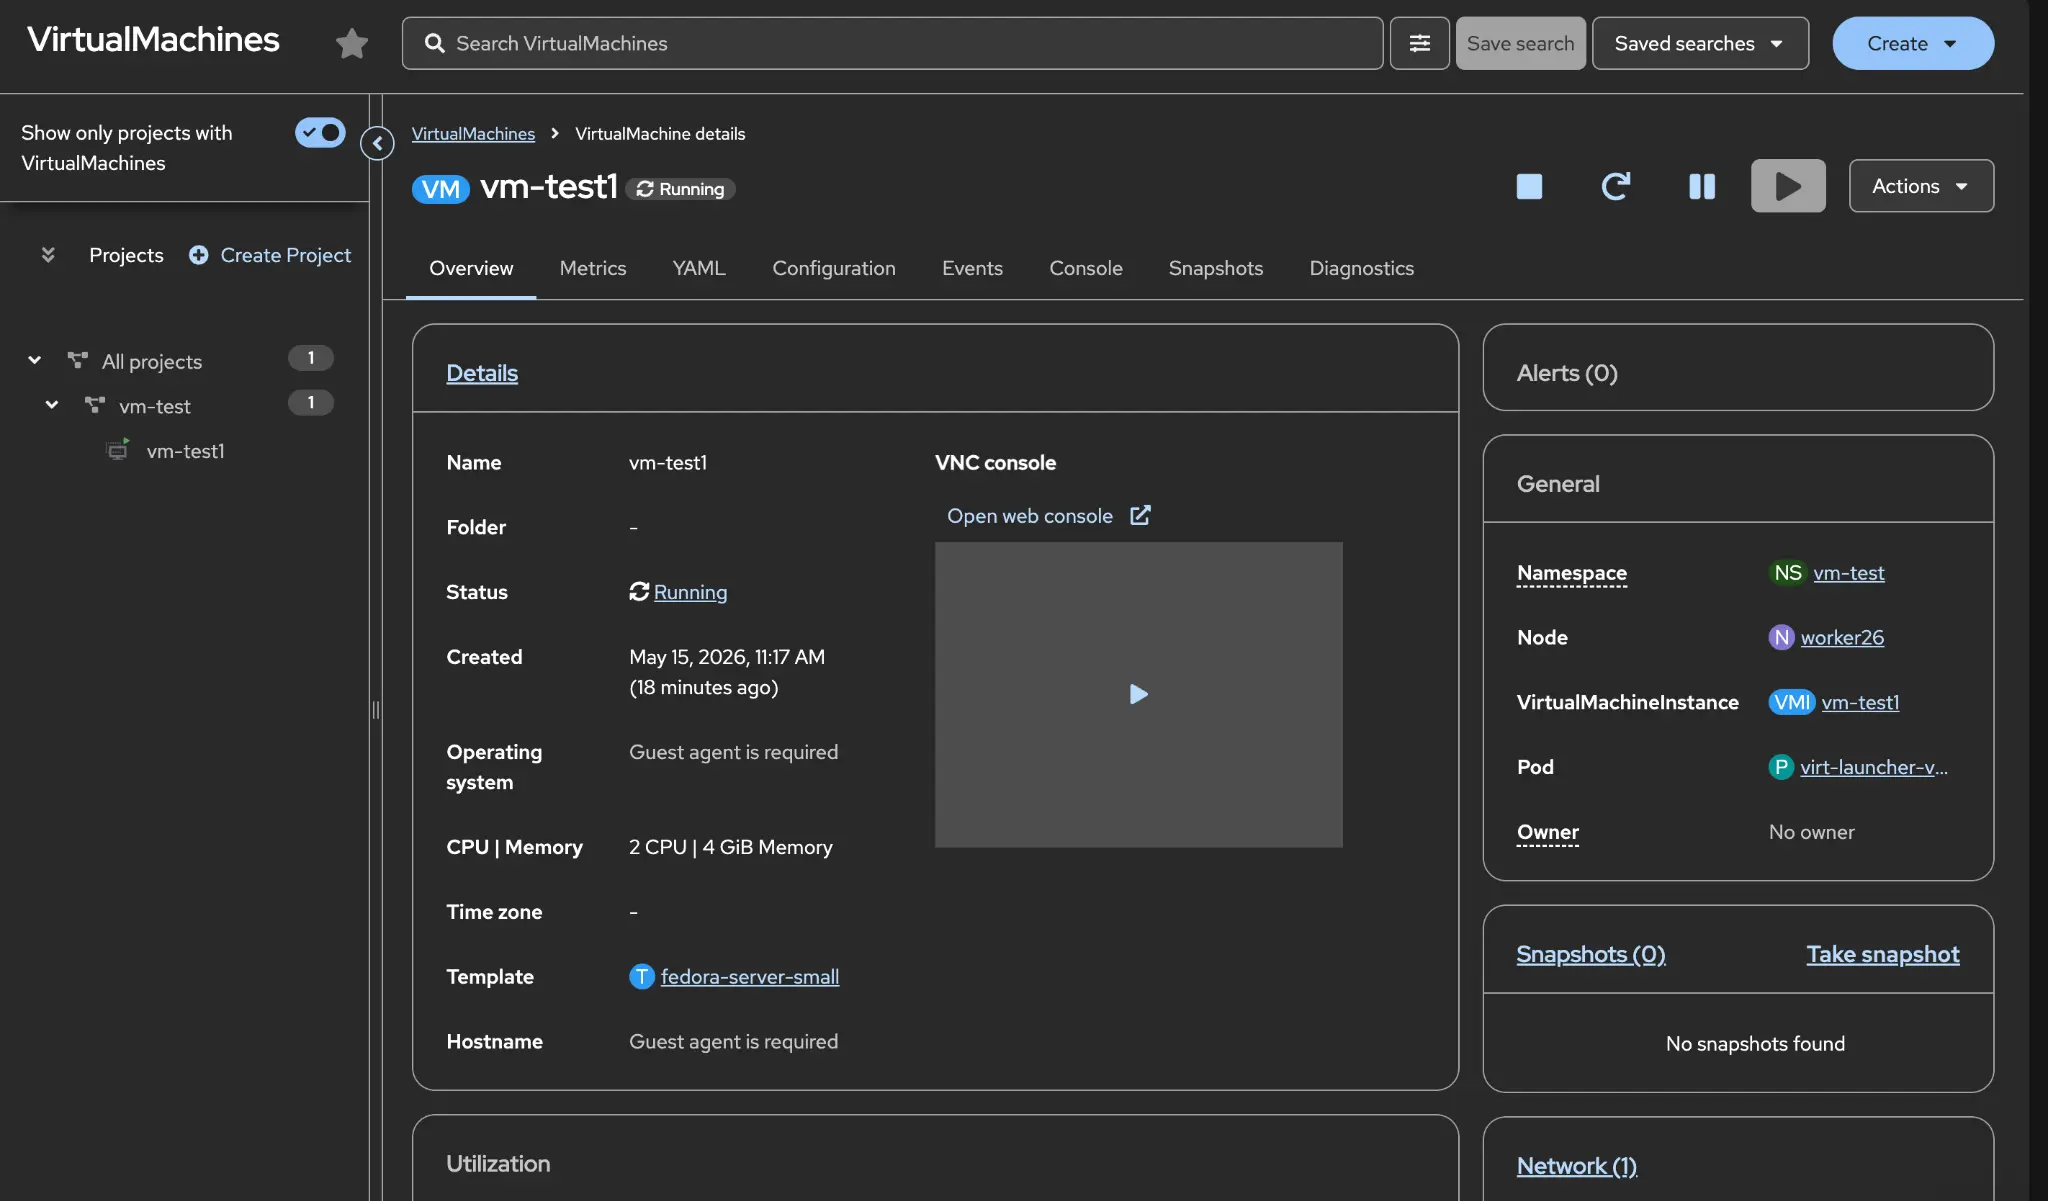
Once the discovery process wraps up, navigate to the new class list to see a clean, one-to-one mapping (one row for every VM in your cluster). If you filter for Running status, you can cross-verify the live data—like CPU count, memory, and node location—directly against the output of an oc get vm command. One of the best parts? You'll notice that your CMDB remains uncluttered by Kubernetes-specific CI rows.
You can test the lifecycle: Stop a VM, and the status in ServiceNow flips to Stopped while the record persists. Delete it, and the install status updates to Absent. It's a robust, automated way to keep your inventory in sync with reality (figure 5).
Check out section 7.2 of the runbook for the full verification checklist.
Tips and best practices
While VM identity is technically tied to the UID, it's often much smarter to rely on the durable cluster, namespace, and name tuple for identification, as it's worth reviewing what makes the most sense for your specific organization.
I also prefer keeping the cluster, namespace, node, and pod context as queryable string columns rather than generating a mess of separate Kubernetes CIs.
Finally, make sure to disable any stock Kubernetes schedules so you don't end up with duplicate entries for your virt-launcher pods.
Conclusion
By following these steps, you've successfully built a custom VM CI class, defined an independent identifier, and launched a Cloud Resource pattern on a solid schedule. The result is a clean inventory with a one-to-one mapping for every VM. You can see the success for yourself: The new class list matches your live environment perfectly with oc, all without any unnecessary Kubernetes CI clutter.
Next steps
To reproduce this yourself, clone and follow the full runbook on GitHub. If you have not done the MID server setup yet, start with How to set up Red Hat OpenShift Virtualization ServiceNow CMDB discovery: Deploying an in-cluster MID server.
To explore the platform further, try Red Hat OpenShift Virtualization.
Last updated: July 6, 2026