Page
Build the Node.js and React application
In this lesson, you will create a simple full-stack application. We will use a Node.js backend to serve the static files generated by a React build.
Prerequisities:
- A basic understanding of how to traverse a Linux file system.
- An understanding of how to create and edit Linux text files.
- Podman Desktop installed
- Lesson 1 completed
- A local folder on your machine to store your code (e.g.,
~/nodejs-dev).
In this lesson, you will:
- Configure a Node.js development container using Podman.
- Initialize a React project inside the container.
- Build your application for production.
The core application components
The application you are building consists of three main parts:
- The Front end: A React application that is built into static HTML, JavaScript, and CSS files.
- The Back end: A Node.js server using the Express framework to serve those static files and handle API requests.
- The Process Manager: A systemd unit file that ensures the Node.js server starts automatically when the OS boots.
Step 1: Build and utilize a Node.js container-based Red Hat developer environment
Let's start by creating a directory nodejs-dev where we’ll store all the files we’ll use for this project. You’ll do this on the computer on which you are running Podman Desktop.
We’ll place the following contents in the file containerfile in our nodejs-dev project directory:
# Node.js Application Developer Container
# Use the official Red Hat Universal Base Image 10 as the foundation.
FROM registry.access.redhat.com/ubi10/ubi:latest

# Good practice to label your images.
LABEL maintainer="Your Name <youremail@example.com>" \
      description="Node.js and React development environment based on UBI 10."

# Install Node.js and some other useful packages:
#     nodejs24 - Latest version of Node.js supported for RHEL
#     ncurses  - makes it easy to clear the screen
#     procps   - provides process management and resource utilization info
#
# Note: DNF will pull RHEL 10 packages (not UBI) because Podman shares
# the host's  subscription
# We clean up the dnf cache to keep the image size down
RUN dnf install -y \
        nodejs24 \
        ncurses \
        procps \
    && dnf clean all

# Set Node.js 24 as default using alternatives
RUN alternatives --install /usr/bin/node node /usr/bin/node-24 24 && \
    alternatives --install /usr/bin/npm npm /usr/bin/npm-24 24 && \
    alternatives --install /usr/bin/npx npx /usr/bin/npx-24 24

# Set the working directory to the new user's home.
WORKDIR /app

# Expose port 8080. This makes the port available for mapping to the host,
# which is necessary for testing web applications when running in container
# mode.
EXPOSE 8080

# Set the default command. When the container starts, it will drop you into a Bash shell.
CMD ["/usr/bin/bash"]
With the file nodejs-dev/Containerfile in place, we’re ready to build our app development container.
- Create the
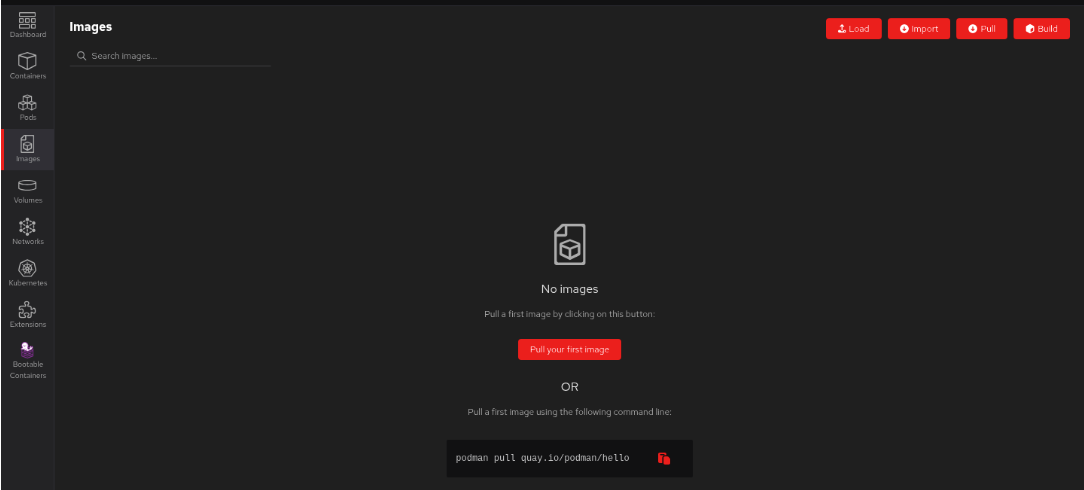
sub-directory nodejs-dev/bootc/appon your local desktop using your preferred native desktop tools. We’ll use this directory as the central repository for our application files. You’ll be able to edit files either using the editors in your container or by using your favorite desktop text editor or IDE. Either way, they will be accessible from your container. Open Podman Desktop on your local machine and go to the Images section in the left navigation (Figure 1):

Figure 1: Podman Desktop Images section. - Select Build in the top right corner.
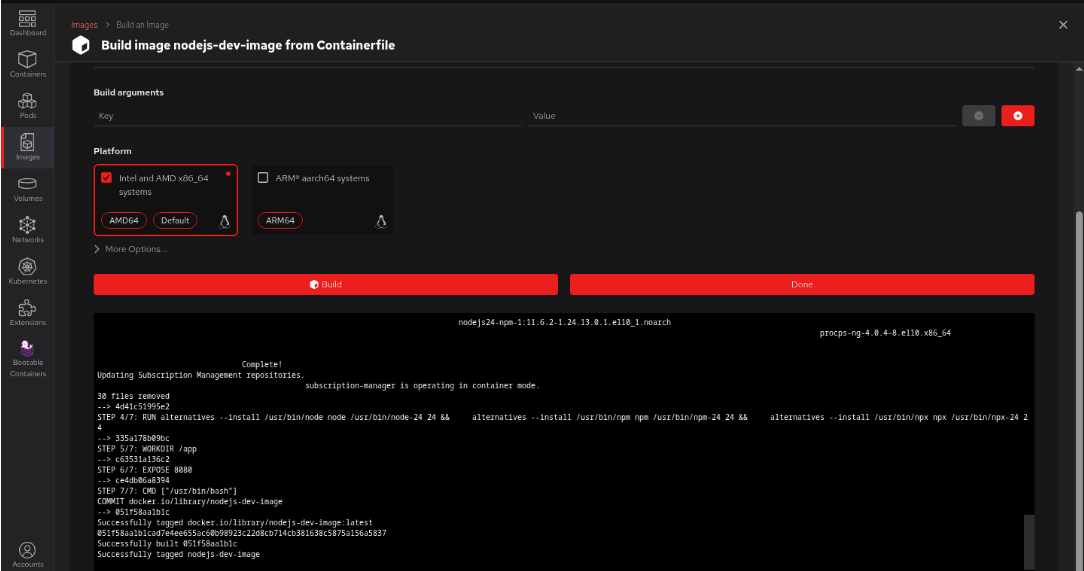
Specify the
Containerfilepath for the file we just created, specify the image name,nodejs-dev-image, and specify a platform. On my laptop, I chose the Intel and AMD x86_64 image option for my RHEL-based laptop (Figure 2).
Figure 2: Podman Desktop Build screen. Now select Build at the bottom. It will build your new image as shown in Figure 3.

Figure 3: Podman Desktop Build Process screen. - Select Done.
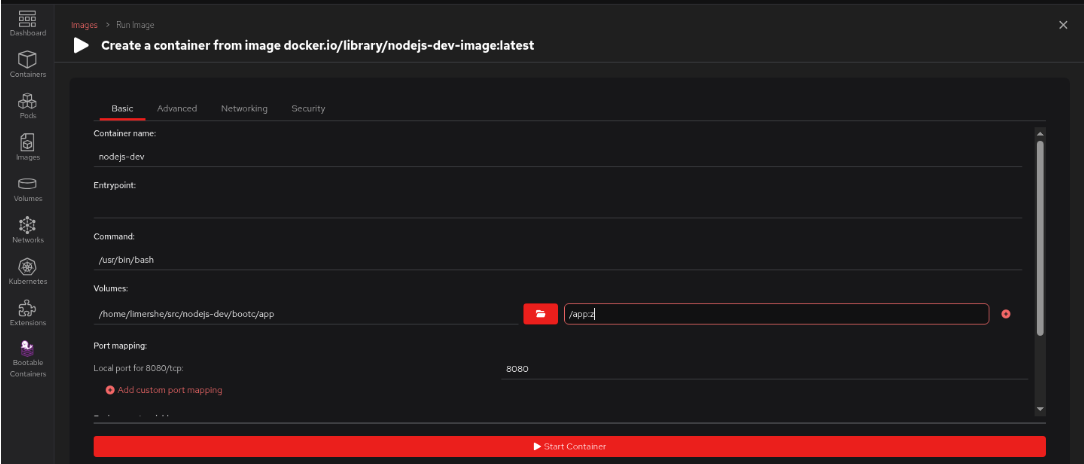
Back on the main Images section, select the right arrow next to
nodejs-dev-imageimage to start the image (Figure 4).
Figure 4: Podman Desktop Images screen with images listed. Give the container the name
nodejs-devand, under Volumes, select the subdirectory we created earlier,nodejs-dev/bootc/app, as the Path on the Host and specify/app:zas the Path inside the container (Figure 5).
Figure 5: Podman Desktop Create Container screen (basic tab). Figure 5: Podman Desktop Create Container screen (Basic tab).


Note
The :z option will not show up in the actual path in the container. It’s a directive to Podman to allow multiple containers to share the volume content with the local host. In this case, your desktop. You achieve this by re-labeling the directory to "container_t" on SELinux-enabled Linux systems. It is only necessary if our desktop is a Linux system such as RHEL. Do not select Start Container as we still have an additional step to take.
Select the Security section at the top right of the form and scroll down to Specify user namespace to
use:and enterhost. This keyword will map the root user in your container to your local system user on the machine running Podman. That way, you can share files between your native desktop environment and your new development container. An example is Figure 6: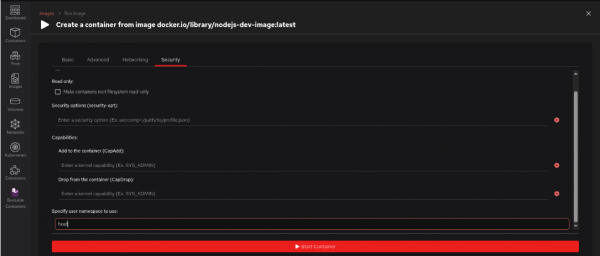
Figure 6: Podman Desktop Create Container screen (Security tab). - Select Start container at the bottom. We now have a running container named
nodejs-dev. Go to the Containers section, double-click on the container, and select Terminal. For the next part of this learning path, our examples assume we’ll be working from a terminal screen (Figure 7).
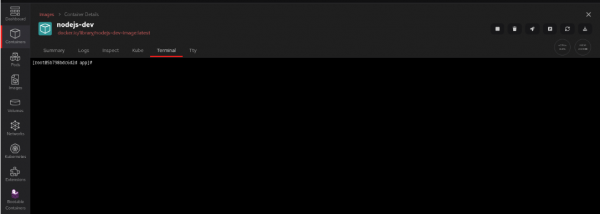
Figure 7: Podman Desktop Container Details screen (Terminal tab).

Step 2: Create the application
Let’s start creating our Hello World React application.
cd /app
npm init vite@latest . -- --template react
The npx command will prompt you for input as follows:
- Need to install the following packages:
create-vite...→ Type y and Enter. - Install with
npmand start now? → Select No.
We next need to install some additional dependencies:
npm install
npm install express
Once we’ve created our HelloRHEL project, we enter the source directory for the project:
cd srcThere will be an existing file called App.jsx in this directory. Remember that you can use your native desktop IDE to edit this file (nodejs-dev/bootc/app/src/App.jsx) or use an editor within our development container that is running RHEL where you can find the file as app/src/App.jsx.
Replace the file with the following content:
import './App.css'
function App() {
return (
<div style={{ textAlign: 'center', marginTop: '50px' }}>
<h1>Hello from Node.js, Vite, and RHEL 10!</h1>
</div>
);
}
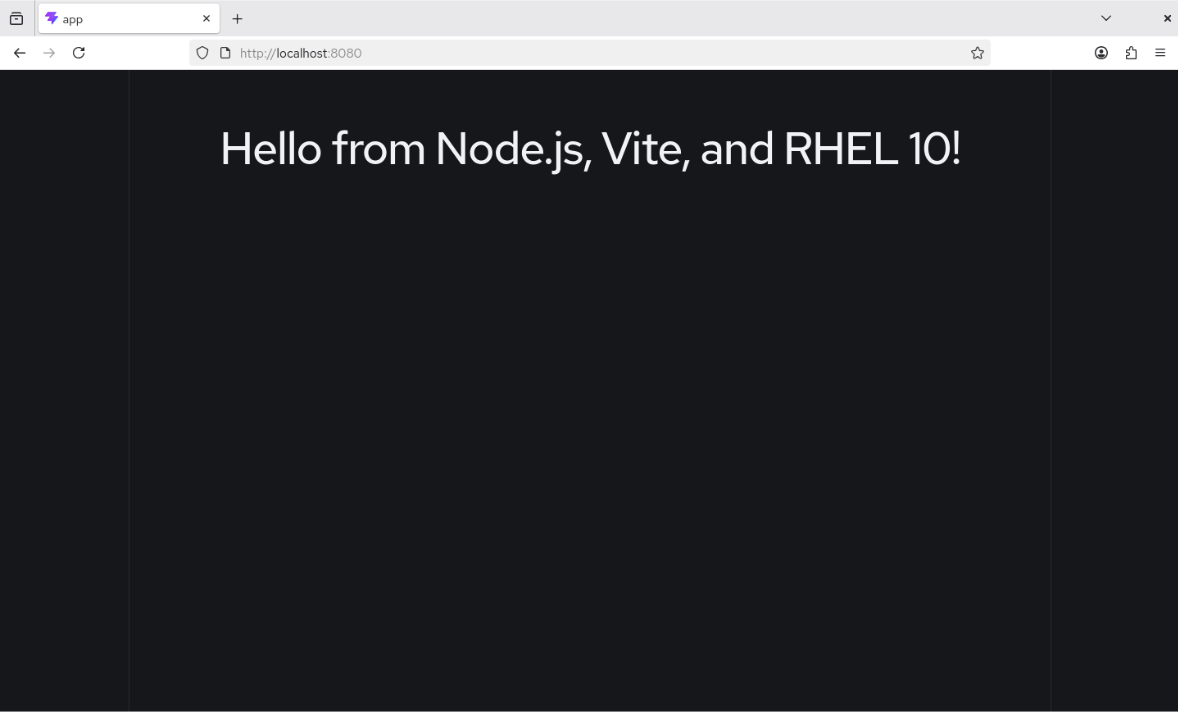
export default App;We can test our application now by running:
npm run dev -- --host --port 8080Now use your browser to connect to:
http://localhost:8080The Hello World will be displayed in your browser (Figure 8).
We now need to compile our application for production use:
Stop the server (Ctrl+C).To create the dist/ folder, run the following command:
npm run buildWhen your build successfully completes, you’ll see output that looks similar to:
> temp@0.0.0 build
> vite build

vite v7.3.1 building client environment for production...
✓ 30 modules transformed.
dist/index.html                   0.45 kB │ gzip:  0.29 kB
dist/assets/index-COcDBgFa.css    1.38 kB │ gzip:  0.70 kB
dist/assets/index-BqM8j2dI.js   193.31 kB │ gzip: 60.70 kB
✓ built in 929ms
Create a production server
Create the server.js file depending on where you wish to host it:
From desktop
Within the container
import express from 'express';
import path from 'path';
import { fileURLToPath } from 'url';

const app = express();
const __dirname = path.dirname(fileURLToPath(import.meta.url));

// Serve static files
app.use(express.static(path.join(__dirname, 'dist')));

app.get(/^(?!\/api).+/, (req, res) => {
  res.sendFile(path.join(__dirname, 'dist', 'index.html'));
});

const PORT = 8080;
app.listen(PORT, '0.0.0.0', () => {
  console.log(`Validation Server: Listening on port ${PORT}`);
});
At this point, we’re ready for Lesson 3, where we’ll build the image mode for RHEL image used for production environments.