Page
Install the front-end application on your OpenShift cluster
Prerequisites:
- The Developer Sandbox and your local laptop to deploy the front end and the database, respectively.
- Podman or Docker installed on your local machine.
- A no-costDeveloper Sandbox account; follow these instructions to set up your sandbox if you haven't already done so.
- OpenShift command-line interface (CLI) installed on your local machine.
Install the front-end application on your OpenShift cluster
The first step in your process of connecting services across different environments, is to prepare your environment.
- From the Developer Sandbox dashboard, click the Try it button on the OpenShift card. This opens the OpenShift web console.
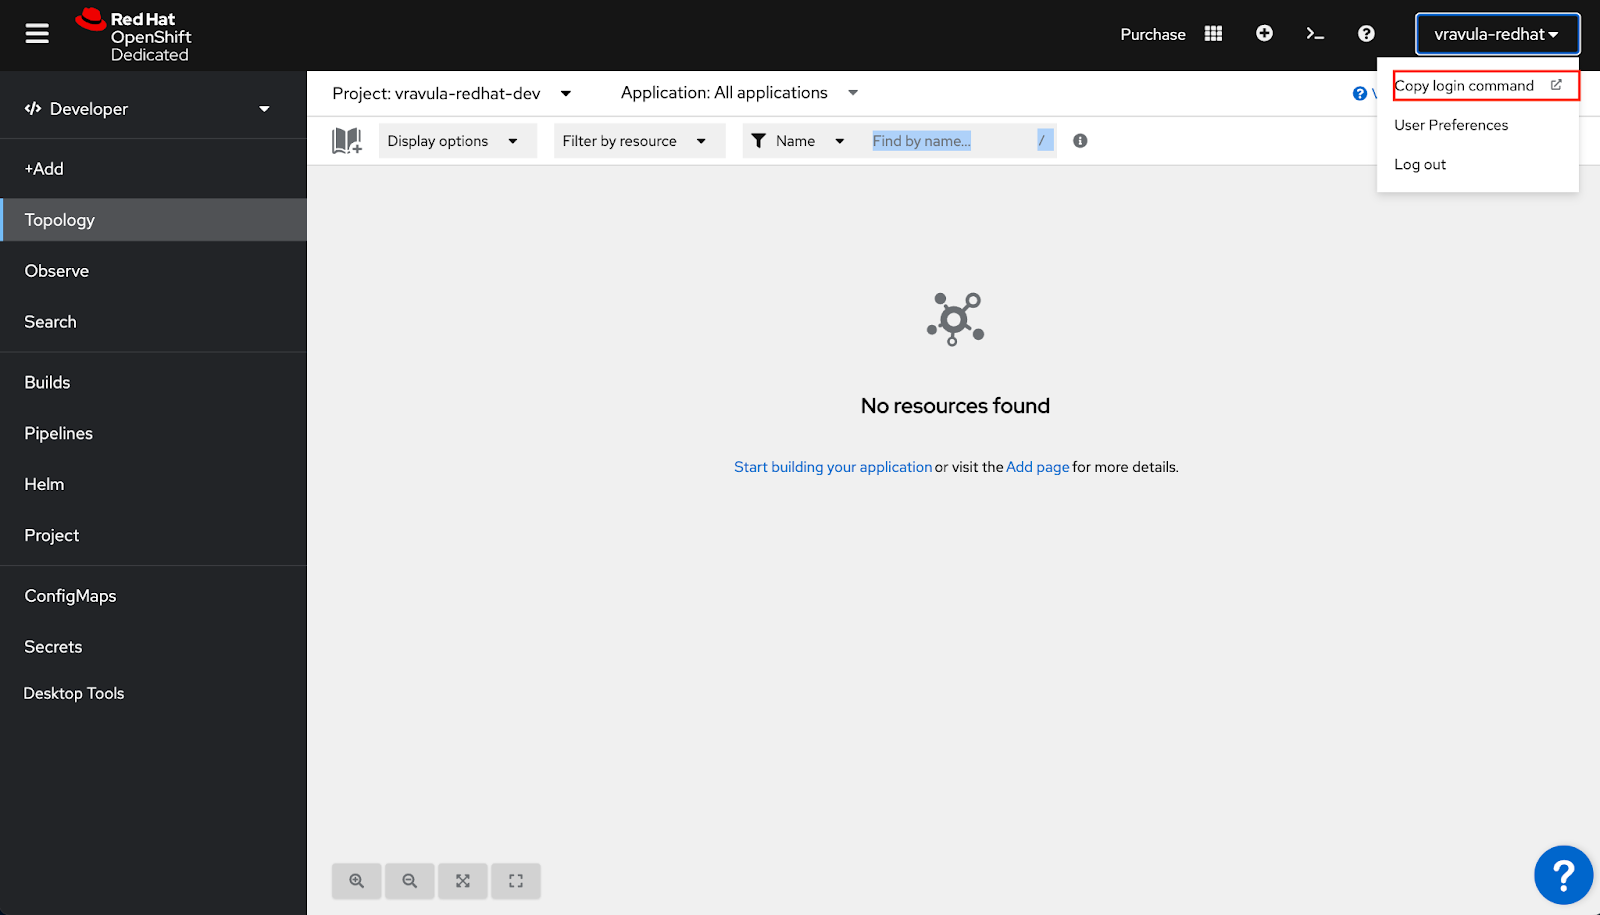
- Click your user name, and click Copy login command (Figure 2).
- Click the Display Token link. Copy the command under the Log in with this token section, and paste it into your terminal to log in to the OpenShift cluster (Figure 3).

Create a new project namespace, and deploy the front-end application to your new project using the following commands:
oc new-project patient-portal-app
oc apply -f https://raw.githubusercontent.com/rpscodes/Patient-Portal-Deployment/main/patient-portal-frontend-deploy.yaml
Get the OpenShift route URL for the front-end application. Copy and paste that URL into the web browser. The URL will look somewhat similar to the one below:
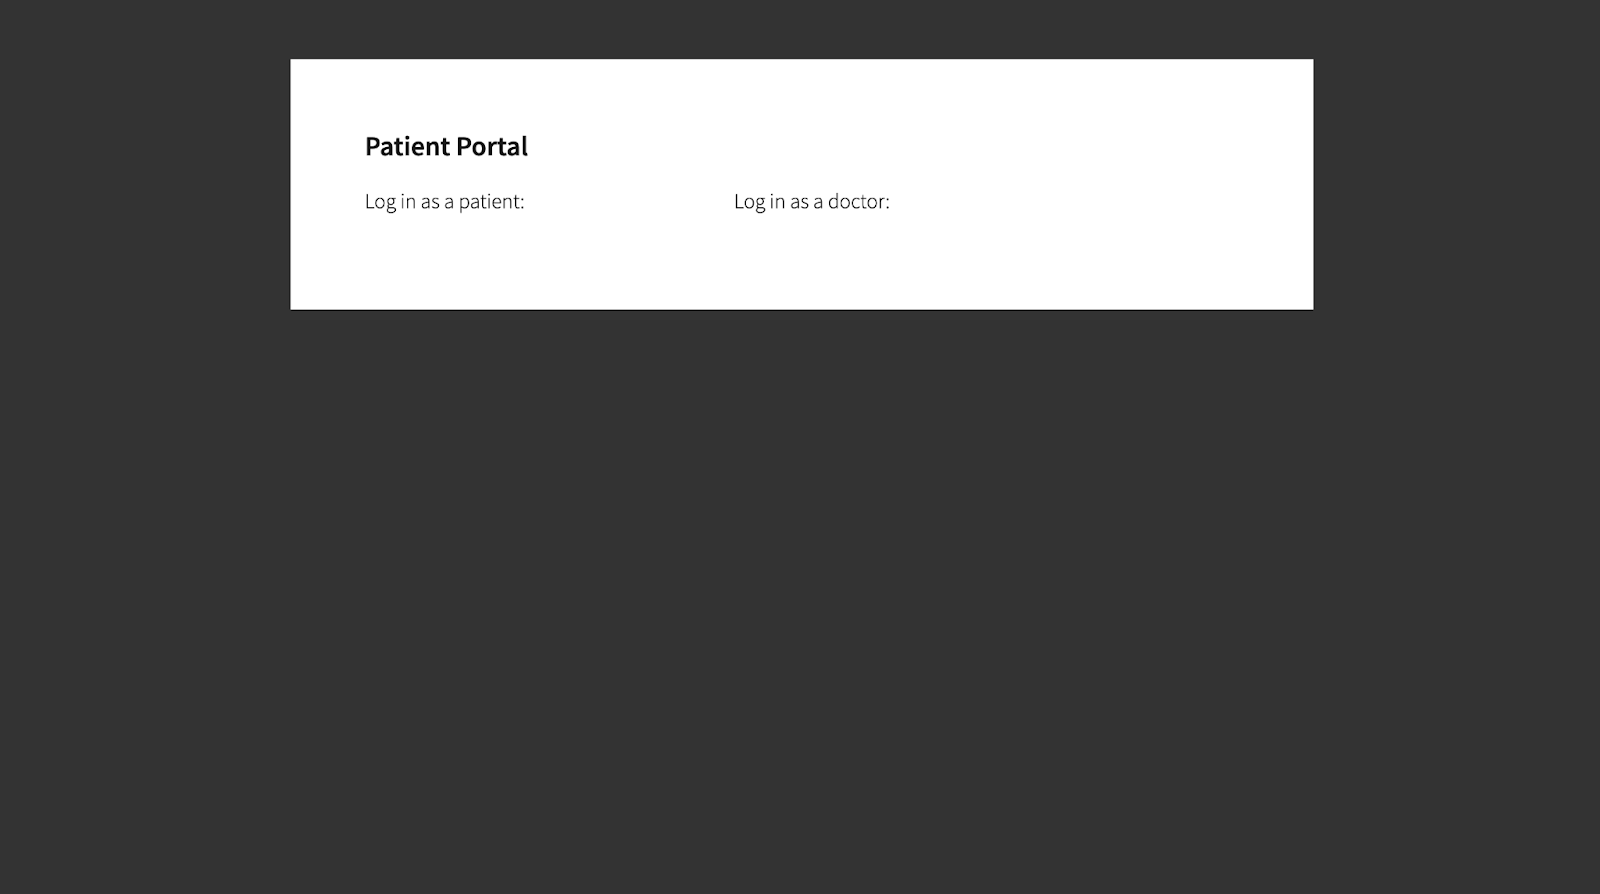
oc get route patient-portal-frontend -o jsonpath='{.spec.host}{"\n"}'patient-portal-frontend-vravula-redhat-dev.apps.sandbox-m4.g2pi.p1.openshiftapps.comYou should now be able to see the front end of the patient portal (Figure 4). Patient and doctor names are not currently visible because we have not established the connection with the database.
Install the database on your laptop
The database contains a list of patients and doctors that will show on the patient portal front-end page once we make the connections using Red Hat Service Interconnect. In a real-world scenario, the database could be on a virtual machine, private data center, or other bare metal environment.
In this example, you will see how to use either Podman or Docker on your local laptop or computer to deploy the database. The following steps assume that you have already installed Podman or Docker locally.
Run the database on your local environment.
To deploy the database on Mac M1:
docker run --name database --detach --rm -p 5432:5432 quay.io/redhatintegration/patient-portal-database-arm64To deploy the database on AMD64 or x86 environments, for example, a Mac with an Intel chip:
docker run --name database --detach --rm -p 5432:5432 quay.io/redhatintegration/patient-portal-databaseTo deploy the database with Podman, for example, on a Red Hat Enterprise Linux or Fedora machine:
podman run --name database --detach --rm -p 5432:5432 quay.io/redhatintegration/patient-portal-databaseConnect the database to the front end using Red Hat Service Interconnect
Now, your challenge is to enable the patient portal front end deployed on the Developer Sandbox to connect to the database. For obvious reasons, you do not want to expose the database over the public internet, so you need to set up a private, secure link between the Developer Sandbox instance and the database on your computer.
This can be accomplished with a VPN between the public cloud and the data center. However, VPNs can be hard to set up and require deep networking expertise. It also requires you to request the network admins and go through a time-consuming approval process.
Red Hat Service Interconnect, on the other hand, creates a dedicated Layer 7 service network, and it is a lot easier to set up. It lets you establish secure interconnection with other services and applications in different environments without relying on network specialists. With Service Interconnect, you can create secure virtual application networks without the cumbersome overhead, complexity, and delays that stem from traditional connectivity solutions.
Follow these steps to connect the database to the front end using Red Hat Service Interconnect:
Install Red Hat Service Interconnect by running the below command from the terminal of your local computer:
curl https://skupper.io/install.sh | sh -s -- --version 1.9.2Export the path only if suggested in the output.
export PATH="/Users/vravula/bin:$PATH"Double-check that you are still logged in to the OpenShift cluster from your local computer by running the following command:
oc projectIf you see output similar to what is below, you can proceed. Otherwise, follow the process from steps 1 and 2 in the first section to log in.
Using project "user-dev" on server "https://api.sandbox-c4.k1pi.p1.openshiftapps.com:6443Initialize Service Interconnect in your sandbox environment namespace. Run the following command from the terminal of your local computer:
skupper init --enable-console --enable-flow-collector --console-auth unsecuredYou should see an output similar to the one below:
Skupper is now installed in namespace 'user-dev'. Use 'skupper status' to get more information.Service Interconnect provides observability out of the box and comes with its own console. The following command should display the URL for the console:
skupper statusYou should see an output similar to the one below:
Skupper is enabled for namespace "username-dev" in interior mode. It is not connected to any other sites. It has no exposed services. The site console url is: https://skupper-username-dev.apps.sandbox-m4.g2pi.p1.openshiftapps.com- Copy the site console URL and paste it in a new browser tab. You should be able to see the sandbox cluster namespace displayed in the console (Figure 5). At the moment, there is not a lot to see because we have only installed one side of the service network.

Now that you have established a service network, with only one site at the moment, you can expose services from a local machine on the service network. A service network enables communication between services running in different network locations or sites. For example, if you run a database on a server in your data center, you can deploy a front end in a cluster that can access the data as if the database was running in the cluster.

