The Coderland booth at the recent Red Hat Summit was all about serverless computing as implemented in the Compile Driver. If you haven't gone through that example (you really should), that code creates a souvenir photo by superimposing the Coderland logo, a date stamp, and a message on top of an image from a webcam. We thought it would be fun to build a Raspberry Pi version for the booth so we could offer attendees a free souvenir. Here's a look at the finished product:
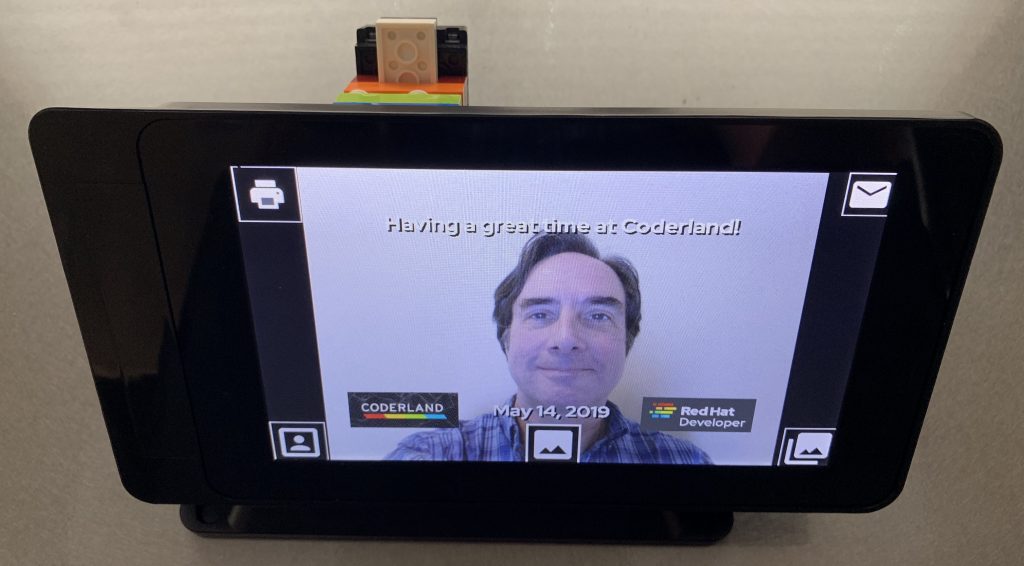
The case shown here incorporates the Raspberry Pi, a touchscreen, and a camera. As you can see, this setup produces results similar to the Java code inside the Compile Driver.
Parts list
Here's what I used to build everything:
- A Raspberry Pi 3B+ (the latest model)
- The official Raspberry Pi touch screen
- The official Raspberry Pi camera module
- A SmartiPi Touch case to hold the three things above
- A Tzumi PocketJuice 8,000 mAh portable battery pack to power everything
- A Canon Selphy CP1300 printer
With these things combined, we had a handheld photo booth to take pictures of attendees in front of a backdrop that made it look like they were riding the Compile Driver. A nice ending to a conversation about serverless computing. We also had people stop by the booth to ask "what is that thing?" Whatever you do with it, people love the Raspberry Pi.
Assembling the hardware
The first task was assembling the case. Fortunately, the folks at Smarticase provide a YouTube video that covers everything. You bolt the touch screen into the case, then attach the Raspberry Pi. An extra-long camera cable is included to connect the two. The Pi can be fastened directly to the case or held in place with a bracket. I went with the bracket approach because that makes it easy to take the Pi out and change its SD card. Finally, the case includes a small bracket to hold the camera module. This is attached to the case with Lego bricks:
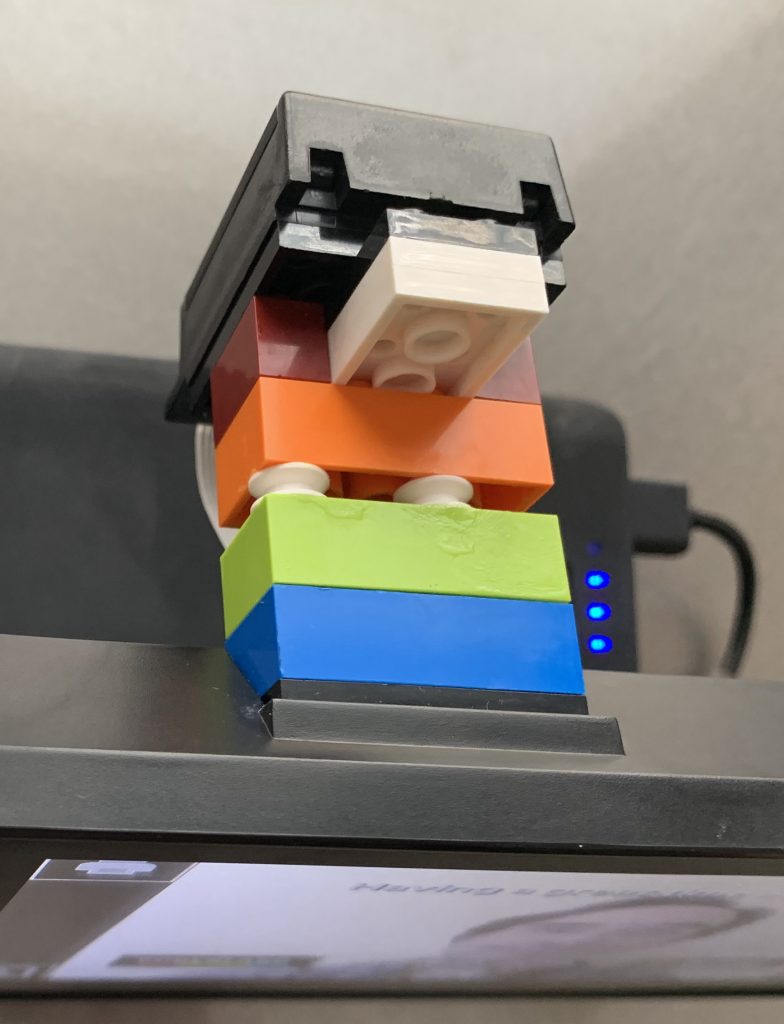
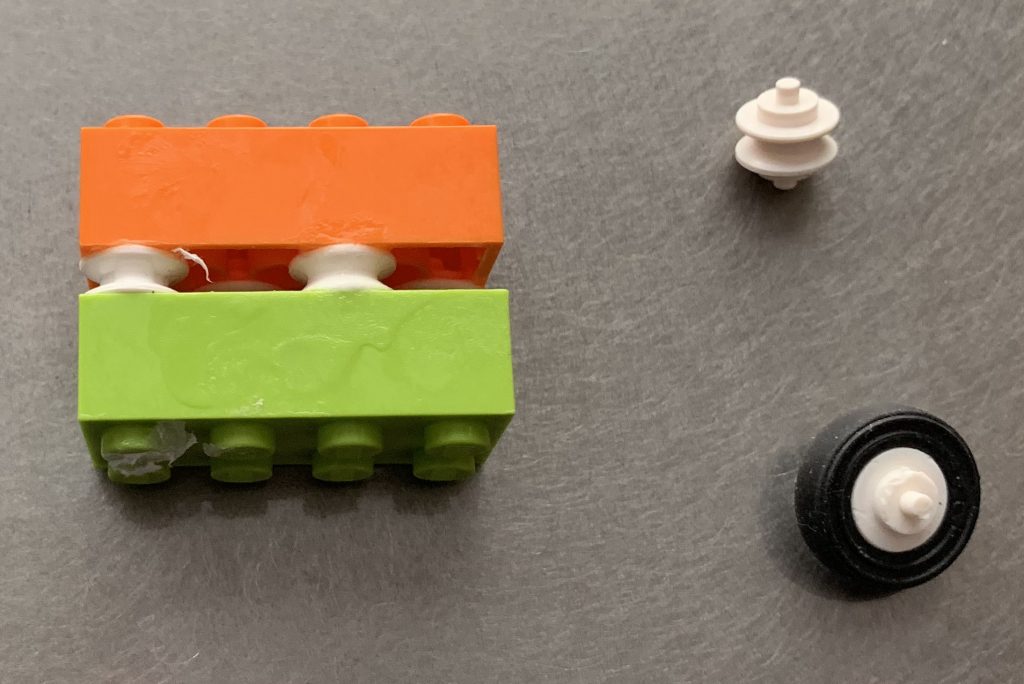
A minor Lego hack: I needed to reverse the direction of the studs on the blocks so that the camera faced away from the screen. (Turns out the nubby things on top of a brick are called studs and the holes on the bottom are called tubes. You learn something every day.) Thanks to this post from The Brick Blogger, I found a straightforward way to do it. I took some Lego wheels, removed the rubber tire portions, then used the wheels to connect the two bricks. To make sure this stayed in place, I superglued everything together:
Software
With the hardware built, I installed the latest Raspbian to a new SD card. The card I used was 32GB, although an 8GB card (if you can find one that small) would have plenty of space. Next, I cloned the repo TouchSelfie-extended, a fork of another photo booth project. There are quite a few RPi photo booths out there, but this one was the best match for what we needed. Speaking of which, I should probably mention our requirements. We needed the photo booth to:
- Take pictures and overlay various things on those images.
- Let people email their photos to themselves.
- Display a privacy notice to let people know how we use their information (spoiler: we don't).
- Use the portable photo printer to create souvenir pictures.
As you'd expect for Raspberry Pi software, the TouchSelfie-extended package is written in Python. Once you've cloned the repo, run the setup.py script to enable the options you want, such as emailing, printing, or uploading the photos you take.
Setting up the overlay image
The setup.py script automates some of the configuration, but there are other values you need to set in the file configuration.json. To overlay an image on the photos you take, specify a value for logo_file:
"logo_file": "/home/pi/Documents/TouchSelfie-extended/scripts/Summit Wednesday Overlay.png",
With this value set, the package superimposes the file Summit Wednesday Overlay.png on top of the photo.
Confession: The overlay image included the greeting, a hardcoded date, and the Coderland and Red Hat Developer program logos. The original Java version generated those things separately, but your author doesn't have the Python skills to work such (Image)Magick.
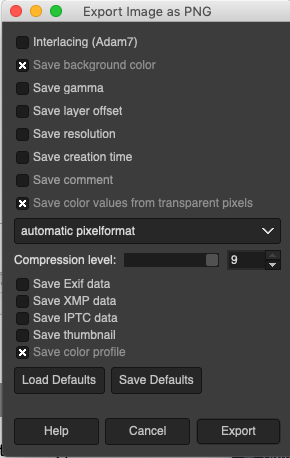
It took a while to figure out the constraints, but it turns out you can't store any EXIF data in the PNG file you want to use as the overlay. Here are the GIMP settings that work:
Enabling email
To enable email, I had to jump through some Google/OAuth hoops to get the credentials that allowed the code to send images via my Gmail account. Those are stored in a file named google_credentials.dat. The rest of the email setup involved straightforward changes to the configuration file:
"email_body": "We're glad you stopped by the booth at Red Hat Summit 2019. Here's your souvenir photo - Enjoy!\n",
"email_subject": "Thanks for visiting Coderland!",
"enable_email": true,
"gmail_user": "xxxxxxxxxxxxxxxxxx@gmail.com",
Creating a privacy notice
With email set up, we needed a privacy notice that let attendees know that their data would only be used to send the photo. I added a Tk Label to the existing Tk Checkbox widget. I also changed the logic so that the photo was not sent unless the user clicked the checkbox. The onscreen keyboard looked like this:
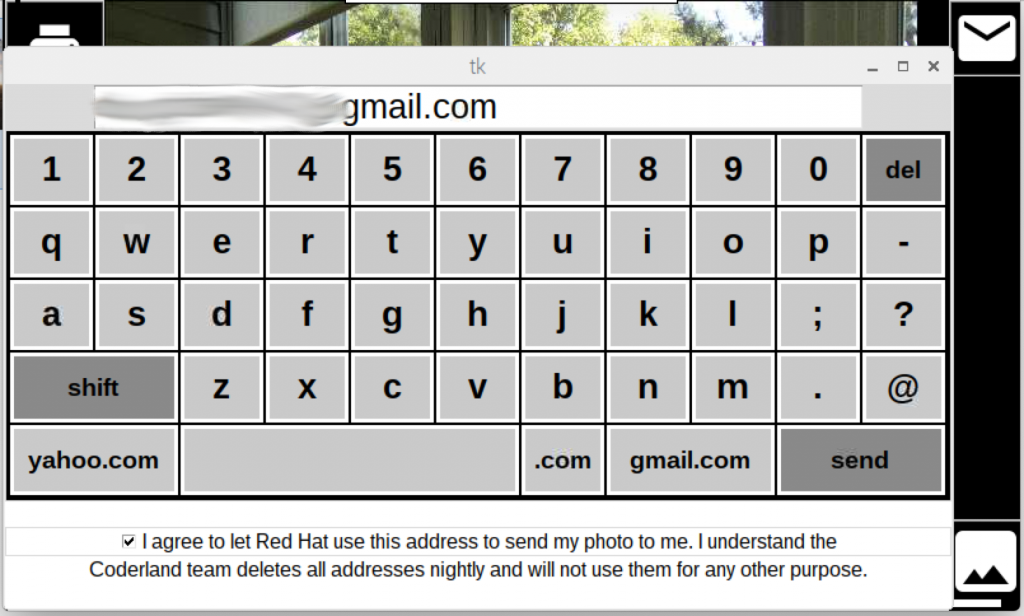
If an attendee typed their email address with the onscreen keyboard, clicked the checkbox, and clicked send, the photo made its way to their inbox. (No doubt shared with all their friends and loved ones upon arrival.)
Configuring the printer
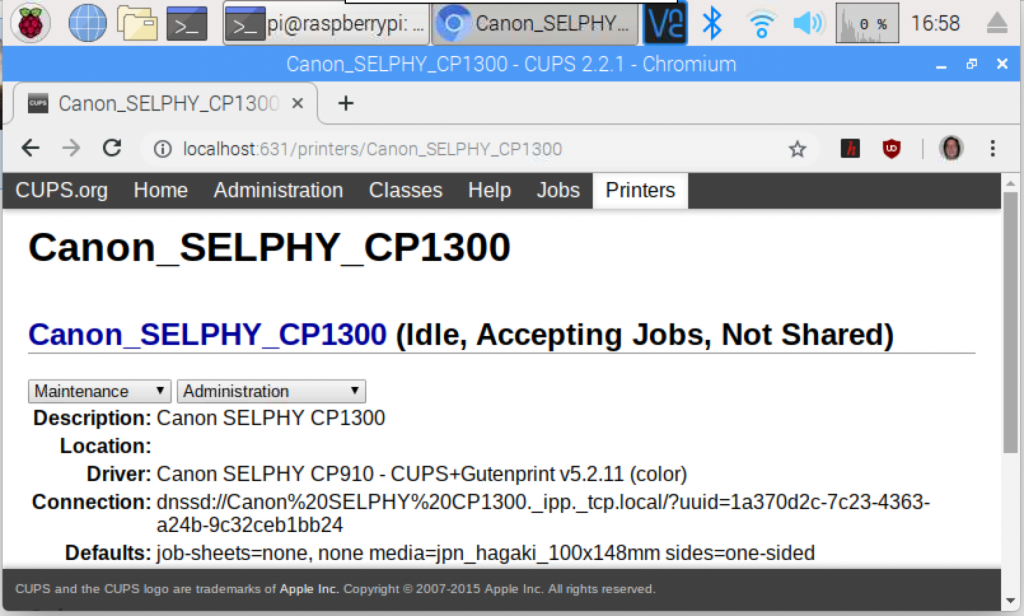
Getting the printer working required setting up CUPS on the Raspberry Pi. Once set up, the CUPS admin console found the printer on our wireless network:
I couldn't get the print command built in to the original code to work, so I just replaced it with a system call to lp:
printCommand = 'lp -o raw -o media=postcard -d Canon_SELPHY_CP1300 ' + self.last_picture_filename;
os.popen(printCommand);
The hassle here was that specifying the paper size with media=postcard is completely undocumented. The values a4, letter, and legal are the only ones mentioned in the lp man page. The images from the Raspberry Pi wouldn't print correctly until I found the postcard setting in the source code of another printer driver. Just one of those unexpected productivity killers that pop up in every project.
The finished product
The final photo booth opens with this interface:
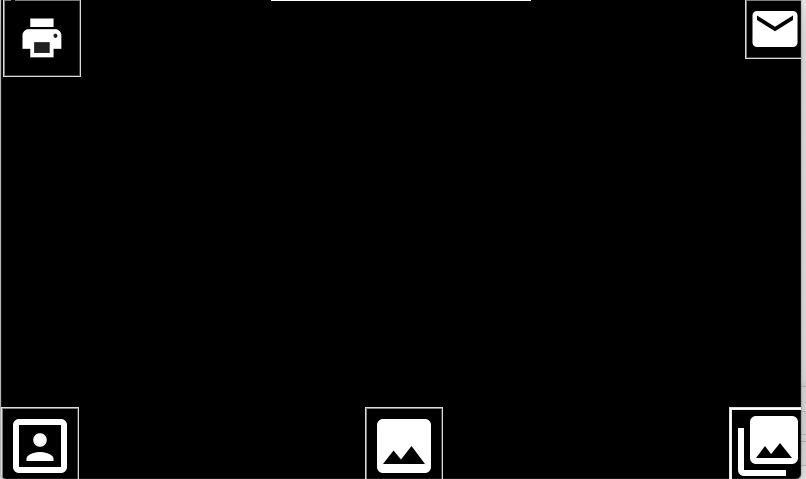
The middle button on the bottom takes the photo. The printer and envelope icons print and email the modified picture, as you would expect. The first image in this post shows you what the interface looks like once you've taken a picture. (FWIW, the buttons in the lower corners allow you to take a collage of photos or generate an animated GIF, but neither of those are printable. A more ambitious programmer would have removed them.)
Summary
As with any Raspberry Pi project, there's an element of astonishment that such small, inexpensive hardware can do something so cool. Total cost for the entire rig, including the printer and power brick, was around US $265 before taxes and shipping. It was fun to have this in the booth at Red Hat Summit, but you could have lots of fun with this at more personal events like parties and weddings. If you build one, let us know how it goes. And send us a picture!
Last updated: February 6, 2024