Attention desktop IDE users: Red Hat Developer Studio 12.9 and the community edition, JBoss Tools 4.9.0 for Eclipse 2018-09, are now available. You can download the Developer Studio bundled installer, which installs Eclipse 4.9 with all of the JBoss Tools already configured. Or, if you have an existing Eclipse 4.9 (2018-09) installation, you can download the JBoss Tools package.
This article highlights some of the new features in both JBoss Tools and Eclipse Photon, covering WildFly, Spring Boot, Camel, Maven, and many Java-related improvements—including full Java 11 support.
Developer Studio/JBoss Tools provides a desktop IDE with a broad set of tooling covering multiple programming models and frameworks. If you are doing container/cloud development, there is integrated functionality for working with Red Hat OpenShift, Kubernetes, Red Hat Container Development Kit, and Red Hat OpenShift Application Runtimes. For integration projects, there is tooling covering Camel and Red Hat Fuse that can be used in both local and cloud deployments.
Installation
Red Hat Developer Studio: Full installation
Download the Developer Studio installer. The download is a single executable JAR file. You will need to have a JDK installed. Then, run the installer like this:
java -jar jboss-devstudio-<installername>.jar
Adding JBoss Tools to your existing Eclipse 4.9 environment
JBoss Tools, which is also known as the Bring-Your-Own-Eclipse (BYOE) option, requires at least Eclipse 4.9 (2018-09), but we recommend using the latest Eclipse 4.9 2018-09 JEE Bundle because then you will get most of the dependencies preinstalled.
Once you have installed Eclipse, you can either find us in the Eclipse Marketplace under JBoss Tools or Red Hat Developer Studio.
Alternatively, for JBoss Tools, you can also use our update site directly:
http://download.jboss.org/jbosstools/photon/stable/updates/
What's new?
Our main focus for this release was on the adoption of Java 11, improvements for container-based development, and bug fixing. Eclipse 2018-09 itself has a lot of new cool stuff, but let me highlight just a few updates in both Eclipse 2018-09 and JBoss Tools plugins that I think are worth mentioning.
Improved OpenShift developer tools
Inner loop for Spring Boot applications
Although Spring Boot applications were already supported by the OpenShift server adapter, the global developer experience has been enhanced. Let’s look at the full workflow.
Bootstrapping your Spring Boot applications
A new generator (wizard) has been added to JBoss Tools. It’s called the Launcher application as it’s based on the fabric8-launcher project. When you launch JBoss Tools, you should see this in Red Hat Central:
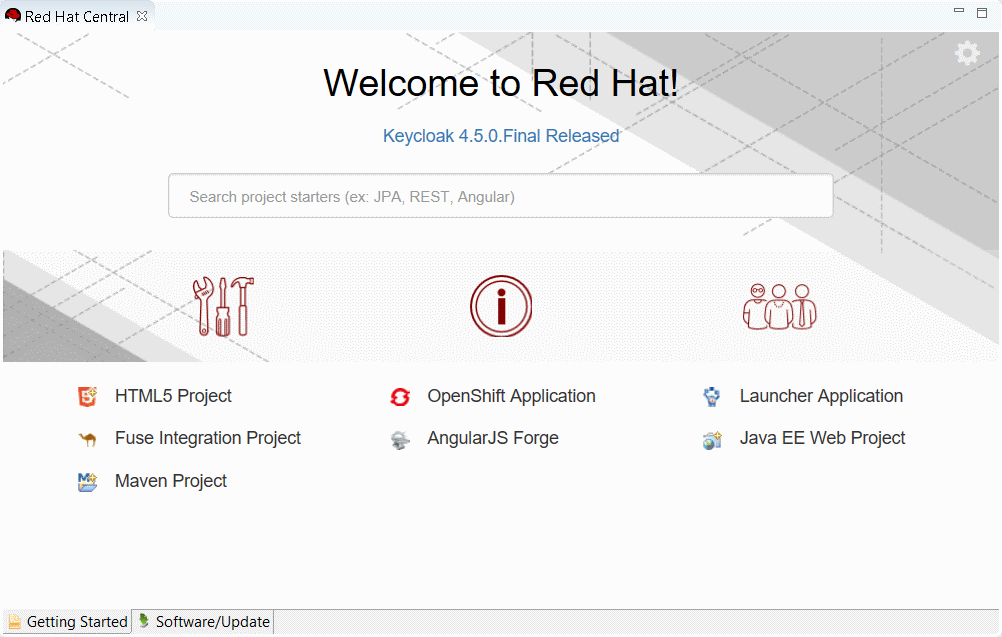
Click on the Launcher application link and the following wizard will appear:
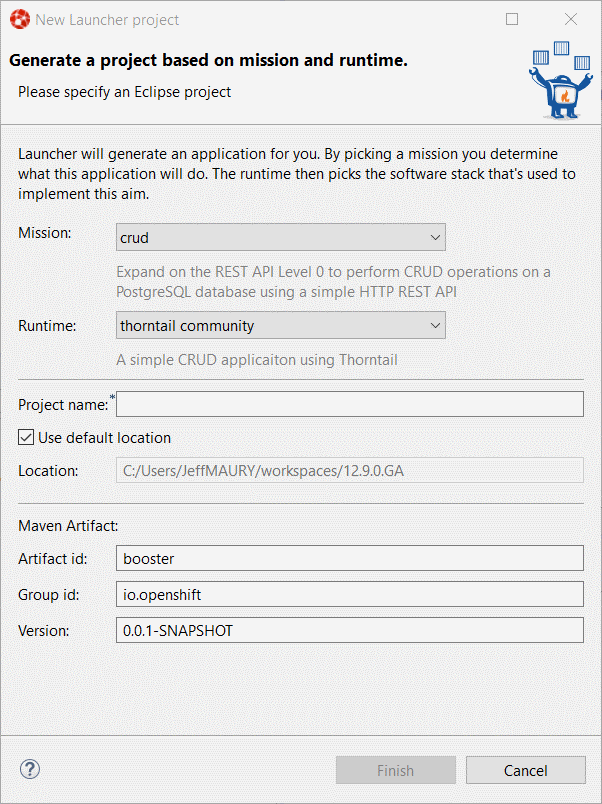
Set the Mission field to rest-http because we want to generate a simple REST application, and set the Runtime field to spring-boot current-community because we want to generate a Spring Boot–based application.
Then set the Project name field to myfirstrestapp and leave the other fields as-is.

Click the Finish button. A new project will be added to your local workspace. It may take some time because Maven will resolve all the Spring Boot dependencies and, thus, need to download them from the Internet.
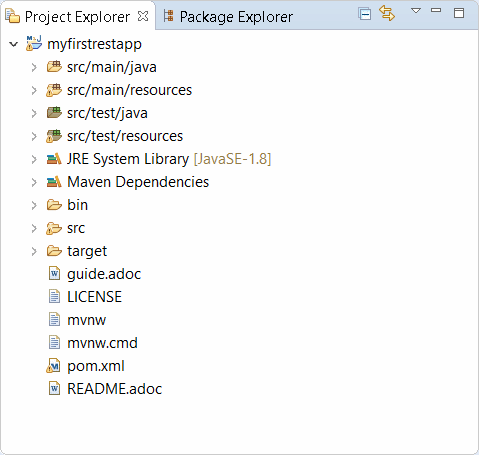
When the project is built, if you expand the myfirstrestapp item in the Project Explorer window, you should see this:
Storing your source code on GitHub
Because OpenShift builder images retrieve code on a Git repository, we first need to push the just-generated application code to GitHub. The following section assumes that you created a repository called myfirstrestapp under your GitHub account.
We will first create a local Git repository for our application code and then push the code to GitHub.
Select the myfirstrestapp project and right-click the Team -> Share project menu item:
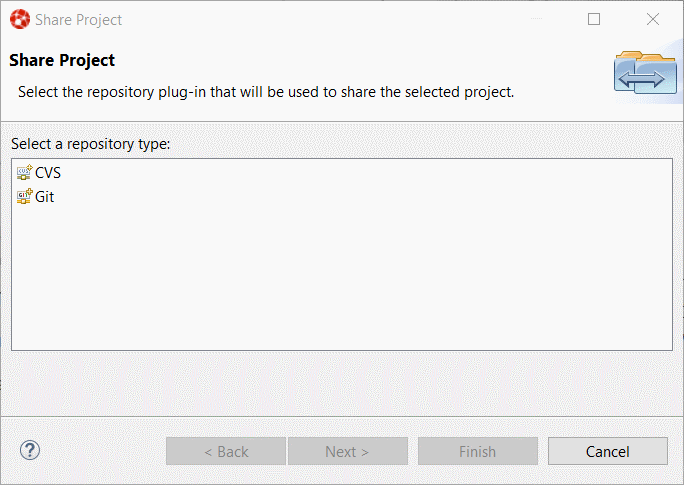
Then select the Git repository type and click the Next button:
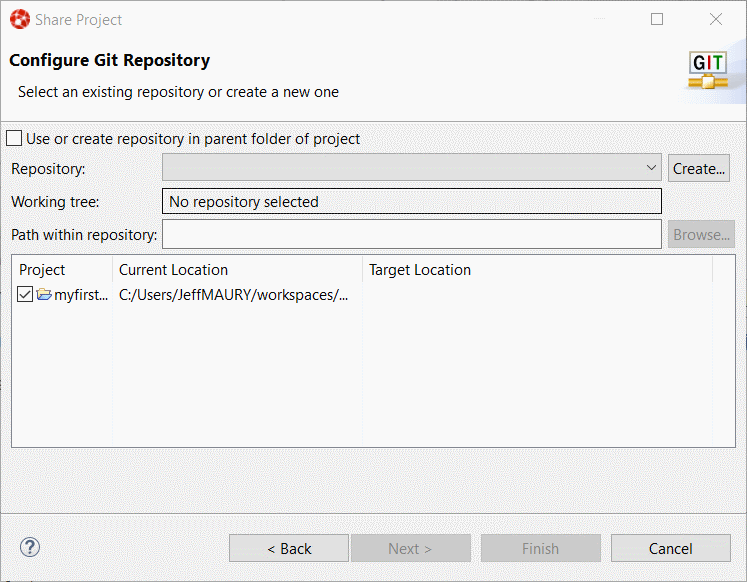
Select the Use or create repository in parent folder of project checkbox and then select the myfirstrestapp project:
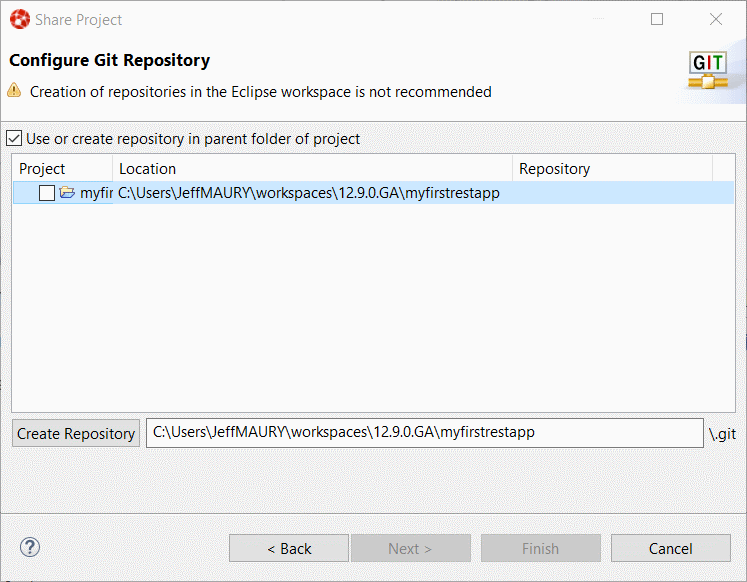
Click on the Create repository button and then the Finish button.
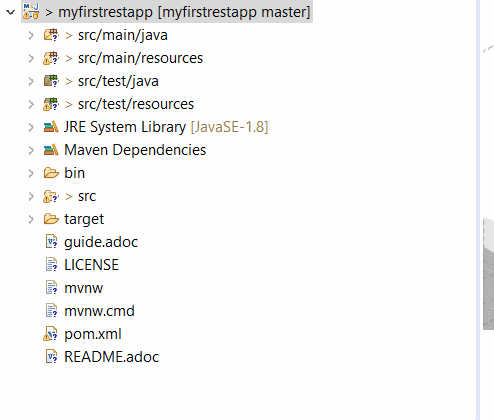
The Project Explorer view is updated:
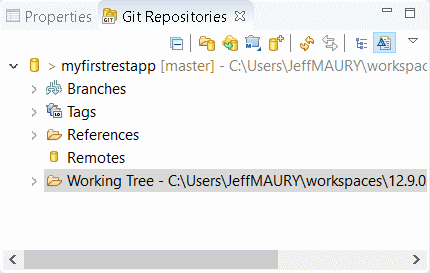
Select the myfirstrestapp project and right-click the Team -> Show in Repositories View menu item. A new view called Git Repositories will be added to the perspective:
Inside this view, select the Remotes node and right-click the Create Remote menu item. The following dialog box will be displayed:
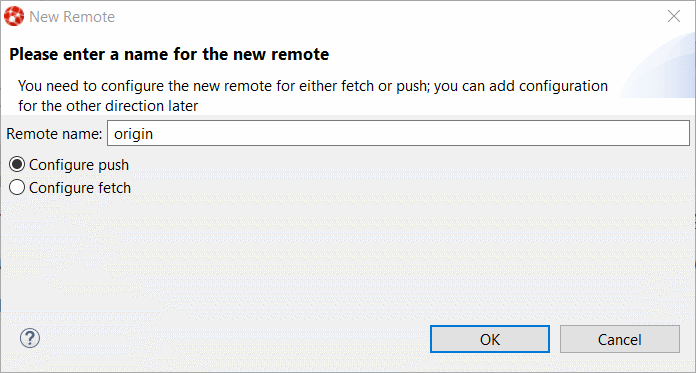
Click on the OK button, and the following dialog box will be displayed:
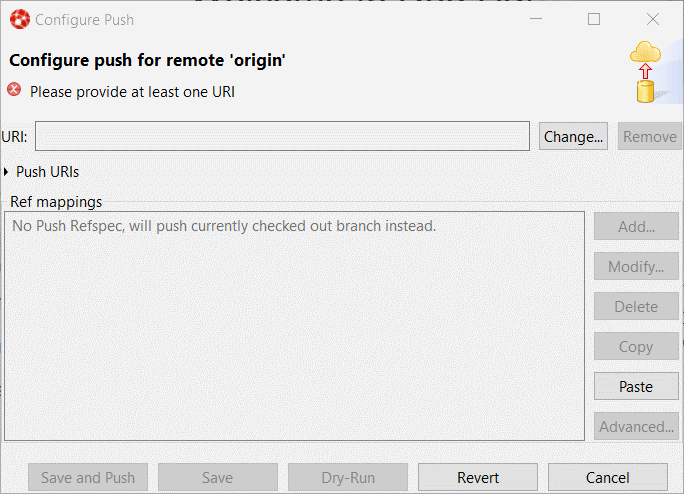
Click on the Change button and enter git@github.com:GITHUB_USER/myfirstrestapp in the URI field, replacing GITHUB_USER with your real GitH username.
Then click the Finish button and then the Save button.
We are now ready to push our application code to GitHub. Select the myfirstrestapp project in the Project Explorer view, and then right-click the Team -> Commit menu item. A new view call Git Staging will open:
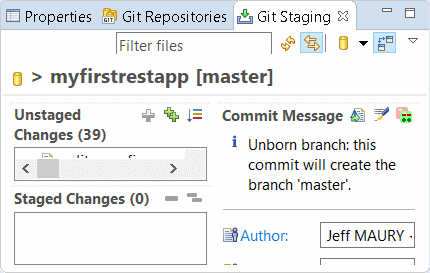
Double-click on the view title to maximize the view:
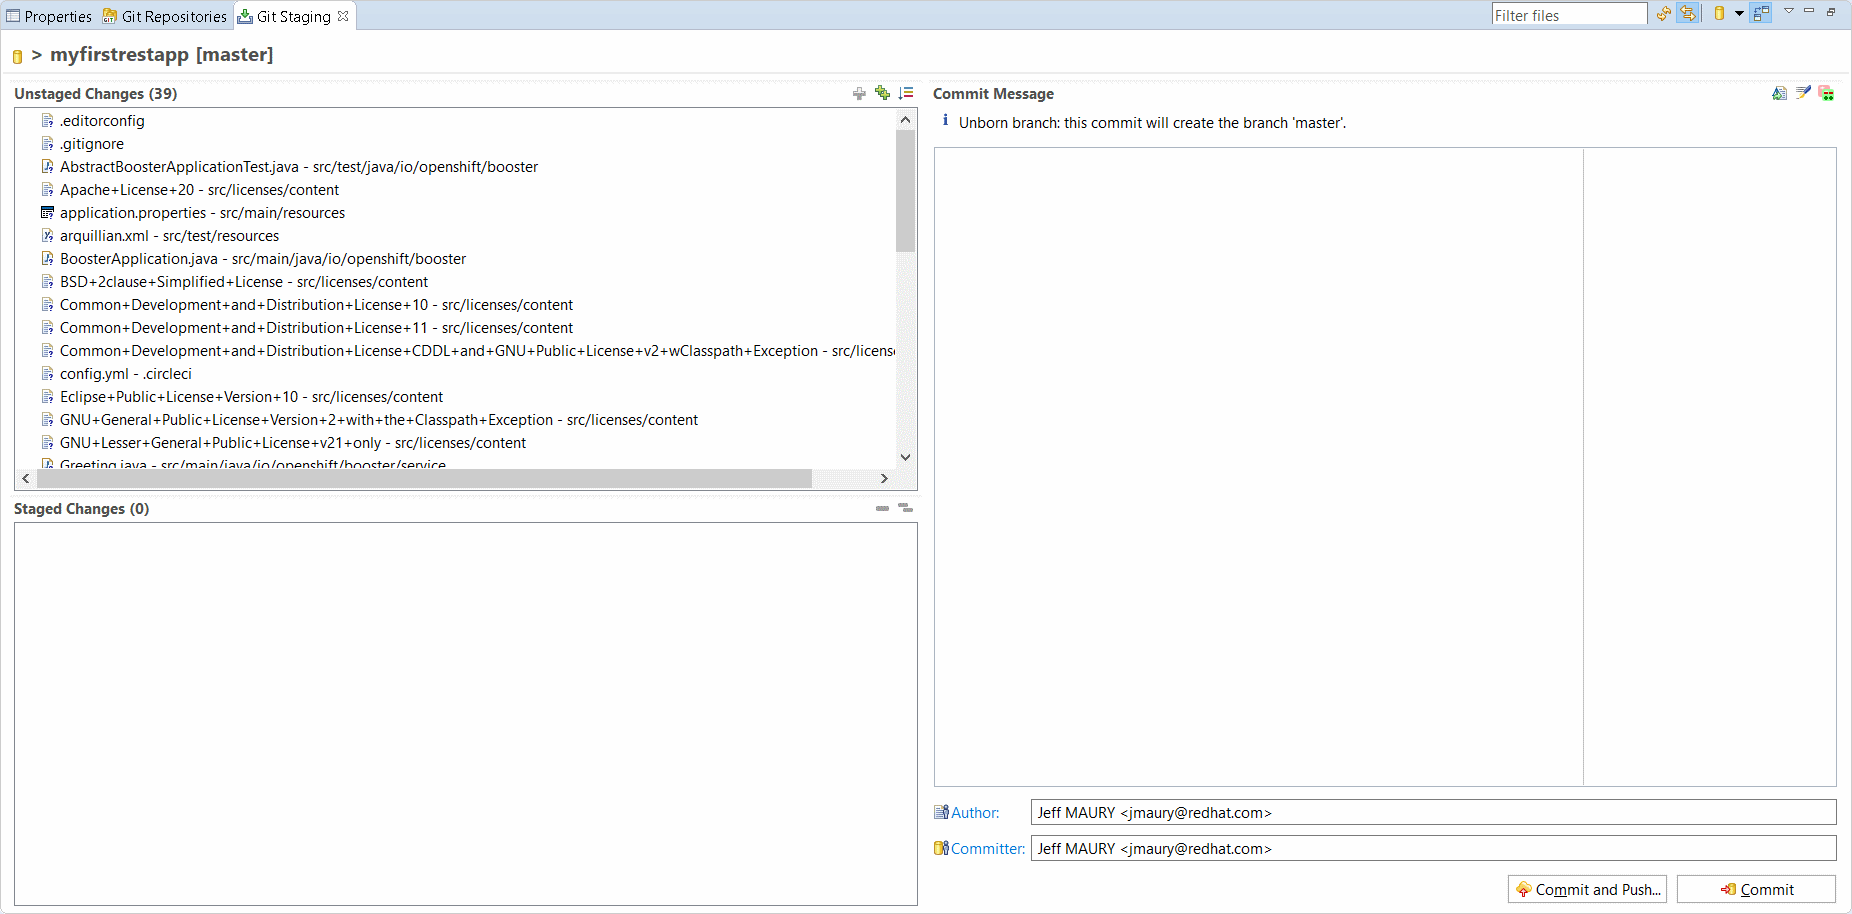
Select all the files listed in the Unstaged changes list and click the + button. The files will then move to the Staged Changes list:
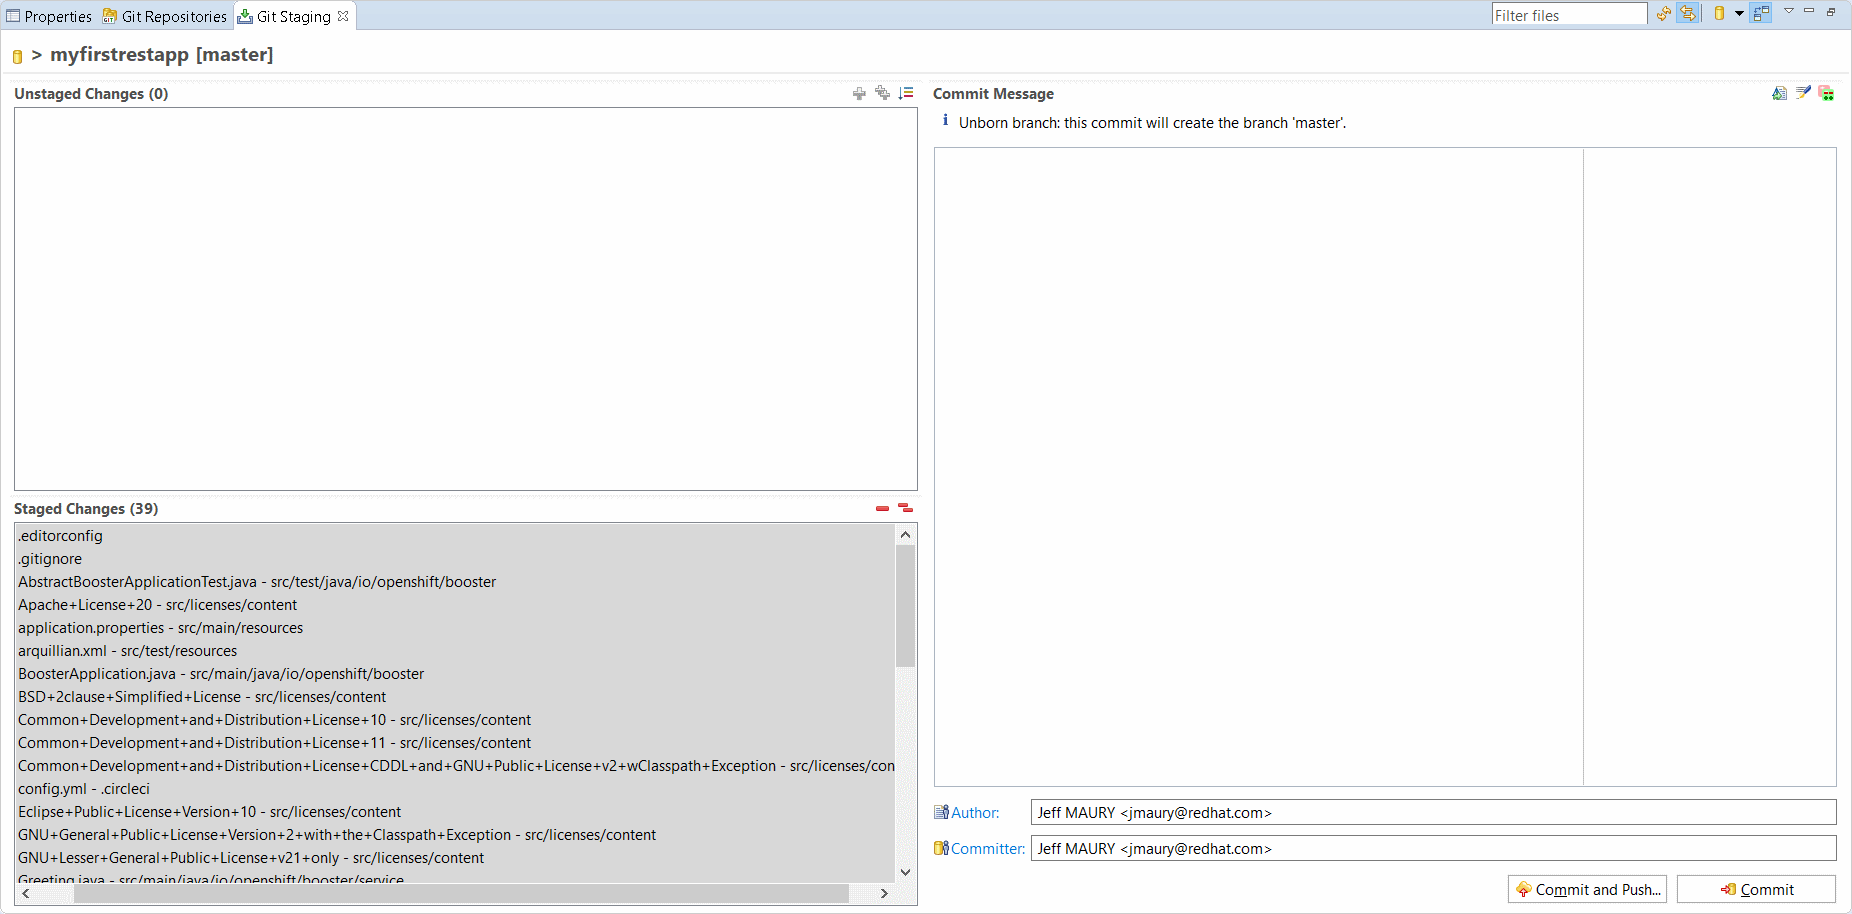
Enter a commit message (for example, "Initial version") and click the Commit and Push button. The following dialog box will be displayed:
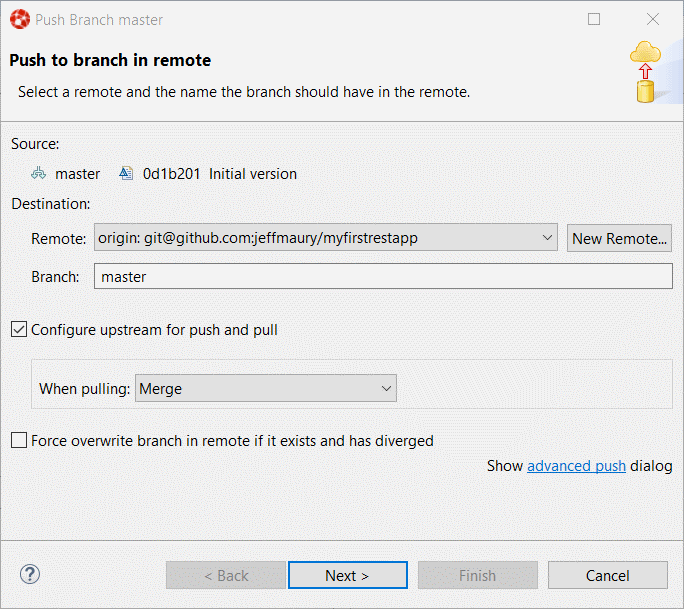
Click on the Next button:
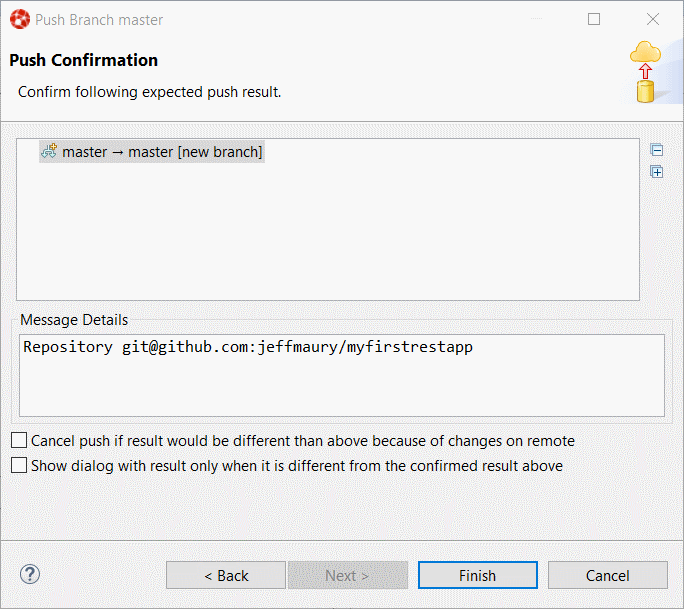
Click on the Finish button to start the push operation.
A dialog box with the result of the push operation will be displayed. Click OK to dismiss it.
Adding Spring Boot Devtools to the packaged application
In order to support live update on an OpenShift cluster, we must add Spring Boot DevTools to our Spring Boot application.
Open the pom.xml file in the myfirstrestapp project. Locate the spring-boot-maven-plugin and add the following section:
<configuration>
  <excludeDevtools>false</excludeDevtools>
</configuration>
The whole spring-boot-maven-plugin section is given below:
<plugin>
  <groupId>org.springframework.boot</groupId>
  <artifactId>spring-boot-maven-plugin</artifactId>
  <executions>
    <execution>
      <goals>
        <goal>repackage</goal>
      </goals>
      <configuration>
        <excludeDevtools>false</excludeDevtools>
      </configuration>
    </execution>
  </executions>
</plugin>
Close and save the pom.xml file.
Push the change to GitHub: select Team -> Commit with a new commit message (for example, "With DevTools").
Deploy the application on OpenShift
Before we can deploy the application on OpenShift, we must first create an ImageStream on our OpenShift cluster. The reason is that the Spring Boot support relies on S2I builds that will explode the Spring Boot uber JAR when Spring Boot DevTools is present. Because this is not supported by Java-based S2I images, we will use one that supports it, that is, fabric8/s2i-java:2.2.
First, in the myfirstrestapp project, create a new JSON file called springboot.json and set the content of this file to this:
{
    "apiVersion": "image.openshift.io/v1",
    "kind": "ImageStream",
	"metadata": {
		"name": "springboot"
	},
    "spec": {
        "lookupPolicy": {
            "local": false
        },
        "tags": [
            {
                "annotations": {
					"tags": "builder,java"
				},
                "from": {
                    "kind": "DockerImage",
                    "name": "registry.access.redhat.com/fuse7/fuse-java-openshift:1.1"
                },
                "importPolicy": {},
                "name": "1.1",
                "referencePolicy": {
                    "type": "Source"
                }
            }
        ]
    }
}
Then, from the OpenShift Explorer view, select the OpenShift connection for your cluster (if you don’t have one already defined, you must define it) and right-click on the New -> Resource menu item. The following dialog box will be displayed:
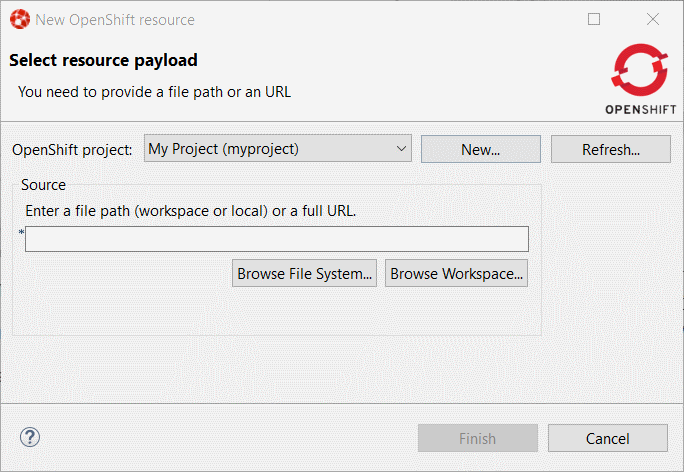
You can select the OpenShift project you want to work with, and then click on the Browse Workspace button and select the springboot.json file in the myfirstrestapp project:
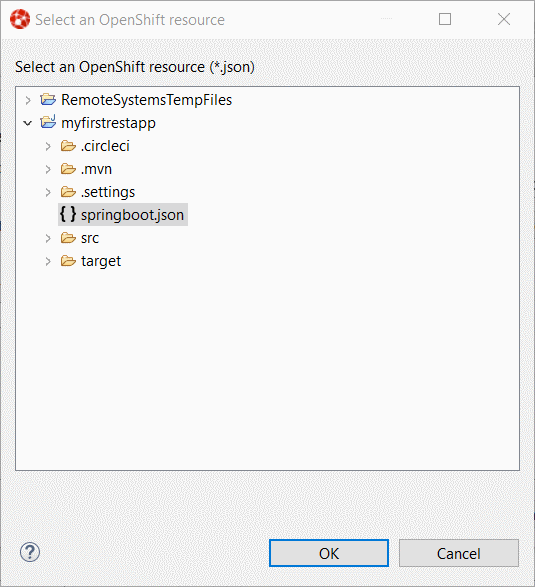
Click the OK and Finish buttons. The new ImageStream will be created and a status dialog box will be displayed:
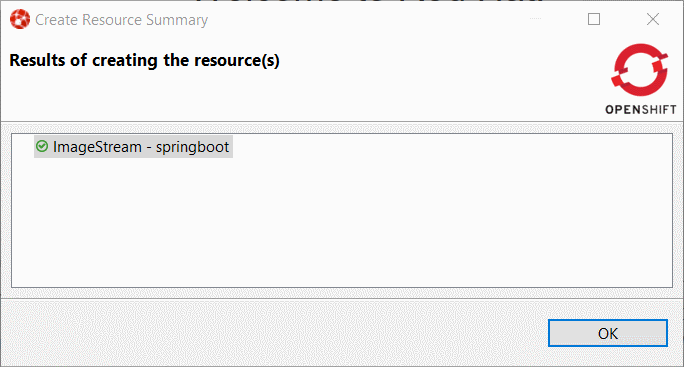
Create the application on OpenShift
We’re now ready to create the application on the OpenShift cluster. Select the OpenShift connection, right-click New -> Application menu item. If you scroll down the list, you should see the springboot ImageStream we just created:
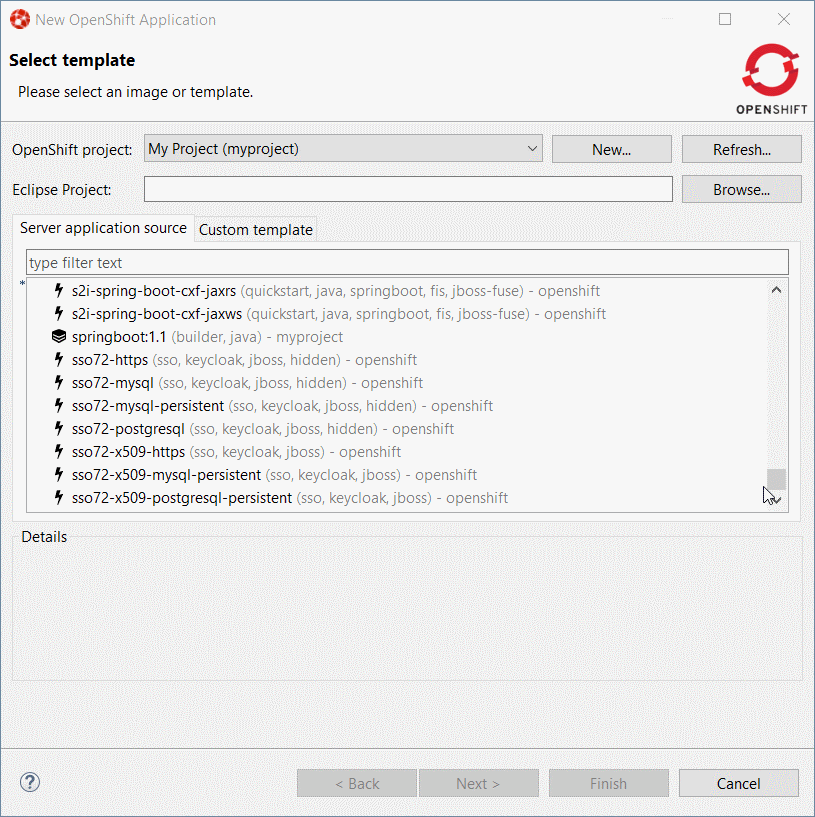
Select the ImageStream and click the Next button:
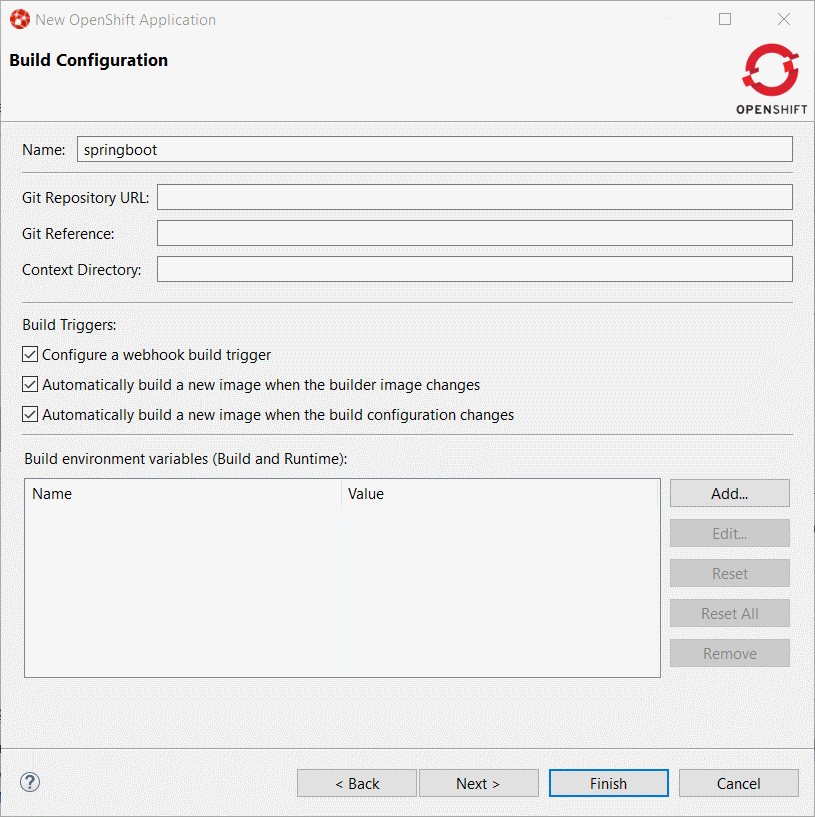
Enter myfirstrestapp in the Name field, enter https://github.com/GITHUB_USER/myfirstrestapp in the Git Repository URL field, replace GITHUB_USER by your real GitHub username, and click the Next button.
In the Deployment Configuration & Scalability dialog box, click the Next button.
In the Service & Routing Settings dialog box, select the 8778-tcp port and click the Edit button. Change the 8787 value to 8080:

Click the OK button then the Finish button.
The list of OpenShift resources created will be displayed in a dialog box:
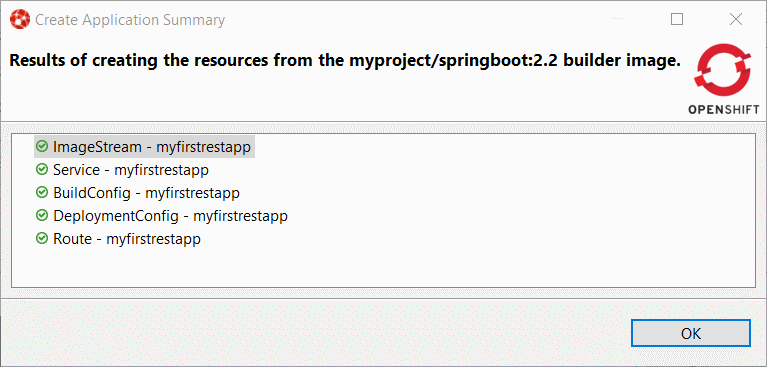
Click the OK button to dismiss the dialog box and when asked to import the application code, click the Cancel button because we already have the source code.
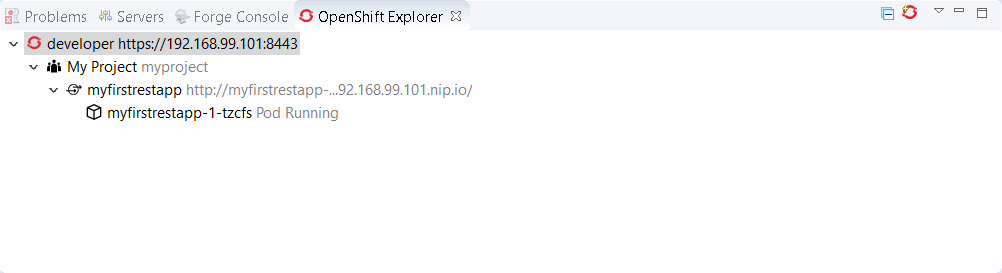
After the build is run (this may take several minutes as the Maven build downloads lots of dependencies), you should see a running pod:
Inner loop setup
We are going to synchronize the local Eclipse project with the remote OpenShift pod. Each time a file is modified locally, the pod will be updated accordingly.
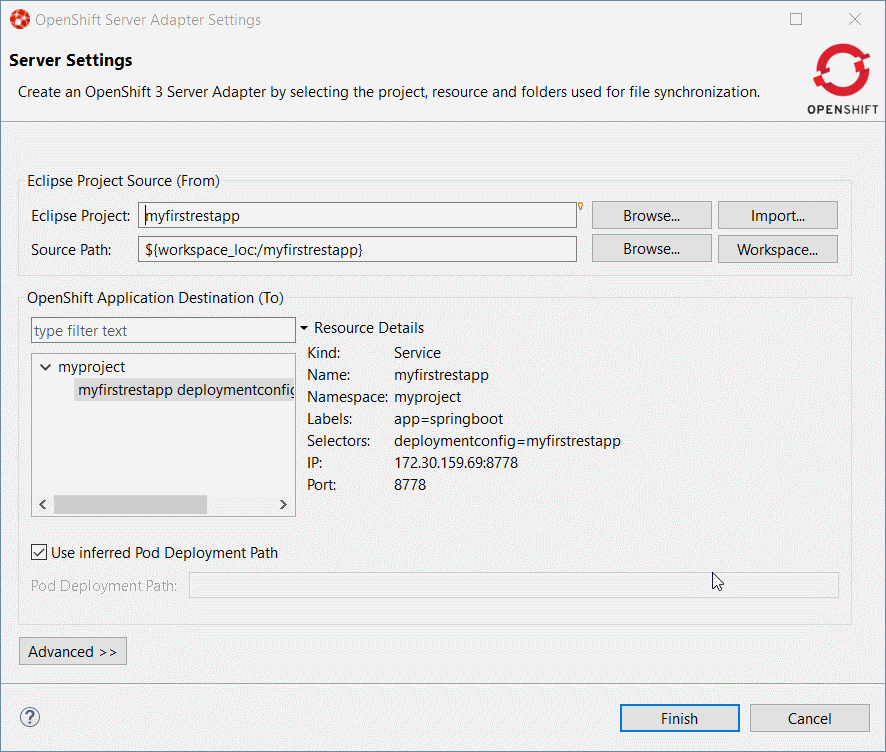
Select the running pod in the OpenShift Explorer, right-click the Server Adapter menu item, and the following dialog will be displayed:
Click the OK button. The initial synchronization will be started and the Servers view will be displayed:
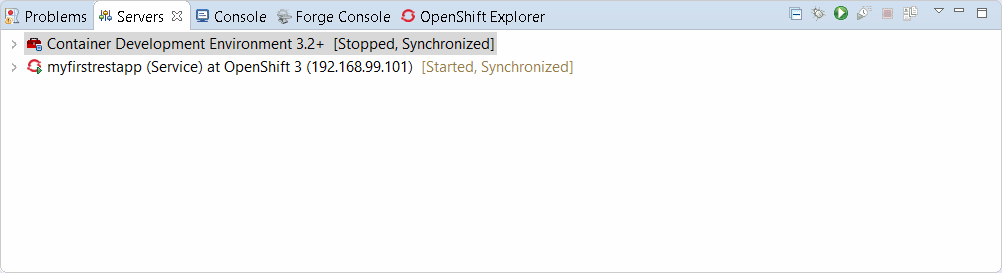
We’ve not set up the synchronization between our local Eclipse project and the remote OpenShift project. Each modification done locally will be reported on the remote OpenShift cluster.
Let's modify our local application code and see the changes applied almost instantly:
Edit the file src/main/java/io/openshift/booster/service/Greeting.java in the myfirstrestapp project and change the FORMATstring value from Hello, %s! to Hello, Mr %s! and then save the file.
The file should be now like this:
/*
 * Copyright 2016-2017 Red Hat, Inc, and individual contributors.
 *
 * Licensed under the Apache License, Version 2.0 (the "License");
 * you may not use this file except in compliance with the License.
 * You may obtain a copy of the License at
 *
 * http://www.apache.org/licenses/LICENSE-2.0
 *
 * Unless required by applicable law or agreed to in writing, software
 * distributed under the License is distributed on an "AS IS" BASIS,
 * WITHOUT WARRANTIES OR CONDITIONS OF ANY KIND, either express or implied.
 * See the License for the specific language governing permissions and
 * limitations under the License.
 */
package io.openshift.booster.service;

// tag::snippet-greeting[]
public class Greeting {

    public static final String FORMAT = "Hello, Mr %s!";

    private final String content;

    public Greeting() {
        this.content = null;
    }

    public Greeting(String content) {
        this.content = content;
    }

    public String getContent() {
        return content;
    }
}
// end::snippet-greeting[]
Then, in the OpenShift explorer view, select the myfirstrestapp deployment and select the Show In -> Web Browser menu item and once the web browser is displayed, ckick the Invoke button, you should see the following view:
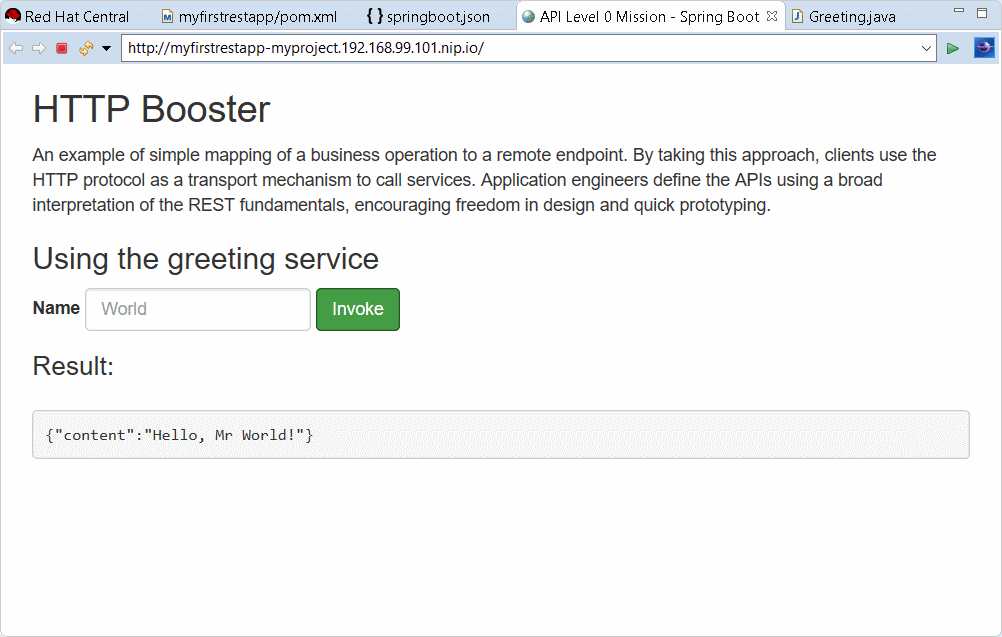
You’ve just experienced the inner loop on your Spring Boot application: any change done locally is reported and testable almost immediately on your OpenShift cluster.
You can restart the deployment in debug mode and you’ll be able to remote debug your Spring Boot application. Amazing, no ?
Server tools
Wildfly 14 Server Adapter
A server adapter has been added to work with Wildfly 14. It adds support for Java EE 8.
Hibernate Tools
Runtime Provider Updates
The Hibernate 5.3 runtime provider now incorporates Hibernate Core version 5.3.6.Final and Hibernate Tools version 5.3.6.Final.
The Hibernate 5.2 runtime provider now incorporates Hibernate Core version 5.2.17.Final and Hibernate Tools version 5.2.11.Final.
The Hibernate 5.1 runtime provider now incorporates Hibernate Core version 5.1.16.Final and Hibernate Tools version 5.1.10.Final.
Fuse Tooling
REST Viewer becoming an editor
Previously, there was a REST editor which was read-only. It is useful to have a great overview of already defined Camel REST DSL definitions. Now the editor and its related properties tab are also providing editing capabilities allowing to develop faster.
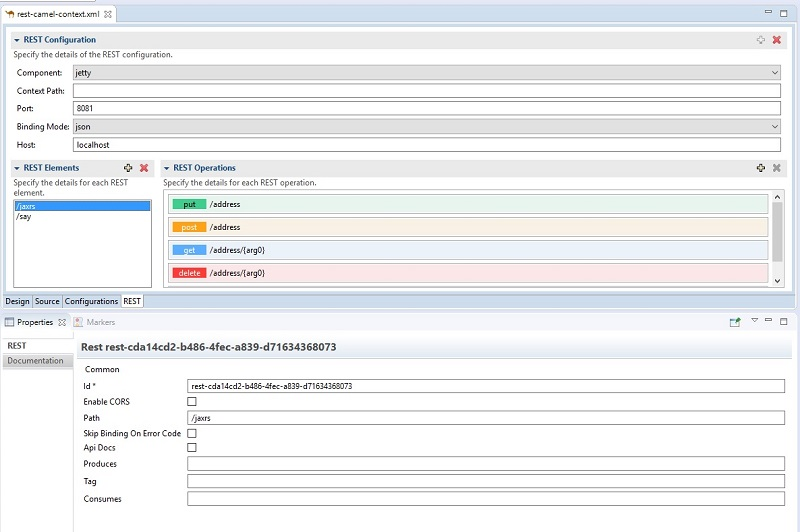
You can now:
- Create and delete REST Configurations
- Create and delete new REST Elements
- Create and delete new REST Operations
- Edit properties for a selected REST Element in the Properties view
- Edit properties for a selected REST Operation in the Properties view
In addition, we’ve improved the look and feel by fixing the scrolling capabilities of the REST Element and REST Operations lists.
Java Developement Tools (JDT)
Java Editor
Improved Breadcrumb for Dark theme
The Breadcrumb in the Java Editor now uses a dark background in the Dark theme.
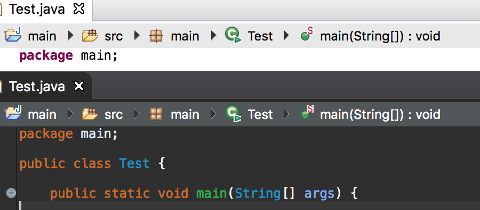
In the Light theme, the Breadcrumb uses a flat look style instead of a gradient.
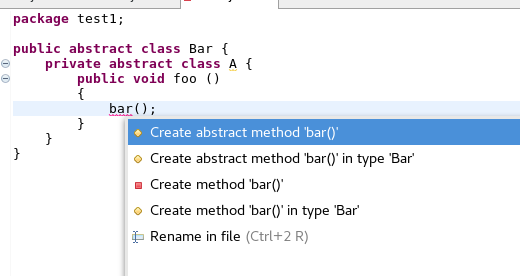
Quick fix to create abstract methods
The existing quick fix to create missing methods has been improved to create abstract method declarations. The option only appears when the target class is an abstract class.
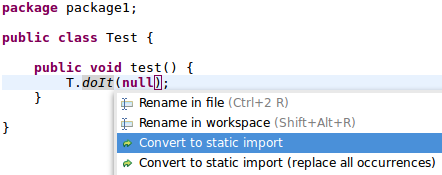
Quick fix to convert to static import
A new quick fix has been implemented that allows the user to convert static field accesses and static methods to use a static import. It’s also possible to replace all occurrences at the same time.
Java Code Generation
Improved hashCode() and equals() generation
A new option in the Source > Generate hashCode() and equals()… tool allows you to create implementations using the Java 7 Objects.equals and Objects.hash methods.

The above setup generates the following code:
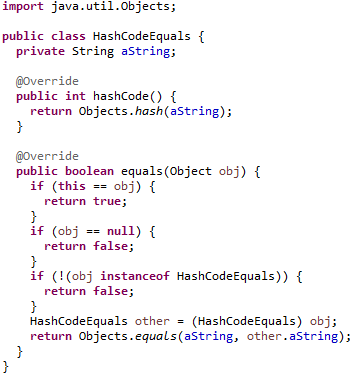
Additionally, arrays are handled more cleverly. The generation prefers the Arrays.deepHashCode and Arrays.deepEquals methods when dealing with Object[], Serializable[], and Cloneable[] or any type variables extending these types.
Java Views and Dialog Boxes
Quick Fix for JRE Compiler Compliance Problem Marker
A new quick fix is provided on the JRE Compiler Compliance problem marker, which is created when the compiler compliance does not match the JRE being used. This quick fix provides the option of opening the Compiler Compliance page of the project to fix the issue.
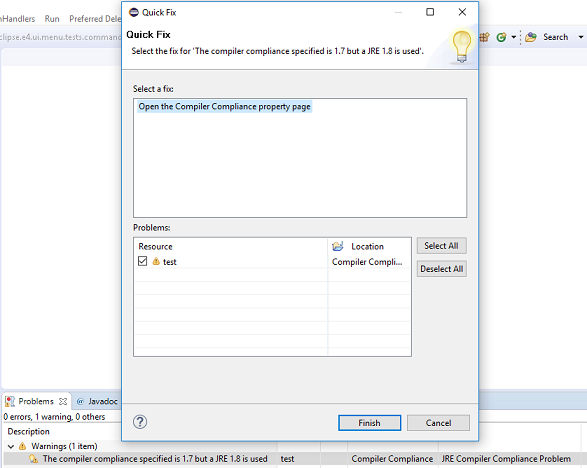
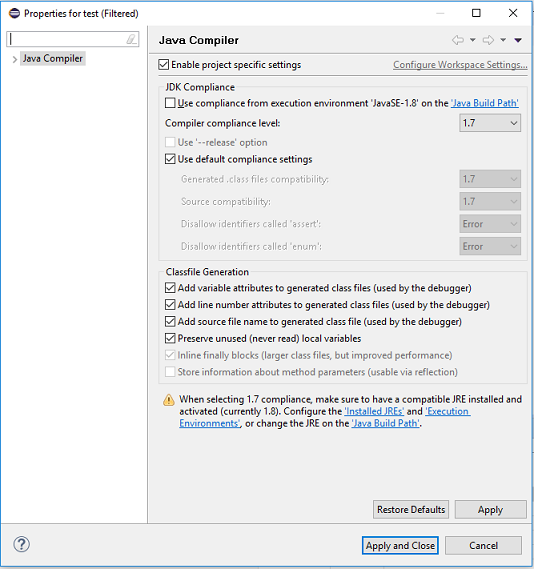
Selecting this option opens the Compiler Compliance property page for the specified project as shown below.
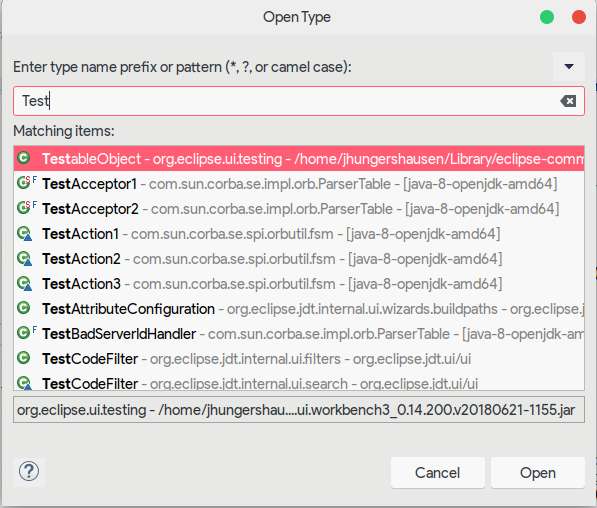
Open Type dialog box always shows the full path now
The Open Type dialog box now always shows the full path of all the matching items.
Java Formatter
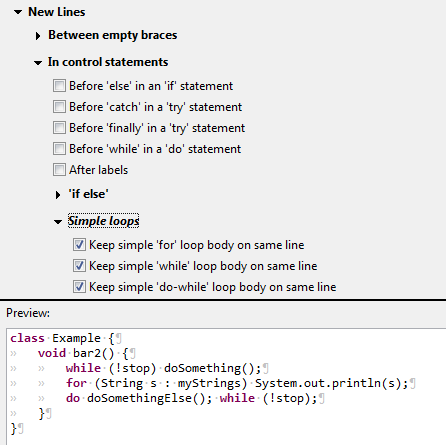
Keep simple loops in one line
New formatter settings have been added that make it possible to keep the bodies of simple loops (without braces) in the same line as their headers, similar to the previously existing setting for simple if statements. Different kind of loops (for, while, do while) can be controlled independently.
The settings can be found in the profile editor under New Lines > In control statements > Simple Loops.
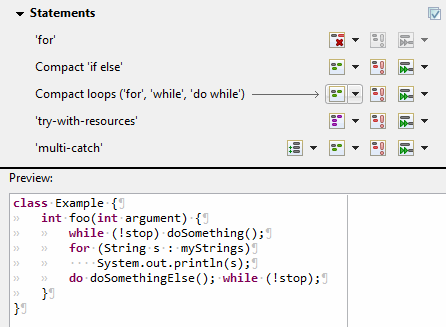
There’s also a new setting to control how these loops should be handled if they exceed the maximum line width. It’s located under Line Wrapping > Wrapping settings > Statements > Compact loops ('for', 'while', 'do while').
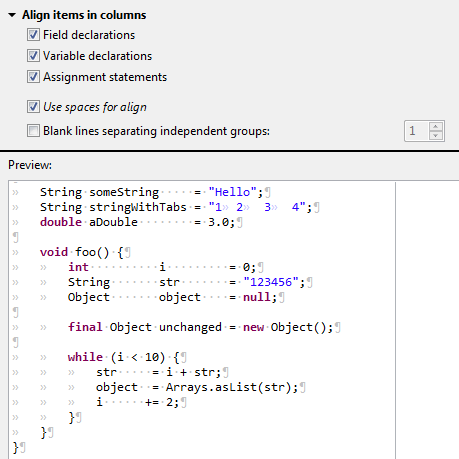
Align items in columns
A feature previously known as align fields in columns has been expanded and can now be used for variable declarations and assignment statements as well.
An option has also been added to always align with spaces, even if tabs are used for general indentation. This is very similar to the Use spaces to indent wrapped lines option and is useful to make the code look good in editors with differing tab widths.
All the settings related to aligning are now in the new preferences subsection: Indentation > Align items in columns.
Debug
Timeout for the result of step operations
Observing the result of step operations may slow down execution, which may make trying to observe results unusable if a step takes long already. Therefore, a timeout (default is 7000 ms) has been introduced after which the observation mechanism is disabled until the end of the step operation.
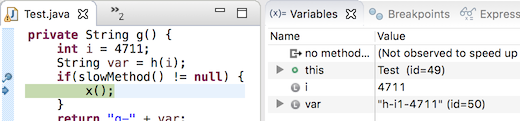
The timeout can be configured in Preferences > Java > Debug > Don’t show if step operation takes longer than (ms).
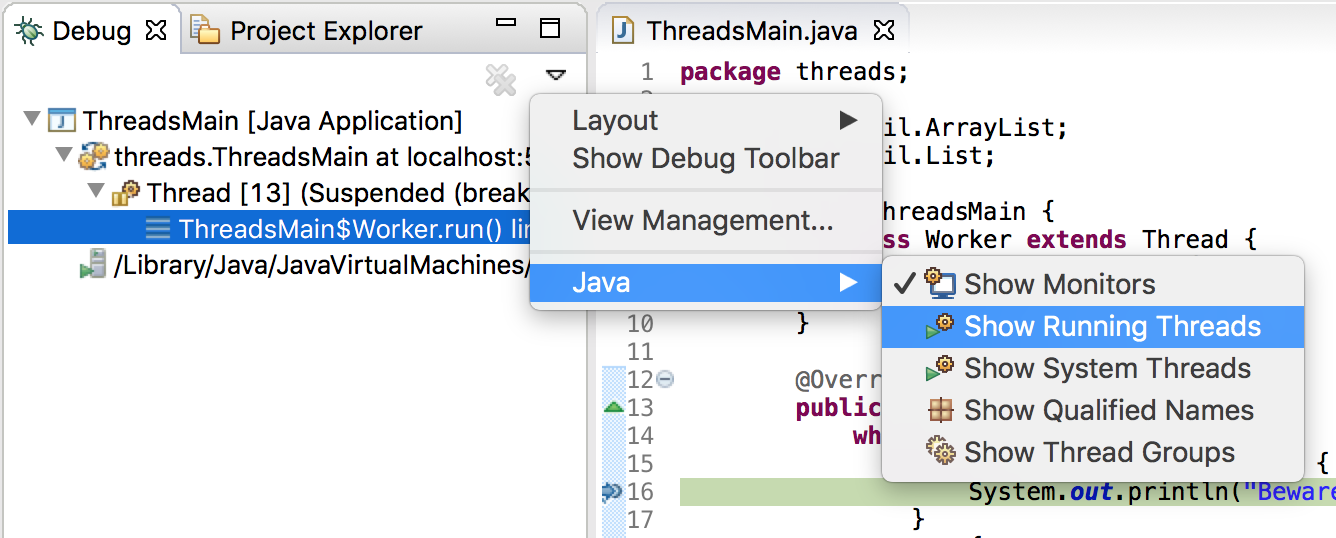
Option to hide running threads in Debug view
A new option has been introduced in the Debug view to show or hide running threads.
Hiding running threads can be useful when debugging a heavily multithreaded application when it is difficult to find threads stopped at breakpoints among hundreds or thousands of running threads.
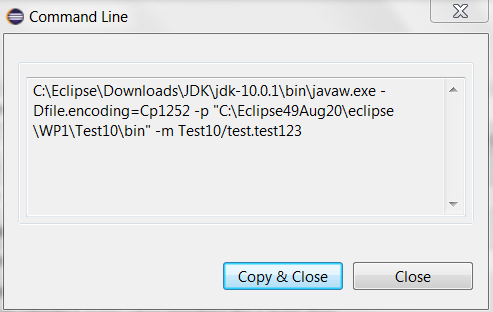
Show Command Line button in Launch Configuration
A new Show Command Line button has been added in the Java Launch Configuration dialog box.
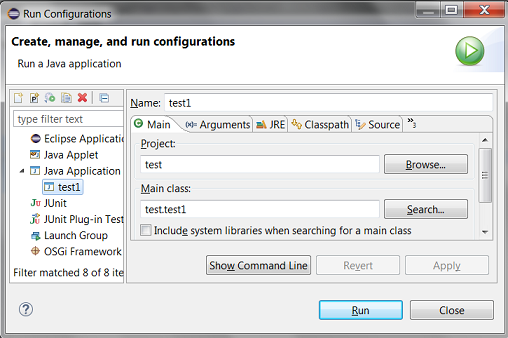
Clicking the button will open a dialog box to show the command line used for launching the application.
Option to disable thread name changes in Debug view
Thread name changes in the JVM being debugged are reflected in the Debug view. A VM option can now be used to disable this behavior in case the JVM communication necessary for the name updates is not desired.
The functionality can be disabled by specifying the following VM option:
-Dorg.eclipse.jdt.internal.debug.core.model.ThreadNameChangeListener.disable=true
Support for long classpath/modulepath
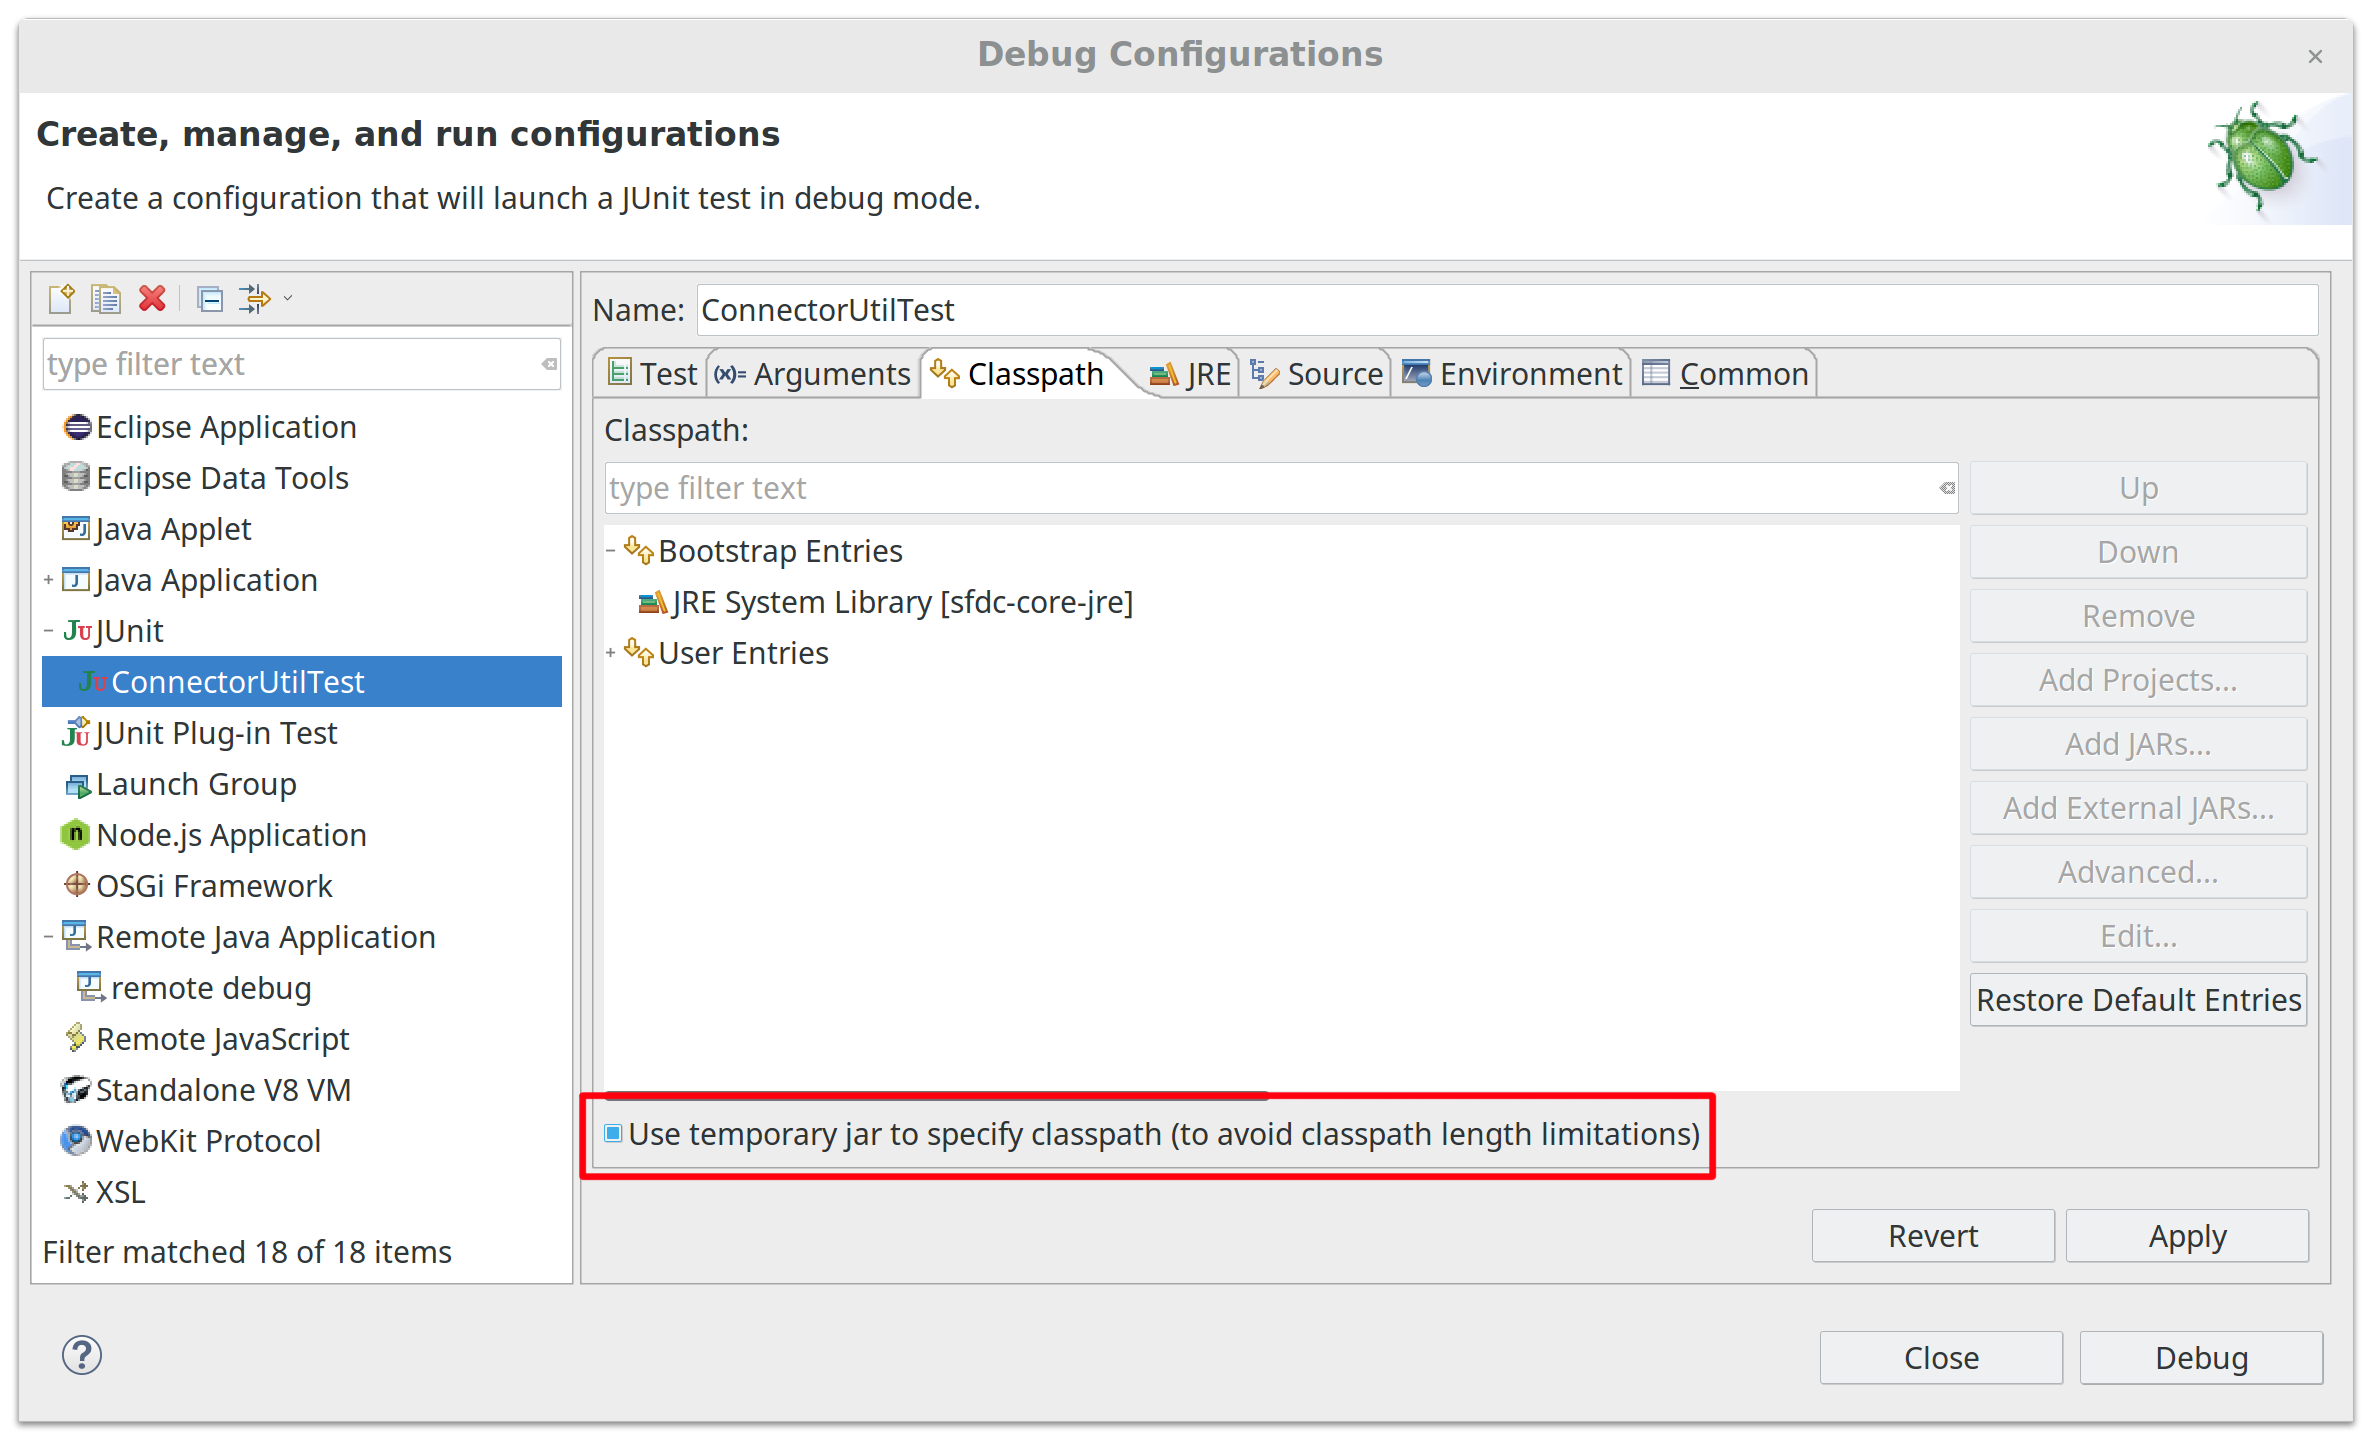
The classpath and/or modulepath are now shortened if they are longer than current operating system limits.
If a temporary JAR is needed to shorten the classpath (Java 8 and previous versions), a dialog box is shown asking for confirmation.
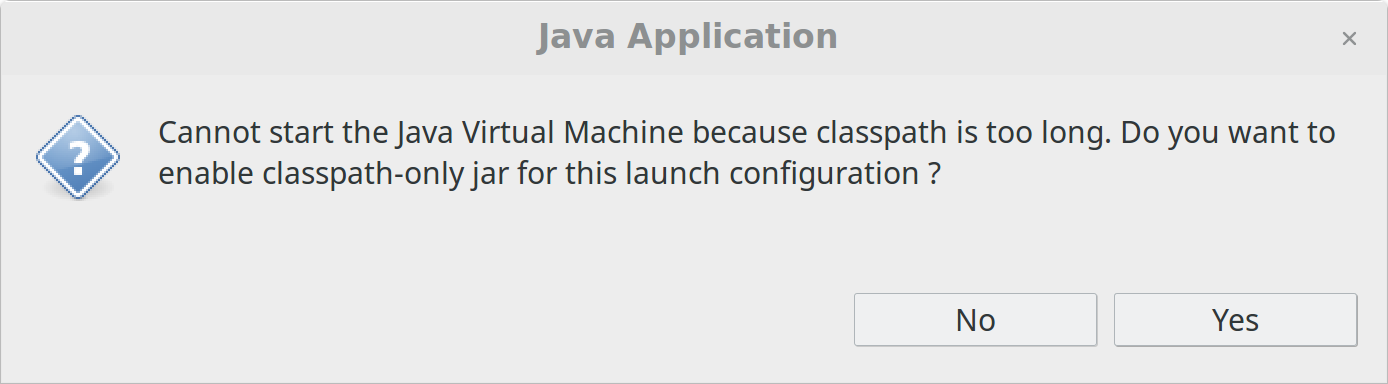
The option Use temporary jar to specify classpath (to avoid classpath length limitations) is available in the Classpath tab of the Run/Debug Configuration dialog box.
And more…
You can find more noteworthy updates in on this page.
What's next?
Now that JBoss Tools 4.9.0 and Red Hat Developer Studio 12.9 are out, we are already working on the next release for Eclipse 2018-12.
Enjoy!
Last updated: January 12, 2024