You obviously know what a LAMP stack is if you’ve managed to find your way here, but for those who may be unsure, the key is in the name (L)inux (A)pache (M)ariaDB (P)HP—a term that has become synonymous around the globe for building a basic web server with database and PHP functionality. There are a myriad of web applications, ranging from Wordpress to Joomla to Magento that all use this setup, and if you know how to get it up and running, then you’re off to a great start. It couldn’t be easier with RHEL, so let’s get started. MariaDB can also be exchanged for MySQL or a database of your choice.
Our Objectives
- Set up a Red Hat Enterprise Linux (RHEL) 7.2 virtual machine
- Install required applications (Apache, MariaDB, PHP)
- Configure an initial virtual host in Apache
- Configure MySQL and create a database for testing
- Demonstrate PHP working with a test page, which also pulls data from our test database
Installing RHEL on a VM
To get started, I’m firing up a virtual machine with the following specifications:
- 1GB RAM
- 16GB virtual hard drive space
- 1 vCPU
Now it’s time to power up our VM and let it boot from the RHEL ISO. Once you’ve booted into the setup GUI, you’ll be asked some basic questions. In my case, I simply selected my time zone and specified my network settings. I would suggest leaving everything else at default for simplicity.
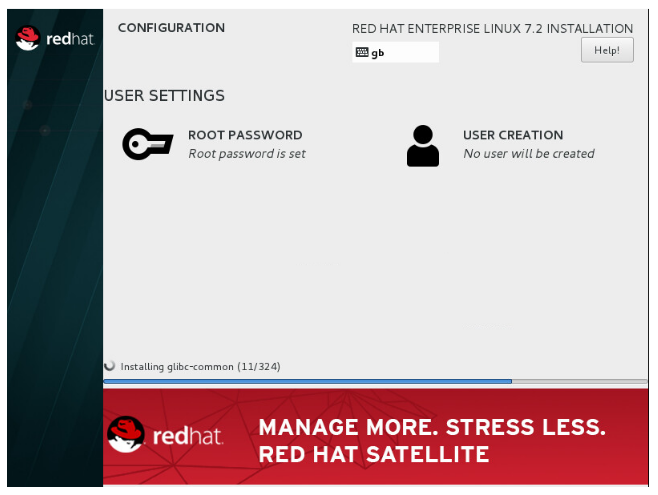
Once RHEL has successfully installed, you can reboot into your new installation. As we have left the default of “minimal install” selected, we’ll need to manually register the system to the Red Hat network and attach it to a subscription to allow it to receive updates and packages. Simply log in and run subscription-manager register –auto-attach and you will be prompted to enter your username and password.
Installing required applications
Great! Before getting started, I would first recommend you run yum –y update to grab any recent security updates and reboot.
Now we’re ready to install Apache, MariaDB and PHP. Simply run:
yum –y install httpd php php-mysql mariadb mariadb-server
Then wait for yum (Yellowdog Updater, Modified) to do its thing. After yum has finished, we want to make sure that our newly installed applications are set to start at boot. To do this, we run:
systemctl enable httpd && systemctl enable mariadb
systemctl start mariadb && systemctl start httpd
This will get them all up and running for the first time.
Configure Virtual Host in Apache
This step isn’t strictly necessary if you’re only wanting to run one application on your server, but I always try to get a virtual host configured as it keeps things tidy and allows for easy expansion for hosting other websites on your LAMP server in the future if you feel like doing so.
So let’s go ahead and create a new virtual host—but first, let’s create a directory for this virtual host to serve files from. And whilst we’re at it, we might as well add a ‘phpinfo’ file there to validate our PHP configuration.
mkdir /var/www/test-site && echo –e “<?php \nphpinfo();” > /var/www/test-site/index.php
Creating the virtual host is easy. Let’s create a new file named /etc/httpd/conf.d/test-site.conf and add the following to it:
<VirtualHost *:80>
 DocumentRoot “/var/www/test-site”
 ServerName test-site.example.com
</VirtualHost>
If you’re following this guide exactly, then you’ll need to add a host entry on your local computer to make sure it knows where ‘test-site.example.com’ exists. Simply take the IP address of the server you’re configuring your LAMP stack on and insert it into your host’s file (where x.x.x.x is the server IP):
x.x.x.x test-site test-site.example.com
Now you’re ready to browse to your new LAMP server—but wait, your page load times out and can’t connect. You need to allow the web traffic through the firewall with the following command:
firewall-cmd –zone=public –add-service=http
If everything goes to plan, you should now see a phpinfo screen confirming that Apache and PHP are set up and working together.
Configure MySQL and create database for testing
Although MariaDB is now up and running, it’s worth running /usr/bin/mysql_secure_installation to secure MariaDB further. You should do the following when prompted:
- Set the root password for access to MariaDB
- Remove anonymous users
- Disallow root login remotely (unless you want to be able to connect to it remotely, of course)
- Remove test database and access to it
- Reload privilege tables
Great! Now we want to go ahead and make sure that a PHP application running on our LAMP server can access a database in MariaDB and see tables. Firstly, we’ll need to create a database for testing and create some tables. To do this, we need to first connect to MariaDB with our root username and password. I have included a screenshot of this below to show you what sort of output to expect. Upon logging in with ‘mysql –uroot –p’ you’ll need to run the following commands:
-
create database test;
-
use test;
-
create table example ( id INT, data VARCHAR(100) );
-
create table example1 (id INT, data VARCHAR(100) );
-
create table example2 (id INT, data VARCHAR(100) );
-
create user ‘test-site’@’localhost’ identified by ‘password’;
-
grant all on test.* to ‘test-site’@’localhost’;
-
flush privileges;
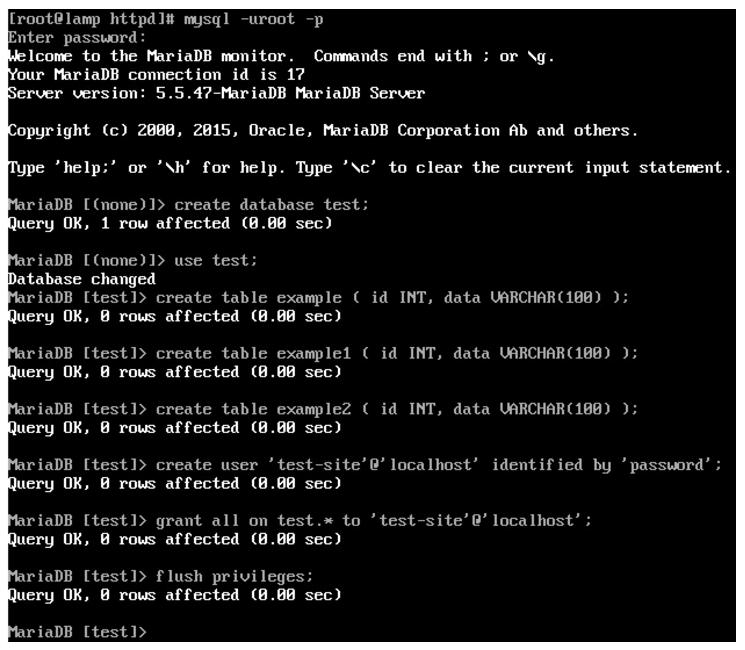
In the above example, we’re creating a database, creating three example tables within this database, and creating a user with limited access to this database. We don’t want to use our root user MariaDB credentials for any interaction between our web application and the database, as this is insecure.
Now that we’ve got our database and tables set up, let’s delete our old index.php file and recreate it with the following PHP code. If you’ve been following this guide exactly, then you’ll be good to go with the existing ‘dbname’, ‘dbuser’, ‘dbpass’ and ‘dbhost’ variables as set below. But If not, then you’ll simply need to change these to match your chosen credentials and database name.
<?php
$dbname = 'test';
$dbuser = 'test-site';
$dbpass = 'password';
$dbhost = 'localhost';
$connect = mysql_connect($dbhost, $dbuser, $dbpass) or die("Unable to Connect to '$dbhost'");
mysql_select_db($dbname) or die("Could not open the db '$dbname'");
$test_query = "SHOW TABLES FROM $dbname";
$result = mysql_query($test_query);
$tblCnt = 0;
while($tbl = mysql_fetch_array($result)) {
  $tblCnt++;
}
if (!$tblCnt) {
  echo "There are no tables<br />\n";
} else {
  echo "There are $tblCnt tables<br />\n";
}
?>
If everything has gone to plan, then the next time you browse to your server you should see the following:

Final Thoughts
So there you have it. Setting up RHEL to serve your PHP application with a database backend couldn’t be easier! Adding additional sites to your Apache configuration is easy and can be done by simply adding additional VirtualHost config files in the manner shown on page 2. You can go more in-depth by adding additional configuration parameters to each virtual host. For instance, you may wish for ‘test-site.example.com’ to show a directory index but wish to prevent ‘test-site2.example.com’ from exhibiting this same behaviour.
Resources
- Apache virtual host examples can be found here: https://httpd.apache.org/docs/current/vhosts/examples.html
- The PHP test script above: https://gist.github.com/chales/11359952
- Red Hat’s getting started page: http://developers.redhat.com/products/rhel/get-started/
About Keith Rogers
 Keith Rogers is an IT professional with over 10 years’ experience in modern development practices. Has built full development stacks. Currently he works for broadcasting organization in the DevOps space with a focus on automation. In his spare time he tinkers with modern development tools, and a technical contributes Fixate IO.
Last updated: March 16, 2018
