Eclipse Che stacks contain compilers, runtimes, tools, and other useful things for most popular programming languages. But there's a chance your project needs tooling and other utilities that aren't part of the stacks included with the product. Fortunately, you can build a custom stack that includes everything you need, then build a workspace on top of your new stack. In this article, we'll show you how.
If you'd rather watch than read, all of this article's content is presented in the following video:
The 2048 game
For our example, we'll use Eclipse Che to take a look at a C++ implementation of the popular game 2048. The 2048 source code requires some special tooling, so we'll need to create a custom stack before we can build it in Che. By the time we're done here, you'll know how to build a stack that has all the tools you need for your projects. And best of all, you'll be able to waste hours of precious time while pretending to work. You're welcome!
We'll start by going to the Che home page, eclipse.org/che:
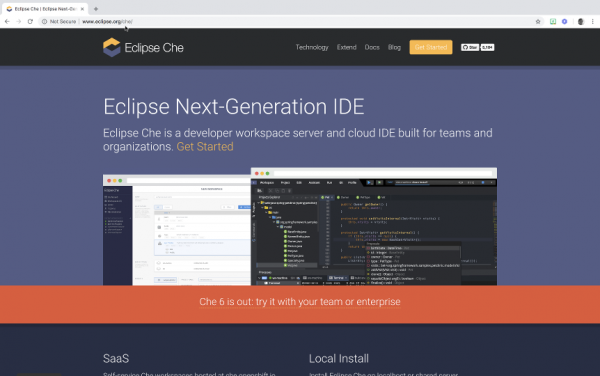
Scroll down slightly and click on the Create Free Account button under the SaaS heading.

Now scroll down to Create workspace from a template. The code we're going to build is written in C++, so choose the C++ stack.

At this point, you need a CodeReady Toolchain account. If you don't have one (it's free), you can sign up at openshift.io. If you have an account and you're not logged in, you'll see the openshift.io login screen.
Once you're logged in, you'll see an entertaining crane animation as the workspace loads. The system does some initialization, downloads a container image, creates and starts a container based on that image, then loads the necessary code to display the IDE. The first time you run this in your account, Che has to download the container image for the stack that contains the operating system and other tools. When it's all done, you'll see this screen:

The IDE as shown here includes a sample Hello, World project that has been cloned from a GitHub repo (github.com/che-samples/console-cpp-simple.git), and Che has built and run that code. You can see "Hello, world" in the Run tab at the bottom of the screen.
But we're here to build a productivity-destroying game. To do that, we'll create a new project from the 2048 repo.
Building the code
Go to the Workspace menu and click Import Project:

Enter the URL of the repo as shown on the screen here (github.com/plibither8/2048.cpp.git). I named the project 2048, but you can call it anything you like. We'll leave the other options blank.

Now click the Import button to clone the code. Once the code is imported, go to the Project menu, then select Update Project Configuration... and tell Che that this is a C++ project:

That enables syntax highlighting and other nice features. Click Save and you're done.
Expand the project and look in the /src folder. 2048.cpp has the main() method, but game.cpp has most of the logic. Feel free to explore the code all you want, but ... looking in the project, there's no Makefile.

It's not clear how to build this code, so out of desperation, let's actually read the instructions. The README.md file in the repo says we need to create a build directory in the project, then run cmake:
3. Create and enter the build directory:
$ mkdir build && cd build4. Compile the program with cmake
$ cmake ..5. Build the executable
$ makeSo, off to the terminal we go! Change to the project directory (2048, in my case), then make a build directory and change to it. You might notice that as you create the directory, the tree view of your project automatically updates itself. Now run cmake ... only there is no cmake:

Custom stacks
Which brings us to the subject of custom stacks. What we need to do is take the stack underneath this workspace and add cmake to it. Then we'll create a workspace on top of the new stack and everything should work just fine. But what is the stack underneath this workspace? To find out, go to the Workspaces tab on the far left side of the window.

Click the gear icon across from the name of your workspace:

You'll see the workspace's config file. What we're looking for in the JSON is the recipe entry, which you can see here:

The workspace is built on top of a container image named eclipse/cpp_gcc. That's what we'll use in the Dockerfile that builds the new stack.
Here's the Dockerfile that does the work:

As you can see, all it does is start with the base image and go through a few commands to download and install cmake.
Bonus content: GitHub repo
This GitHub repo has a file named Dockerfile.cmake. That's what I used to build the image for the new stack.
Learn how to build the image for the new stack
More bonus content: A container image
Feel free to build the image yourself, or you can simply refer to the pre-built image here without building anything. We'll take the lazy approach here and just use the pre-built image.
Using a custom stack
Now that we have our container image, let's go back to Che and create a new stack. Stop the workspace (go to the Workspace menu and click Stop) and go to the Stacks tab on the far left. As you would expect, you want to click the Add Stack button:

For the recipe, we're going to use the container image we just looked at, so click Dockerimage and enter quay.io/dougtidwell/2048-stack:cmake:

Click OK to create the stack.
We'll configure the stack by giving it a name (I called mine 2048-stack) and a description, then we'll edit the machine that runs inside the container. Click the pencil icon to change the name of the machine, then click the arrow next to the machine name to add a few agents to it:

You'll need the Exec, Terminal, and Workspace API agents at a minimum:

With those changes made, go ahead and click the Save button. If you want, you can test the stack directly, but instead we'll create a workspace based on it. All we did was add cmake to the existing stack, so things should work. (Trust me on this.)
Go back to the Workspaces tab on the far left and click the Add Workspace button. Give the workspace a name, then select the 2048-stack we just defined. Now click the Add or Import Project button. Click the Git tab and enter the URL of the repo (https://github.com/plibither8/2048.cpp.git):

By the way, if you click GitHub, Che wants to connect to your GitHub account. Since we don't own the repo we're working with, just use the Git tab. That lets you clone any public repo.
Click the Add button to add the repo to your workspace, then click the green Create button at the bottom of the page. On the panel that pops up, click Open to see the workspace in your browser. After a few seconds, you'll see that Che is pulling the new image. The running workspace looks like this:

As you can see, the 2048.cpp repo is cloned into the environment. We know what to do from here. Go to the Terminal tab and follow the instructions from before. Make the build directory, switch to it, run cmake .., and then run make. cmake creates the Makefile, and make creates the object files and links them into an executable. Now double-click the Terminal tab to maximize it and then type ./2048. I played a new game with a 4 x 4 board and used the arrow keys to manipulate the cells. Here's a screen capture from early in the game:

This UI is not as visually flashy as other versions you might have seen, but it's every bit as difficult and addictive.
That's how to build a custom stack. Most of the time you'll be able to use one of Che's default stacks to do everything you need to do, but if not, building a custom stack is the way to go. In the Dockerfile, we used a few commands to install the missing tooling, we created a new stack based on the new container image, we created a workspace based on the new stack, and finally built the code inside the workspace using the tools we added.
Che Factories
If you want to take things a step further, you can use a factory to create a URL from that workspace. You can then share the URL with anyone. When they open the factory URL, their browser will open a new workspace with the exact same environment. In other words, it will work on their machine. Factories are another feature that makes Che so powerful. We cover factories in this video:
This video is from a complete article on Che factories and workspaces. When you're done here, check out that article as well.
Summary
With a custom stack, you can be sure that everyone has the same tools and libraries. That means anything that works on your machine works on everybody else's machine. We hope this helps you make the most of Eclipse Che across your team.
Last updated: July 8, 2025