Redhat Developers  Logo
  • AI

    Get started with AI

    • Red Hat AI
      Accelerate the development and deployment of enterprise AI solutions.
    • AI learning hub
      Explore learning materials and tools, organized by task.
    • AI interactive demos
      Click through scenarios with Red Hat AI, including training LLMs and more.
    • AI/ML learning paths
      Expand your OpenShift AI knowledge using these learning resources.
    • AI quickstarts
      Focused AI use cases designed for fast deployment on Red Hat AI platforms.
    • No-cost AI training
      Foundational Red Hat AI training.

    Featured resources

    • OpenShift AI learning
    • Open source AI for developers
    • AI product application development
    • Open source-powered AI/ML for hybrid cloud
    • AI and Node.js cheat sheet

    Red Hat AI Factory with NVIDIA

    • Red Hat AI Factory with NVIDIA is a co-engineered, enterprise-grade AI solution for building, deploying, and managing AI at scale across hybrid cloud environments.
    • Explore the solution
  • Learn

    Self-guided

    • Documentation
      Find answers, get step-by-step guidance, and learn how to use Red Hat products.
    • Learning paths
      Explore curated walkthroughs for common development tasks.
    • Guided learning
      Receive custom learning paths powered by our AI assistant.
    • See all learning

    Hands-on

    • Developer Sandbox
      Spin up Red Hat's products and technologies without setup or configuration.
    • Interactive labs
      Learn by doing in these hands-on, browser-based experiences.
    • Interactive demos
      Click through product features in these guided tours.

    Browse by topic

    • AI/ML
    • Automation
    • Java
    • Kubernetes
    • Linux
    • See all topics

    Training & certifications

    • Courses and exams
    • Certifications
    • Skills assessments
    • Red Hat Academy
    • Learning subscription
    • Explore training
  • Build

    Get started

    • Red Hat build of Podman Desktop
      A downloadable, local development hub to experiment with our products and builds.
    • Developer Sandbox
      Spin up Red Hat's products and technologies without setup or configuration.

    Download products

    • Access product downloads to start building and testing right away.
    • Red Hat Enterprise Linux
    • Red Hat AI
    • Red Hat OpenShift
    • Red Hat Ansible Automation Platform
    • See all products

    Featured

    • Red Hat build of OpenJDK
    • Red Hat JBoss Enterprise Application Platform
    • Red Hat OpenShift Dev Spaces
    • Red Hat Developer Toolset

    References

    • E-books
    • Documentation
    • Cheat sheets
    • Architecture center
  • Community

    Get involved

    • Events
    • Live AI events
    • Red Hat Summit
    • Red Hat Accelerators
    • Community discussions

    Follow along

    • Articles & blogs
    • Developer newsletter
    • Videos
    • Github

    Get help

    • Customer service
    • Customer support
    • Regional contacts
    • Find a partner

    Join the Red Hat Developer program

    • Download Red Hat products and project builds, access support documentation, learning content, and more.
    • Explore the benefits

How I refactored a legacy Node.js test suite with Claude (and saved 3 days of work)

April 10, 2026
Tomas Juhasz
Related topics:
Artificial intelligenceDeveloper productivity
Related products:
Developer ToolsetRed Hat AI

    I recently came across an issue in the test suite of our Node.js component. Like many long-standing projects, this suite was developed over many years by different people. This naturally led to a certain "rustiness" in the code.

    The specific issues were classic signs of technical debt:

    • Hard-coded values that were no longer relevant or correct.
    • Missing metadata that broke our testing strategy for newer Node.js versions.
    • Inconsistent structure across tests written by different generations of developers.

    The fix was conceptually simple: rewrite a few lines, replace hard-coded paths with environment variables, and add a standard metadata file. It was a job that would take 15 minutes at most per test.

    The catch? Our test suite had more than 100 such tests in our test suite. 

    100 tests times 15 minutes equals 1,500 minutes (25 hours). That's three full working days of mind-numbing, repetitive value rewriting. I needed a better way.

    The solution: AI as a pattern matcher

    Before I found this problem, I was playing around with Claude AI. I noticed that while Claude isn't the best at creating code from scratch, it is quite good at rewriting it, especially if given an example to mimic.

    I think this is one of the best use cases for AI. It doesn't need to be creative or understand the problem as a whole; it just needs to apply changes made to one file dynamically across the test suite.

    How to set up Claude for large-scale refactoring

    While you can use the web interface, manually syncing more than 100 files is inefficient and a version control nightmare. To handle a task of this scale, it's better to use tools that can interact with your local file system directly.

    The Claude command-line interface (CLI) is the official tool from Anthropic. Unlike the web interface, it can read your file structure, run terminal commands, and—crucially—edit files directly.

    Installation

    The installation is straightforward and requires no additional dependencies. As described in the official docs, the installation is very simple and requires no additional dependencies. Use the bash or Zsh shell to run the following command and install claude:

    curl -fsSL https://claude.ai/install.sh | bash

    Authentication

    Once installed, run the following command to initialize the tool:

    claude

    Optional: Authenticate for Google Vertex AI

    If you access Claude through Google Vertex AI, you must install the gcloud CLI to handle authentication. For detailed instructions, refer to the Google Cloud SDK documentation.

    Now that Claude has access to local files, we can get back to solving our problem.

    Step 1: Create the pattern

    First, I manually fixed one test file to establish the pattern.

    Remove hard-coded paths

    I replaced the rigid binary paths with environment variables. This ensures the tests can run with different versions, such as Node.js 22 or Node.js 24.

    Before (hard-coded):

    # Before (Hardcoded)
    NODE_BIN="/usr/bin/node"

    After (flexible):

    NODE_BIN=${NODE_BIN:-/usr/bin/node}
    NPM_BIN=${NPM_BIN:-/usr/bin/npm}
    NPX_BIN=${NPX_BIN:-/usr/bin/npx}
    NODEJS_MAIN_PACKAGE=${NODEJS_MAIN_PACKAGE:-nodejs}

    Add FMF metadata

    Our testing strategy uses .fmf metadata files to call tests with environment variables. These values set the local variables defined in the previous step, allowing you to use the same test code for different binaries.

    The following example shows the metadata structure and the added values:

    summary: Verify usage of pqc in nodejs
    tag:
     - TestCaseCopy
     - Tier1
    tier: '1'
    component:
     - nodejs:24
    environment:
     MODSTREAMS: nodejs:24
    extra-summary: /CoreOS/nodejs/Sanity/pqc [nodejs:24]

    Step 2: Craft the prompt

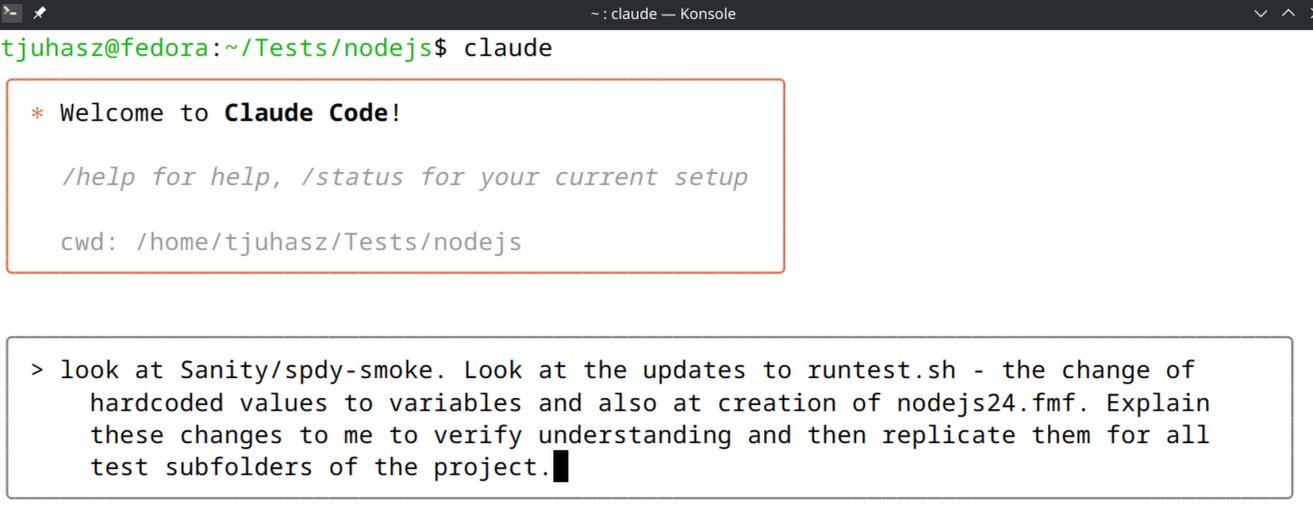
    Instruct Claude to look at the existing change, highlight the important parts, and apply them across the entire test suite. Asking the tool to explain the changes as a verification is also a good idea to ensure accuracy before proceeding. See Figure 1.

    Prompt claude: look at sanity/spdy-smoke, look at the updates to runtest.sh the changes  of structure and hardcoded values. Explain those changes to me and apply them across all test files in the project.
    Example claude prompt.
    Figure 1: Claude Code interface showing a prompt to analyze a manual refactor and apply it project-wide.

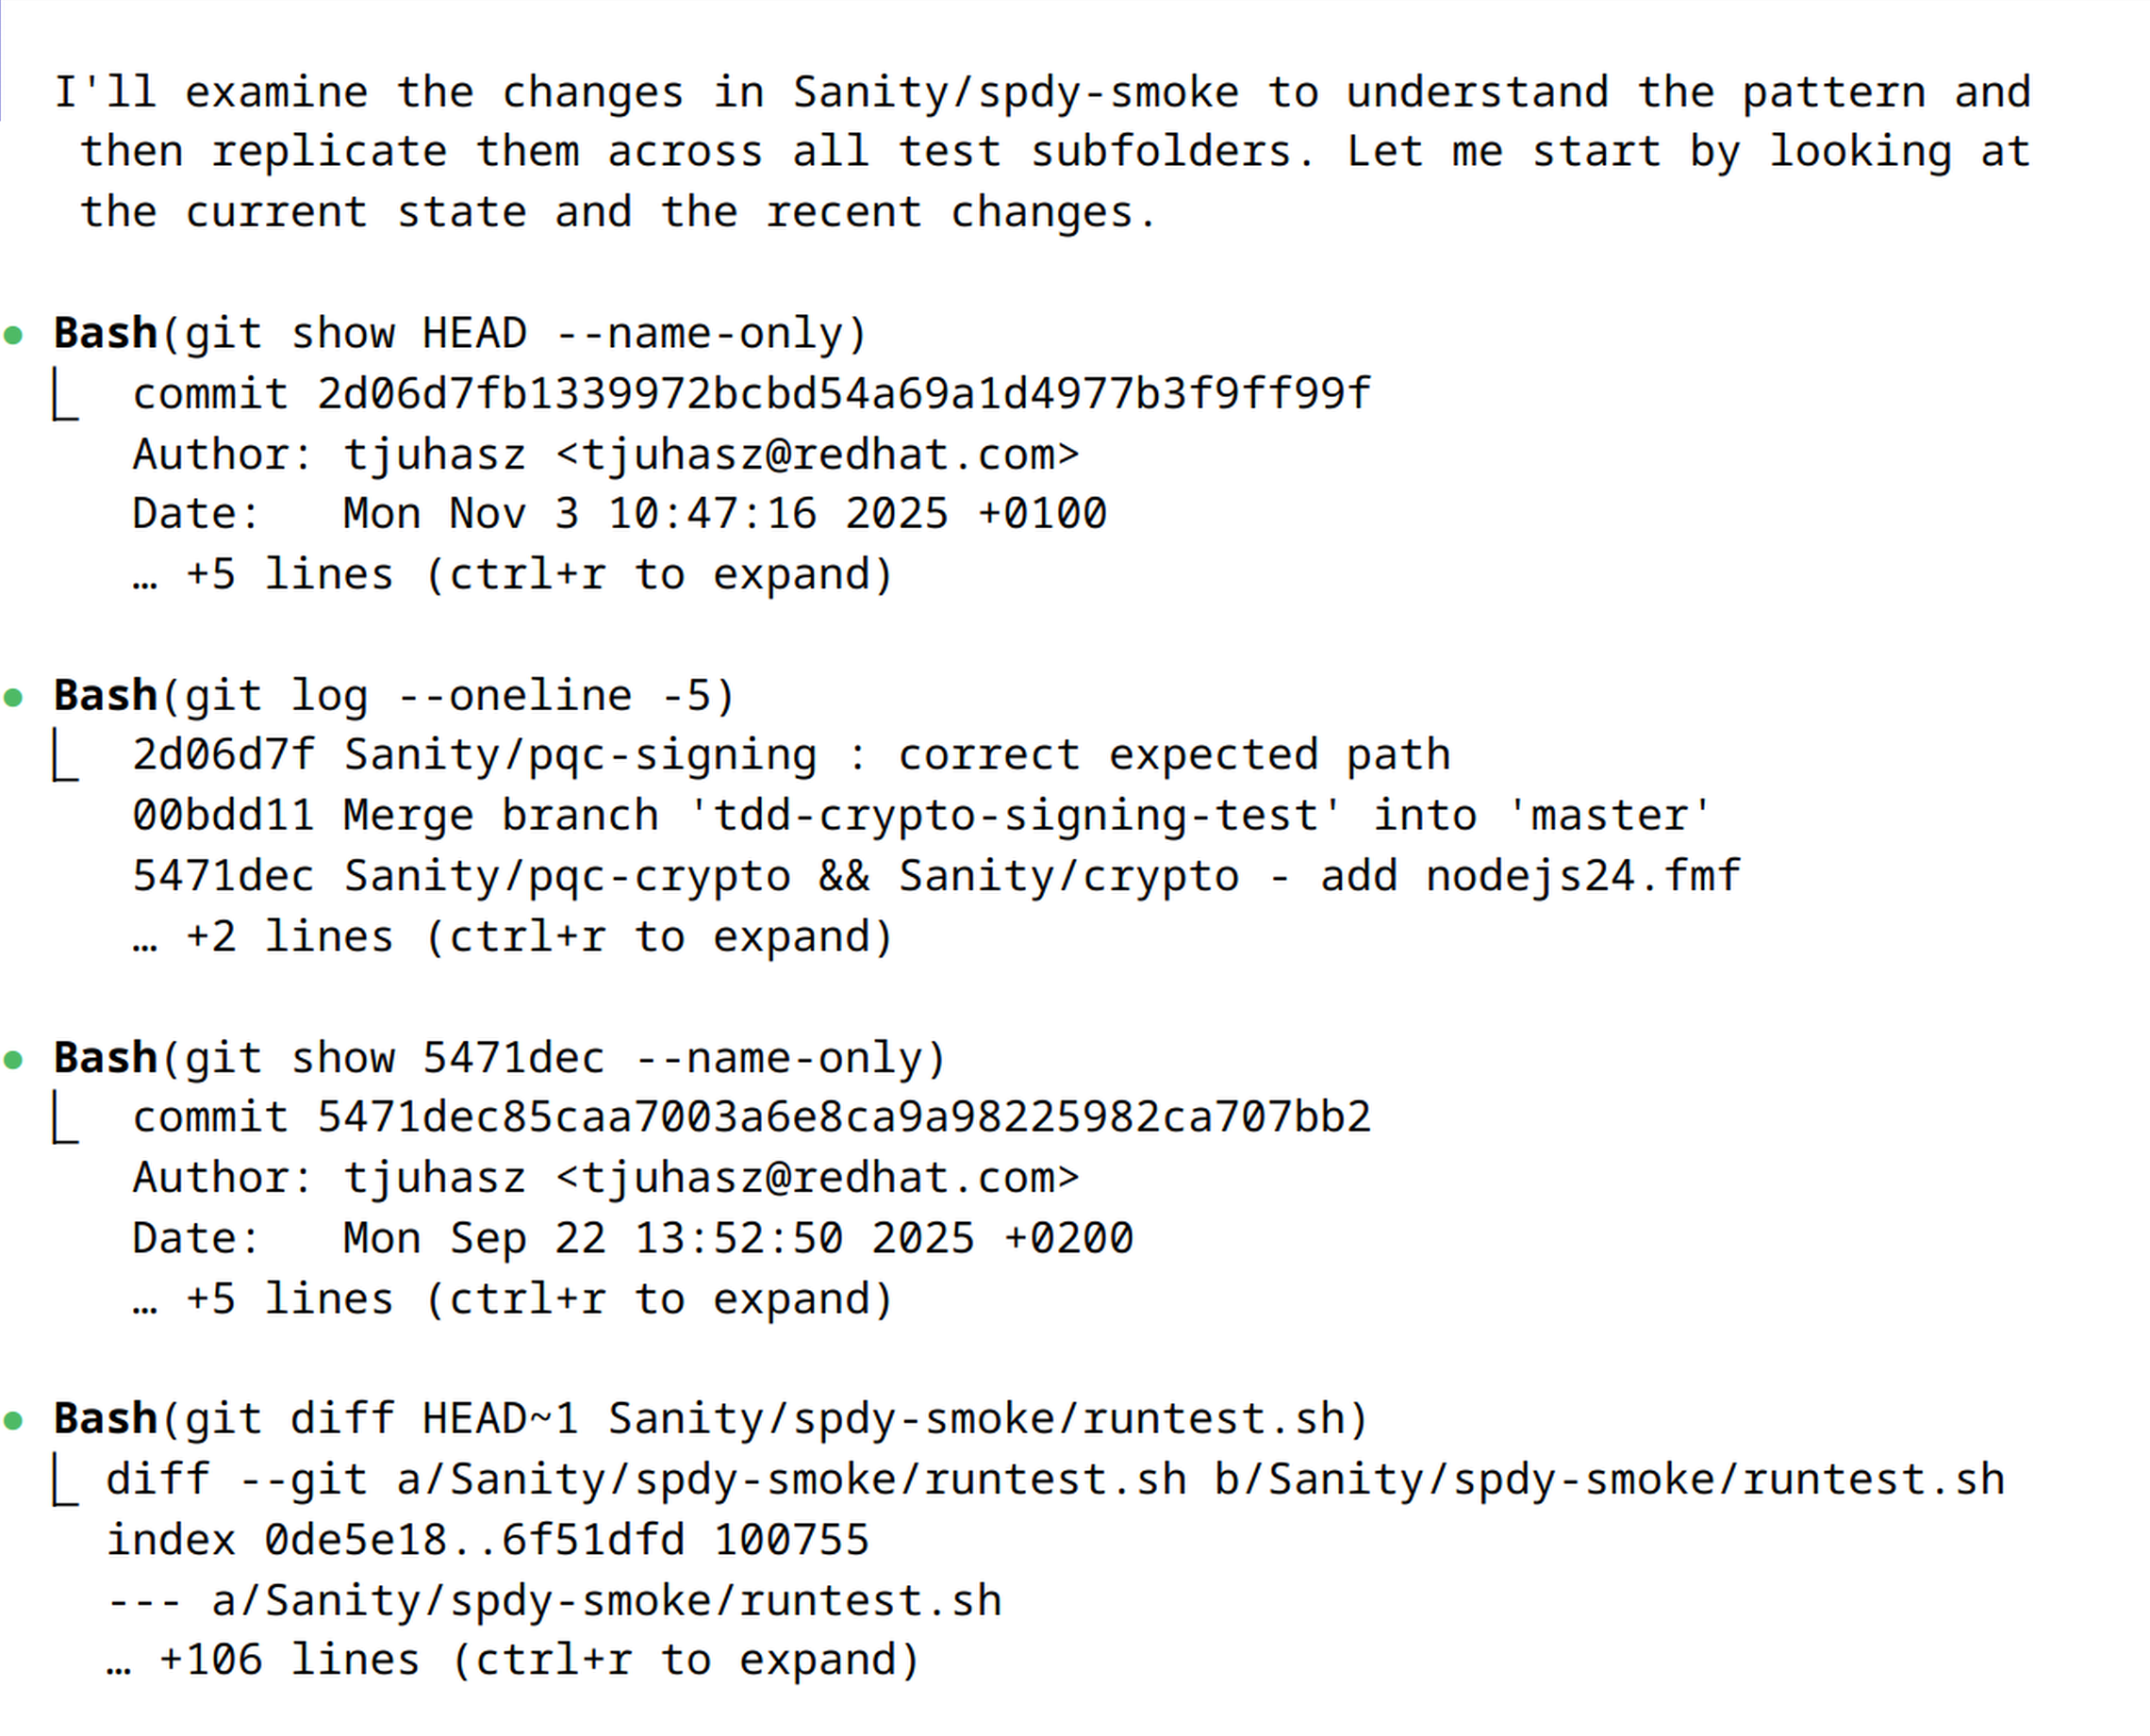
    Claude then resolves the issue by scanning the project files, as shown in Figure 2.

    Claude scanning files.
    Claude scanning.
    Figure 2: Claude automatically executing Git commands to identify specific code changes and the project's commit history.

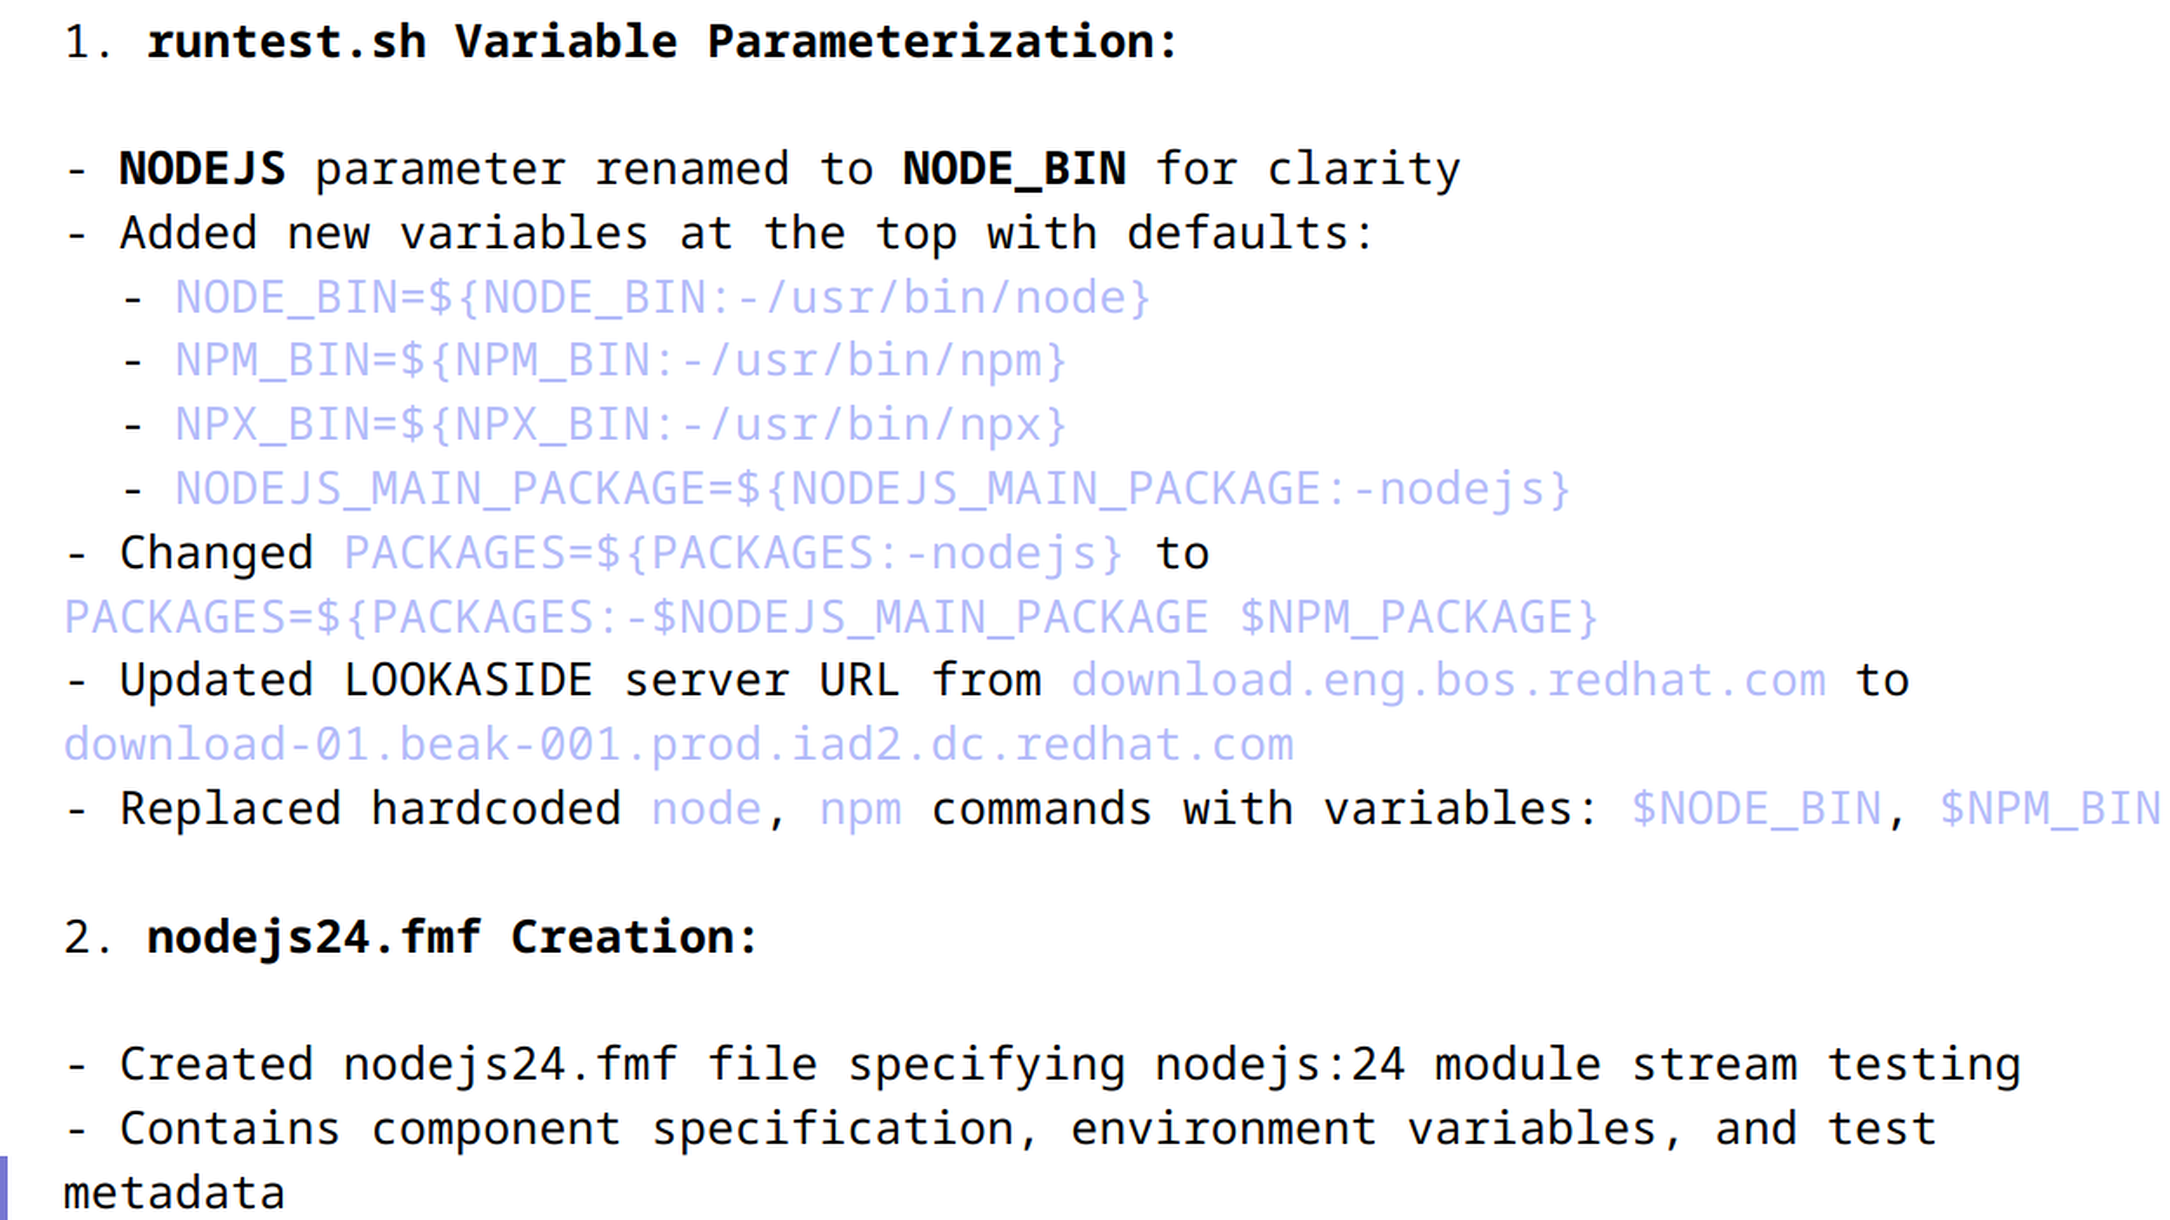
    It will provide the requested explanation for verification (Figure 3).

    Claude listing changes as it understands them.
    Claude verification.
    Figure 3: Claude's summarized explanation of the refactoring pattern for verification before it applies changes.

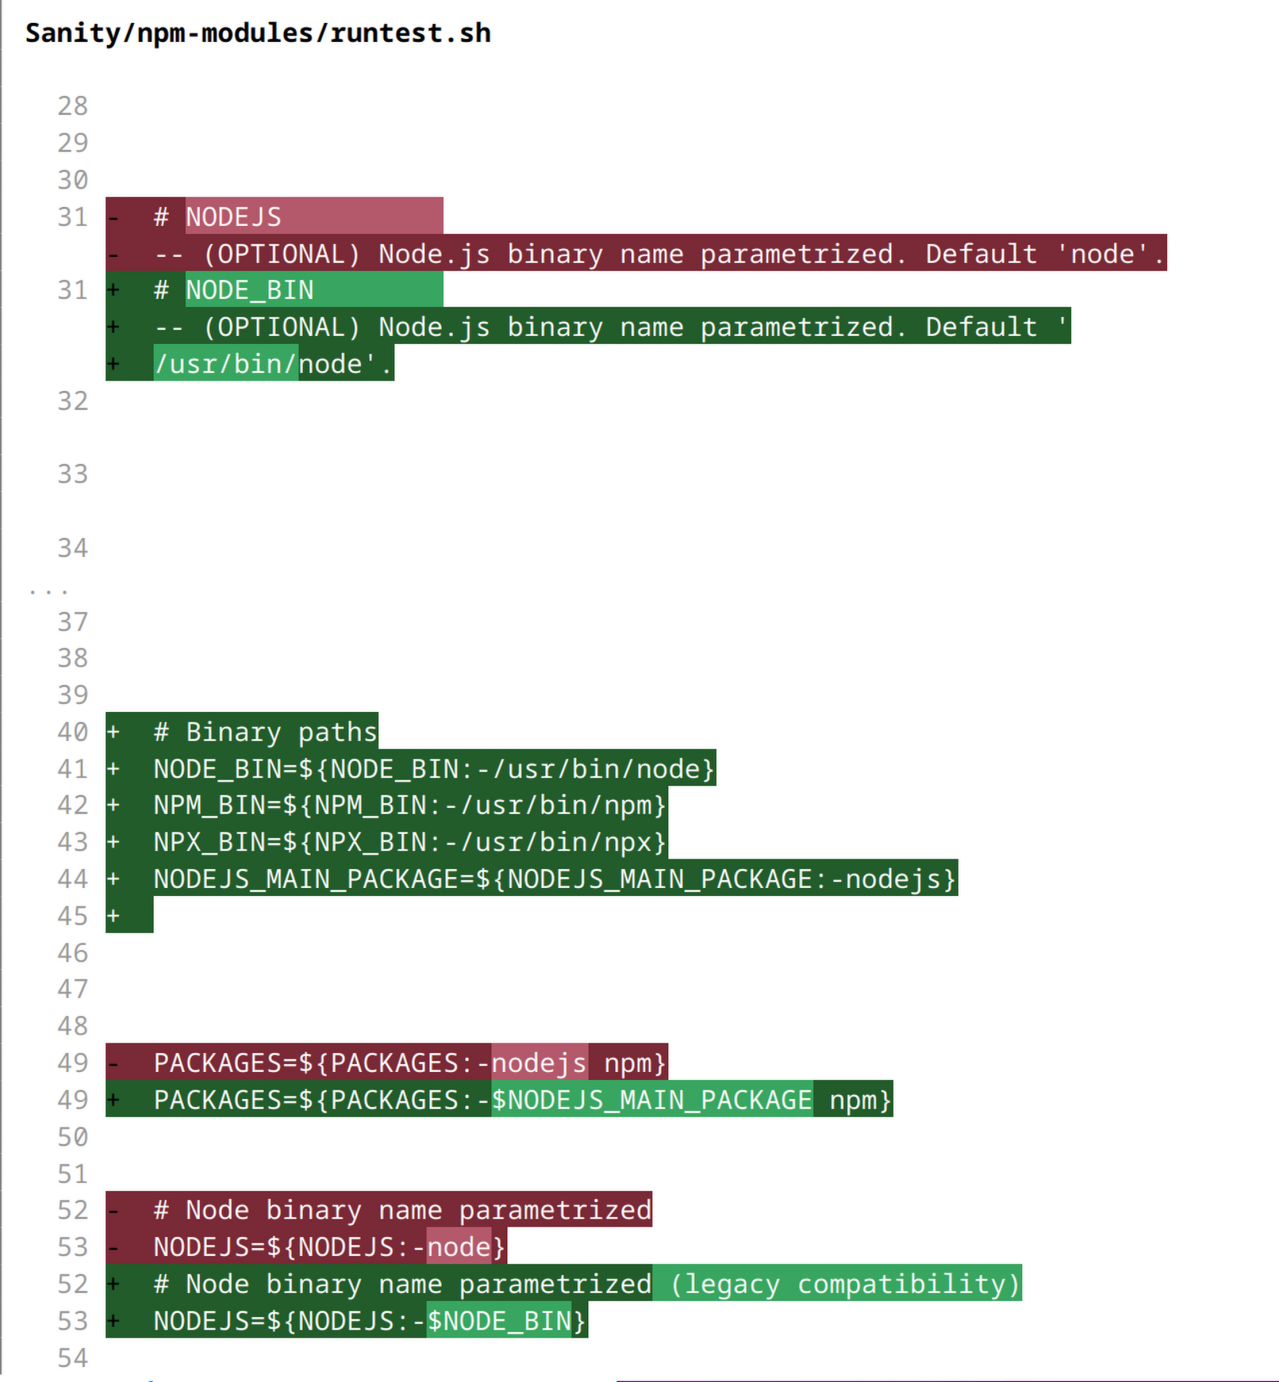
    Claude then automatically applies the same changes to other files across the project (Figure 4) and displays each code change.

    Claude is suggesting changes to other files.
    Claude suggesting changes.
    Figure 4: Code diff in the Claude interface illustrating the replacement of hard-coded paths with flexible environment variables.

    Claude asks for confirmation for each file (Figure 5). You can skip this step if it is no longer necessary.

    Claude asks you to confirm change or prompt it.
    Claude suggestion.
    Figure 5: Interactive Claude Code prompt requesting user authorization to apply edits to the local file system.

    The result

    Claude applied the pattern across the suite in approximately 15 minutes. I manually accepted each change to ensure accuracy.

    Instead of spending three days on copy-paste drudgery, the new process took less than an hour:

    • 15 minutes fixing the first test.
    • 20 minutes crafting the prompt and reviewing Claude's output.
    • 20 minutes verifying the test run.

    Refactoring legacy test suites is rarely difficult, but it is almost always boring and tedious. By using Claude as a pattern matcher rather than a generator, you can complete these tasks more efficiently and safely.

    Next steps

    Ready to explore how intelligent tools can enhance your development workflow? 

    • Check out our collection of learning paths for Red Hat OpenShift AI to start building and deploying your own AI-powered applications.
    • Browse the AI quickstarts catalog for production-ready use cases, including fraud detection, document processing, and customer service automation.
    • Discover more ways to integrate AI into your workflow by exploring our curated resources for AI in development.

    Related Posts

    • Introduction to the Node.js reference architecture: Testing

    Recent Posts

    • A guide to JIT checkpointing with Kubeflow Trainer on OpenShift AI

    • How to manage TLS certificates used by OpenShift GitOps operator

    • Configure a split disk on OpenShift Container Platform

    • Red Hat Enterprise Linux 10.2 and 9.8: Top features for developers

    • What GPU kernels mean for your distributed inference

    What’s up next?

    Learning Path RHEL_AI_LP_featured_Image

    Download, serve, and interact with LLMs on RHEL AI

    Configure your Red Hat Enterprise Linux AI machine, download, serve, and...
    Red Hat Developers logo LinkedIn YouTube Twitter Facebook

    Platforms

    • Red Hat AI
    • Red Hat Enterprise Linux
    • Red Hat OpenShift
    • Red Hat Ansible Automation Platform
    • See all products

    Build

    • Developer Sandbox
    • Developer tools
    • Interactive tutorials
    • API catalog

    Quicklinks

    • Learning resources
    • E-books
    • Cheat sheets
    • Blog
    • Events
    • Newsletter

    Communicate

    • About us
    • Contact sales
    • Find a partner
    • Report a website issue
    • Site status dashboard
    • Report a security problem

    RED HAT DEVELOPER

    Build here. Go anywhere.

    We serve the builders. The problem solvers who create careers with code.

    Join us if you’re a developer, software engineer, web designer, front-end designer, UX designer, computer scientist, architect, tester, product manager, project manager or team lead.

    Sign me up

    Red Hat legal and privacy links

    • About Red Hat
    • Jobs
    • Events
    • Locations
    • Contact Red Hat
    • Red Hat Blog
    • Inclusion at Red Hat
    • Cool Stuff Store
    • Red Hat Summit
    © 2026 Red Hat

    Red Hat legal and privacy links

    • Privacy statement
    • Terms of use
    • All policies and guidelines
    • Digital accessibility

    Chat Support

    Please log in with your Red Hat account to access chat support.