Many people have done continuous integration and continuous delivery (CI/CD) for .NET Core, but they still may wonder how to implement this process in Red Hat OpenShift Container Platform (OCP). The information is out there, but it has not been structurally documented. In this article, we'll walk through the process.
The CI/CD process for .NET applications
The CI/CD process is fairly straightforward for .NET applications, with the following high-level process:
- Start Jenkins to check out the Jenkinsfile.
- Get the .NET Core source code from Gogs.
- Continue according to the configured pipelines, which in this case means:
- Run
dotnet restoreto restore the NuGet packages from the Nexus repository. - Run
dotnet publishto build and publish the.dllfiles. - Run
oc start-buildto build the container image using the published.dllfiles, which deploys or redeploys the container when the image build in theDevelopmentproject is completed. - Tag the image in the
Developmentproject (in this example, the tag issampledotnet:UATReady-1.0.0), which triggers an image pulled from theDevelopmentproject to the user acceptance testing (UAT) project.
- Run
The required Openshift artifacts for the Development and UAT projects are preconfigured in the next section by using the sample template, which you can download from GitHub.
Configuring OpenShift
Note: You may wish to change some of the paths and parameters according to your environment.
To configure Red Hat OpenShift for our example CI/CD process, complete the following steps.
- Create your OpenShift projects:
oc new-project demo-dev --display-name="Development"
oc new-project demo-uat --display-name="UAT"
oc new-project demo-tools --display-name="CI/CD Tools"
- Apply the necessary permissions so Jenkins can modify and access the
DevelopmentandUATprojects. We also need to grant permission for theUATproject to pull images from theDevelopmentproject:
oc policy add-role-to-user edit system:serviceaccount:demo-tools:jenkins -n demo-dev
oc policy add-role-to-user edit system:serviceaccount:demo-tools:jenkins -n demo-uat
oc policy add-role-to-user system:image-puller system:serviceaccount:demo-uat:default -n demo-dev
Note: If these lines result in "Warning: ServiceAccount 'jenkins' not found," this message can be ignored.
- Deploy the necessary CI/CD tools:
oc new-app -f https://raw.githubusercontent.com/chengkuangan/templates/master/gogs-persistent-template.yaml -p SKIP_TLS_VERIFY=true -p DB_VOLUME_CAPACITY=1Gi -p GOGS_VERSION=latest -p GOGS_LIMIT_CPU=300m -p GOGS_LIMIT_MEM=256Mi -p POSTGRESQL_LIMIT_CPU=200m -p POSTGRESQL_LIMIT_MEM=256Mi -n demo-tools
oc new-app -f https://raw.githubusercontent.com/chengkuangan/templates/master/nexus3-persistent-templates.yaml -p NEXUS_VOLUME_CAPACITY=20Gi -p NEXUS_VERSION=latest -p NEXUS_LIMIT_CPU=1 -p NEXUS_LIMIT_MEM=3Gi -n demo-tools
oc new-app jenkins-persistent -n demo-tools
oc create -f https://raw.githubusercontent.com/chengkuangan/dotnetsample/master/templates/dotnet-jenkins-slave.yaml -n demo-tools
Note: Typically Microsoft Team Foundation Server (TFS) is used for source control management (SCM) in the Microsoft world; however, Gogs is used in this example mainly because there is no TFS available for me to try out. If TFS is the use case, you will need to install the TFS plugin for Jenkins to enable integration between Jenkins and TFS.
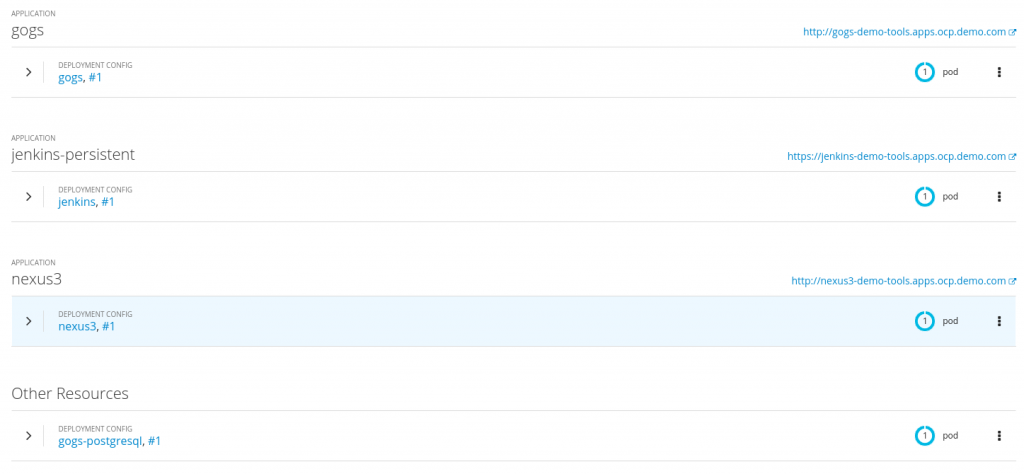
Now, you can see your deployed tools in OpenShift:
You may receive an error where the .Net Jenkins slave could not be started due to a missing ImageStream, like so:
![]()
In this case, the image above shows an error in the Jenkins pod indicating that the ImageStream dotnet-22-jenkins-slave-rhel7 is not found. To fix this problem, you would change the following in the dotnet-jenkin-slave.yaml file to use the correct URL path for the ImageStream setting:
<image>dotnet-22-jenkins-slave-rhel7:latest</image>
Or, you can modify the ConfigMap created earlier (named dotnet-jenkins-slave-22 in this example).
- Deploy the .NET Core artifacts using the .NET Core templates. Notice the parameter
--allow-missing-imagestream-tags=true, which indicates that we do not have any images available until we build them in when we run the pipelines:
oc new-app -n demo-dev --allow-missing-imagestream-tags=true -f https://raw.githubusercontent.com/chengkuangan/dotnetsample/master/templates/dotnet-template.yaml -p IMAGE_PROJECT_NAME=demo-dev -p IMAGE_TAG=latest -p APPLICATION_NAME=sampledotnet
oc new-app -n demo-uat --allow-missing-imagestream-tags=true -f https://raw.githubusercontent.com/chengkuangan/dotnetsample/master/templates/dotnet-nobuild-template.yaml -p IMAGE_PROJECT_NAME=demo-uat -p IMAGE_TAG=UATReady-1.0.0 -p APPLICATION_NAME=sampledotnet
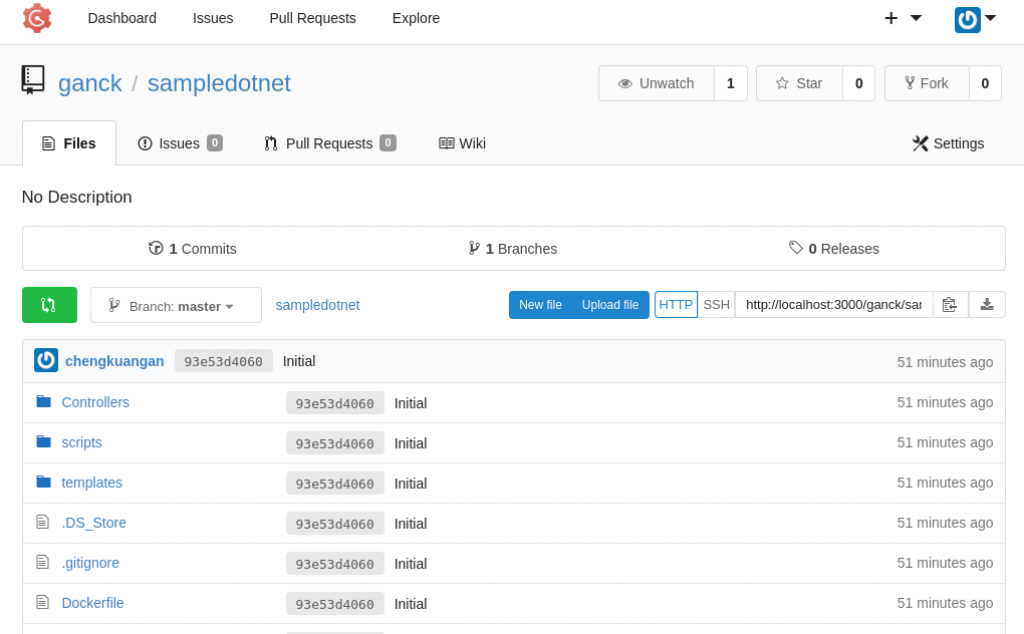
- Log into Gogs and clone the .NET Core sample code from https://github.com/chengkuangan/dotnetsample.git, shown below:
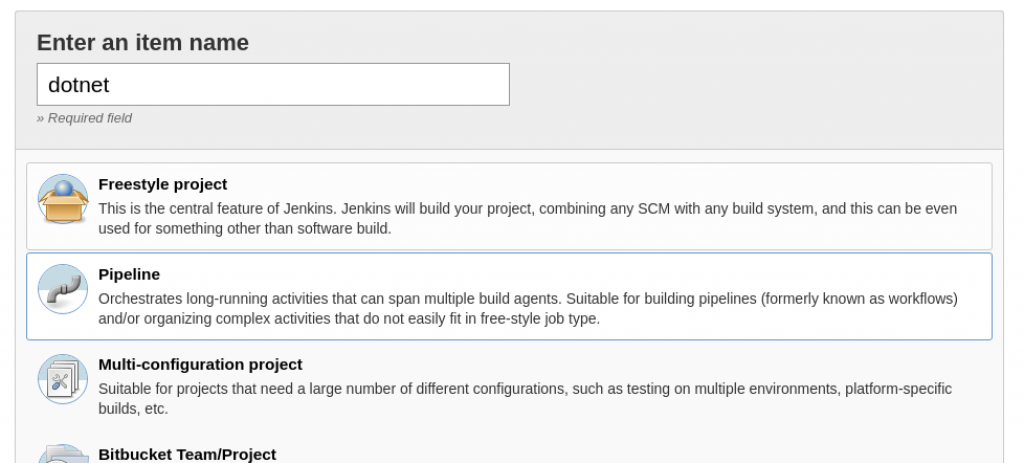
- Create a Jenkins Pipeline item as shown here:
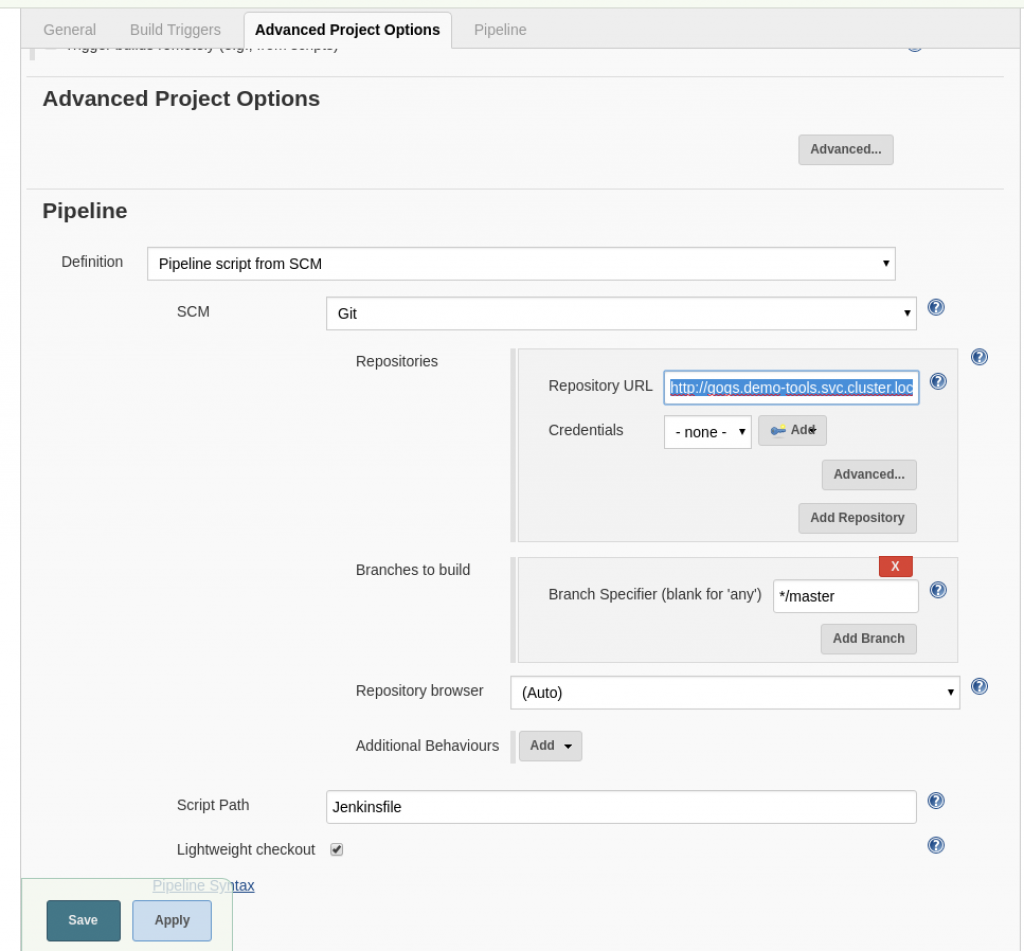
- Point the Git URL to the Gogs repository URL:
- Go the Jenkins item just created and click Build Now. The .NET apps will be built and deployed in no time.
Changing the .NET project files
The following summarizes the changes required in the .NET project files:
- Introduce
RuntimeIdentifierinto the existing.csprojfile to indicate that this project should be built for the Red Hat Enterprise Linux 7 environment:
  <PropertyGroup>
    <TargetFramework>netcoreapp2.2</TargetFramework>
    <AspNetCoreHostingModel>InProcess</AspNetCoreHostingModel>
    <DockerDefaultTargetOS>Linux</DockerDefaultTargetOS>
    <UserSecretsId>0a9f43ee-3c69-42b2-9766-c1b35bafeebd</UserSecretsId>
    <RuntimeIdentifier>rhel.7-x64</RuntimeIdentifier>
  </PropertyGroup>
- Add NuGet package configuration into the
.csprojand.deps.jsonfiles to test whether the Nexus works as expected for NuGet packages. A snippet of this configuration change is shown below:
  <ItemGroup>
    <PackageReference Include="Microsoft.AspNetCore.App" Version="2.2.0"/>
    <PackageReference Include="Microsoft.AspNetCore.Razor.Design" Version="2.2.0" PrivateAssets="All" />
    <PackageReference Include="Microsoft.VisualStudio.Azure.Containers.Tools.Targets" Version="1.4.10" />
    <PackageReference Include="Dapper" Version="1.60.6"/>
  </ItemGroup>
- For the .NET apps build process to refer to our predefined repository in Nexus, we need to create a
nuget.configfile in the project's root folder. Use the following configuration as the bare minimum settings. Notice theNexus_Packagesunder<packageSources>, where we set the proxy repository in the Nexus server:
  <?xml version="1.0" encoding="utf-8"?>
  <configuration>
      <packageRestore>
          <!-- Allow NuGet to download missing packages -->
          <add key="enabled" value="True" />
          <!-- Automatically check for missing packages during build in Visual Studio -->
          <add key="automatic" value="True" />
      </packageRestore>
      <solution>
          <add key="disableSourceControlIntegration" value="true" />
      </solution>
      <packageSources>
          <add key="Nexus_Packages" value="http://nexus3-demo-tools.apps.ocp.demo.com/repository/nuget.org-proxy/" />
      </packageSources>
  </configuration>
- Create the following Jenkinsfile in the project's root folder:
#!groovy
def DEV_PROJECTNAME = "demo-dev"
def UAT_PROJECTNAME = "demo-uat"
def BUILDCONFIGNAME="sampledotnet"
def IMAGE_NAME="sampledotnet:latest"
def UATIMAGENAME = "sampledotnet:UATReady-1.0.0"
node('dotnet-22') {
  stage('Clone') {
    checkout scm
  }
  stage('Restore') {
    sh "dotnet restore Test.csproj --configfile nuget.config --force --verbosity d"
  }
  stage('Publish') {
    sh "dotnet publish Test.csproj --no-restore  -c Release /p:MicrosoftNETPlatformLibrary=Microsoft.NETCore.App"
  }
  stage('Build Image') {
    sh "oc -n $DEV_PROJECTNAME start-build $BUILDCONFIGNAME --from-dir=./bin/Release/netcoreapp2.2/rhel.7-x64/publish --follow"
    sh "oc -n $DEV_PROJECTNAME tag $DEV_PROJECTNAME/$IMAGE_NAME $UAT_PROJECTNAME/$UATIMAGENAME"
  }
}
Note: You may create the pipelines as part of YAML config in Openshift. However, I personally prefer to keep the Jenkinsfile as part of the project files in the source control system.
As illustrated in the above pipelines, instead of using the dotnet publish command to perform both the restore and publish processes, a --no-restore parameter is specified. This setup is to keep the command from calling the dotnet restore command automatically, which would cause it to bypass the nuget.config and directly connect to nuget.org to download the nuget packages. We introduce another stage before the Publish stage to explicitly call the dotnet restore command by pointing to nuget.config.
I hope this article helps you implement CI/CD for .NET Core using Red Hat OpenShift Container Platform.
