When an agent process runs on your laptop, it typically inherits anything your user has access to. Often this includes the full network stack, the file system, and the credentials sitting in memory. When integrating with GitHub, Slack, or a cloud provider, you could be one faulty permission or well-crafted prompt injection away from a security incident. We recorded a 3-part video series to prevent that, detailing how to secure AI agents for production. This post walks through 3 pillars:
- Containment: Restrict what an agent can reach
- Identity: Make it verifiable
- Governance: Enforce complete observability into and control over its actions
Every command and manifest below comes from a working demo cluster, so you can follow along and apply the same controls to your own agent deployment.
Prerequisites
Before you start, you need:
- A Red Hat OpenShift cluster. Our demo runs on OpenShift Local (formerly CodeReady Containers), so every command below works the same on a laptop-sized cluster or a full production cluster.
- The
occommand, and you must be logged in as a user who can create namespaces, ResourceQuotas, and install operators (or a cluster-admin for the OperatorHub installs in this post). - The zero trust workload identity manager operator, available from OperatorHub.
- The gatekeeper operator for OpenShift, for the admission control step.
- An agent you want to secure. In this example, we used OpenClaw, and we reference our demo repo's manifests (
agent-pod.yaml,network-policy.yaml,resource-quota.yaml,spire-values.yaml) throughout.
Contain the agent: namespace, quota, and a second sandbox layer
Wrapping an agent in a container on Red Hat OpenShift already operates under the restricted-v3 security context constraint (SCC). This SCC provides process isolation, a separate network namespace, and a non-root, read-only, all-capabilities-dropped runtime by default.
For a closer look at container-level isolation and NetworkPolicy, see our guardrails article for OpenClaw agents.
Here's how to go a few steps further:
1. Put every agent in its own namespace
Every agent, or every team's set of agents, should get its own Kubernetes namespace.
$ oc new-project gableidi-mlops-demo-agent-openclawIn its namespace, the workloads, secrets, and network traffic for one agent stay invisible to another agent by default. Without that boundary, an agent answering "What is my colleague working on this week?" for a Slack channel could end up surfacing details it picked up from a GitHub-focused agent's context, not because either agent misbehaved, but because they shared an environment.
Add a custom NetworkPolicy to specify rules for traffic flow within your cluster or between your pods and the outside world. OpenShift provides a default-deny ingress/egress policy meaning any inbound or outbound traffic can be explicitly allowed but is blocked by default to prevent any internal recon or mysterious outbound calls.
2. Cap CPU and memory with a ResourceQuota
Namespaces solve visibility. A ResourceQuota solves the noisy-neighbor problem: without limits, an agent stuck in a reasoning loop or handling a burst of requests can consume enough CPU or memory to degrade every other agent on the cluster.
The resource-quota.yaml file:
# resource-quota.yaml
apiVersion: v1
kind: ResourceQuota
metadata:
  name: agent-quota
spec:
  hard:
    requests.cpu: "2"
    requests.memory: "4Gi"
    limits.cpu: "4"
    limits.memory: "8Gi"
    pods: "10"
Apply it:
$ oc apply -f resource-quota.yaml
$ oc describe resourcequota openclaw-agent-quota -n gableidi-mlops-demo-agent-openclaw
Each individual agent pod should also request and limit its own resources, so the quota has something to enforce against. Create the agent-pod.yaml file:
# agent-pod.yaml
apiVersion: v1
kind: Pod
metadata:
  name: demo-agent
  namespace: gableidi-mlops-demo-agent-openclaw
  labels:
    app: agent
    role: agent
spec:
  # runtimeClassName: kata
  containers:
  - name: agent
    image: python:3.11-slim
    command: ["/bin/sleep", "3600"]

    resources:
      requests:
        cpu: "100m"
        memory: "128Mi"
      limits:
        cpu: "500m"
        memory: "512Mi"

    securityContext:
      runAsNonRoot: true
      runAsUser: 1002900000
      readOnlyRootFilesystem: false
      allowPrivilegeEscalation: false
      capabilities:
        drop:
        - ALL
3. Add Kata Containers for kernel-level sandboxing
A standard container shares the host kernel with every other container on the node. If an agent process breaks out of its container through a kernel exploit, the blast radius extends to the node itself. Kata Containers close that gap by giving each pod its own lightweight virtual machine and kernel, so a break-out from the container process still can't reach the host.
With the Kata Containers Operator installed, turning it on for an agent is a one-line change. Uncomment runtimeClassName: kata in agent-pod.yaml above, then apply it:
$ oc apply -f agent-pod.yaml
$ oc get pod demo-agent -n gableidi-mlops-demo-agent-openclaw -o jsonpath='{.spec.runtimeClassName}{"\n"}'
kata
Namespace isolation, a ResourceQuota, and Kata Containers turn containment from "the agent can't see out" into "the agent can't see out, can't starve its neighbors, and can't break out even if the container process itself is compromised."
Give the agent a cryptographic identity
So, now we need to answer the question "where do the API keys live?" In order to get credentials out of .env files and into Kubernetes Secrets, we can use a secure secrets management tool and serve credentials through short-lived ServiceAccount tokens. (We go deeper on Secrets, the Secrets Store CSI Driver, and the External Secrets Operator in our OpenClaw guardrails article.)
However, this doesn't solve a related problem: How does one workload prove to another which agent it actually is, without either side holding a shared secret?
4. Install workload identity with SPIFFE and SPIRE
Secure Production Identity Framework for Everyone (SPIFFE) defines a standard identity document, the SPIFFE ID, that a workload can present and another workload can verify cryptographically. SPIRE is the runtime that issues and rotates those identities automatically, based on attributes of the workload itself, such as its namespace and ServiceAccount, rather than a hard-coded key.
On Red Hat OpenShift, this ships as the zero trust workload identity manager operator, which runs the SPIRE server and agent in the cluster alongside the SPIFFE CSI Driver that mounts the identity into each pod at runtime. Our demo repo deploys it through a spire-values.yaml values file alongside the rest of the agent manifests:
server:
  image:
    repository: gcr.io/spiffe-io/spire-server
    tag: "1.7.0"
  replicas: 1
  namespace: agent-isolation-demo

agent:
  image:
    repository: gcr.io/spiffe-io/spire-agent
    tag: "1.7.0"
  replicas: 1
  namespace: agent-isolation-demo

trustDomain: "example.com"
However, the zero trust identity manager is an operator that can be installed through the OpenShift UI.
5. Verify the agent is getting a real identity
You don't have to leave the console to confirm this is working. Open the cluster Overview page and check the Activity feed: A spiffe-oidc container starting up shows up as a real, auditable event, right alongside the usual ConfigMap and Deployment changes.
Once issued, an agent no longer authenticates with a string copied into a config file. It authenticates with a SVID that SPIRE rotates on its own schedule, and that another workload can verify without calling back to a shared secret store. This matters more for agents than for a typical microservice: A microservice calls a small, fixed set of downstream services, but an AI agent can decide, mid-conversation, to call a new tool or API it hasn't called before. Whatever it calls next, the receiving service can still confirm which agent, in which namespace, made the request, instead of trusting a bearer token that could have leaked anywhere.
Govern what the agent is allowed to do
Containment and identity control the perimeter. Governance controls behavior: what an agent is allowed to do once it's authenticated and inside the network boundary. Tracing every decision with OpenTelemetry and aggregating it in MLflow (covered in more depth in our OpenClaw guardrails article) tells you what an agent did after the fact.
The next 3 steps add enforcement before or during the action itself.
6. Block noncompliant pods at admission with OPA and Gatekeeper
Open Policy Agent and its Kubernetes integration, Gatekeeper, enforce policy at the admission layer before a workload ever runs. Write the rule once as a ConstraintTemplate, apply a Constraint that uses it, and the platform blocks anything that violates it at the API server rather than after it's already running.
Try deploying a pod without runAsNonRoot: true and it never schedules; Gatekeeper rejects it at the API server with the message from the ConstraintTemplate.
7. Gate tool calls with an MCP Gateway
Admission control governs what gets scheduled. It doesn't govern what an already-running agent decides to do with the model context protocol (MCP) tools available to it. An MCP gateway sits in front of a policy checkpoint between the agent and every tool call, enforcing a 3-tier risk model scoped to individual tool invocations rather than broad API access.
- Low-risk calls: Reading a file and similar operations are executed and logged automatically.
- Medium-risk calls: Writing a file or calling an external API are rate-limited and audited.
- High-risk calls: Accessing credentials, or destructive operations, are held for human approval before they run.
8. Filter prompts and completions with NeMo Guardrails
The last checkpoint sits between the agent and the model itself. NeMo Guardrails runs as a service in the request path and filters both directions: Prompts going into the model and completions coming out. A prompt injection buried in a document the agent was asked to summarize, or an unsafe output the model generates in response, gets caught here, before it reaches the model's next reasoning step or the end user.
9. Verify the audit trail
Each decision must be visible after the fact. Open MLflow (figure 1) and check the openclaw-traces experiment. In our demo cluster, it shows exactly that: A trace that completed in 3.157 seconds with a state of OK, and another that failed instantly with a state of Error. That's the audit trail a reviewer would pull to answer "did this agent's last high-risk action actually get approved, and what happened when it didn't."
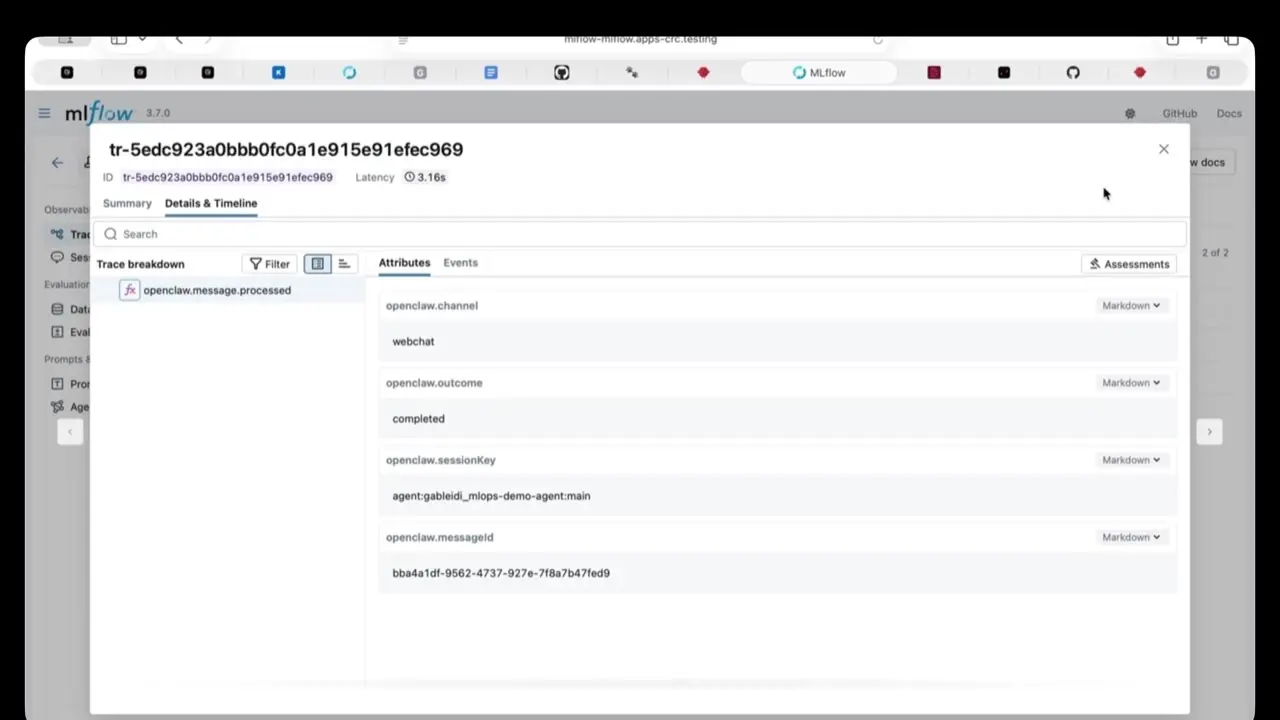
Together, admission control, tool-layer authorization, inference filtering, and trace review mean a risky action can be caught at 4 separate points: Before the workload runs, before the tool call executes, before the model sees a manipulated prompt, and in the audit trail if something still gets through.
What to try next
None of these controls work as a single line of defense. Namespace isolation and Kata Containers keep a compromised agent from reaching the node or a neighboring tenant. SPIFFE and SPIRE mean that even inside the network boundary, every request carries a verifiable identity instead of a bearer token. OPA Gatekeeper, MCP Gateway, and NeMo Guardrails enforce policy at multiple points in the agent's decision path, so a single missed check doesn't mean the whole system fails open.
Start with namespace isolation and a ResourceQuota, because those take minutes to apply to an existing agent deployment. Layer in Kata Containers and workload identity next. Governance controls are the most involved to stand up, so save those for once the 1st pillars are in place.
For the container, RBAC, and Secrets fundamentals these steps build on, see our article on building guardrails for OpenClaw agents. Watch the full 3-part video series for a walkthrough of each step on a live cluster, and check out our AI quickstarts for repositories that demonstrate agents deployed on Red Hat AI and Red Hat OpenShift.

