Analyzing and improving the quality of code should be one of the top priorities. AI brings a lot of positive and negative approaches. Our team recently needed to migrate our Bash container test suite, container-common-scripts (https://github.com/sclorg/container-common-scripts/), to a new Python-based CI suite (container-ci-suite). We would like to ensure that the code in container-ci-suite is well written and well covered by tests. We have decided to onboard two tools, CodeCov and CodeRabbit, into several repositories, such as container-ci-suite, ci-scripts and others. This article describes how to onboard a project and analyze the results.
Get started
CodeCov from code coverage works pretty smoothly. It perfectly detects what the code is really covered by tests. It does not generate the test code automatically. In case we would like to deliver a code that is shipped to customers, then the CodeCoverage should be added to all upstream projects. Let’s hit the issues as soon as possible, like shift left.
Before onboarding the repositories to CodeCov there are two actions needed.
First, log into app.codecov.io. Then, you will see all the onboarded projects. Figure 1 is an example of our onboarded projects.

If you do not see your repo, then the CodeCov GitHub application is not installed on your GitHub Repo. To install it, go to the installation page. Select the organization or repos where you would like to install CodeCov GitHub application.
Figure 2 shows how to install CodeCov in your whole organization or in specific repositories.
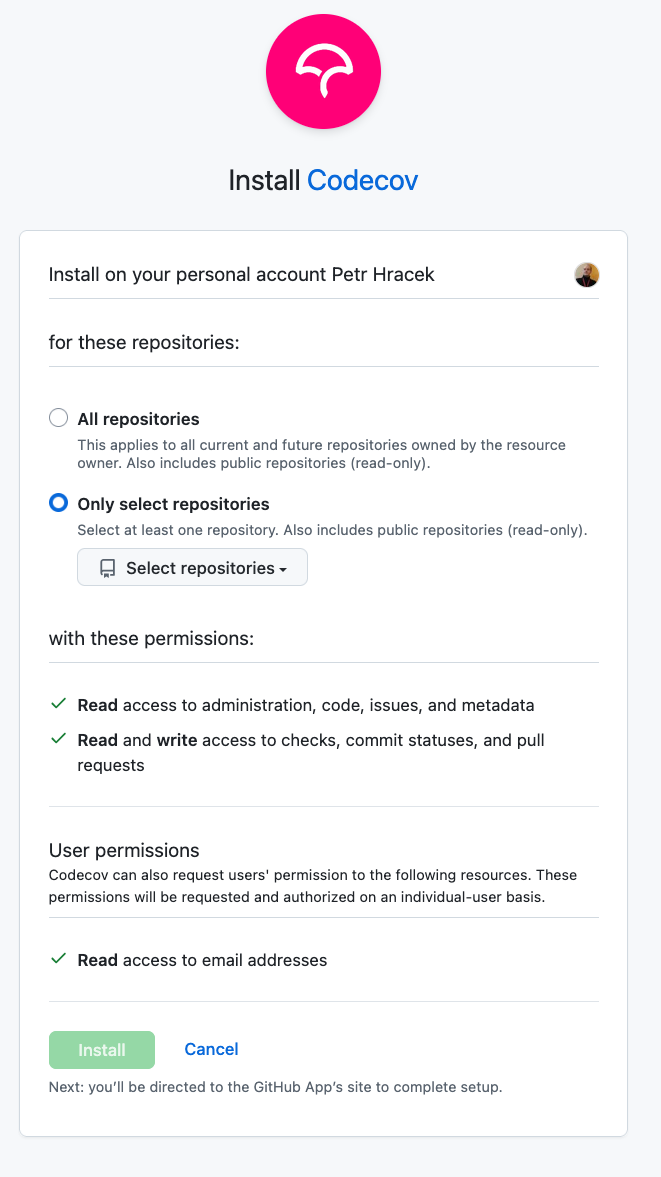
Click the Install button. Once the you've installed the application, you will see it in your GitHub applications. You can see all installed application in your GitHub profile.
Now let’s add CODECOV_TOKEN to your repository following these steps:
Go to your organization page api.codecov.io and select the repository you want to get the token.
The token is available in the Configuration -> General section.
Then copy the
CODECOV_TOKENto add to your repository or organization to the secrets variables.
Deploy CodeCov
In order to deploy CodeCov to your repository, you need to call it for each pull request by GitHub action. You can refer to this example.
The GitHub action for the Python case will look like this:
---
on:
  push:
    branches:
    - master
  pull_request:
    branches:
    - master
name: Run Tox tests on daily-tests
jobs:
  tox_test:
    strategy:
      matrix:
        tox_env: [py311, py312, py313, py314]
    runs-on: ubuntu-latest
    steps:
    - uses: actions/checkout@v2
    - uses: fedora-python/tox-github-action@main
      with:
        tox_env: ${{ matrix.tox_env }}
        workdir: “YOUR_PYTHON_WORKDIR” in our case "daily-tests/"
    - name: Upload coverage to Codecov
      uses: codecov/codecov-action@v5
      with:
        token: ${{ secrets.CODECOV_TOKEN }}
        flags: daily-tests-unit
        files: daily-tests/coverage.xml
        fail_ci_if_error: false
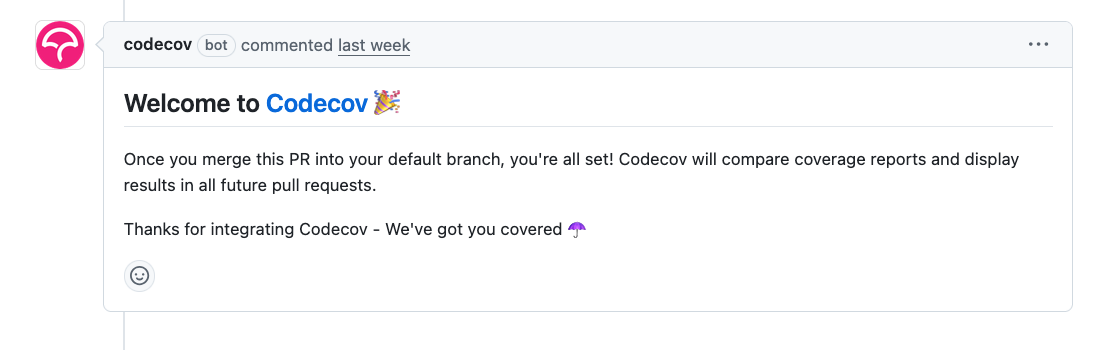
As soon as this is pushed as a pull request, then you should see in onboarding pull request a comment. Figure 3 shows the CodeCov comment on a real pull request that the project is successfully onboarded.
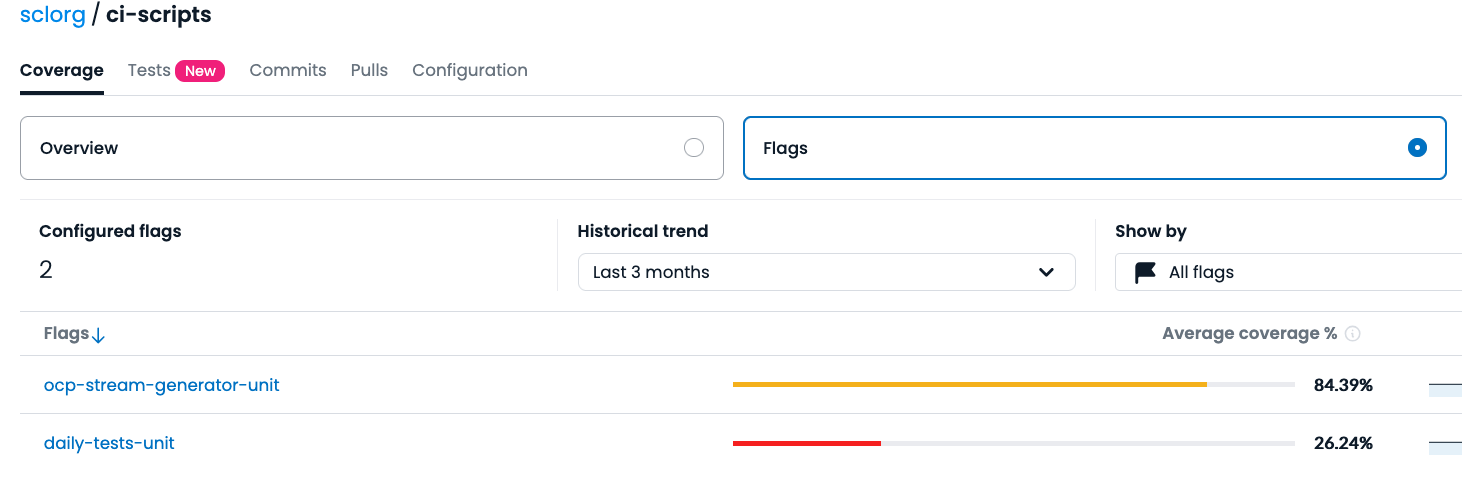
In case you do not see a message like this, look at the codecov web page and enable flags. Figure 4 shows how to enable flag analytics.
As soon as you deployed this, then in your next pull request you should see a message from CodeCov. Figure 5 shows the Codecov report and how the project is covered by tests.

Install CodeRabbit
For open source repositories, you can use the free version of CodeRabbit; though this version has a limitation of four pull requests per user per day. You can activate this using the free trial option on the coderabbit.ai website. Afterwards, you choose whether you want to use it on GitLab or GitHub, add it to your organization, and you’re good to go. To use it in a repository, you just have to add it in the GitHub apps section of the repository settings.
CodeRabbit settings and configuration
The options provided by default are mostly acceptable but you can personalize the way the large language model interacts with the repository and pull requests to a surprising degree. This is done using yaml files named .coderabbit.yaml. These files work on an inherit-based hierarchy. The configuration affects all the subdirectories and files in the directory/repository of the config unless a specific option is overwritten by a config in said subdirectory. You can find all the specific options on the coderabbit website.
Experience with CodeCov
Now in each pull request when a code is changed, CodeCov adds a comment about test coverage. Figure 6 shows how the changed code is covered.
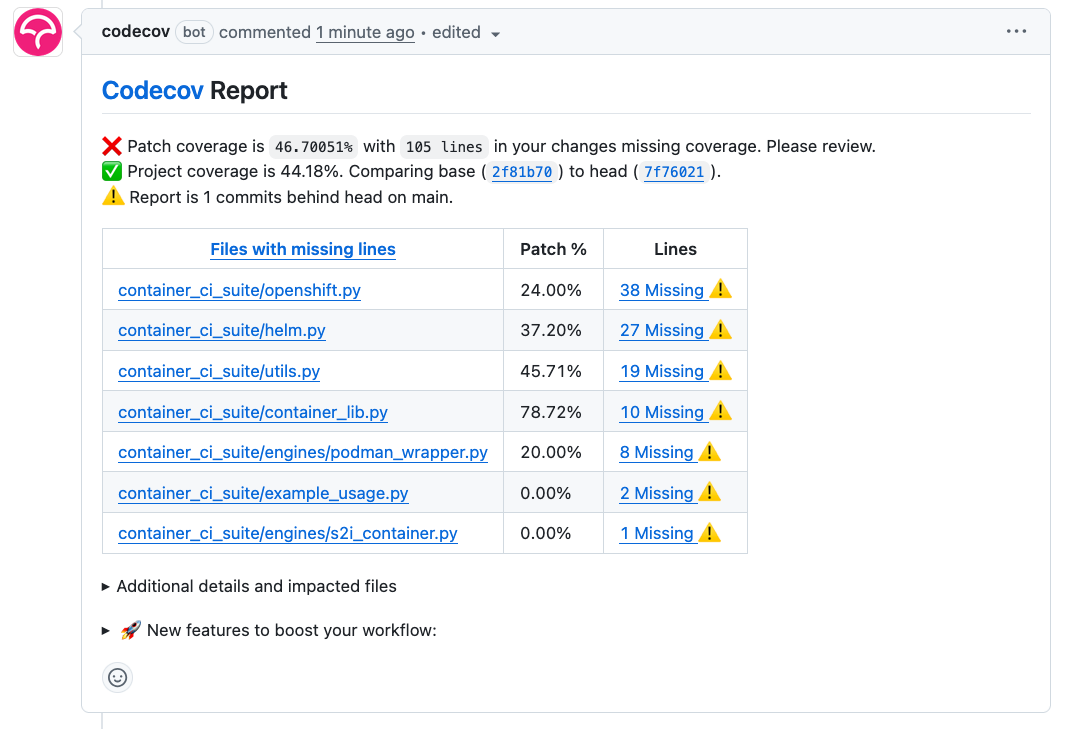
That describes how much code is changed and how much code is covered by PyTest. Ideally it would be nice to use an AI in case users want to increase code quality. We want to update the code so it is covered by tests. Now you should go through the code that is missing. Click on a link in the Lines column and analyze what has to be covered.
Experience with CodeRabbit
We have tested CodeRabbit on multiple pull requests ranging from simple changes to the README to advanced Python code changes. This one was not ground breaking, but it was still interesting to see how CodeRabbit would handle working with changes that do not necessarily affect code, yet they still have to be concise and structured. This shows that CodeRabbit maintains the sanity of your project even beyond the code.
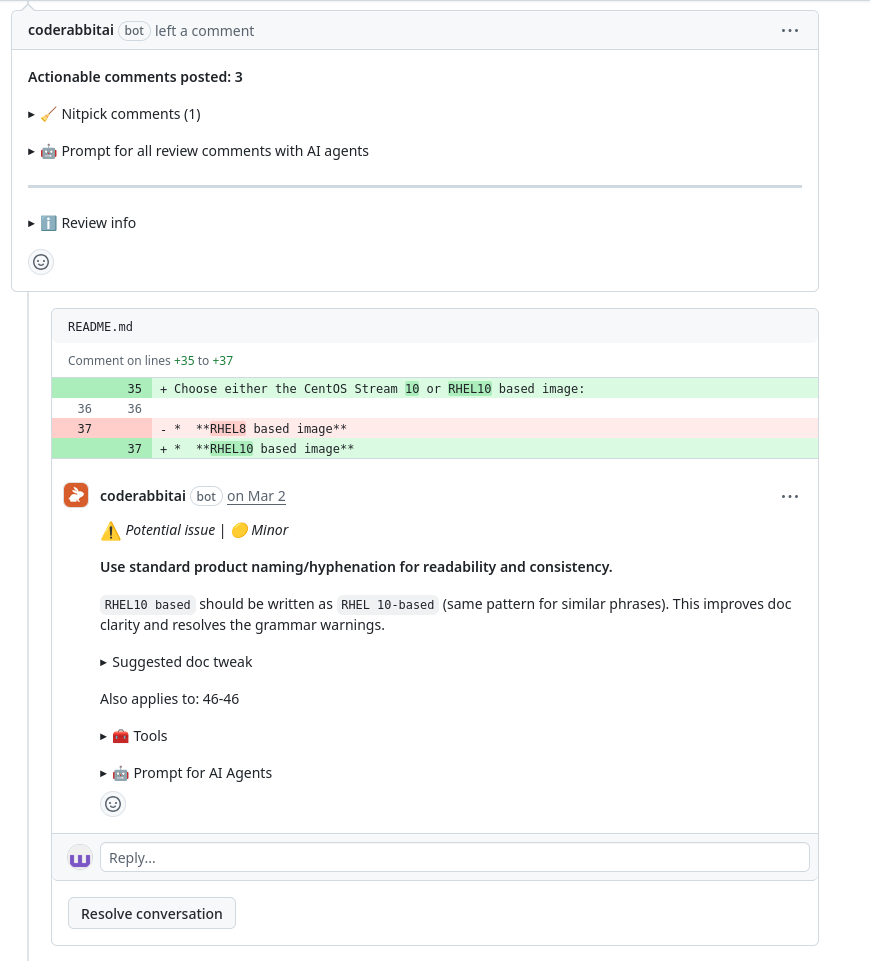
The Figure 7 shows suggestions by CodeRabbit about consistency in the README.
View the experiment with a Dockerfile and how CodeRabbit AI handles the FROM directive of the Dockerfile. Figure 8 shows how the CodeRabbit AI suggest changes in a Dockerfile.

FROM command reliability in a Dockerfile.What was a pleasant surprise was that CodeRabbit scans the entire file when a change is made to it, therefore uncovering potential issues even outside the scope of the changes inside the pull request. The results from these experiments were quite surprising, even uncovering an issue with passwords stored inside the Python code.
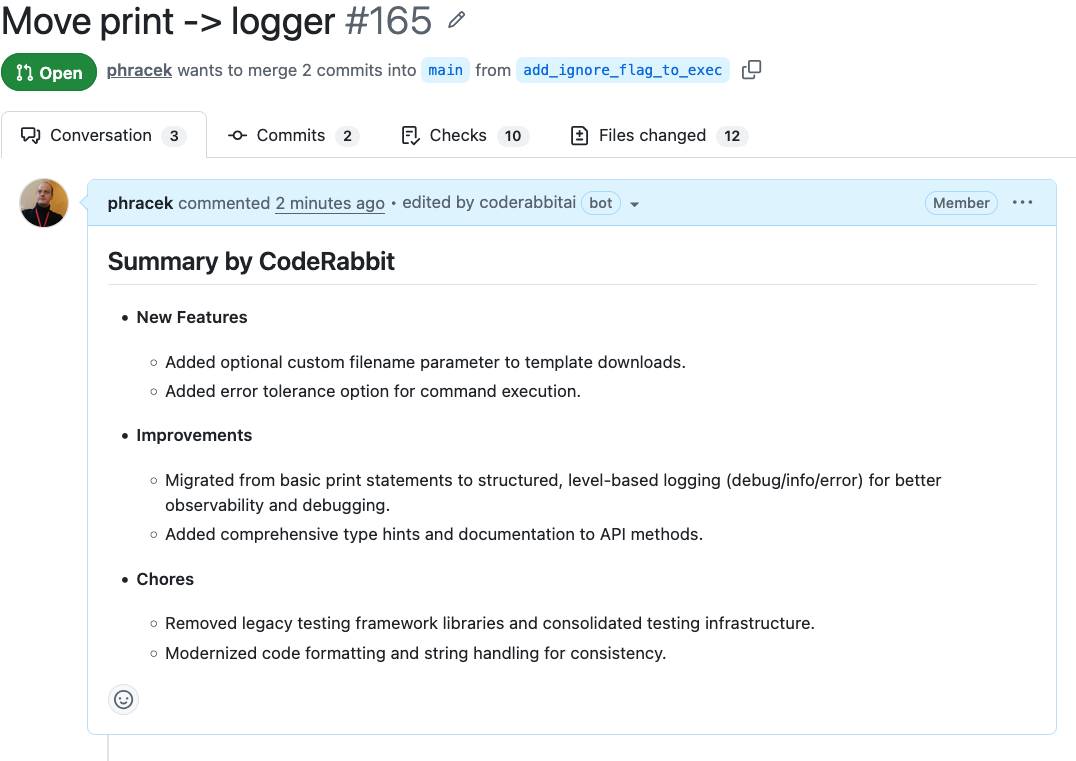
CodeRabbit automatically generates a summary even if a user adds a summary. Figure 9 shows the automatically generated summary in a real pull request.
Prompts for other AI agents
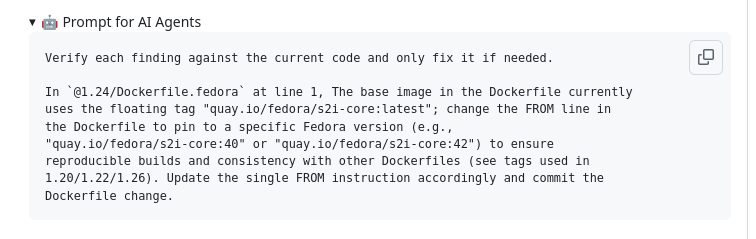
CodeRabbit AI also creates prompts for other AI agents whenever it detects a new find. This can be used to double check the suggested changes and the finds themselves with other agents easily.
Figure 10 shows a prompt for other AI agents.
Final thoughts
CodeCov is a great tool to use with CodeRabbit AI to bump your projects to a higher level. But before applying any changes to the code please look for them and do not apply them automatically. As you can see, you can use the CodeCov and CodeRabbit for analyzing your pull request before merging them. We strongly recommend not merging or even proposing the fixes caught by CodeRabbit automatically. Think about whether the code is really useful or not. Both tools can help you with the analysis either where the test coverage is missing and how your code is perfect, or the location of the gaps. Sometimes it can really hit the big issues.
This article is important for the Red Hat Enterprise Linux system and Red Hat AI since it describes how to maintain code quality and style to meet enterprise standards.
