

Welcome to the final instalment of this series on computer vision at the edge. We have covered all the steps needed to be ready to deploy our model at the edge, from installing a single node OpenShift to use Red Hat OpenShift AI to training our own computer vision model. If you missed any of the previous articles in this series, you can catch up here:
- How to install single node OpenShift on AWS
- How to install single node OpenShift on bare metal
- Red Hat OpenShift AI installation and setup
- Model training in Red Hat OpenShift AI
- Prepare and label custom datasets with Label Studio
- Deploy computer vision applications at the edge with MicroShift
Deploying our application with MicroShift
As we embark on the final instalment of our series, we delve into the installation of MicroShift and the deployment of the Safari application on the edge with MicroShift. The Safari application simulates a device that is able to locate and recognize animals from a camera feed and display some basic information about them. However, in our case, we are going to access this application’s graphical interface from a web browser and use a pre-canned video as input.
By bringing computational capabilities closer to the data source and end users, edge computing can minimize latency, enhance data privacy, and enable near real-time decision-making. Deploying applications at the edge comes with its own set of challenges however, particularly in terms of resource constraints and management complexities.
With MicroShift, Red Hat’s lightweight Kubernetes distribution optimized for edge computing, we address these challenges head-on by leveraging its lightweight footprint and efficient resource utilization to deploy our Safari application at the edge.
Set up the edge device
The first step before building and deploying the Safari application is to prepare our edge device to run MicroShift. There are several edge devices that can be used for this demo, but for this series, we will recreate an edge device with a virtual machine (VM).
Red Hat OpenShift Virtualization lets us create, run, and manage virtual machines. Therefore, we will use this operator to create a VM simulating an edge device. Accompany me in this process:
- In our OpenShift Container Platform web console, we need to navigate to the Operators tab.
- Access the catalog via OperatorHub.
Search the operator by typing
virtualization(Figure 1).
Figure 1: After searching virtualization, select the OpenShift Virtualization operator that will populate in the search results. - Select the OpenShift Virtualization operator. On the right side of the screen, click Install.
- Scroll down in the configuration page and click Install again.
- Wait until the operator installation finishes and click Create HyperConverged. This custom resource is required to create and maintain the operator deployment.
- The default values are already configured, so we can skip this part and click Create to launch the OpenShift Virtualization installation. Wait until the status says “Reconcile completed, Available.”
We can verify the installation progress from the terminal window. All OpenShift Virtualization pods will be deployed on the namespace
openshift-cnv, so we can run this command to check the status:watch oc get pods -n openshift-cnvWait until all pods are up and running:
NAME READY STATUS RESTARTS AGE bridge-marker-48f5v 1/1 Running 0 3m42s cdi-apiserver-786754669f-nckf2 1/1 Running 0 3m41s cdi-deployment-bff9754d8-jpw2c 1/1 Running 0 3m41s cdi-operator-74c59b467c-7ssqv 1/1 Running 0 11m cdi-uploadproxy-595d9df57f-lxzlw 1/1 Running 0 3m41s cluster-network-addons-operator-6f586d45d6-v8jpr 2/2 Running 0 11m hco-operator-5b9968bf59-rcv97 1/1 Running 0 11m hco-webhook-97c9dfc77-nwz7v 1/1 Running 0 11m hostpath-provisioner-operator-b99c7955-skrss 1/1 Running 0 11m hyperconverged-cluster-cli-download-58cc6f9686-nr4gf 1/1 Running 0 11m kube-cni-linux-bridge-plugin-bmcw7 1/1 Running 0 3m42s kubemacpool-cert-manager-67c6c4d57b-twc85 1/1 Running 0 3m42s kubemacpool-mac-controller-manager-64ccb67b-fjtg5 2/2 Running 0 3m42s kubevirt-apiserver-proxy-54f5bb9d78-dlpwh 1/1 Running 0 2m51s kubevirt-console-plugin-5bbc5bc799-v6gvh 1/1 Running 0 2m51s mtq-operator-685d44cbb6-gtlkb 1/1 Running 0 11m ssp-operator-5b6b9f44b4-nbwgv 1/1 Running 1 (3m21s ago) 11m virt-api-5887945789-lpqkl 1/1 Running 0 3m14s virt-controller-65d75b6d9b-hkxnt 1/1 Running 0 2m49s virt-exportproxy-775bbc5c8c-6qwrm 1/1 Running 0 2m49s virt-handler-nqvjn 1/1 Running 0 2m49s- Going back to our web console, a new pop-up window should have appeared asking to Refresh web console.
- Once the page is reloaded, you should see that a Virtualization tab has been added to the menu on the left side.

Now that the operator is installed, we can create our RHEL virtual machine:
- Navigate to the Virtualization menu.
- Under this section click VirtualMachines.
- The dashboard will show the option to Create VirtualMachine > From Template.
We will be redirected to the Catalog where different operating systems are listed. Find the Red Hat Enterprise Linux 9 VM (Figure 2).
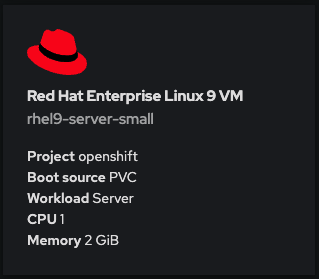
Figure 2: Select the Red Hat Enterprise Linux 9 VM template from the catalog. - To edit the template, on the right side of the screen, complete the following fields:
- VirtualMachine name:
edge(type your preferred name for the VM). - CPU | Memory: increase it to
2 CPUand8 GiB Memory. - Disk source:
URL (creates PVC). The PV will contain the following OS image. - Image URL: Navigate to the RHEL software page. Scroll down to Red Hat Enterprise Linux 9.3 KVM Guest Image. Right click over the Download Now button, select Copy Link Address and paste it in the field.
- Disk size:
40 GiBshould be enough for our application. - CLOUD_USER_PASSWORD: under Optional parameters, type your preferred
«vm_password».
- VirtualMachine name:
- To ensure MicroShift has enough disk space to be deployed, click Customize VirtualMachine and click on Disks to add a new disk.
- Select Add disk and keep the defaults. Then click Save.
- Finally, click Create VirtualMachine to start the deployment process.
- The new RHEL 9.3 virtual machine will start provisioning automatically. Wait until your virtual machine comes up.
Once the machine is running, go back to your terminal and run the following command to connect to your VM:
virtctl console edge- When asked, log in using your VM credentials. The user will be
cloud-userand the«vm_password»you entered during the VM configuration. Once connected to the VM, we will need to register our RHEL machine. Run the following command and enter your Red Hat account credentials. If you don’t have one, don’t worry. You can use the Red Hat Developer Subscription for Individuals, which is free of charge.
sudo subscription-manager registerIn order to access the Safari application once it is deployed it’s necessary to enable the RHEL graphical interface along with some other packages. Run the following commands to install the necessary components:
sudo dnf group install "Server with GUI" -y
sudo systemctl isolate graphical.target
wget https://dl.google.com/linux/direct/google-chrome-stable_current_x86_64.rpm
sudo yum install ./google-chrome-stable_current_*.rpm -y

MicroShift deployment
Now that we have our RHEL device up and running, we can continue with the MicroShift deployment. The steps are quite simple and just in a few minutes you will have your own MicroShift instance ready to deploy the model on top of it. Let’s get into the deployment process:
In the terminal connected to your RHEL VM, list the disks assigned to our VM. There you can identify the extra disk added during the VM configuration.
lsblkCreate a new volume group for the empty disk:
sudo vgcreate rhel /dev/vdcNow, run the following command to enable the MicroShift repositories:
sudo subscription-manager repos \
    --enable rhocp-4.15-for-rhel-9-$(uname -m)-rpms \
    --enable fast-datapath-for-rhel-9-$(uname -m)-rpms
Once enabled, we can get the Red Hat build of MicroShift from those repositories:
sudo dnf install -y microshiftBefore continuing we need to Copy the installation pull secret from the Red Hat Hybrid Cloud Console. We will use it to authenticate against the container registries that we will be using. Paste it in the
pull-secretfile:vi $HOME/pull-secretCopy the pull secret file to the
/etc/criofolder:sudo cp $HOME/pull-secret /etc/crio/openshift-pull-secretChange the owner to root and give the file the appropriate permissions:
sudo chown root:root /etc/crio/openshift-pull-secretsudo chmod 600 /etc/crio/openshift-pull-secretAt this point we can start the MicroShift service. In the first MicroShift boot, the service requires downloading and initializing the images for the different MicroShift containers, which can lead to a few minutes of waiting time:
sudo systemctl enable microshift --nowMost bare metal systems come with a default MTU of 1500. However, when using virtualization, part of its MTU is used for encapsulation, resulting in a smaller MTU value on the virtual machine. To solve this, we can configure the MicroShift MTU in a config file:
sudo vi /etc/microshift/ovn.yamlmtu: 1400Restart the MicroShift service to apply the new configuration:
sudo systemctl restart microshiftIn the meantime, we can save some time by configuring the access to the MicroShift instance. Create the following folder to store the
kubeconfigfile:mkdir -p ~/.kube/Now we can copy the
kubeconfigfile created when we started the MicroShift service to the new folder:sudo cat /var/lib/microshift/resources/kubeadmin/kubeconfig > ~/.kube/configFinally, we will change the file permissions:
chmod go-r ~/.kube/configAnd—perhaps without even realizing it—you have just deployed MicroShift. Access the cluster to track the deployment process. Run:
oc get pods -AWe should see the following list with the pods running:
NAMESPACE                      NAME                                          READY     STATUS        AGE
kube-system                    csi-snapshot-controller-6686957bb9-vz8tv      1/1       Running       22m
kube-system                    csi-snapshot-webhook-64455cd68b-47vjj         1/1       Running       22m
openshift-dns                  dns-default-msfxp                             2/2       Running       47s
openshift-dns                  node-resolver-247rt                           1/1       Running       22m
openshift-ingress              router-default-65757846cd-4chhm               1/1       Running       22m
openshift-ovn-kubernetes       ovnkube-master-ql5k7                          4/4       Running       22m
openshift-ovn-kubernetes       ovnkube-node-6w4p8                            1/1       Running       22m
openshift-service-ca           service-ca-6dbd7c5ddc-2pqpj                   1/1       Running       22m
openshift-storage              topolvm-controller-597486954b-9ffz9           5/5       Running       22m
openshift-storage              topolvm-node-8fbcq                            4/4       Running       47s
That’s all! Our first MicroShift instance is ready. This means that our infrastructure is complete, so we can now focus 100% on the application part.
Build the container image
To build the application container image, we are going to use our personal computer. In the real world, you would use (for example) an OpenShift build pipeline for continuous integration and deployment. Clone the GitHub repository:
git clone https://github.com/OpenShiftDemos/safari-demo.gitThe files needed to build the image will be stored in the app folder. Navigate to the folder’s path to see its contents:
cd app/ && lsYou will see:
- Containerfile
- app.py: Contains the logic to deploy a Flask server.
- /templates: Folder structure needed for the Flask server.
- index.html: File containing the logics for the Safari interface.
- /static: Where the rest of the code and files needed are stored.
- object_detector.js: Contains the code to process the input/output images.
- worker.js: Where the detections are made. Results are sent to
object_detector.js. - best.onnx: weights file obtained after training. Feel free to replace this with your own weights file.
- stats.csv: Contains the stats displayed for each animal detection.
- safari.mp4: Video input.
Let’s take a closer look at some of those files, starting with the Containerfile:
# Use an official Python runtime as the base image
FROM registry.access.redhat.com/ubi9/python-311

# Set the working directory in the container
WORKDIR /app

USER root
RUN dnf install -y libpng

# Install Python dependencies
RUN pip install opencv-python-headless Pillow numpy flask flask_socketio eventlet gevent gevent-websocket
RUN git clone https://github.com/ultralytics/yolov5 && cd yolov5 && sed -i s/'opencv-python>'/'opencv-python-headless>'/g requirements.txt && pip install -r requirements.txt && pip uninstall -y opencv-python && pip install --force-reinstall opencv-python-headless

# Expose the port
EXPOSE 5000

ENV LD_LIBRARY_PATH=/usr/lib64:/usr/lib64/openmpi/lib/:$LD_LIBRARY_PATH

USER 1001

# Copy the code into the container
COPY . /app

# Run the script when the container launches
CMD ["python3", "app.py"]
This container will use an ubi9 + python image as a base. Then, we need to install the Python dependencies and clone the YOLO repository. The image will also contain the code present in app.py. Let's take a look at it:
#!/bin/env python3
import cv2
import numpy as np
from PIL import Image
from flask import Flask, send_file, render_template, request, jsonify, Response
from flask_socketio import SocketIO, emit
import torch
import threading
import io
from io import BytesIO
import base64
import time
import os
import eventlet
import pandas

app = Flask(__name__, static_url_path='/static', static_folder='static')

@app.route('/')
def render_index():
    return render_template('index.html')

if __name__ == '__main__':
    app.run(host='0.0.0.0', port=5000)
Here we are specifying where the static folder lives and the route to access the index.html file. Apart from the graphical implementation, this file is where we specify the input video and where the object_detector.js is referenced:
...
<div id="deviceContainer">
    <video controls style="display:none" src="{{ url_for('static', filename='safari.mp4') }}"></video>
...
<script src="{{ url_for('static', filename='object_detector.js') }}" defer></script>
...
Let’s take a look at the object_detector.js file:
const worker = new Worker("/static/worker.js");
...
fetch("/static/stats.csv")
...
All the heavy lifting is contained in this file, including the image processing, dynamic retrieval of statistics, and sending the information to the worker.js. Let’s open this last file:
onmessage = async(event) => {
    const input = event.data;
    const output = await run_model(input);
    postMessage(output);
}

async function run_model(input) {
    const model = await ort.InferenceSession.create("./best.onnx");
    input = new ort.Tensor(Float32Array.from(input),[1, 3, 640, 640]);
    const outputs = await model.run({images:input});
    return outputs["output0"].data;
}
The worker is separated from the object_detector to speed up the detections, which runs in a separate parallel thread. The model uses our weights file to do the inference and send back the results.
Now that we know what our code is doing, we can build the model. We will tag it to match our quay.io repository url:
podman build -t quay.io/dialvare/safari:latest .Log in and push the image to your repo. Make sure you make your repository Public once finished:
podman login quay.io
podman push quay.io/dialvare/safari:latest
That’s all we need to do to prepare our container image and push it into our Quay repository. It's time for the step we were waiting for: deploying our Safari application!
Deploy the model
In this last step, we will need to go back to the MicroShift terminal (the one that was connected to the virtual machine):
virtctl console edgeThere we will need to create the app deployment. Copy and paste the following lines:
vi deployment.yamlapiVersion: apps/v1
kind: Deployment
metadata:
name: safari
spec:
replicas: 1
selector:
matchLabels:
app: safari
template:
metadata:
labels:
app: safari
spec:
containers:
- name: safari
image: quay.io/dialvare/safari:latest
ports:
- containerPort: 5000
securityContext:
allowPrivilegeEscalation: false
capabilities:
drop: ["ALL"]
seccompProfile:
type: RuntimeDefault
runAsNonRoot: trueAs you can see, we just had to specify the Quay image we created and expose the container’s port 5000. Apply the deployment:
oc apply -f deployment.yamlIt’s time to create the service:
oc expose deployment safariYou can check the cluster IP assigned by running the following command. Note it down:
oc get svcNAME TYPE CLUSTER-IP EXTERNAL-IP PORT(S) AGE
kubernetes ClusterIP 10.43.0.1 <none> 443/TCP 4d9h
safari ClusterIP 10.43.63.143 <none> 5000/TCP 4m35sYou should be able to access the application from a web browser using that safari IP address. But let's go one step further and create a route that is more human readable:
oc expose svc safariAt this point we should be able to access our Safari app from a web browser. Get the IP address by running this command:
oc get routeNAME HOST ADMITTED SERVICE TLS
safari safari-default.apps.example.com True safari Info alert: Note
Note
You might need to add the route to your DNS. Open the /etc/hosts file and include a new line including your Safari service IP and the new safari route.
Now that we have the route to our application, it’s time to access it from the web browser. You can open the VM graphical interface from the Console tab inside the edge VM, or by launching a VNC window from your terminal:
virtctl vnc edgeFinally, open Google Chrome and type the route in the search bar. Don’t forget to append the 5000 port at the end of the route. And that’s it. Enjoy your Safari application (Figure 3) detecting and learning about animals in the wild!

Conclusion
As we draw the curtains on this series, we reflect on a journey that has traversed the realms of single node OpenShift, both on bare metal and in the cloud. From the initial stages of deploying OpenShift on diverse infrastructures, to the meticulous preparation of our environment for YOLO object detection model training, the convergence of these technologies has culminated in the deployment of our animal recognition application on MicroShift. By simulating an edge device, we are able to showcase our Safari application running on resource-constrained devices.
We thank you for accompanying us on this technological journey. We hope it has been an enjoyable process and easy to replicate. From here on, a great world of possibilities opens up. There are no limits to the wide variety of artificial intelligence applications that can be used to help on the edge. It's your turn to let your imagination fly and keep discovering this exciting technological world.
