AI
  • Get started with AI

    • Red Hat AI

      Accelerate the development and deployment of enterprise AI solutions.

    • AI learning hub

      Explore learning materials and tools, organized by task.

    • AI interactive demos

      Click through scenarios with Red Hat AI, including training LLMs and more.

    • AI/ML learning paths

      Expand your Red Hat OpenShift AI knowledge using these learning resources.

    • AI quickstarts

      Focused AI use cases designed for fast deployment on Red Hat AI platforms.

    • No-cost AI training

      Foundational Red Hat AI training.

  • Featured resources

    • Red Hat OpenShift AI
    • Open source AI for developers
    • AI product application development
    • Open source-powered AI/ML for hybrid cloud
    • AI and Node.js cheat sheet

Red Hat AI Factory with NVIDIA

Red Hat AI Factory with NVIDIA is a co-engineered, enterprise-grade AI solution for building, deploying, and managing AI at scale across hybrid cloud environments.

Learn
  • Self-guided

    • Documentation

      Find answers, get step-by-step guidance, and learn how to use Red Hat products.

    • Learning paths

      Explore curated walkthroughs for common development tasks.

    • Guided learning

      Receive custom learning paths powered by our AI assistant.

    • See all learning
  • Hands-on

    • Developer Sandbox

      Spin up Red Hat's products and technologies without setup or configuration.

    • Interactive labs

      Learn by doing in these hands-on, browser-based experiences.

    • Interactive demos

      Click through product features in these guided tours.

  • Browse by topic

    • AI/ML
    • Automation
    • Java
    • Kubernetes
    • Linux
    • See all topics
  • Training & certifications

    • Courses and exams
    • Certifications
    • Skills assessments
    • Red Hat Academy
    • Learning subscription
    • Explore training
Build
  • Get started

    • Red Hat build of Podman Desktop

      A downloadable, local development hub to experiment with our products and builds.

    • Developer Sandbox

      Spin up Red Hat's products and technologies without setup or configuration.

  • Download products

    • Red Hat Enterprise Linux
    • Red Hat AI
    • Red Hat OpenShift
    • Red Hat Ansible Automation Platform
    • See all products
  • Featured

    • Red Hat build of OpenJDK
    • Red Hat JBoss Enterprise Application Platform
    • Red Hat OpenShift Dev Spaces
    • Red Hat Developer Toolset
  • References

    • E-books
    • Documentation
    • Cheat sheets
    • Architecture center
Community
  • Get involved

    • Events
    • Live AI events
    • Red Hat Summit
    • Red Hat Accelerators
    • Community discussions
  • Follow along

    • Articles & blogs
    • Developer newsletter
    • Videos
    • Github
  • Get help

    • Customer service
    • Customer support
    • Regional contacts
    • Find a partner

Join the Red Hat Developer program

Download Red Hat products and project builds, access support documentation, learning content, and more.

ConsoleDocsSupport Search
New For you

Recommended

We'll recommend resources you may like as you browse. Try these suggestions for now.

  • Product downloads
  • Cheat sheets
  • Red Hat Developer learning portal
  • Developer blog
  • E-books
  • Developer Sandbox
Log in

Get more with a Red Hat Developer account

  • Product downloads
  • Console access
  • Event registration
  • Training & trials
Explore more account benefitsLog in or register

A subscription may be required for some services.

Contact us

Understanding Ansible Tower Isolated Nodes

December 20, 2017
Alessandro Arrichiello
Related topics:
LinuxKubernetes
Related products:
Streams for Apache Kafka

    Today I want to talk of one of the great, brand new features that Ansible Tower introduced in version 3.2: Ansible Tower Isolated Nodes.

    Thanks to this feature, you'll be able to create an isolated (Ansible-Tower) node in a restricted network that will manage automation jobs for the main tower, reporting results!

    To quote the release statement:

    "A Tower Isolated Node is a headless Ansible Tower node that can be used for local execution capacity, either in a constrained networking environment such as a DMZ or VPC, or in a remote data center for local execution capacity. The only prerequisite is that there is SSH connectivity from the Tower Cluster to the Isolated Node. The Tower Cluster will send all jobs for the relevant inventory to the Isolated Node, run them there, and then pull the job details back into Ansible Tower for viewing and reporting."

    In this article, I'll guide you in properly configuring Ansible Tower for managing target machines on an isolated network through an Ansible Tower Isolated Node.

    For getting into a real scenario, we'll install Gitlab Community Edition through Ansible Tower on a VM not directly reachable by the Tower.

    I've created on Google Cloud the following network architecture:
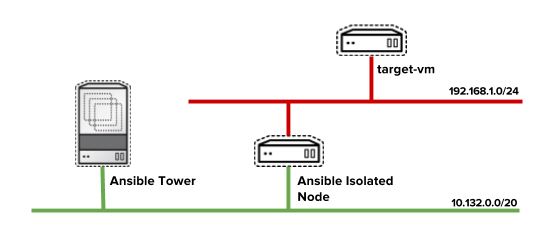
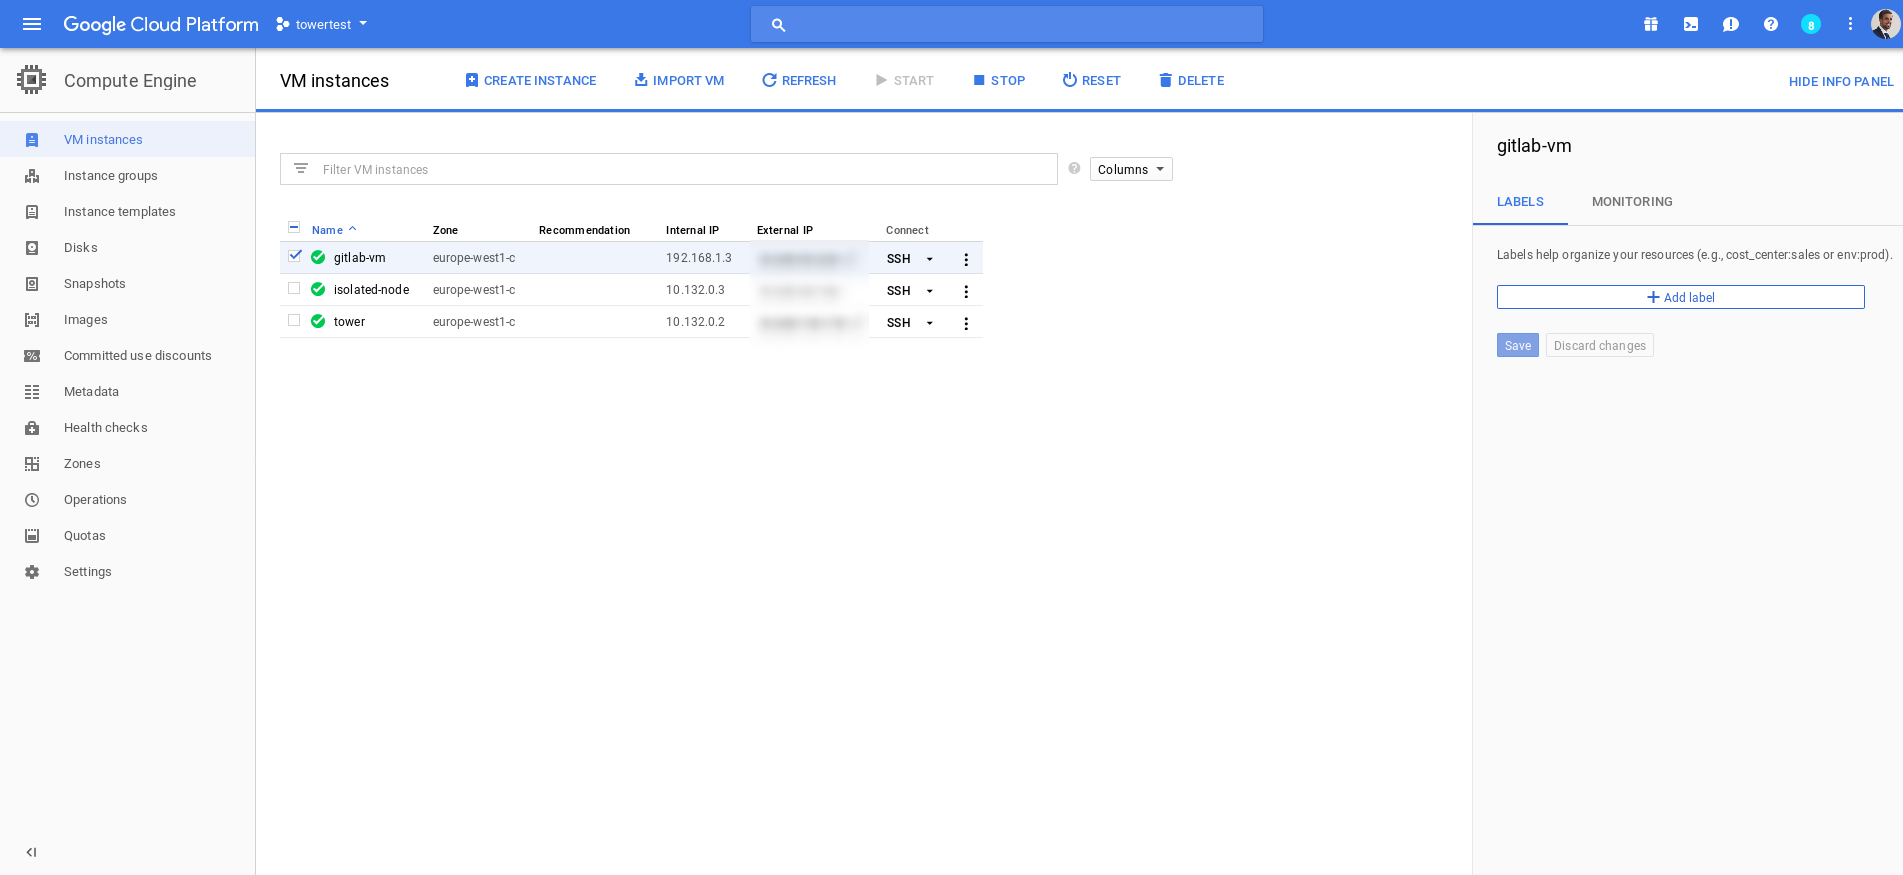
    Then I've started creating the three virtual machines (I've also created a VPC Network for using 2 different networks):
    After that, I've just followed the Ansible Tower Installation guide for setting up the environment:

    # curl https://releases.ansible.com/ansible-tower/setup/ansible-tower-setup-latest.tar.gz -o ansible-tower-setup-latest.tar.gz 
    # tar -vxf ansible-tower-setup-latest.tar.gz 
    # cd ansible-tower-setup-3.2.2/

    Then I started configuring the base inventory for the installation playbook:

    [tower]
    localhost ansible_connection=local
    
    [database]
    
    [all:vars]
    admin_password='******'
    
    pg_host=''
    pg_port=''
    
    pg_database='awx'
    pg_username='awx'
    pg_password='******'
    
    rabbitmq_port=5672
    rabbitmq_vhost=tower
    rabbitmq_username=tower
    rabbitmq_password='******'
    rabbitmq_cookie=cookiemonster
    
    # Needs to be true for fqdns and ip addresses
    rabbitmq_use_long_name=false
    
    
    [isolated_group_restrictedzone]
    isolated-node.c.towertest-188910.internal
    
    
    [isolated_group_restrictedzone:vars]
    controller=tower

    As you can see I've added the definition for an isolated_group named "restrictedzone" and I defined in the section the host that will schedule jobs in that zone. Then I also defined in the vars the controller instance_group for that isolated_group: tower.

    Just in case you have multiple Tower machines in clustering, you may choose a subset of these machines creating a dedicated instance_group and assigning as the controller the name of that instance_group you may create.

    For ensuring that Ansible Tower virtual machine will be able to jump inside the isolated node, I've created an ssh-keypair that I've distributed to the isolated node:

    # ssh-keygen
    # cat .ssh/id_rsa.pub

    Finally, I just launched the setup:

    # ./setup.sh

    Once the Ansible Tower installation is completed, you can navigate to the Settings page looking for "Instance Groups" and once inside, look at the "restrictedzone" instance group.
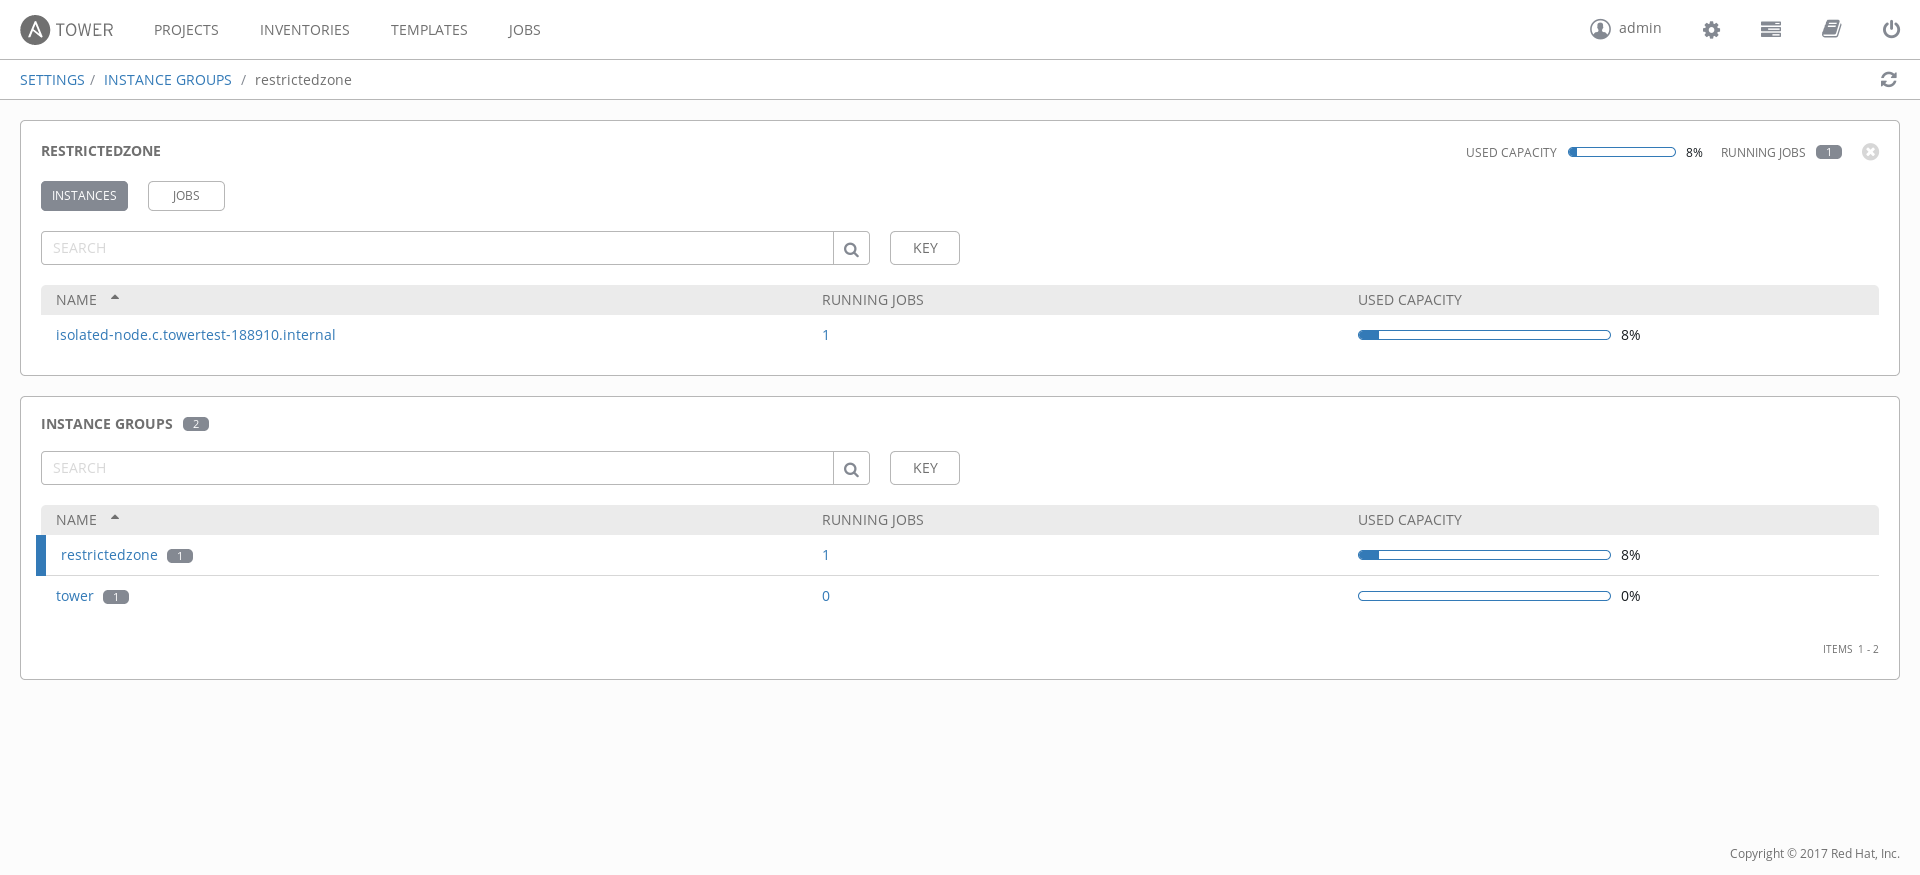
    As you can see by the previous image in my case, I found the isolated-node vm.

    Ok, then you may start asking: how can I use this restricted zone with my target virtual machine and playbooks? I'll explain that in the following paragraphs.

    First, I'll skip all the steps necessary for creating/adding a host, credentials, projects of playbooks and templates. I suppose you're able to do that. If this is not the case, you can search the Ansible Tower documentation for tons of examples.

    You have two options for using Isolated Node:

    1. Define the association at inventory level.
    2. Define the association at the template level.

    Because my target machine is only reachable through the isolated node (the tower has no chance to connect to it), I've added the association at inventory level.
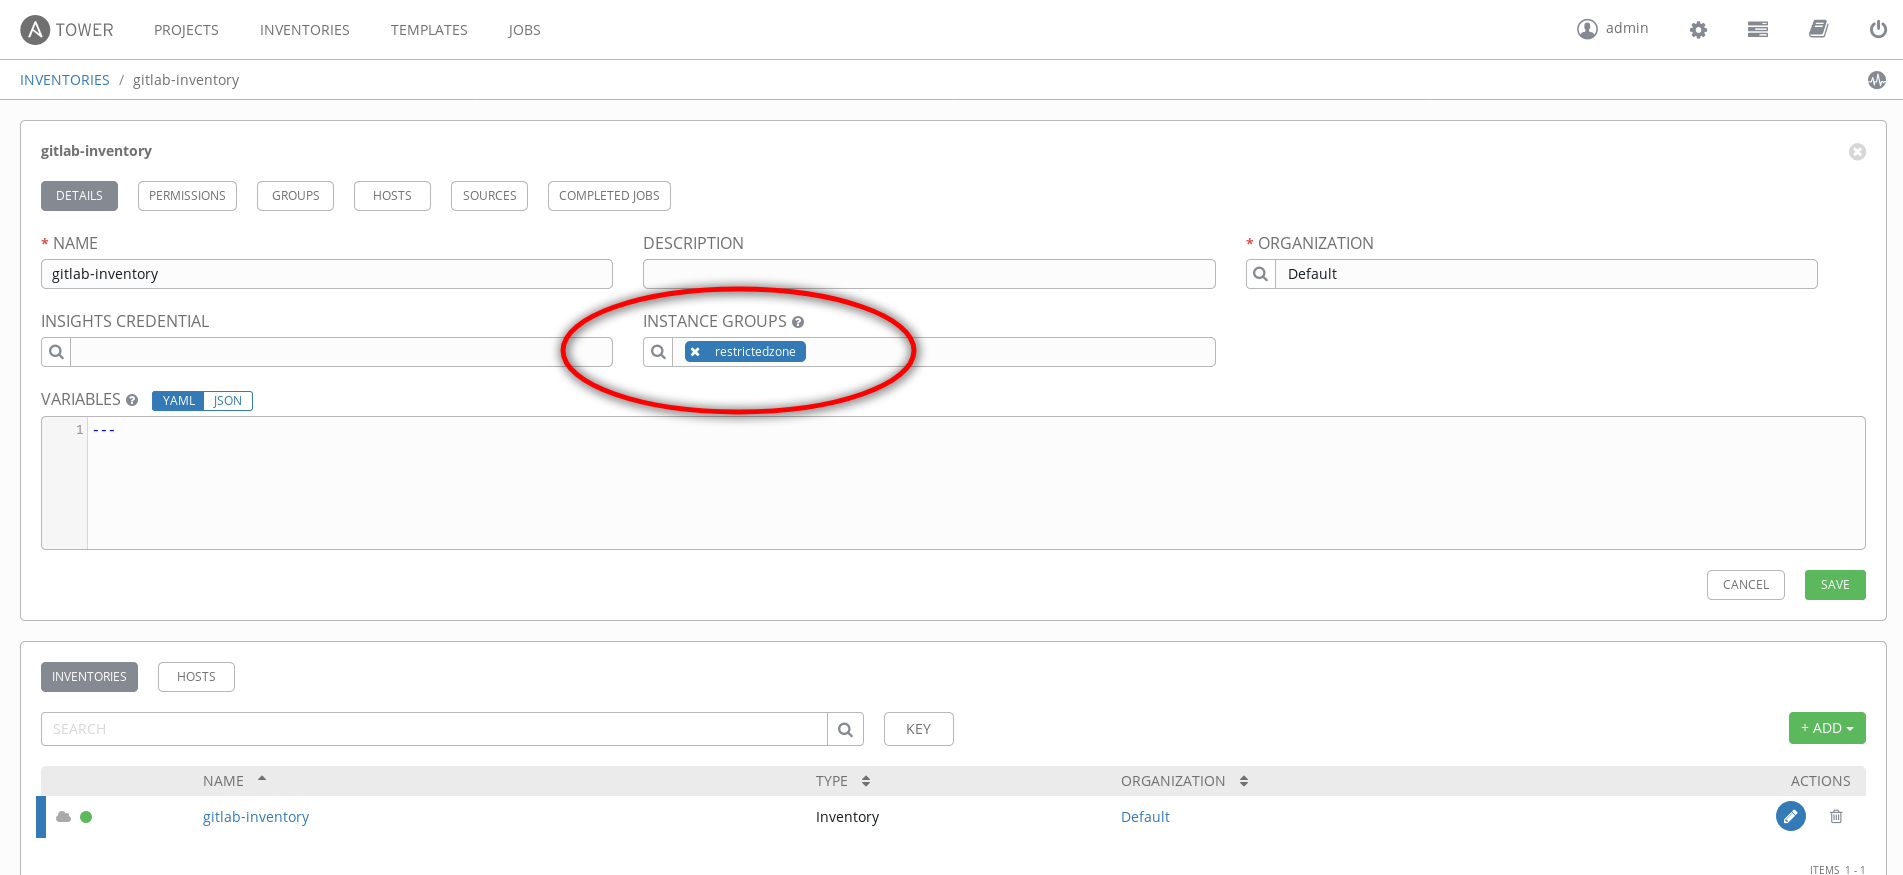
    As you can see by the previous screenshot I've defined the "restrictedzone Instance Group" associated to the gitlab-inventory.

    Then after adding, projects, and credentials and so on, I just run the Ansible Template:
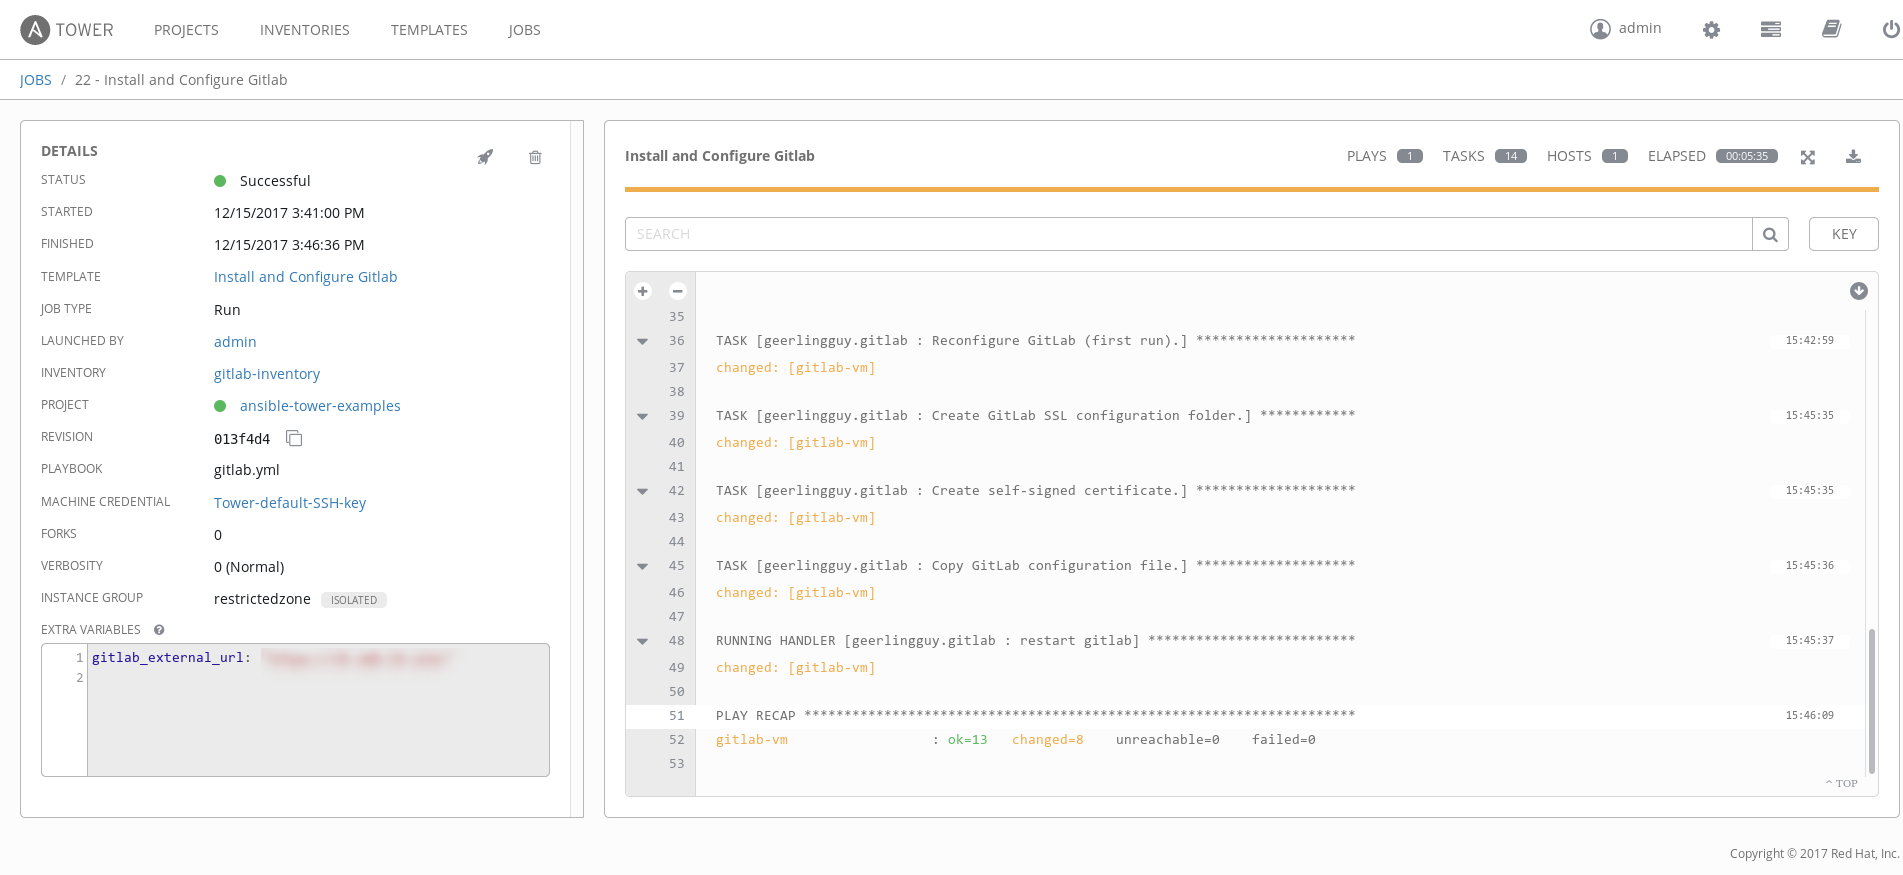
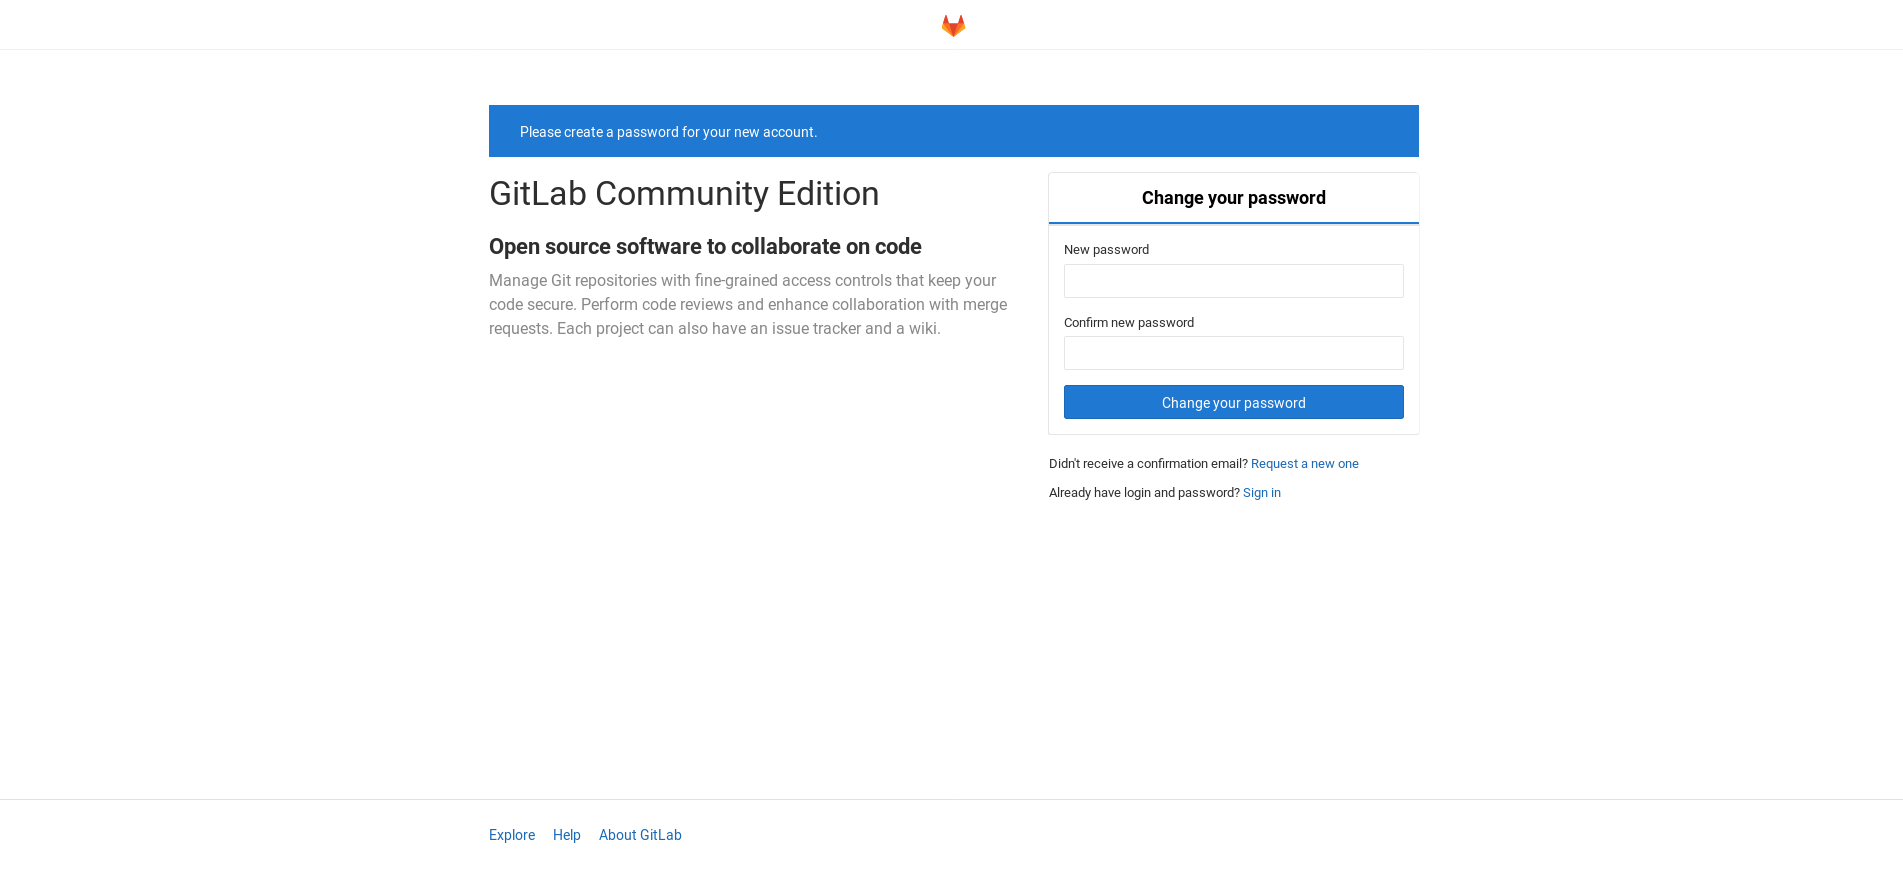
    As you can see, the job completed successfully and our Gitlab Community Edition was correctly installed:
    That's all for now!

    PS: Are you curious about the playbook I used in this example? You can look at https://github.com/alezzandro/

    Ciao

    About Alessandro

    Alessandro Arrichiello is a Solution Architect for Red Hat Inc. He has a passion for GNU/Linux systems, which began at age 14 and continues today. He worked with tools for automating Enterprise IT: configuration management and continuous integration through virtual platforms. He’s now working on distributed cloud environment involving PaaS (OpenShift), IaaS (OpenStack) and Processes Management (CloudForms), Containers building, instances creation, HA services management, workflows build.


    Take advantage of your Red Hat Developers membership and download Red Hat Enterprise Linux today at no cost.

    Last updated: May 8, 2024

    Recent Posts

    • A day in the life of an NVIDIA H100 on Red Hat OpenShift 5

    • Migrate BuildConfigs to builds for Red Hat OpenShift with one plug-in install

    • Run Red Hat Enterprise Linux CoreOS on NVIDIA BlueField DPUs

    • Agent harness engineering: Separating model capabilities from enforcement

    • What's new for developers in Red Hat Enterprise Linux 10.3 and 9.9

    Red Hat Developers logo

    Platforms

    • Red Hat AI
    • Red Hat Enterprise Linux
    • Red Hat OpenShift
    • Red Hat Ansible Automation Platform
    • See all products

    Build

    • Developer Sandbox
    • Developer tools
    • Interactive tutorials
    • API catalog

    Quicklinks

    • Learning resources
    • E-books
    • Cheat sheets
    • Blog
    • Events
    • Newsletter

    Communicate

    • About us
    • Contact sales
    • Find a partner
    • Report a website issue
    • Site status dashboard
    • Report a security problem

    Red Hat Developer

    Build here. Go anywhere.

    We serve the builders. The problem solvers who create careers with code.

    Join us if you’re a developer, software engineer, web designer, front-end designer, UX designer, computer scientist, architect, tester, product manager, project manager or team lead.

    Sign me up

    Red Hat legal and privacy links

    • About Red Hat
    • Jobs
    • Events
    • Locations
    • Contact Red Hat
    • Red Hat Blog
    • Inclusion at Red Hat
    • Cool Stuff Store
    • Red Hat Summit
    © 2026 Red Hat

    Red Hat legal and privacy links

    • Privacy statement
    • Terms of use
    • All policies and guidelines
    • Digital accessibility
    Ask AI