

Functions as a Service (FaaS) and serverless architecture promise quick, lightweight deployments for web applications and other standalone functions. But until recently, creating FaaS in Red Hat OpenShift has been a "sort of" process consisting of multiple steps. You weren't really creating a function so much as an application that could scale back to zero pods after a few minutes, then scale up again when called.
Red Hat OpenShift Serverless Functions is a newer feature that changes all of that. As a developer, you can use it to deploy functions in a snap. You can scaffold functions that handle HTTP requests or CloudEvents with one command.
This article gets you started with creating and deploying serverless functions with OpenShift Serverless Functions. We'll use Python to develop our serverless function, but it's just one of many languages you could choose from.
Note: This article demonstrates how to create an HTTP-based serverless function. See Create event-based serverless functions with Python for a guide to writing serverless functions that respond to CloudEvents.
Creating and deploying serverless functions with Knative
OpenShift Serverless Functions uses the open source Knative framework, which offers powerful management tools through its kn command-line interface (CLI). Prior to OpenShift Serverless Functions, creating a function in OpenShift required writing an application from scratch, using Knative to manage the application, and creating the deployment, service, and route to support the application. While creating a serverless function that way was not terribly complicated, OpenShift Serverless Functions makes life much easier.
With OpenShift Serverless Functions, developers no longer have to worry about creating the deployment, service, and route. It's all one thing: The function. You can't get more serverless than that.
Deploying a function with OpenShift Serverless Functions requires three Knative commands:
kn func create
kn func build
kn func deploy
There's more to the process, but those three commands get to the heart of it. We'll explore more about deployment shortly. First, we need to set up our environment to support OpenShift Serverless Functions.
Step 1: Set up your serverless development environment
I was able to complete all of my examples for this article using Red Hat CodeReady Containers. CodeReady Containers requires at least 9GB of RAM. I also had to set the number of CPUs to five in order to get both HTTP-driven and event-driven functions to run at the same time. Note that I issued this command before starting CodeReady Containers:
crc config set cpus 5
When I used a more enterprise-like, cloud-based OpenShift cluster—as you might find in a typical OpenShift installation—CPU and memory usage was not a concern.
The OpenShift Serverless Operator
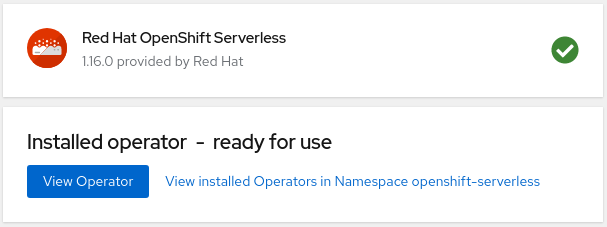
Before you can start deploying functions to an OpenShift cluster, you must install the OpenShift Serverless Operator. From the OpenShift console, locate the operator's card, click on it, and then use the default values to install it. When the installation is finished, the dashboard will let you know. When you see the "Installed operator — ready for use" message shown in Figure 1, click the View Operator button.
You will see your OpenShift Serverless Operator in all its glory, as shown in Figure 2.
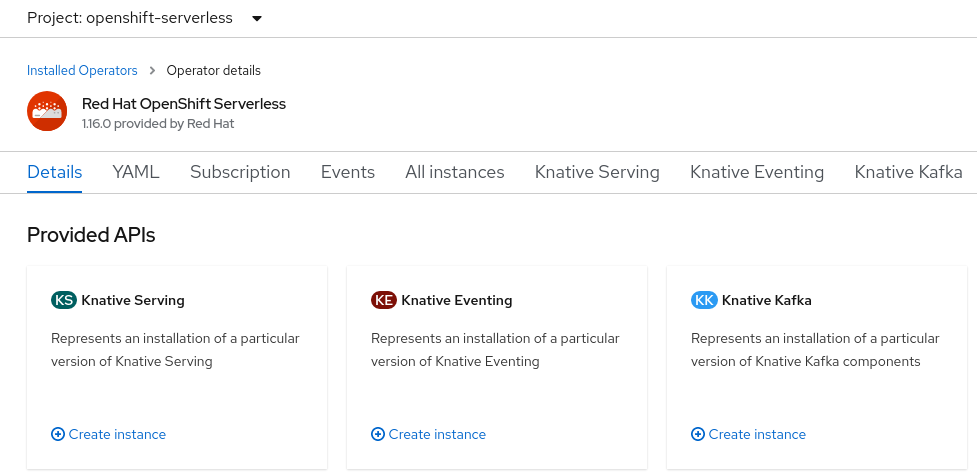
The Knative Serving API
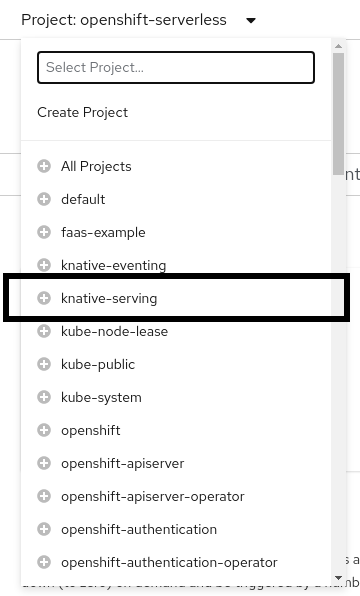
With the operator in place, your next step is to prepare the Knative Serving API. Change the project you're working in to knative-serving, as shown in Figure 3. That's where the API must be located.
Once that's done, click on the Knative Serving link under the Provided APIs, click Create Knative Serving, and use the default values to create the API.
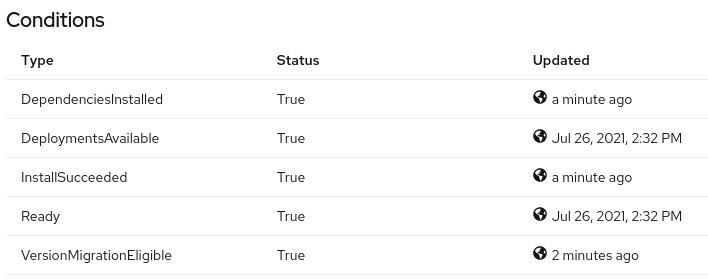
When all of the statuses read True, as shown in Figure 4, you are ready to start using OpenShift Serverless Functions for HTTP-based functions.
The Knative Eventing API
You need to perform the steps in this section if you want to use CloudEvents to fire your functions. In this case, we'll use Knative Eventing with CloudEvents. The steps are similar if you want to use Knative Serving instead.
Change the working project to knative-eventing and make sure the OpenShift Serverless Function Operator page is displayed.
Click on the Knative Eventing link under the Provided APIs, then click Create Knative Eventing. Use the default values to create the API.
When all of the statuses at the bottom of the page read True, you are ready to start using OpenShift Serverless Functions for CloudEvent-based functions.
That's it: We're finished with all of the installation tasks. Our cluster will now support both HTTP-based and CloudEvent-based serverless functions.
Step 2: Create an HTTP serverless function in Python
You can create an HTTP serverless function using Knative's kn CLI, and the function will be fully functional. You do have to edit the code, of course, to do what you want.
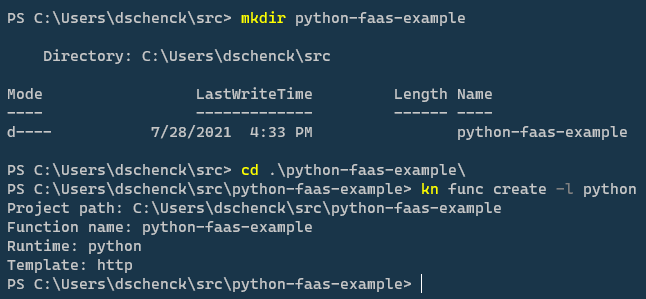
The steps required to create a basic function are shown in Figure 5. In a terminal window, create a directory whose name will become the name of the function. Then, move into that directory and create the function using the kn func create command. The default runtime is Node.js, which we will not be using. Instead, we'll use the following command to create a serverless function written in Python:
$ kn func create -l python
Note: Why did I choose Python? It's popular, I have a Python microservice that I'm going to convert to a function (in my next article), and Red Hat Developer already has a series of articles about creating OpenShift Serverless Functions with Node.js. So, Python it is.
About the kn func create command
The kn func create command uses the name of the current directory to create the source code for a function. Any supporting files, such as dependencies, will also be created. You simply start with this template and edit the function to suit your needs.
If no language is specified, Node.js will be the default. Several languages are supported, and the list seems to be growing at a decent pace. For now, you can specify any of the following:
- Go
- Node.js
- Python
- Quarkus
- Rust
- Spring Boot
- TypeScript
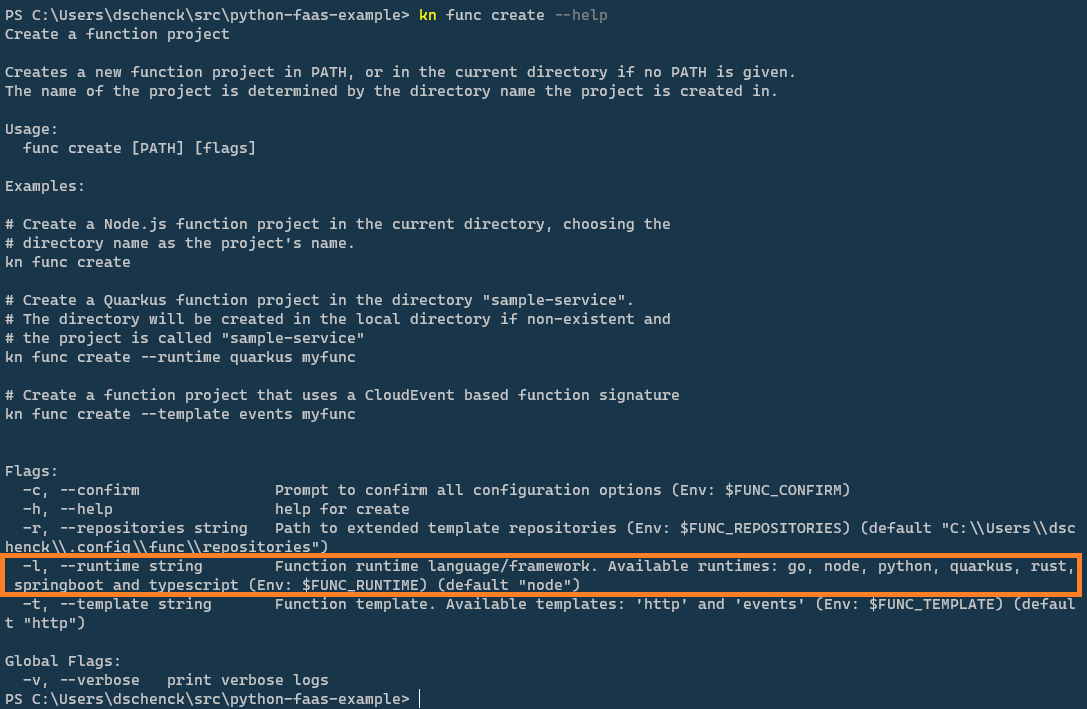
Enter this command to see the list of currently supported languages:
$ kn func create --help
Figure 6 shows where the list of languages appears in the output.
Creating the Knative function
So what just happened in our kn command? Figure 7 shows a listing in the directory after we run kn func create -l python.
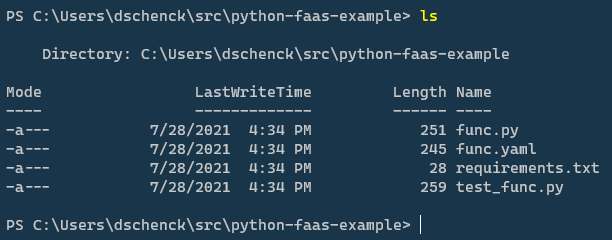
Let's look inside the func.py file to see what was created and how it will be used:
from parliament import Context


def main(context: Context):
    """
    Function template
    The context parameter contains the Flask request object and any
    CloudEvent received with the request.
    """
    return { "message": "Howdy!" }, 200
As shown, this skeleton Python function returns "Howdy!" Remove the comments and you can see that it only takes three lines of code to make a working function. As a default function, the skeleton function is not very useful. My next article will update it to read from a database, so stay tuned.
Note that we've also created the func.yaml file. If you view the contents, you will notice that it is incomplete. For example, the image field is empty. If you wish, you can edit this file to create the image name and tag. The default will be the function name and the :latest tag:
name: python-faas-example
namespace: ""
runtime: python
image: ""
imageDigest: ""
builder: quay.io/boson/faas-python-builder:v0.8.3
builderMap:
  default: quay.io/boson/faas-python-builder:v0.8.3
volumes: []
envs: []
annotations: {}
options: {}
Step 3: Build the Python serverless function
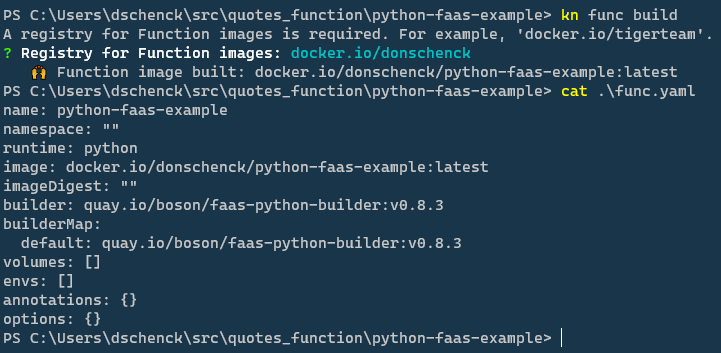
We can build our default HTTP-based function by running the kn func build command. But because the image name was not specified in the func.yaml file, this command will prompt us for an image registry. It will use the registry name, the function name, and the tag :latest to create the image name—if you haven't already supplied one by editing the YAML file. For my own functions, I use my registry: docker.io/donschenck.
Figure 8 shows the kn func build command and the resulting func.yaml file. Notice that the fully-qualified image name has been generated by the command. I'm using PowerShell in Windows, but a Bash shell terminal in macOS or Linux works just as well. The operating system you choose doesn't affect the results: You can build functions anywhere.
If you view your local image registry, shown in Figure 9, you will see that the image now exists. (I have no idea why "41 years ago" appears.)

Testing the function
You can use the kn func run command to run the function locally and test it. In this case, the function will run on port 8080.
Step 4: Deploy the Python serverless function
With the function built into an image on your local machine, it's time to deploy it to a cluster. Before you can do that, you need to sign into two systems: The image registry you're using (mine is docker.io/donschenck) and the cluster where you wish to deploy the function. You also need to make sure you're in the correct project. Figure 10 shows an example of what to do.
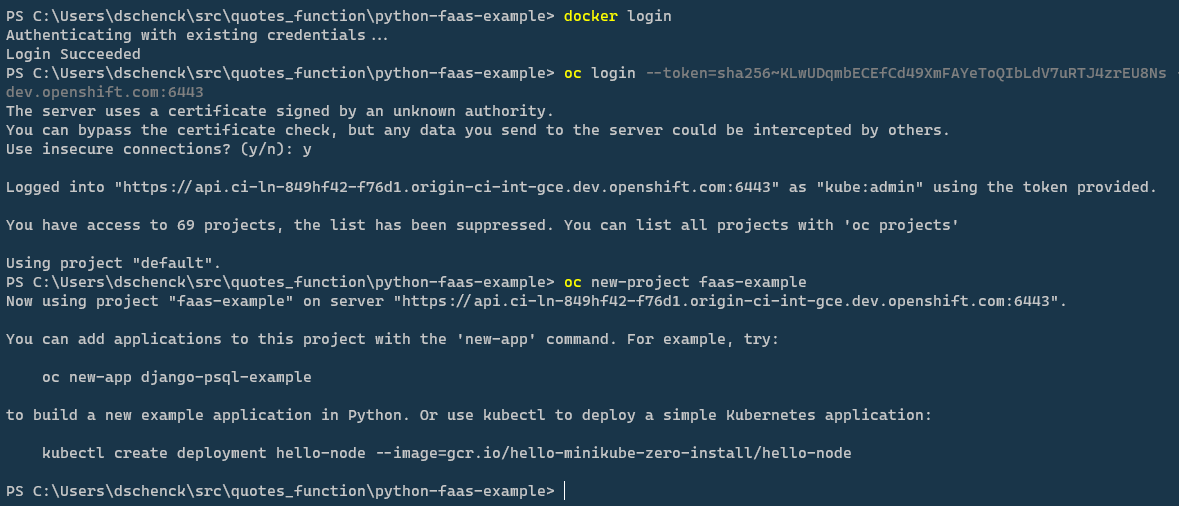
When you run kn func deploy, the command builds the image, pushes the image to the image registry you specified, and then deploys that image from the registry into the OpenShift project to which your current context is set.
In this case, the docker.io/donschenck/python-faas-example:latest image is deployed to the faas-example project in my cluster, as shown in Figure 11.

Note: You can edit the func.yaml file and change the image tag if you wish. I changed my tag from :latest to :v1 and it works just fine.
Figure 12 shows the developer topology view in the OpenShift dashboard, displaying the deployed function.
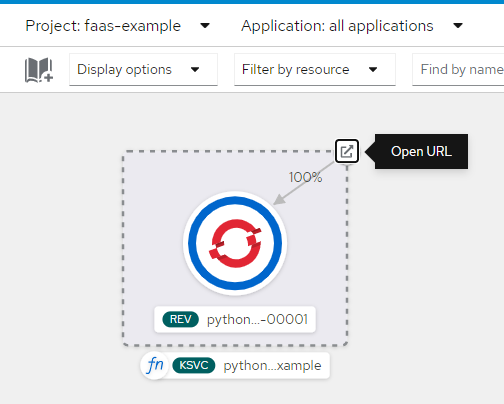
You can prove that the function in the cluster is working simply by clicking on the Open URL icon.
Watch the HTTP function scale to zero
Wait a bit and you'll see the dark blue circle in the function turn white (see Figure 13). This means the function is still available, but it has scaled down to zero pods.

If you access the function now—by clicking on the Open URL icon, or refreshing the browser where you previously opened it—you'll see a slight delay before getting the result. This delay happens only when the function is scaling from zero to one. Refresh yet again and you'll see a speedy response. The function is now up and running.
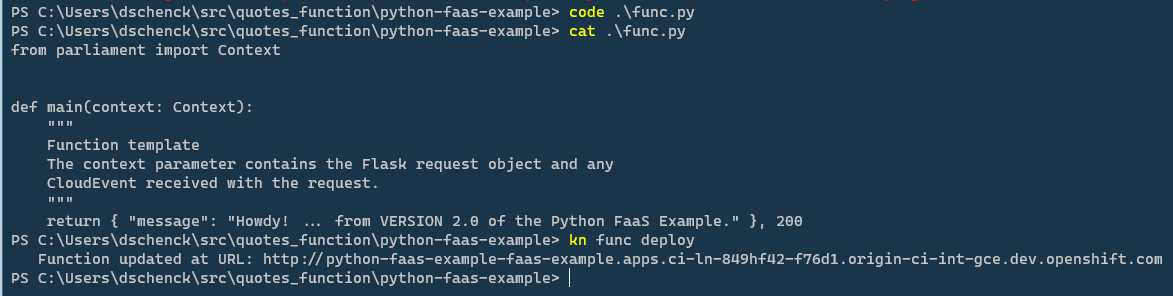
Update the function
Updating the function requires the following steps, which are shown in Figure 14:
- Edit the
func.pysource file. - Run the
kn func deploycommand.
That's all you need to do. The kn func deploy command automagically rebuilds the image before pushing it to your image registry and deploying it to your cluster.
Troubleshooting kn func deploy
Before closing, let's look at some common error messages related to kn func deploy and how to recover from them.
incorrect username or password
This message, shown in Figure 15, occurred to me once when I ran kn func deploy while I was not logged into my docker.io registry.

The lesson is that you must be logged into the image register in order to successfully run the command, because it has to push the image to the repository. The kn command was nice enough to prompt me for username and password, but I made a mistake entering them. Of course, my function was not deployed as a result. When I supplied the correct name and password, the command worked.
knative deployer failed to get the Knative Service
This happened to me when I ran kn func deploy while I was not logged into my OpenShift cluster, as shown in Figure 16. The deployment failed.

Although the kn command can gracefully log in to the image repository, as shown in the previous section, it cannot automatically connect to a cluster. Make sure to log in to the cluster and the correct project, then rerun the kn command.
timeout
I got this error when I ran kn func deploy while using Red Hat's quay.io as my image registry, as shown in Figure 17.

By default, images added to quay.io registry are marked Private, so your OpenShift cluster cannot pull the image. Simply change the repository visibility in quay.io to Public. OpenShift will continue to attempt to pull the image, and once it is publicly available, the deployment will succeed.
What else can I do with Python serverless functions?
Look for the next article in this series, where we'll build a Python-based serverless function that responds to a CloudEvent instead of an HTTP request. Also visit the OpenShift Serverless homepage to learn more about creating, scaling, and managing serverless functions on Red Hat OpenShift.
Serverless functions in Java and Node.js
Are you interested in writing serverless functions in Java or Node.js? Start with this overview of OpenShift serverless functions, then get a quick tutorial introduction to writing a Quarkus function in two steps or developing Node.js serverless functions on Red Hat OpenShift.
Last updated: November 8, 2023