

Node.js 14 is available as a UBI (Universal Base Image) minimal image on Red Hat Enterprise Linux. Minimal images are typically used in conjunction with a larger build image. The larger builder image contains all the dependencies and tools needed for your application’s build process, whereas the smaller runtime image contains just the dependencies needed to run your application.
The UBI minimal images minimize what is included in the image to reduce their size. For example, the full Node.js 14 UBI image is about 225MB (610MB uncompressed), whereas the slim image is about 70MB (189MB uncompressed), less than a third the size. A smaller image means less code in production, which in turn reduces your deployment’s potential attack surface and potentially speeds up your builds. You can read more about UBI minimal images in its documentation.
You can deploy the Node.js minimal image through various deployment methods. This article shows you how to use the images through Dockerfiles and through chained builds on Red Hat OpenShift.
A minimal image with a Dockerfile
To use the Node.js image in a Dockerfile, follow these steps:
-
Pull the base images for the builder and minimal runtime images:
$ docker pull registry.access.redhat.com/ubi8/nodejs-14:latest $ docker pull registry.access.redhat.com/ubi8/nodejs-14-minimal:latest - Clone your Node.js application. You can use the following example application, or adapt the rest of these steps to your own Node.js application:
$ git clone https://github.com/nodeshift-starters/nodejs-rest-http.git - Create the multistage Dockerfile with the following content:
The Dockerfile uses the# Install the application dependencies in a full UBI Node docker image FROM registry.access.redhat.com/ubi8/nodejs-14:latest # Copy package.json and package-lock.json COPY package*.json ./ # Install app dependencies RUN npm install --production # Copy the dependencies into a minimal Node.js image FROM registry.access.redhat.com/ubi8/nodejs-14-minimal:latest # Install app dependencies COPY --from=0 /opt/app-root/src/node_modules /opt/app-root/src/node_modules COPY . /opt/app-root/src ENV NODE_ENV production ENV PORT 3000 EXPOSE 3000 CMD ["npm", "start"]ubi8/nodejs-14image to handle the build process, which in this case isnpm install --production. Thenode_moduleassets are then copied into the second image, which is based on the minimizedubi8/nodejs-14-minimalimage.
A copy of this Dockerfile is available on GitHub. The Dockerfile assumes the use of Express.js and hosts the application on port 3000, but can be adjusted as necessary for your application. - Build the image and run your containerized application:
$ docker build --tag nodejs-app .
$ docker run --publish 3000:3000 nodejs-app

> nodejs-rest-http@4.0.0 start /opt/app-root/src
> node .

[1627920401838] INFO (17 on 3dc9969e3f2b): Listening on port 3000
If you’re using our sample application, it should be accessible at http://localhost:3000.
-
To stop the container from running, press Ctrl+C in your terminal.
These steps have demonstrated the Docker multistage build flow, where we build the application in the larger builder image and then copy the assets into a smaller runtime image.
A minimal image in OpenShift with Source-to-Image chained builds
Within OpenShift, the minimal image can be used with a chained build process. In this case, you’ll use the nodejs:14-ubi8 image stream to handle your application's build, and then use the nodejs:14-ubi8-minimal image stream as the runtime image.
The nodejs:14-ubi8-minimal image stream is available by default in OpenShift versions 4.9+. In previous versions, you can import the nodejs:14-ubi8-minimal image stream using the following command with the OpenShift command-line tool:
$ oc apply -f https://raw.githubusercontent.com/sclorg/s2i-nodejs-container/master/imagestreams/nodejs-rhel.json -n openshift
In this example, we’ll demonstrate how to implement a chained build flow using two BuildConfigs.
- Log into your OpenShift cluster and select the
defaultnamespace. - From the Administrator view, select Builds → Image Streams to create two new image streams, naming them
nodejs-builder-imageandnodejs-runtime-image. You need to change themetadata.namevalue for each image stream tonodejs-builder-imageandnodejs-runtime-image, respectively. - Next, create the first BuildConfig, which defines the builder image using the Source-to-Image (S2I) strategy. The output of the build is then pushed to the
nodejs-builder-imageImage stream. Create a new BuildConfig by choosing Builds → BuildConfig, with the following YAML configuration:apiVersion: build.openshift.io/v1 kind: BuildConfig metadata: namespace: default name: nodejs-builder-image spec: output: to: kind: ImageStreamTag name: nodejs-builder-image:latest source: git: uri: https://github.com/nodeshift-starters/nodejs-rest-http strategy: sourceStrategy: from: kind: ImageStreamTag name: nodejs:14-ubi8 namespace: openshiftThis example configures the BuildConfig to build an example Node.js application called nodejs-rest-http.
- Create the second BuildConfig. This BuildConfig takes the resulting image from the
nodejs-builder-imageImage Stream and copy the application source and build artifacts. A new runtime image is created on top of the Node.js minimal image, with the application code copied in and ready to run. The resulting runtime image is then pushed into thenodejs-runtime-imageimage stream. The configuration is:
Note theapiVersion: build.openshift.io/v1 kind: BuildConfig metadata: namespace: default name: nodejs-runtime-image spec: output: to: kind: ImageStreamTag name: nodejs-runtime-image:latest source: dockerfile: |- FROM nodejs:14-ubi8-minimal COPY src $HOME CMD /usr/libexec/s2i/run images: - from: kind: ImageStreamTag name: nodejs-builder-image:latest paths: - sourcePath: /opt/app-root/src destinationDir: "." strategy: dockerStrategy: from: kind: ImageStreamTag namespace: openshift name: nodejs:14-ubi8-minimal triggers: - imageChange: from: kind: "ImageStreamTag" name: "nodejs-builder-image:latest" type: ImageChangeImageChangetrigger. This launches a runtime build upon each new build ofnodejs-builder-image:latest. - Now start a build based on the
nodejs-builder-imageBuildConfig. You can do this by navigating to the BuildConfig view, expanding the actions menu (three vertical dots), and clicking Start Build as shown in Figure 1.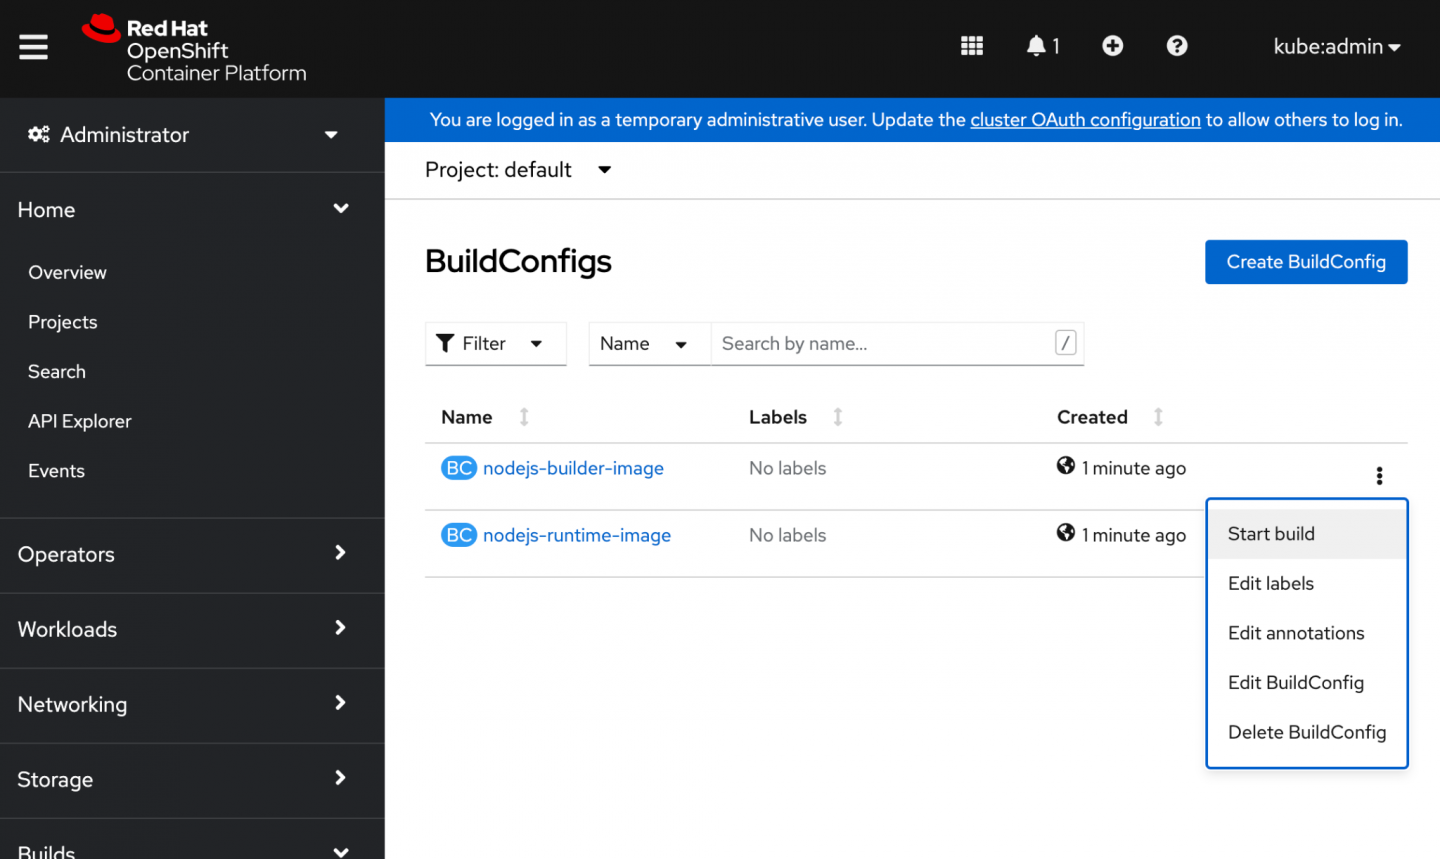
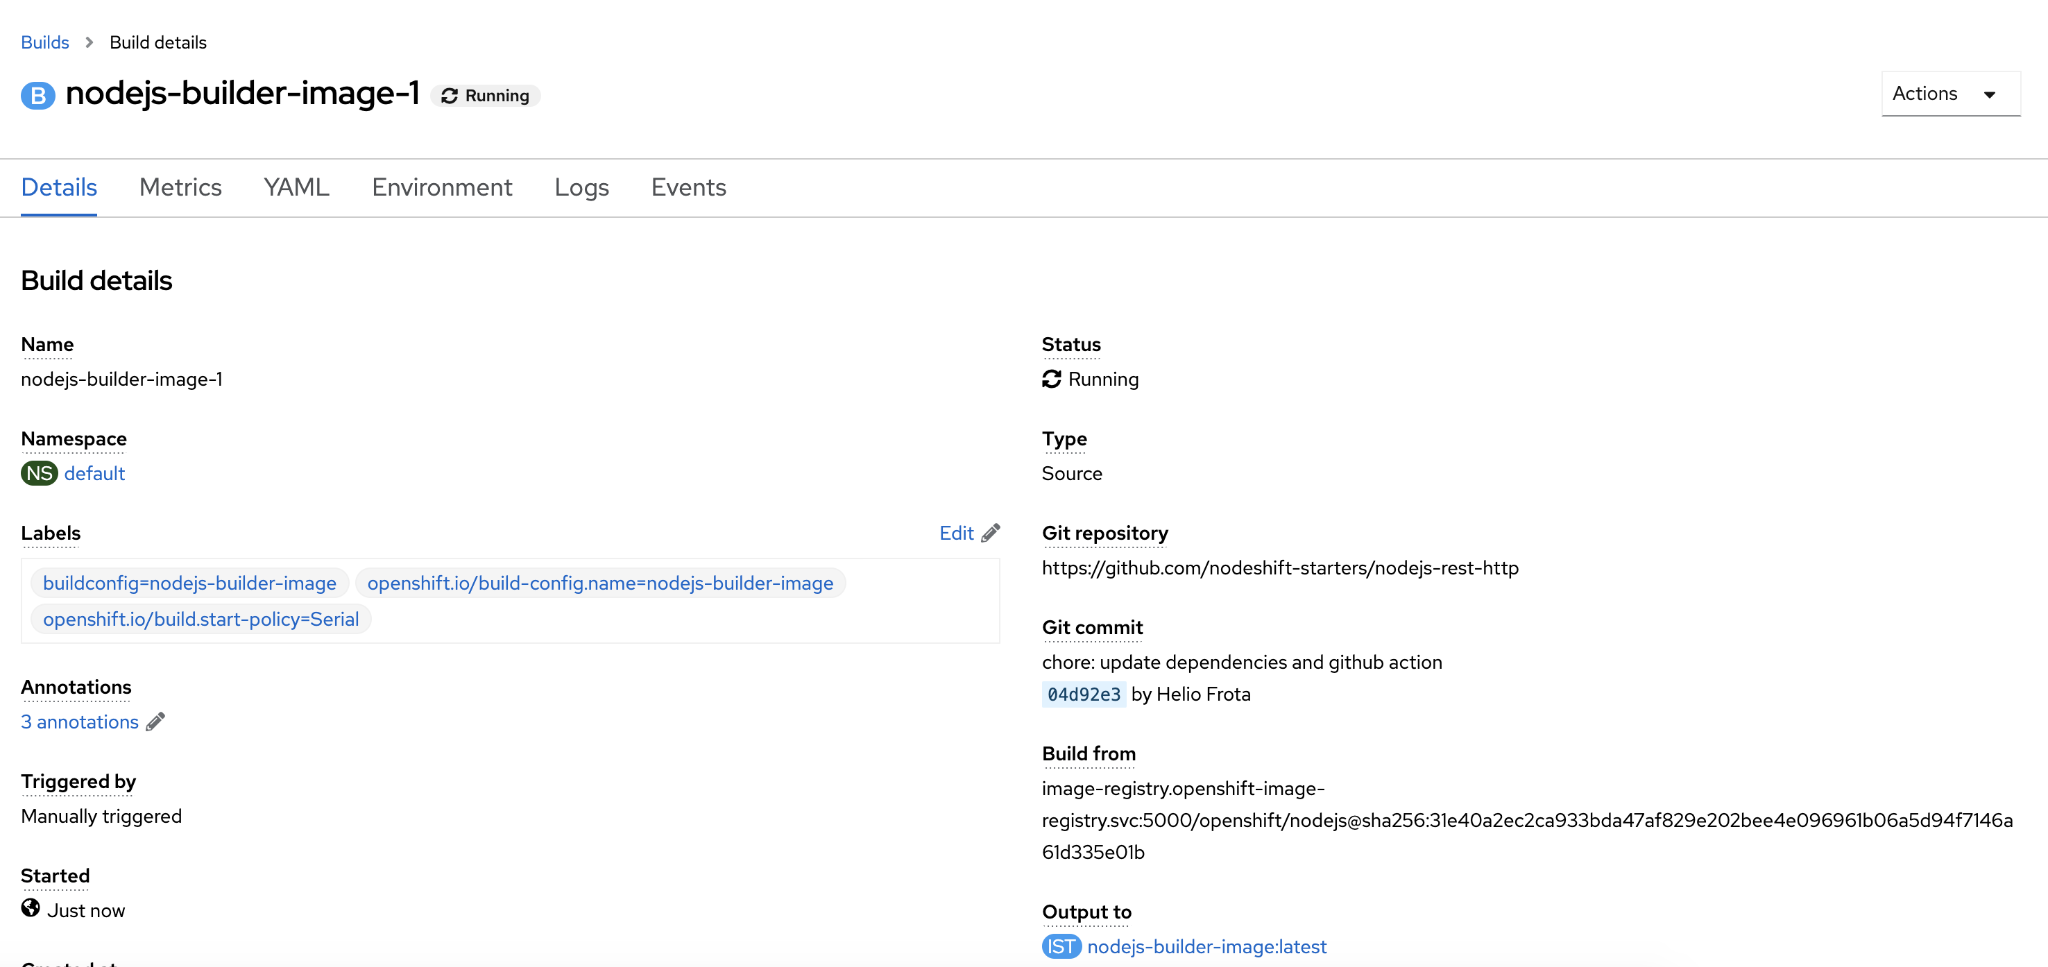
Figure 1. Starting a build in the BuildConfigs interface. - Once the new build is requested, you are taken to the Build Details view (Figure 2). You can click the Logs tab to follow the progress of the build.
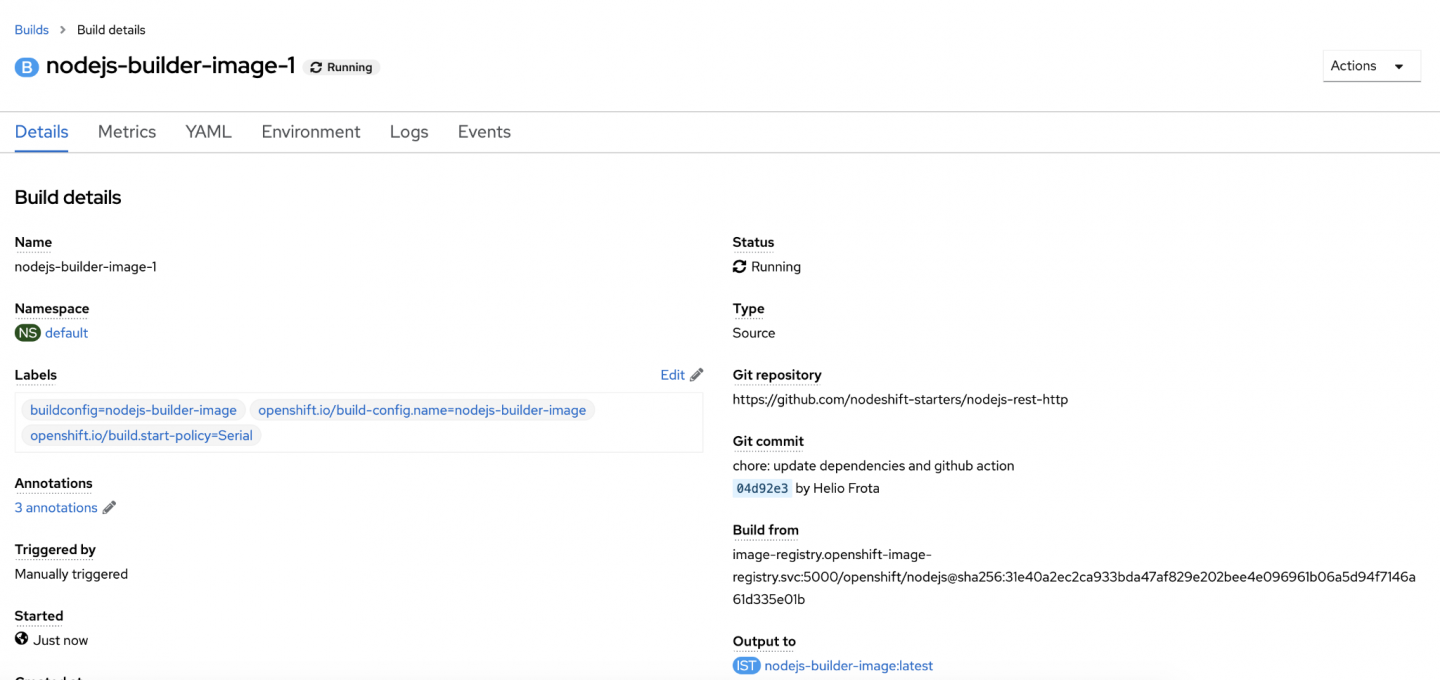
Figure 2. Build details page displayed after you request a build. - Once the
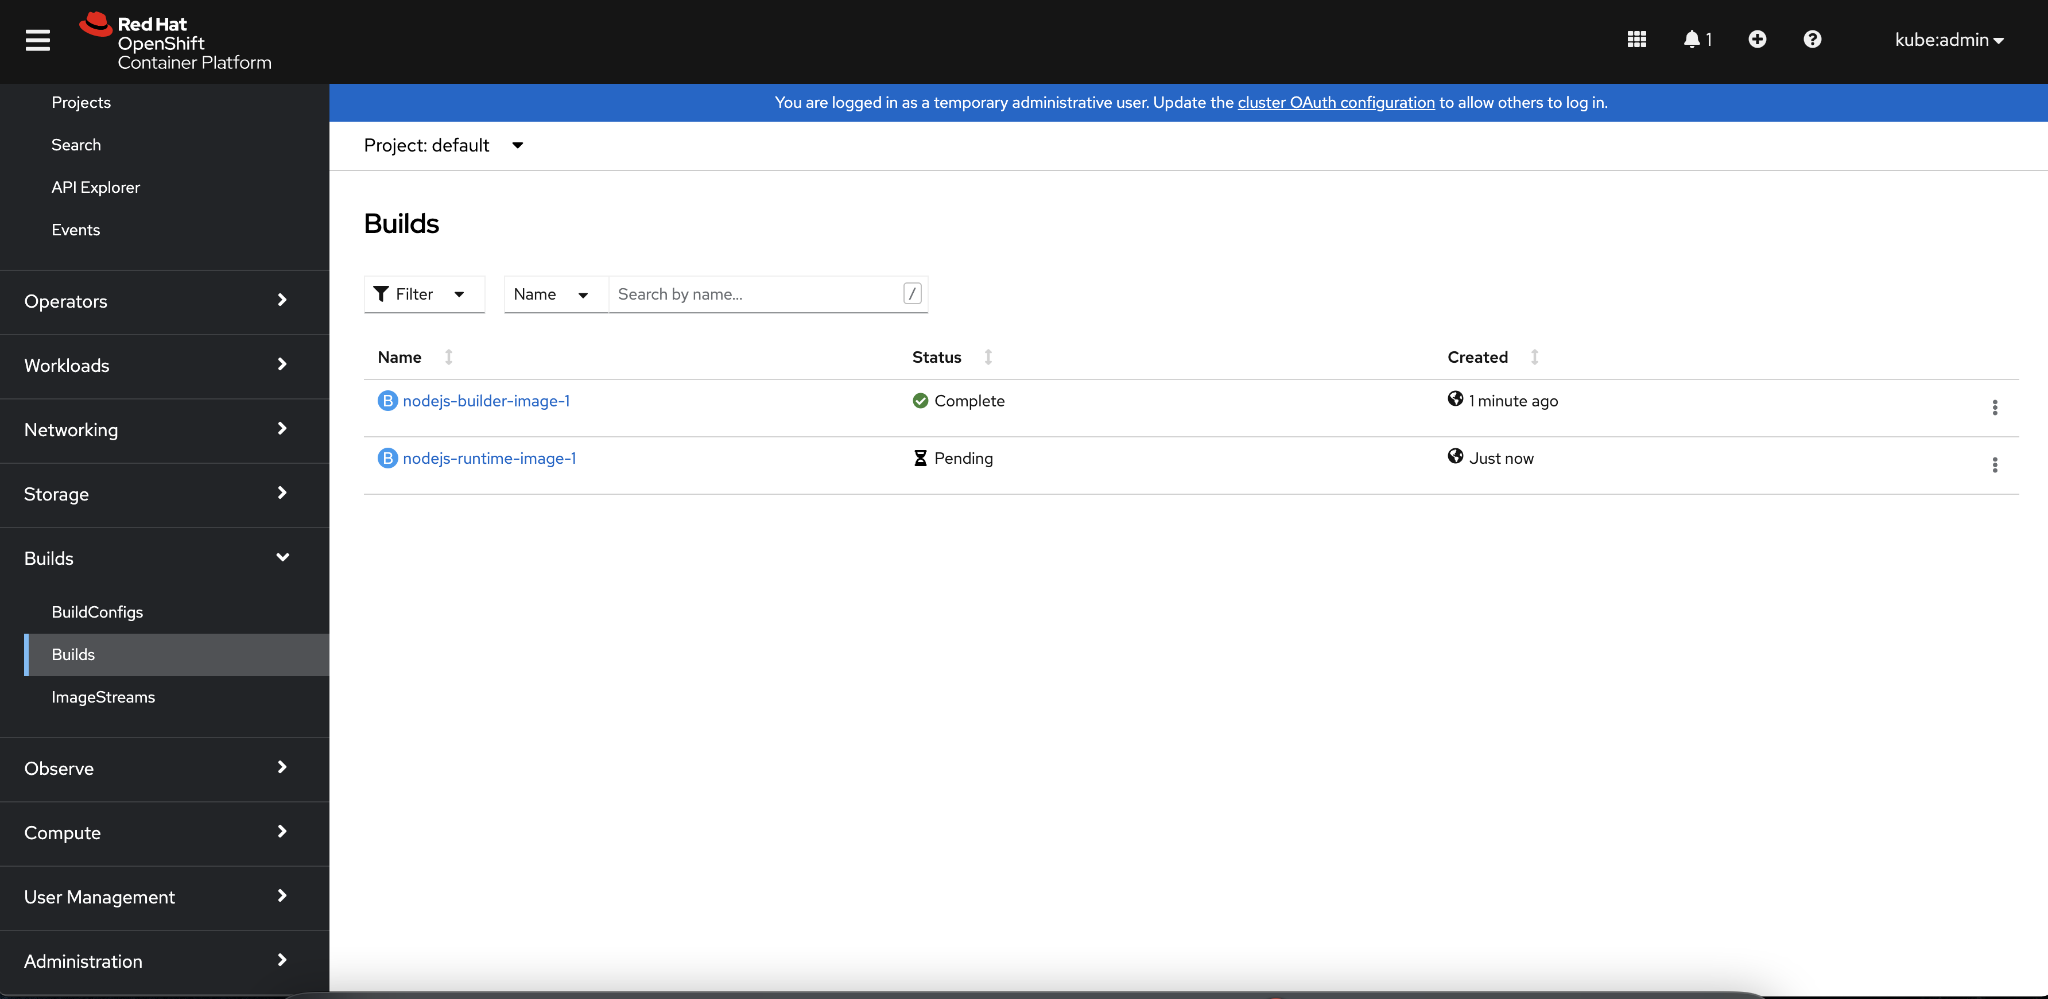
nodejs-builder-imagebuild is complete, anodejs-runtime-imagebuild is automatically started. If you navigate to the Builds interface, you should see a newnodejs-runtime-imagebuild (Figure 3).
Figure 3. Builds interface. - After the
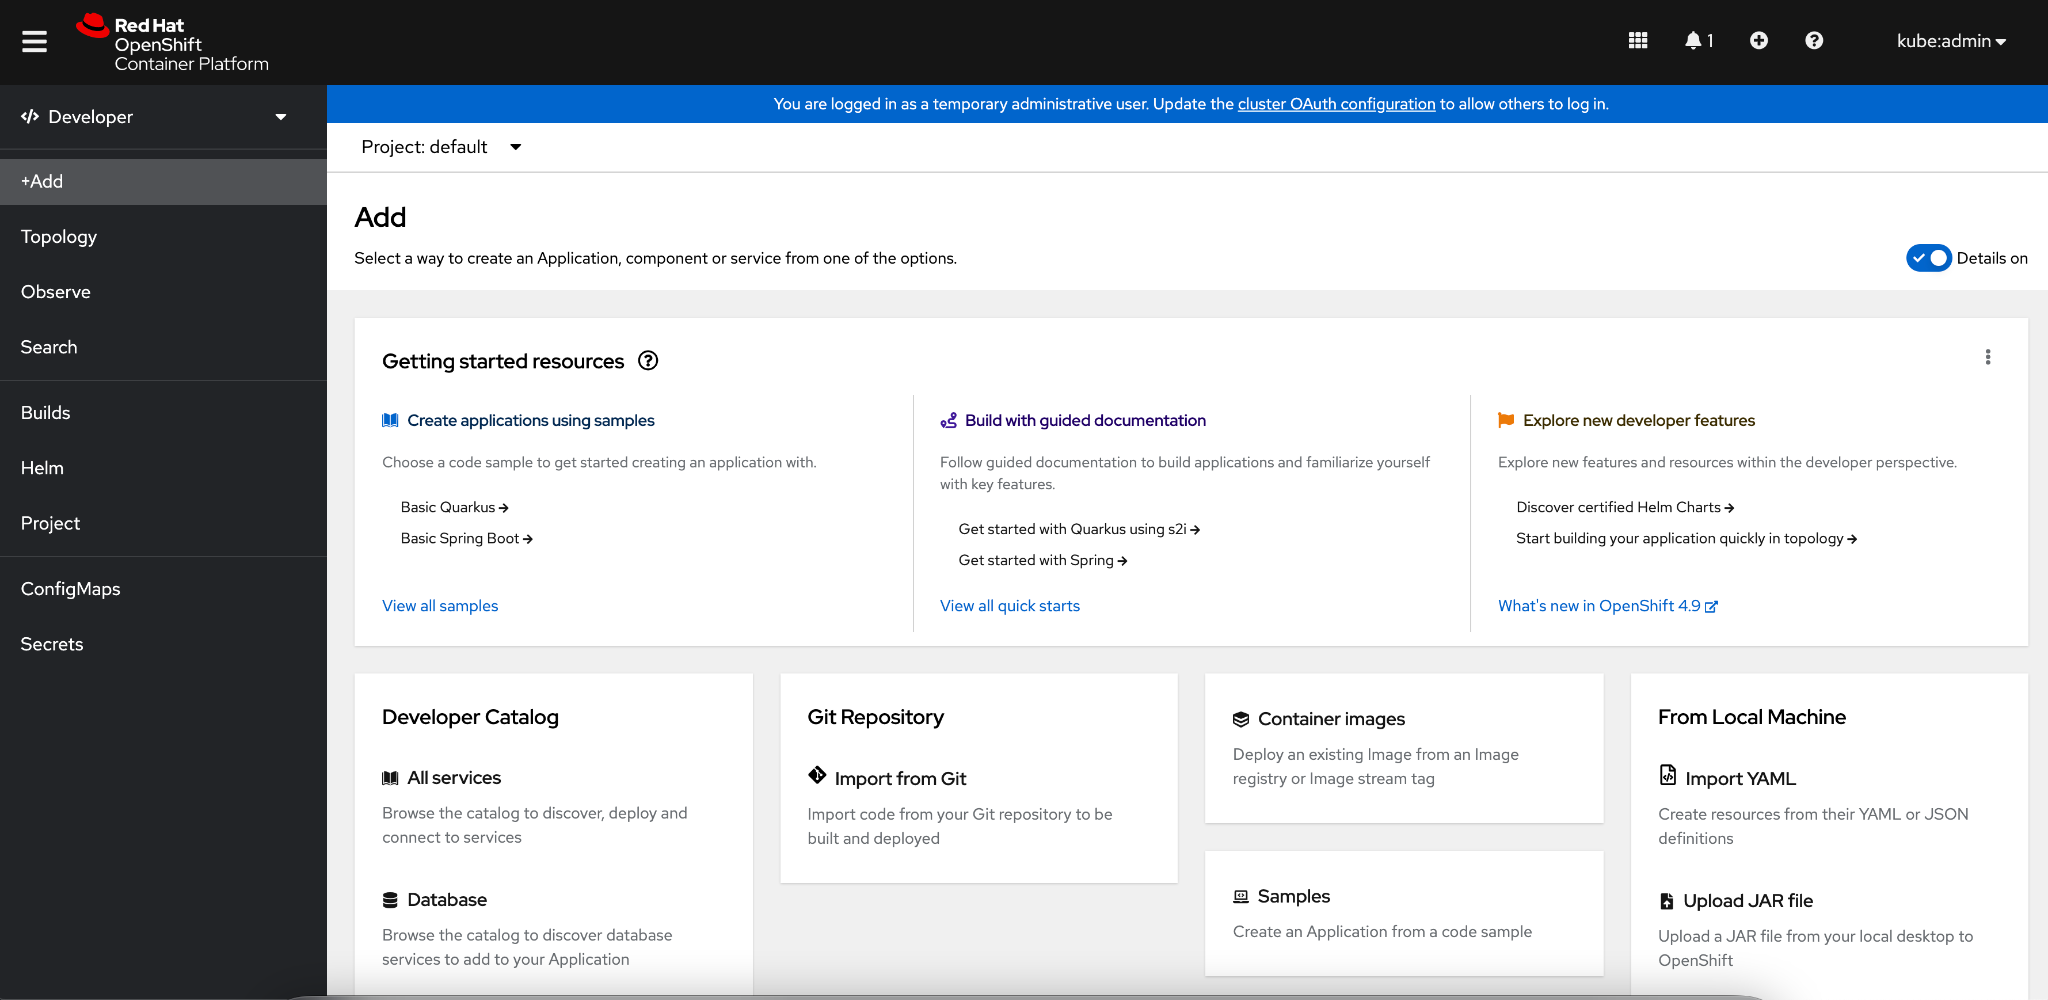
nodejs-runtime-imagebuild is complete, you can deploy a container based on that image. Switch to the Developer view of OpenShift and select the +Add interface (Figure 4).
Figure 4. Add interface. - We want to deploy the container from an image stream tag. Click Container images and then select Image stream tag from internal registry (Figure 5). Populate the Image Stream with
nodejs-runtime-imageand Tag the image withlatest. You can accept all the other defaults and click Create.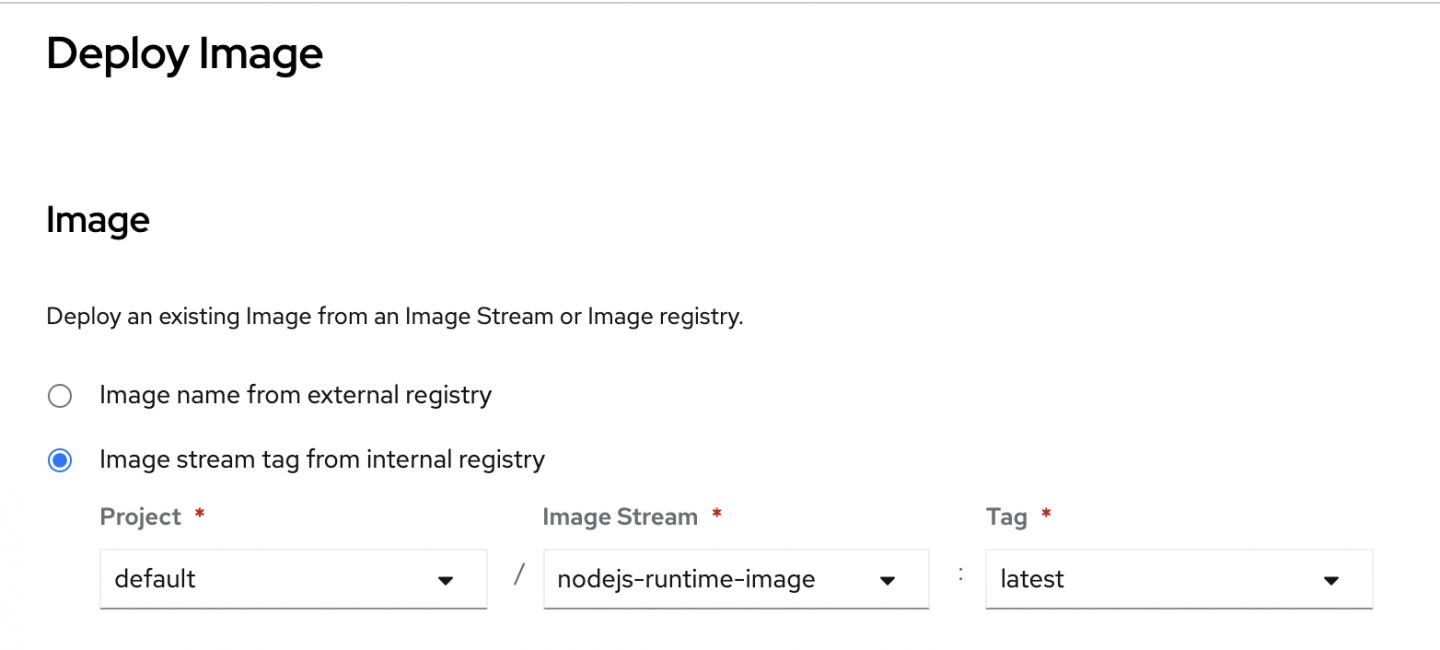
Figure 5. Deploy Image interface. - You are next taken to the Topology view. The ring in the deployment turns blue when the container is deployed and running. You can then click the highlighted icon to access the running application (Figure 6).

Figure 6. Topology view.


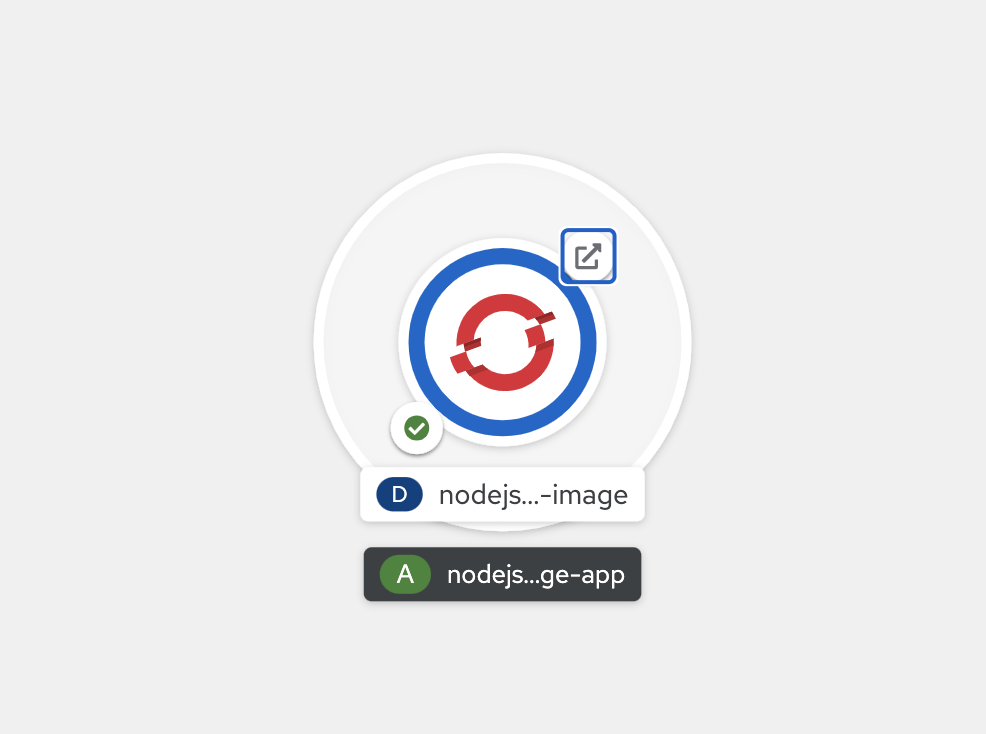
If you used our sample application for this exercise, you should expect to see the sample "Greeting service" application running.
This is an example of how you can configure a multistage build/runtime flow using OpenShift BuildConfigs. The example uses a Git build input trigger, but the same multistage flow could be replicated in more complex build configurations.
Conclusion
Images fully stocked with development tools are necessary for building applications but become unnecessary burdens when run in production. This article showed how to use the build and minimal images on Red Hat Enterprise Linux and OpenShift to optimize your runtime images.
Last updated: September 20, 2023