Page
Load and run a PyTorch model

Load and run a PyTorch model
In the previous section, we have:
- Imported torch libraries (utilities).
- Listed available GPUs.
- Checked that GPUs are enabled.
- Assigned a GPU device and retrieved the GPU name.
- Loaded vectors, matrices, and data onto a GPU.
- Loaded a neural network model onto a GPU.
- Trained the neural network model.
Let’s now determine how our simple torch model performs using GPU resources.
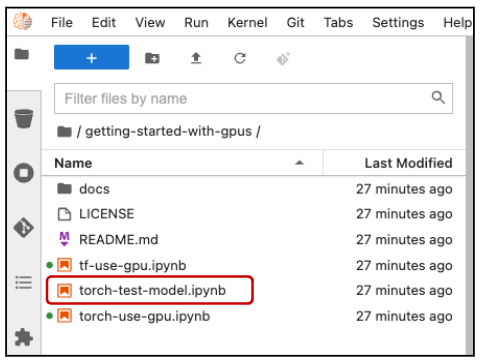
In the getting-started-with-gpus directory, double click on the torch-test-model.ipynb file (highlighted in Figure 9) to open the notebook.

After importing the torch and torchvision utilities, assign the first GPU to your device variable. Prepare to import your trained model, then place the model on your GPU and load in its trained weights:
import torch
import torch.nn as nn
import torch.nn.functional as F
from torchvision import datasets
import torchvision.transforms as transforms
import matplotlib.pyplot as plt
device = torch.device("cuda:0" if torch.cuda.is_available() else "cpu")
print(device) # let's see what device we got# Getting set to import our trained model.
# batch size of 1 so we can look at one image at time.
batch_size = 1
class SimpleNet(nn.Module):
def __init__(self):
super(SimpleNet, self).__init__()
self.fc1 = nn.Linear(784, 784)
self.fc2 = nn.Linear(784, 10)
def forward(self, x):
x = x.view(batch_size, -1)
x = self.fc1(x)
x = F.relu(x)
x = self.fc2(x)
output = F.softmax(x, dim=1)
return outputmodel = SimpleNet().to( device )
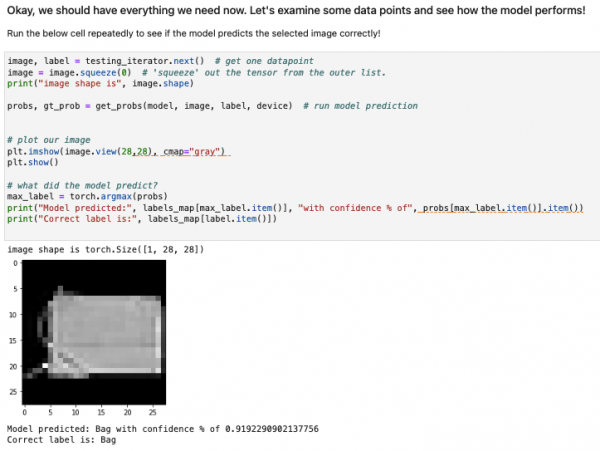
model.load_state_dict( torch.load("mnist_fashion_SimpleNet.pt") )You are now ready to examine some data and determine how your model performs. The sample run in Figure 10 shows that the model predicted a "bag" with a confidence of about 0.9192. Despite the % in the output, 0.9192 is very good because a perfect confidence would be 1.0.

This concludes our tutorial on how to get started with NVIDIA GPUs.
