The recommended steps for setting up the Red Hat JBoss Developer Studio (JBDS), on all supported platforms, are found here. The instructions are pretty straight-forward and it is enough to get started right away - as long as you have a suitable java SDK installed on your machine.
However, if I go along that path, I would later have to deal with the Java SDK updates to go along with the compatibility of the existing tools. Eventually, I may end up having to install multiple versions of the Java SDK.
This led me to look for other alternatives. I thought to myself, the Linux'y way to go would be to run the JBDS as a container and have it display on my Desktop. I figured that I already have the tools for such task: XQuartz as an X11 server, socat to relay the display ports, and my Red Hat Enterprise Linux (RHEL) virtual machine. Yey!
The following are the steps on how I got all these to work together.
Installing Docker and running it as a service
On my RHEL virtual machine, I ran the following:
sudo yum install docker
sudo systemctl start docker.service
sudo systemctl enable docker.service
Preparing a Dockerfile
I decided to build on top of the jboss/base-jdk image. And from that, install gtk2, epel-release and webkitgtk (gtk2 and webkitgtk are required by Developer Studio while the epel-release is a pre-requisite for webkitgtk).
FROM docker.io/jboss/base-jdk:8
USER root
RUN yum -y install gtk2
RUN yum -y install epel-release
RUN yum -y install webkitgtk
USER jboss
Building the image
On my RHEL virtual machine, I ran the following:
sudo docker build -t jbossenv .
Running the conatiner and installing Developer Studio
On my RHEL virtual machine, I ran the following:
sudo docker run --rm --privileged=true -it -v ~/docker/jboss/:/opt/jboss/ docker.io/jboss/base-jdk:8 bash

bash-4.2$ java -jar devstudio-10.1.0.GA-installer-standalone.jar
I just followed the on screen prompts of the installer. After the installation was done, I exited the shell. Notice that when I ran the container, I mounted the local directory ~/docker/jboss to the /opt/jboss container directory. I did this so that the Developer Studio installation will be saved in ~/docker/jboss.
Running XQuartz with socat
On my local machine, I ran the following commands to have the X11 server ready for connections:
~ » open -a XQuartz
~ » echo $DISPLAY
/private/tmp/com.apple.launchd.iY4pclkKNl/org.macosforge.xquartz:0
~ » socat TCP-LISTEN:6000,reuseaddr,fork UNIX-CLIENT:\"$DISPLAY\"
So what's happening here?
XQuartz runs an X11 server that is listening on a UNIX socket. In this instance, it created the following: /private/tmp/com.apple.launchd.iY4pclkKNl/org.macosforge.xquartz:0
In order for the Developer Studio (which will be running as a container) to be displayed on my Desktop, I also ran a tool called socat. It is used to created a TCP socket that listens on port 6000 in my host machine and "pipe" data to the UNIX socket created by XQuartz.
The socat binary can be installed via Macports or Homebrew (Personally, I prefer using Macports). You can check out a discussion on using socat with XQuartz here.
Running the Developer Studio container
On my RHEL virtual machine, I ran the following:
sudo docker run --privileged=true --rm -e PATH="/usr/local/sbin:/usr/local/bin:/usr/sbin:/usr/bin:/sbin:/bin:/opt/jboss/devstudio/studio" -e DISPLAY="10.211.55.2:0" -v ~/docker/jboss:/opt/jboss -t jbossenv devstudio
Environment Variables passed to the container
- PATH should be set to include the path of the Developer Studio binary
- DISPLAY should be set to the IP address of the host machine (READ: not the virtual machine IP address) assigned by Parallels. In my case, 10.211.55.2 is the IP of the vnic0 virtual NIC. The "prlsrvctl net list" command is a good place to start to determine the virtual interface names. From there you can basically figure out the appropriate IP to use. The ":0" basically maps to port 6000 (see socat command above). If I indicated port 6001, then I'd have to adjust and use the value ":1".
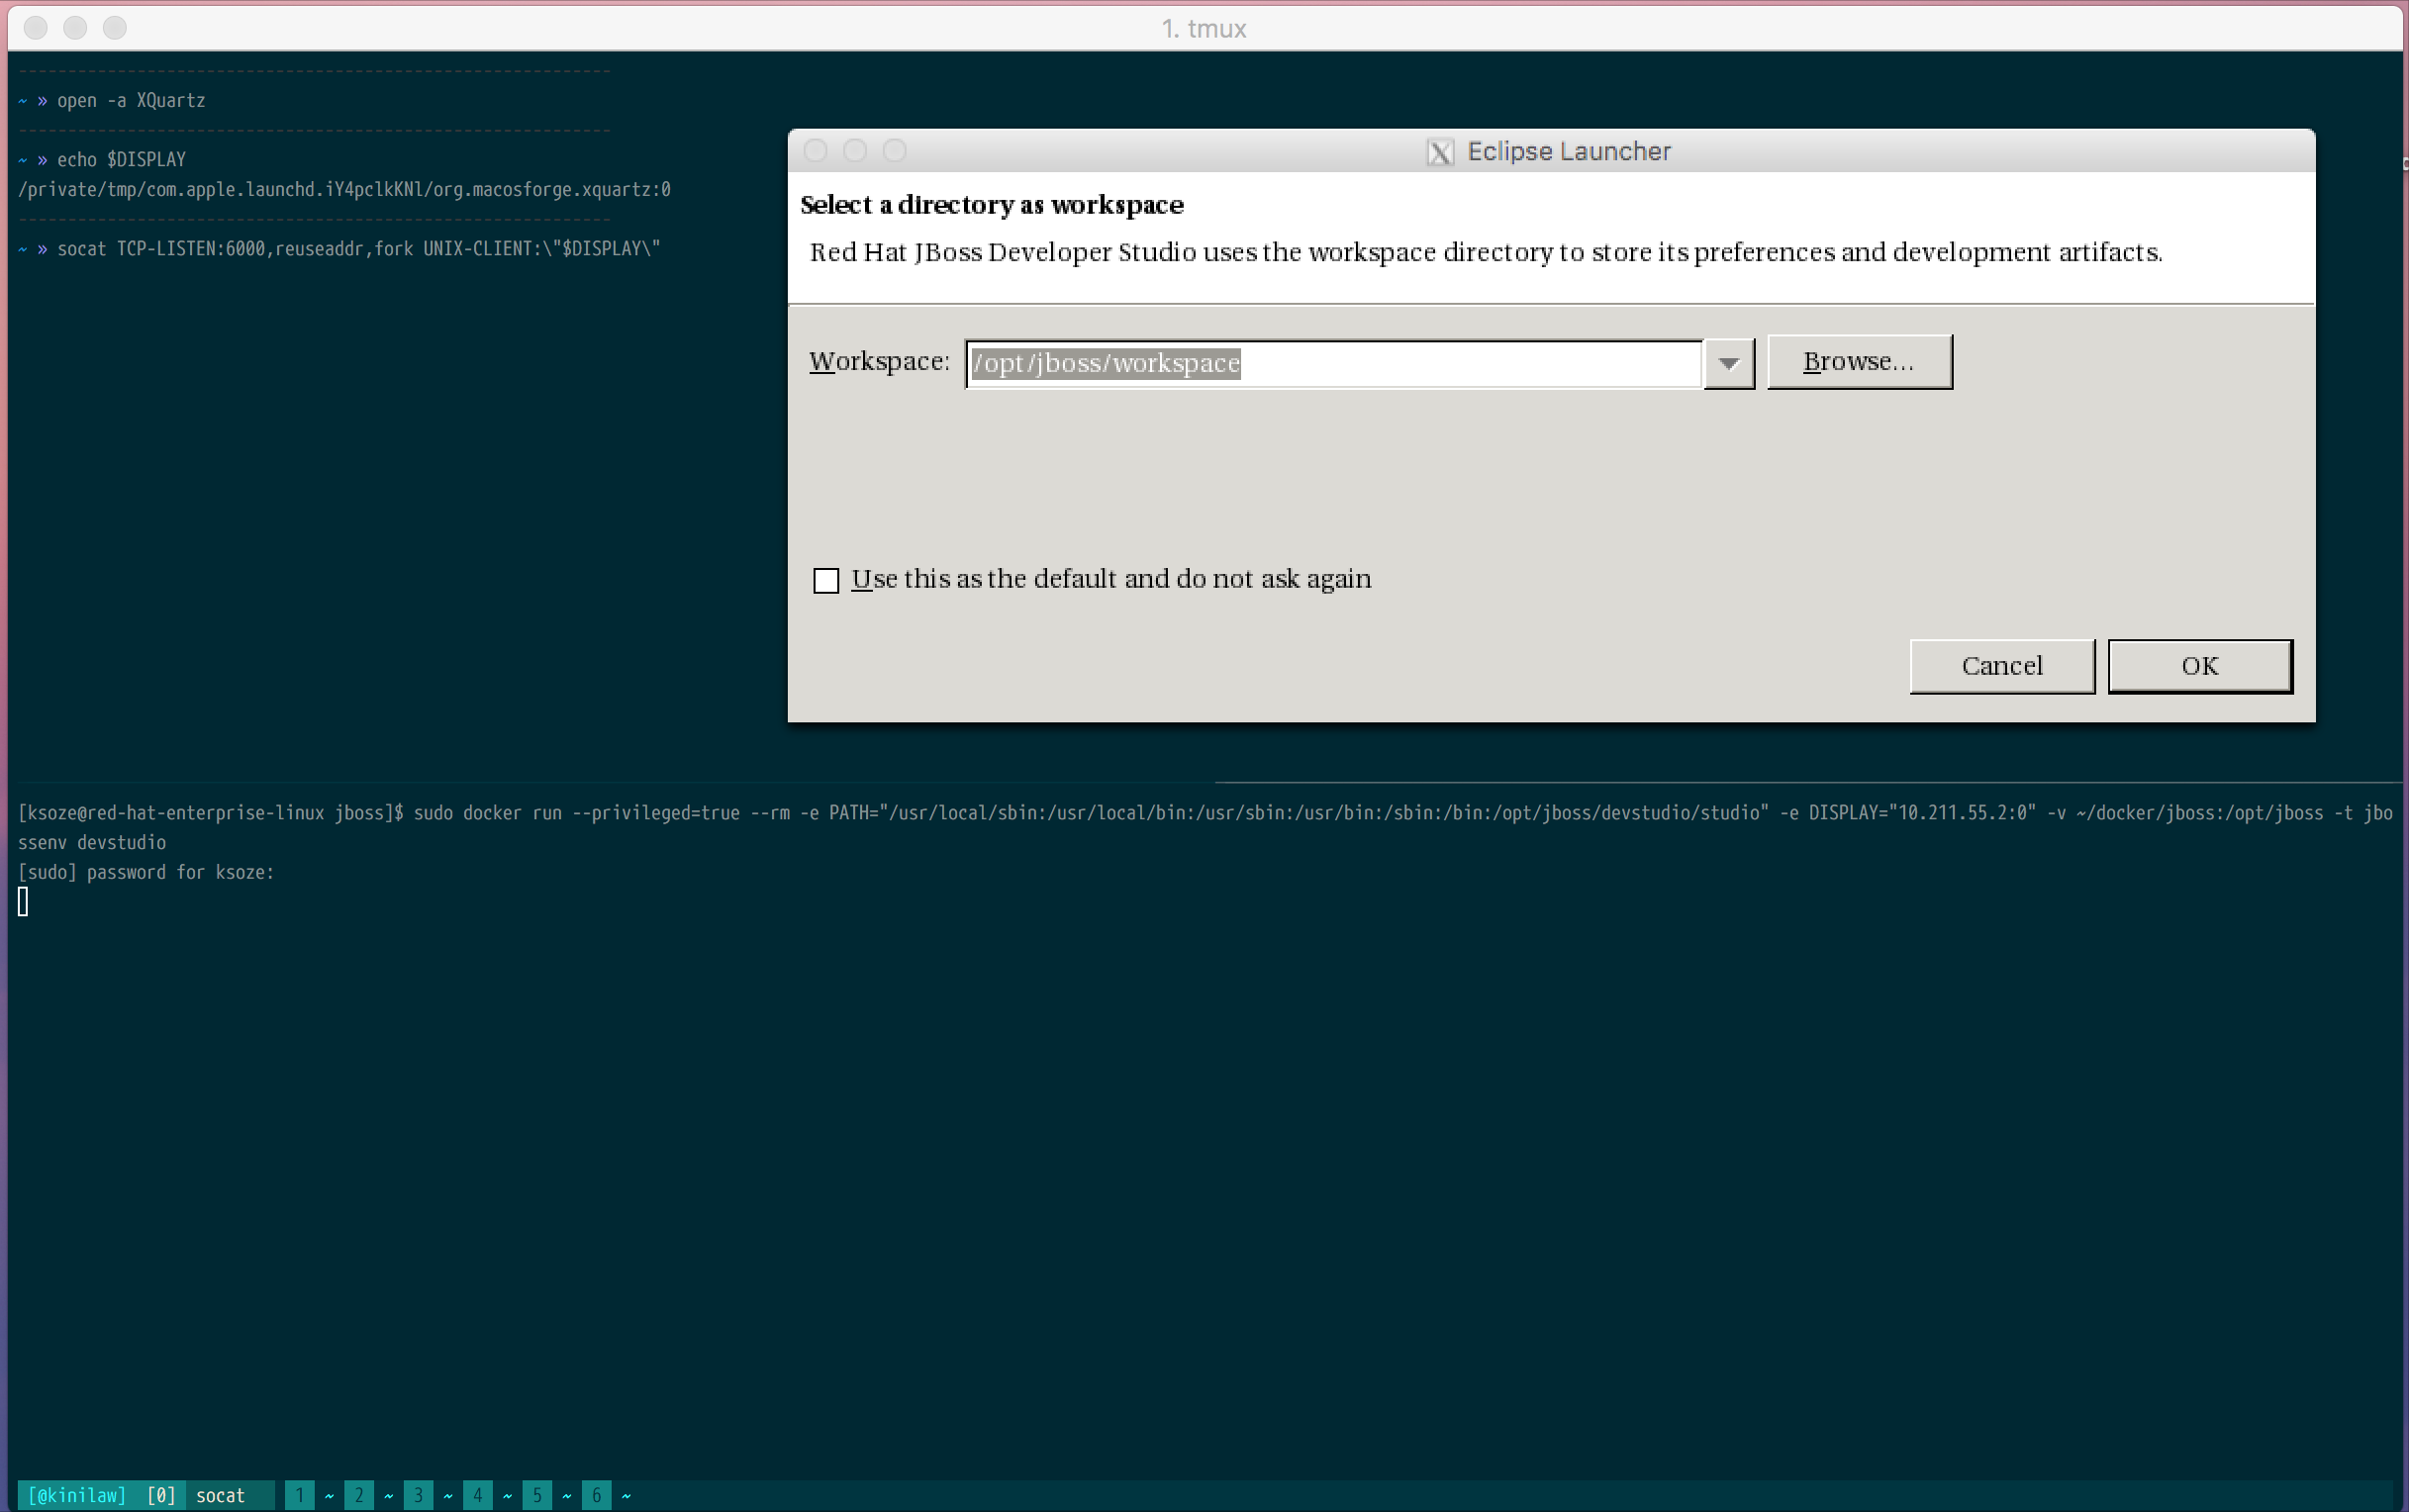
After that, you should see the Developer Studio window prompting for the default workspace directory screen like the one below (I'd have to admin that the text rendering is awful... but this is enough for me to get started)
Last updated: November 9, 2023
