
Welcome to the sixth installment of That App You Love, a blog series in which I show you how to you can make almost any app into a first-class cloud citizen. If you want to start from the beginning, jump back and check out Part 1: Making a Connection. You’ll need the docker service and the oc utility to follow along in this post; for instructions check out Part 5: Upping Our (Cloud) Game.
We’ve been on a pretty amazing journey so far! Now that we’ve learned how to identify and expose the flexibility need in our app, and how to create a config-and-run container image that will make our app run with the settings that are important to us, it’s finally time to get this ship sailing! For these examples, we’re going to continue using my containerized ZNC app, but hey - forget about ZNC, because we’re really talking about That App You Love, and what it takes to deploy that rock star app on the OpenShift Container Platform.
Start Cloud, Start App, Mind Blown
In Part 5, I showed you how you can fire up an entire OpenShift Container Platform cluster with a single command. If you didn’t read it, you should go back because we will be spending a lot of time playing around in this portable mini-cloud.
Ready? Let’s just jump straight in:
- If your docker service is not running, fire it up! Fedora shortcut:
sudo systemctl start docker
- Did you download the `oc` binary? If not, head back to Part 5. If you did, fire it up!
sudo <path_to>/oc cluster up
- Find the OpenShift server IP/Port combo in the output from “cluster up” (ending in 8443) and use it to log in as a non-root user:
oc login -u developer -p developer --server=<server_IP>:8443
- And now, let’s launch znc-cluster-app straight into OpenShift:
oc new-app nhripps/znc-cluster-app:latest
When you fired up your cluster, one of the items in the output is the URL for your mini-cloud’s web console. Look for a line with port number 8443 in it; that will be the one.
You can log into the web console and see what happened by opening that web console URL and using username ‘developer’, password ‘developer’ to log in.
Per our last post, you’re going to see a Projects overview page:
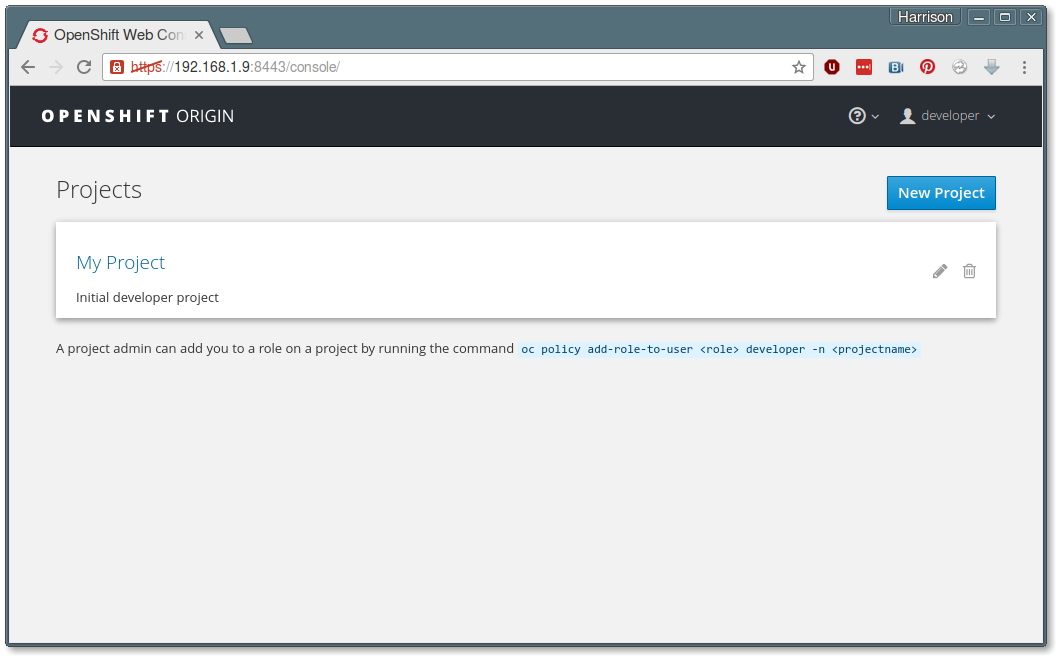
Click on My Project to see what the new-app command actually did:
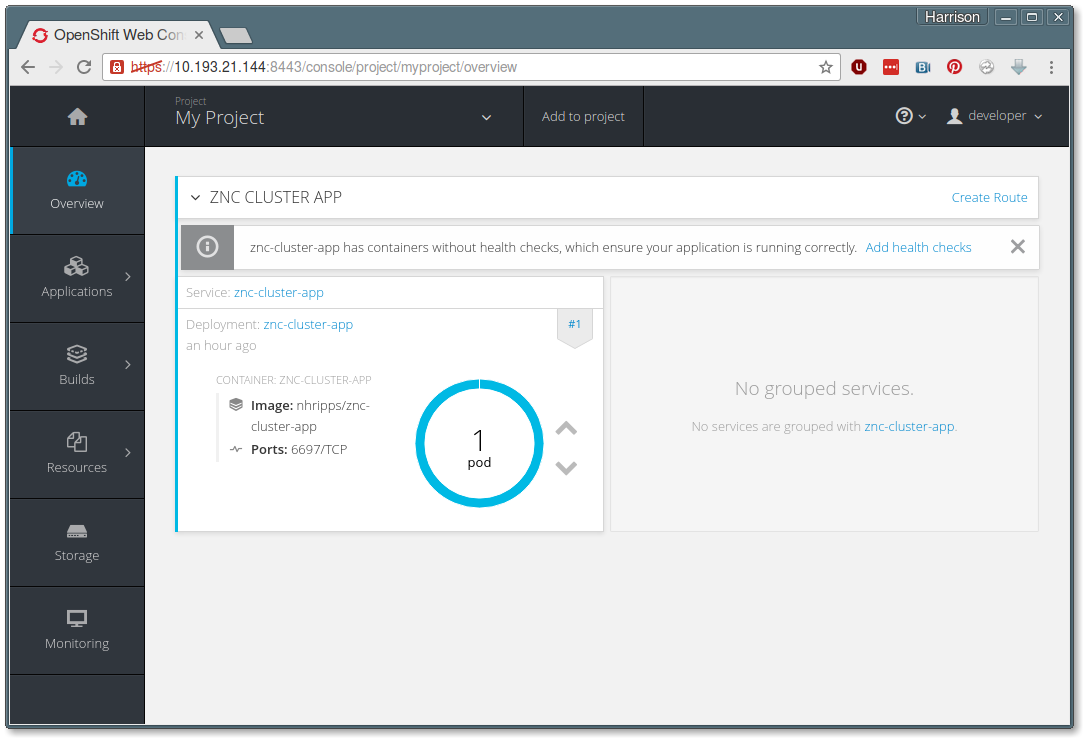
So how do we get to the ZNC homepage? Well, we’ll need to add something to our deployment. It’s time to learn about a few concepts relevant to Kubernetes and OpenShift...
Cloud Parts: Pods, Services and Routes
When you ran oc new-app, OpenShift created a number of helper objects on your behalf. For starters, let’s look at Pods, Services and Routes.
Pods
From the My Project page, use the left-hand navigation panel to move to Applications => Pods. You will see that you have one running pod with a name like ‘znc-cluster-app-1-6phwj’. Click on that Pod name to get some details:

The Pod is Kubernetes way of combining a running container along with some metadata and other code necessary to make that container work as part of a cloud environment. You can click on the Logs tab to see the familiar output from our config-and-run script, or click on the Terminal tab to actually connect to a shell within the running container!
At the bottom of the above screenshot, you can see that Kubernetes and OpenShift are aware of the port number that we are mapping (6697). But how does traffic actually find its way to that container?
Services
Next navigate to Applications => Services, where you will see a Service called ‘znc-cluster-app’. Click on that Service name to see the following information:
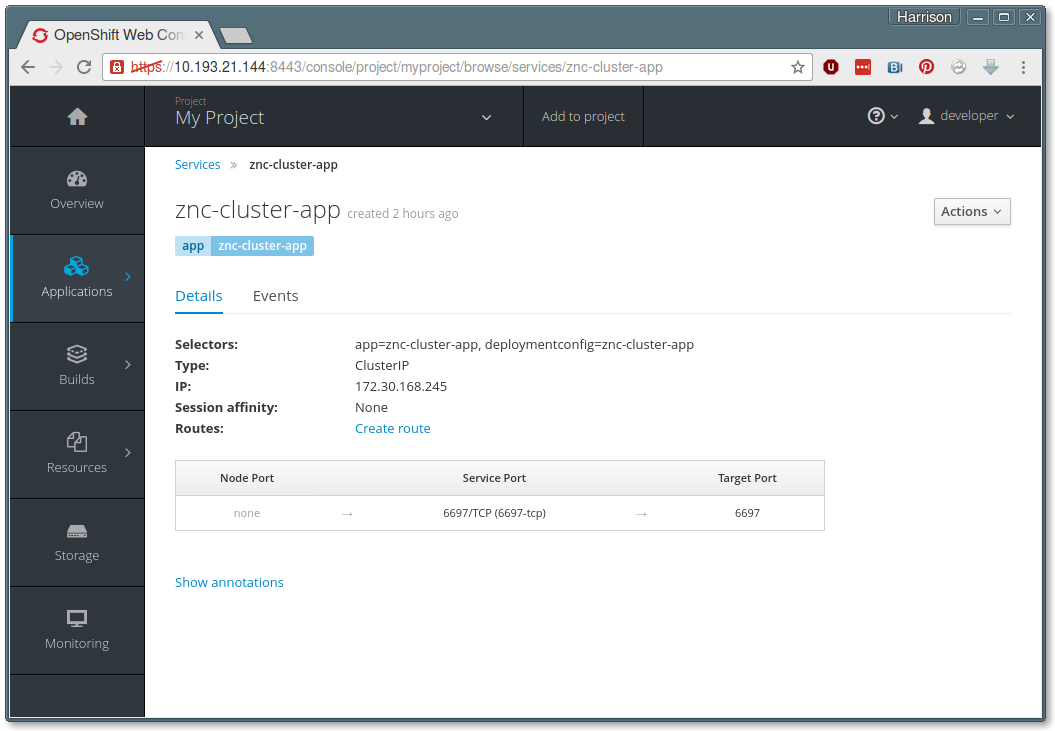
What’s happening here? Inside our mini-cloud, Kubernetes has created a mapping between our target port (6697) and a Service IP / Service port combination. Here’s the interesting part - if we kill our running container and start a new one, the Service ensures that the new container is still reachable at the same Service IP / Service port combination.
We can check that our app is indeed available by navigating to this in a web browser:
https://<service_ip>:<service_port>/
But that will only work on the same computer where we ran oc cluster up, which is effectively part of our mini cluster. So how do we make our app reachable outside of the cloud?
Routes
In the middle of the Service detail page, you should see a link titled ‘Create Route’. Click on this now. You will see the Create Route form:
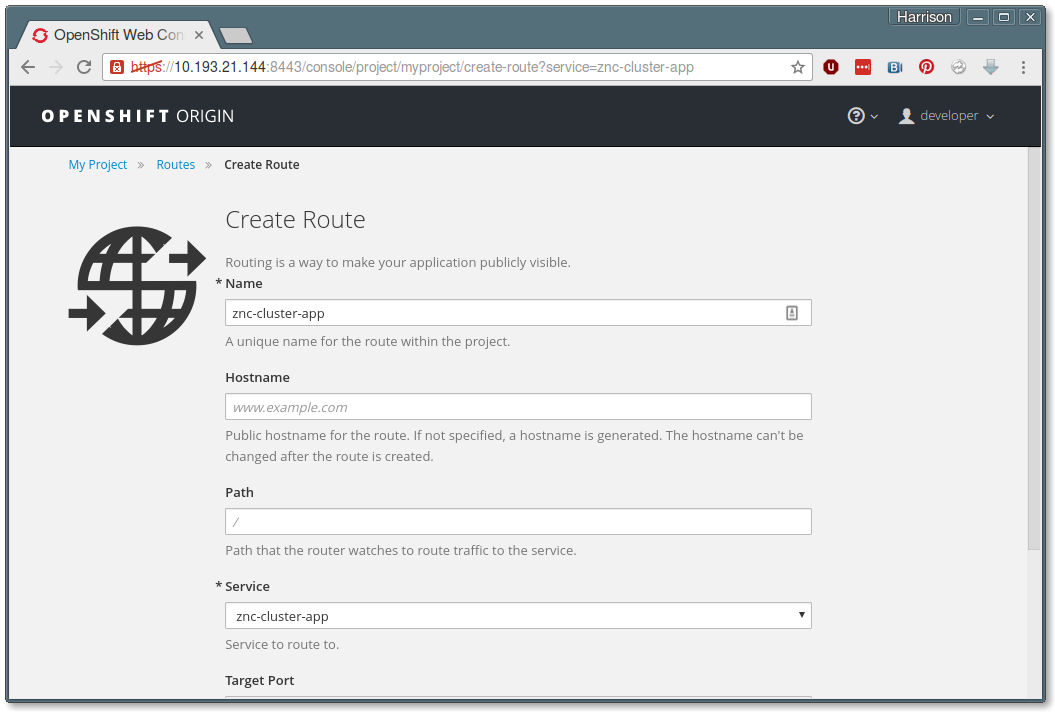
- We don’t need to change any of the visible values, but scroll to the bottom and click the link titled “Show options for secured routes”. This will cause a number of extra options to appear.
- From the “TLS Termination” pulldown, select “Passthrough”. This ensures that all encrypted traffic to our app stays encrypted all the way to the container.
- Now scroll to the bottom and click the Create button.
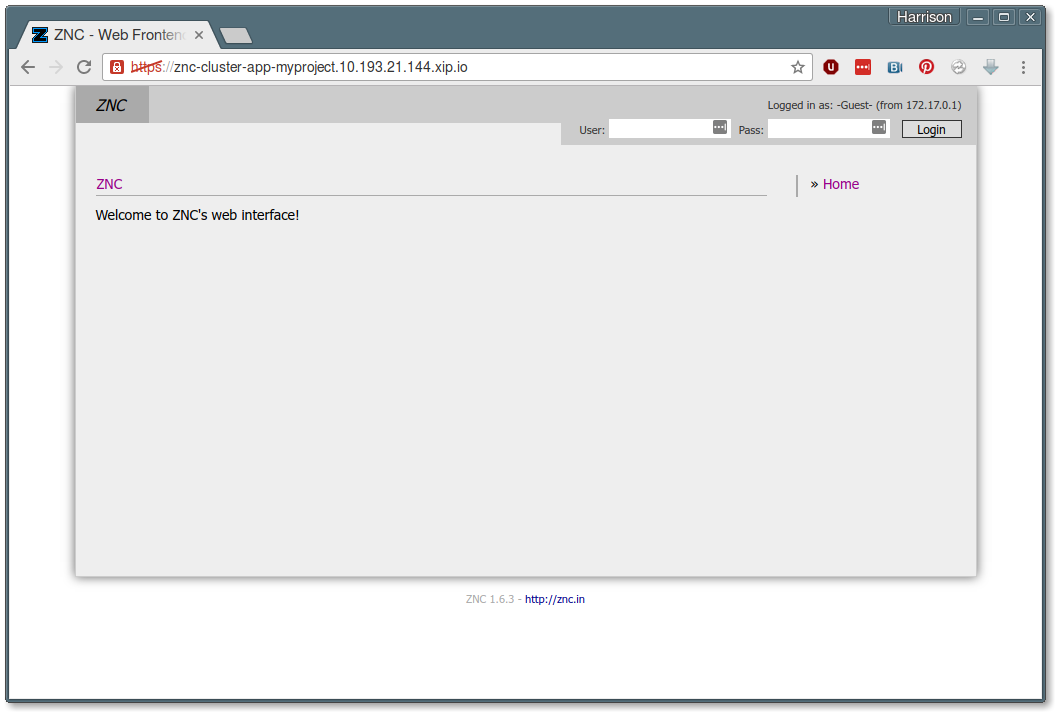
Finally, we’re back in the Service detail page, and there is a new entry in the Routes list ending in “xip.io”. Click on it and you should be taken directly to the ZNC web console (after accepting the self-signed certificate warning):
Note - occasionally on my work VPN, I have seen the “xip.io” addresses fail to work. If this happens to you, try turning off your VPN connection, or tell your boss that I said it was okay for you to continue your research from a nearby coffee shop!
Good Deal. What’s Next?
If you want to log into the ZNC web console, you can do it with our default username/password values of ‘admin’/’admin’. But remember all of that work we did to make the container customizable? And remember how we want this app to run statefully in the stateless world of a container cluster? Starting with Part 7, we’re going to walk through the steps we need to take That App You Love from “nifty container app” to “powerhouse cloud app”.
For now, remember that when you’re done playing around with your mini cloud, you can shut it down with:
oc cluster down
When you do, your app will disappear along with the cluster - our mini-cloud is itself running in a stateless container, after all. But not to worry! We’ll learn about a handy shortcut to get back to where we were, and find out how to expose the container environment variables we’ve created up at the cluster level, all in Part 7: Wired for Sound!
This series will run every Tuesday and Thursday until we've accomplished our goals, so stay tuned in, subscribe, and thanks for reading!
About the Author
Hi there! My name is N. Harrison Ripps, and I am an engineer and people manager on the Containers team at Red Hat. Together with the greater open source community, our team has taken the combination of the docker container format and Google’s Kubernetes orchestration system, and then extended this framework with a number of administrator- and developer-friendly features that we call the OpenShift Container Platform.
Last updated: March 16, 2023